
Great timing, just bought new f350. Been running a 94 f250 with my 1984 keystone and guess what need to do with my camper?
Passenger side does look easy, driver side is the one I'm concerned about. Did you have to take apart the inside first or can I just make sure of where I'm cutting and go for it. Thanks for any advice! 1994.5 diesel will be for sale later this summer!


Keystone Rebuild - Narrow Floor Pack, Redo Interior, Paint Exterior
Started by
Colorado CJ
, Apr 09 2015 01:50 AM
rebuild narrow floor pack
112 replies to this topic
#22

Colorado CJ
-
- Members
-

- 60 posts
Advanced Member
Posted 14 April 2015 - 02:18 AM
Thanks everyone. So far it's all been easy going. Now, designing and finishing the interior will be a little fun/challenging.
Toad, The passenger side was easy. For the drivers side, I'd really recommend taking apart the cabinets before you cut, just to give you some room.
What you can do on the drivers side, is to first remove the wood sides on the "step" you'll have to narrow. Be sure to go on the inside and remove the staples that are holding the wiring on the boards first though. You'll then be able to see what all you need to cut down to get your 3" of clearance on that side.
You will definitely have to take the cover off your water storage area since you'll have to push the water tank out of the way when you cut that area. You'll have to make an extension on your water tank cover as it will now be sticking about 2" outside of where it was before in the cabinet.
#23
Colorado CJ
-
- Members
-
- 60 posts
Advanced Member
Posted 14 April 2015 - 02:21 AM
FWIW I wasn't critiquing the use of Gorilla Glue, just commenting that so often the obvious is eschewed for the esoteric. The "it's wood and outside, therefore we must use a marine wood glue" mentality. And lest anyone think I'm poking fun at them, I'm not. I'm actually poking fun at me!
Yeah, I'm not too fancy
 , I use whatever seems to work. I am sure there are more suitable adhesives out there for sure.
#24
Colorado CJ
-
- Members
-
- 60 posts
Advanced Member
Posted 16 April 2015 - 12:56 AM
I got a little more done on the camper today. First, I started by cutting out and removing the cabover wood. It was in pretty bad shape. I'll be replacing it with 3/4" birch ply.
After removing the wood, I seen that it would be easier to replace the front lifting panel while the cabover wood was removed, instead of having to lay up there and work on my stomach/back. So, I went into the camper to see what to do next.
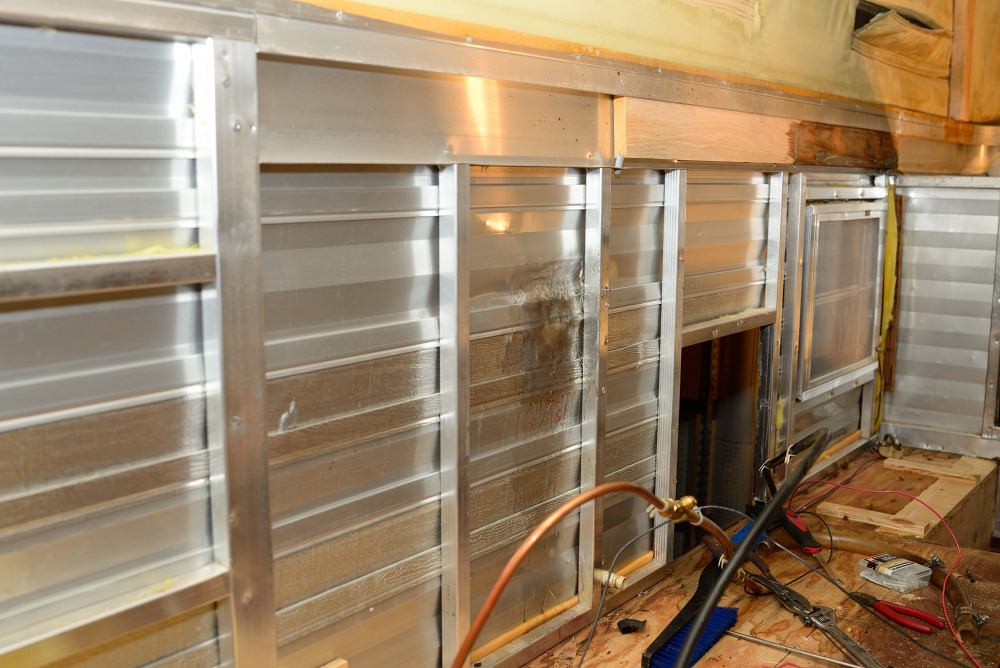
I decided to just gut it totally and start new. So, I spent a couple hours tearing out all the paneling and removing the insulation. I'll be re insulating it with pink core foam. I haven't decided yet on what to replace the paneling with. I'll probably go with some 1/4" beadboard.
So, here's how it looks, totally gutted. Tomorrow, I'll pick up some foam and whatever I decide on paneling it with. I'll run some wires behind everything first so I don't have the rats nest of the stock wiring to worry about.
#25
Colorado CJ
-
- Members
-
- 60 posts
Advanced Member
Posted 17 April 2015 - 01:47 AM
I decided to start taking the lift panels off, so I made a couple 2x4 braces to hold the roof up while I worked on the panels
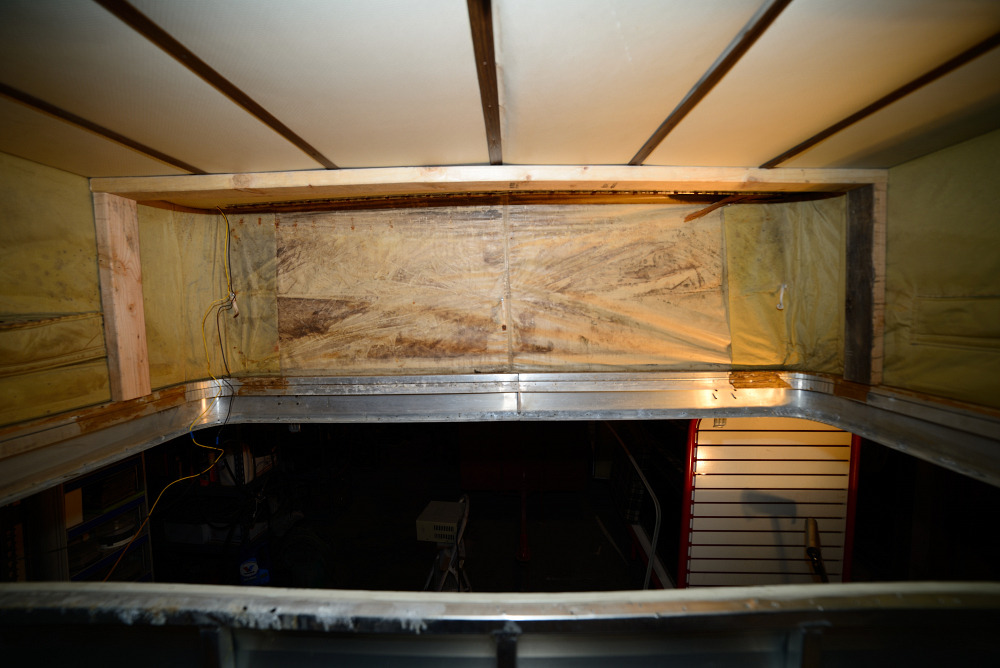
As you can see, the lift panels are toast.
After I took off the front lift panel, there was some mildew/mold. Its long dead and cleaned up like new with a little Tilex.
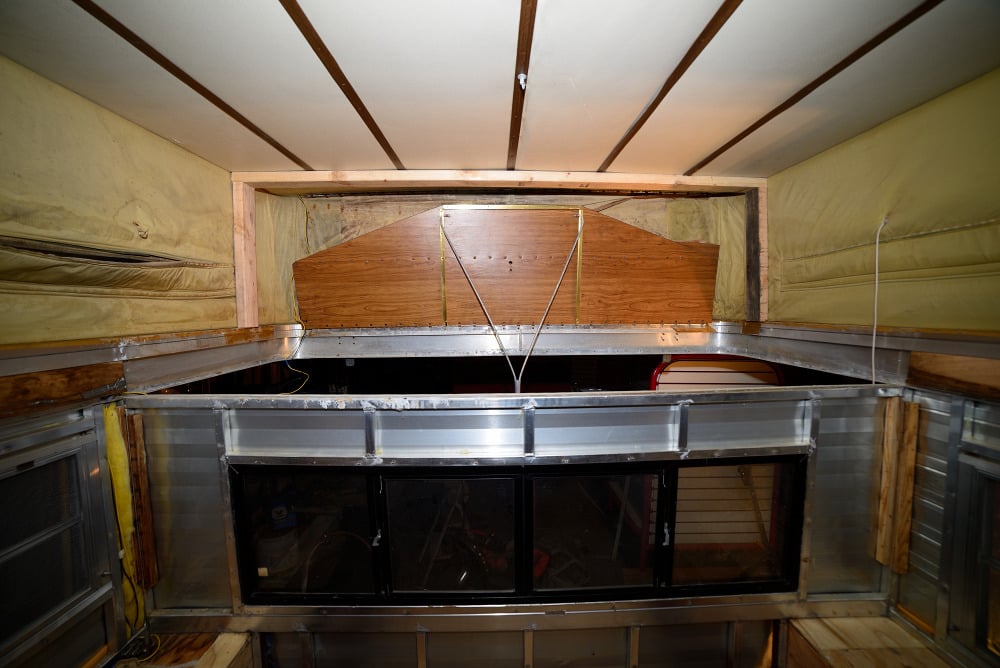
Here are the lift panels after they were removed, along with the old cabover wood. The top lift panels were totally gone, so I have to do a little measuring to see how tall to make them.
I'm not sure yet on what material I'm going to make the new lift panels out of. I thought of some 1/8" fiberglass sheeting, but I'm not sure if it is too flexible. I'll probably just use some birch ply again, if I can find it thin enouugh.

After that, I started working on the couple of holes that were punched into the side of the camper by the previous owner. I started by getting a peening hammer and block and started tapping the siding back into shape. Then after mixing up some polyester resin and cutting some fiberglass mat, I layed up a couple of layers of mat and painted on the polyester to the inside of the aluminum sheeting.
After the fiberglass was cured, I started in on the bondo, building up the area by one thin layer at a time (so I don't get any cracking). It took 3 layers.

That's all I did today. Tomorrow, I'll finish up the bondo work and start sanding the area back into shape. I'll probably build a couple of new lifting panels and rivit them back into the camper as well. Also, if I have enough time, I'll cut and install the new cabover wood.

As you can see, the lift panels are toast.
After I took off the front lift panel, there was some mildew/mold. Its long dead and cleaned up like new with a little Tilex.

Here are the lift panels after they were removed, along with the old cabover wood. The top lift panels were totally gone, so I have to do a little measuring to see how tall to make them.
I'm not sure yet on what material I'm going to make the new lift panels out of. I thought of some 1/8" fiberglass sheeting, but I'm not sure if it is too flexible. I'll probably just use some birch ply again, if I can find it thin enouugh.

After that, I started working on the couple of holes that were punched into the side of the camper by the previous owner. I started by getting a peening hammer and block and started tapping the siding back into shape. Then after mixing up some polyester resin and cutting some fiberglass mat, I layed up a couple of layers of mat and painted on the polyester to the inside of the aluminum sheeting.

After the fiberglass was cured, I started in on the bondo, building up the area by one thin layer at a time (so I don't get any cracking). It took 3 layers.

That's all I did today. Tomorrow, I'll finish up the bondo work and start sanding the area back into shape. I'll probably build a couple of new lifting panels and rivit them back into the camper as well. Also, if I have enough time, I'll cut and install the new cabover wood.
#26
Buckshot62
-

- Members
-
- 72 posts
Advanced Member
- LocationGillette Wyoming
Posted 17 April 2015 - 02:50 AM
Very nice work so far. I have a 1983 grandby that i will do the same narrowing to . You make it look so easy .I will be following this build for more ideas. Keep up the good work and don't forget we love pics !
1999 CTD (391,000 miles ) QC/LB 2500 1986 FWC Fleet . Sold the truck and kept the Fleet.
2000 K3500 CC LB 7.4 4L80E 4.10's
1997 K3500 CC LB Dually 7.4 NV4500 4.56'S
#27
Colorado CJ
-
- Members
-
- 60 posts
Advanced Member
Posted 19 April 2015 - 05:03 AM
Well, this evening, I decided to do a little work on the camper.
I wanted to take care of this mess here.
So, I went and found some decent wood at a great price. I picked up enough to complete the whole interior of the camper, as well as make some new cabinetry out of it. It is Baltic Birch ply with a bead board look to it. $10.00 a sheet marked down from $39.00! The color is actually a light honey color, much lighter than in these photos.
It took an hour or two just to drill out all the rivets from the old lift panel so that I could reuse the piano hinges. With the help of some WD-40, I got the hinges back into shape.
Since the old lift panels were totally broken, I had to do some careful measuring to see what height I needed to make the upper lift panels. Here's the front one starting to get worked on. (excuse the mess, I make a big mess of the shop when I work on things)
And here's a short clip of me riveting the upper panel together.
https://youtu.be/zalFYrWwBV4
Adding the bottom panel to the top panel.
Here is the completed front lift panel. It took approximately 3 hours to build a new one. More than half the time was spent drilling out all the old rivets. One more to go, then I can start installing them
That's it for tonight. I might spend tomorrow evening building the new back lift panel. I might set up my camera and take a time lapse of it, we'll see.
Edited by Colorado CJ, 19 April 2015 - 05:05 AM.
#28
takesiteasy
-

- Members
- 2,588 posts
Senior Member
- LocationMinnesota
Posted 19 April 2015 - 03:17 PM
Looks great! I like that material for the paneling- good score.
#29
pods8
-
- Members
- 2,555 posts
Senior Member
- LocationThornton, CO
Posted 20 April 2015 - 09:13 PM
Nice look to the new panels.
BTW a friend down in Lakewood has done much of the same stuff (or is midway) with an older grandby. Also replaced the roof sheeting and side liner, PM me if you are wondering any ideas. But you seem to be cruising along just fine.
I do wonder how that bondo on the aluminum will hold up though, you even use bondo on thin/flexy aluminum before?
2022 F350 7.3L; family trailer at the moment and some aluminum stuck together to eventually form another truck camper
#30
Colorado CJ
-
- Members
-
- 60 posts
Advanced Member
Posted 24 April 2015 - 02:18 AM
Thanks guys.
Bondo holds up well if you prep the area. You need a decent backing as well. You don't want to bondo over any holes without a decent fiberglass backing. Also, it helps to bondo a few thin layers, bulding it up, not to bondo all at once. This prevents cracking.
Bondo holds up well if you prep the area. You need a decent backing as well. You don't want to bondo over any holes without a decent fiberglass backing. Also, it helps to bondo a few thin layers, bulding it up, not to bondo all at once. This prevents cracking.


1 user(s) are reading this topic
0 members, 1 guests, 0 anonymous users

