Jump to content


Photo
- - - - -

Atl-atl's 1981 Hawk 'documentation' thread


  • Please log in to reply
27 replies to this topic

#21 Atl-atl

Atl-atl

    Advanced Member

  • Members
  • PipPipPip
  • 59 posts

Posted 15 October 2015 - 02:12 AM

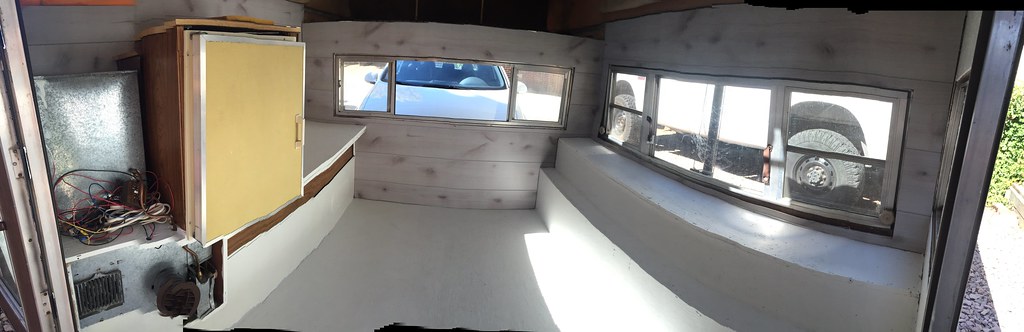
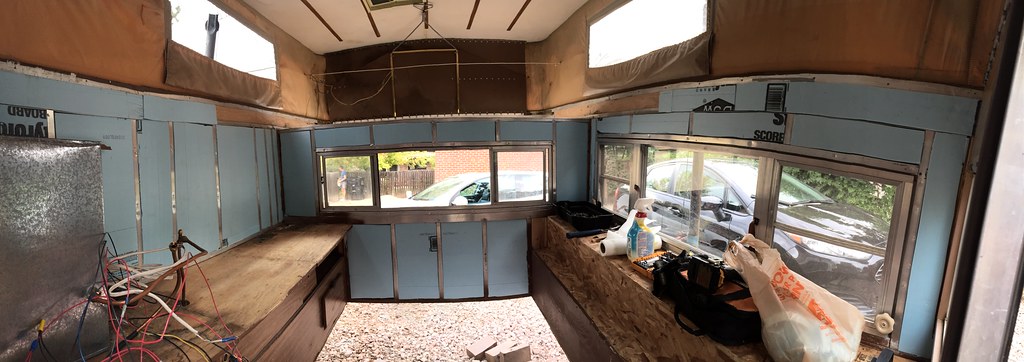
I installed 1" closed cell foam insulation. Its rated R6 and Id guess the old fiberglass batt was lucky to be working at an R2. Luckily I have worked with this foam board before so I know the secret to cutting clean edges! It already feels WAY more insulated inside. Im getting pretty excited.


21929994986_abaae3f6c7_b.jpg


I painted the underside of the floor and both sides of the cabover wood with some crazy goopy paint I got at HD that is supposed to be good at filling cracks and very waterproof because its made for boat docks and things like that. It was about $40 a gallon and seemed to do well on the new 3/4" birch ply I used. I decided not to spring for the $200 a gallon two part epoxy though I wish I would have.


21965931041_8542bd27ce_b.jpg


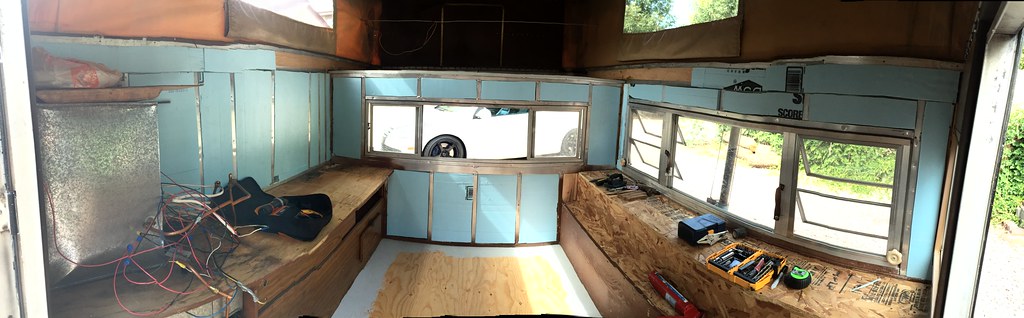
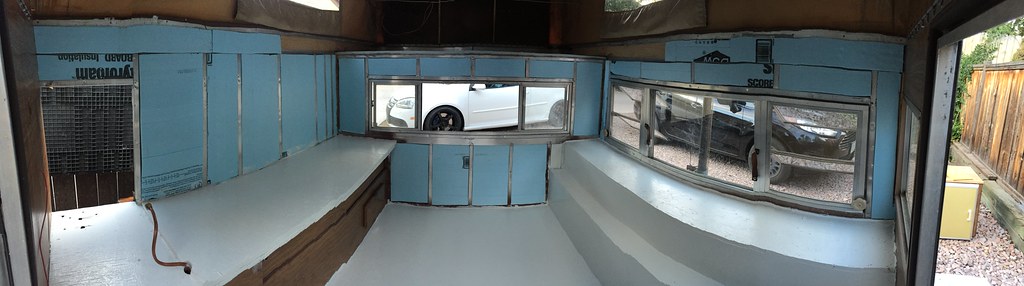
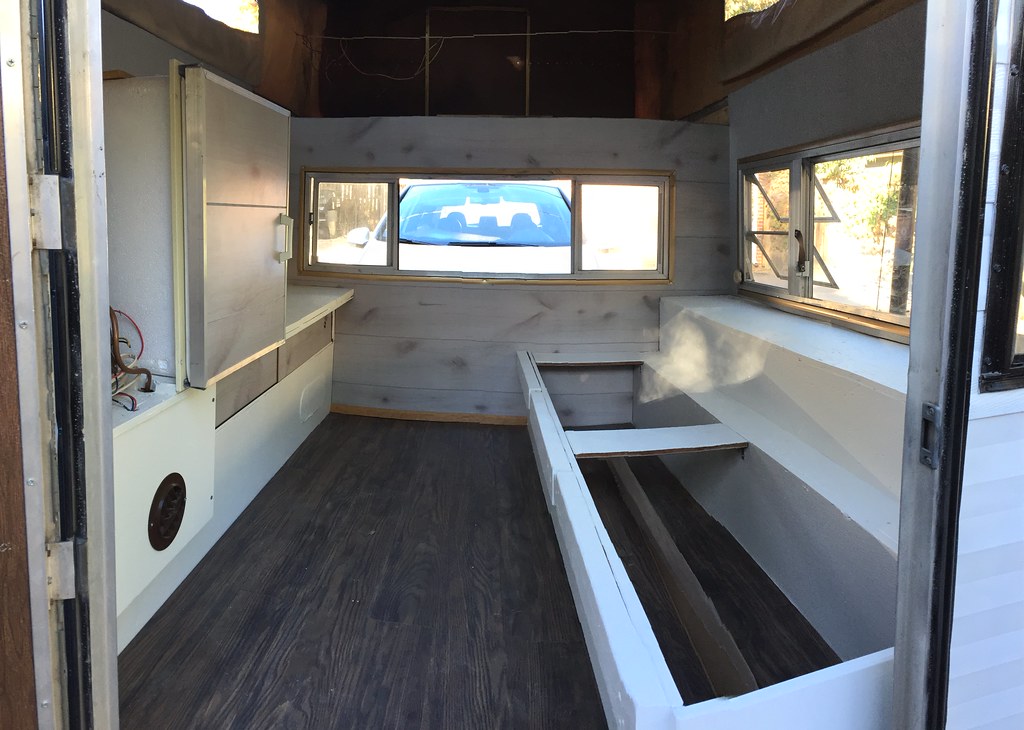
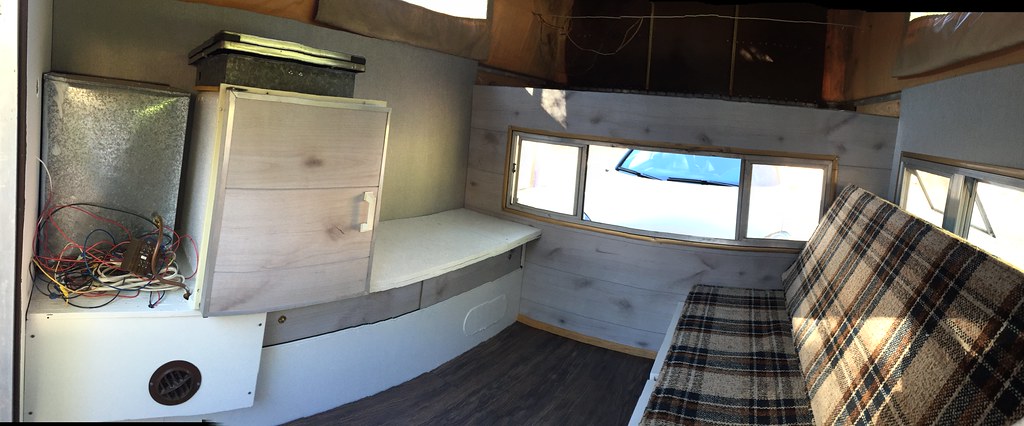
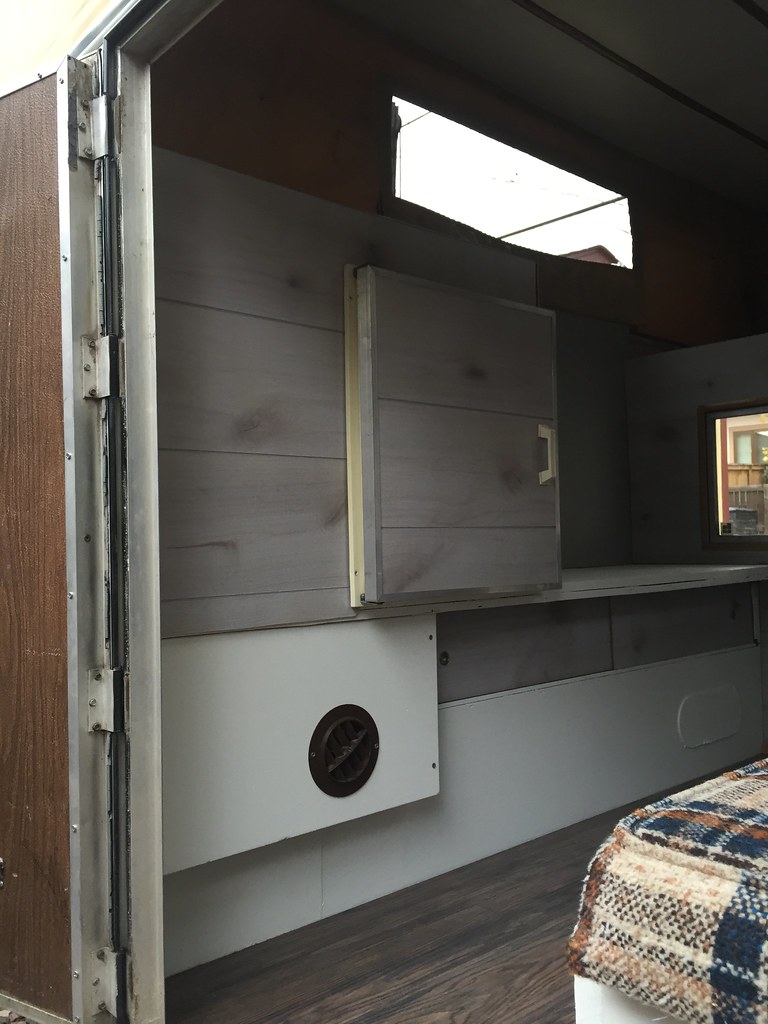
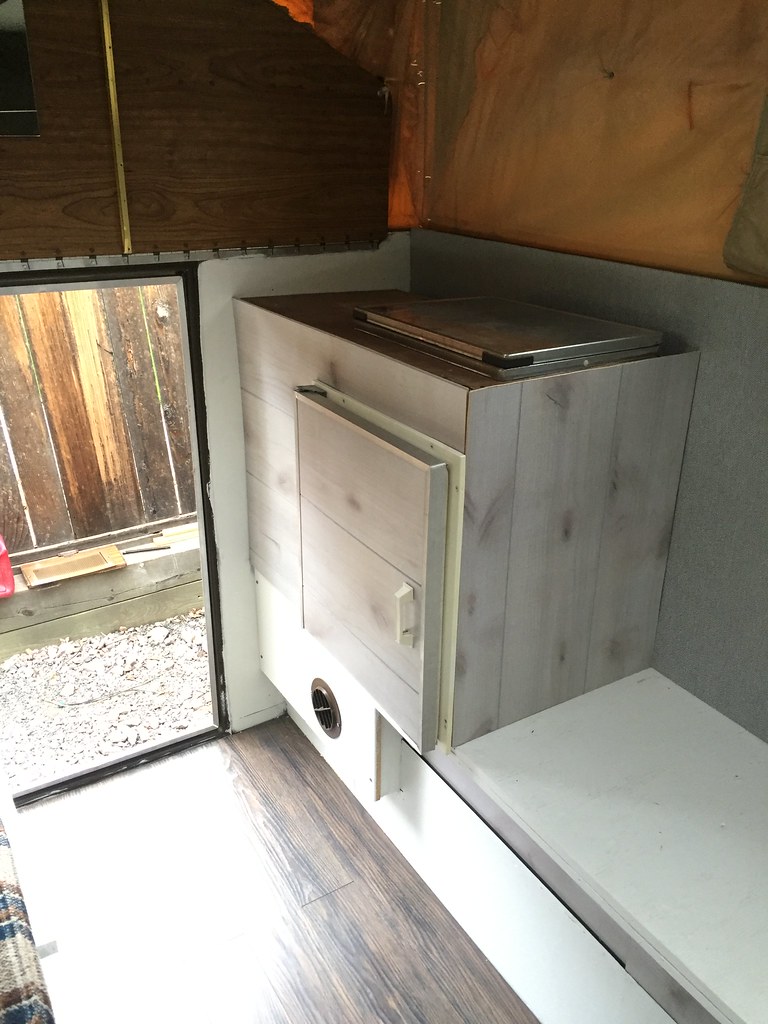
Then I caulked every seem inside with paintable non-silicone and primered 3 coats on nearly the whole interior with good old fashioned Kilz oil based original. I also added a second layer of 3/4" ply on top of the drivers side cabinetry area. There were a few holes from the water system and a small bit of dry rot that I wanted to reinforce.

I wound up pulling almost all the wiring and ditching the entire water system and stove top. Im not sure what I can and can't do with the propane so I need someone to look at it that actually knows about propane heat systems before I fire it up. I ditched the Y in the line that split the stove piping and heater piping and ran a line directly from the tank to the heater. I don't know if this is ok because Ive read that the stove may act as a vent for the system. If anyone can chime in here it will be appreciated.

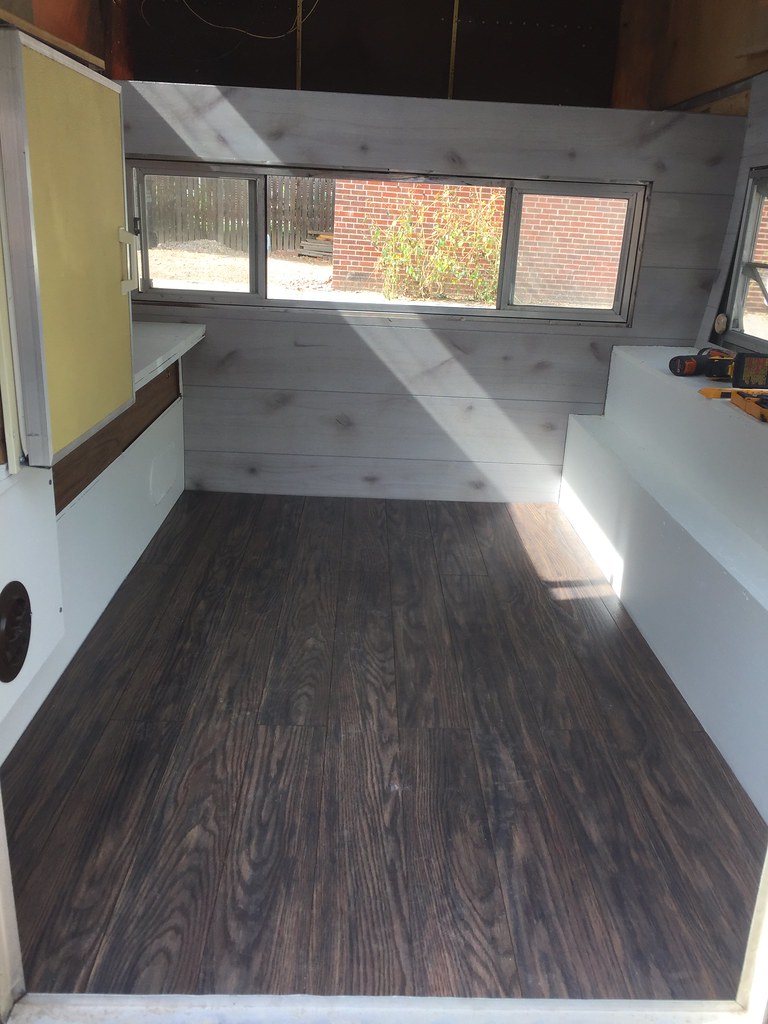
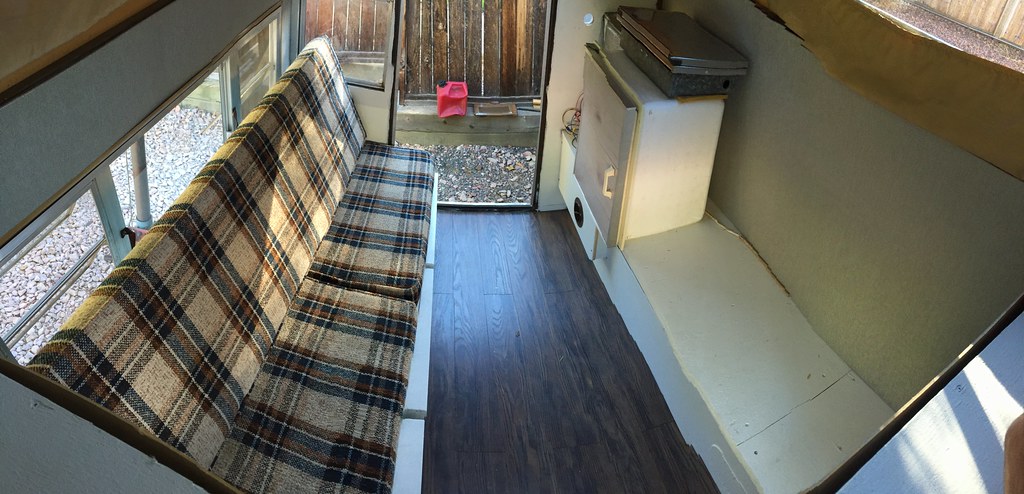
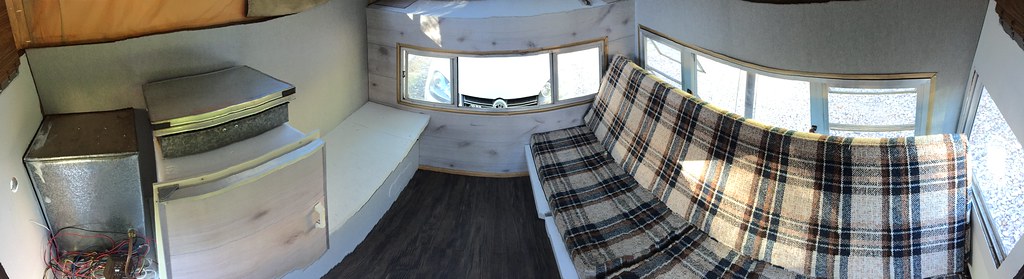
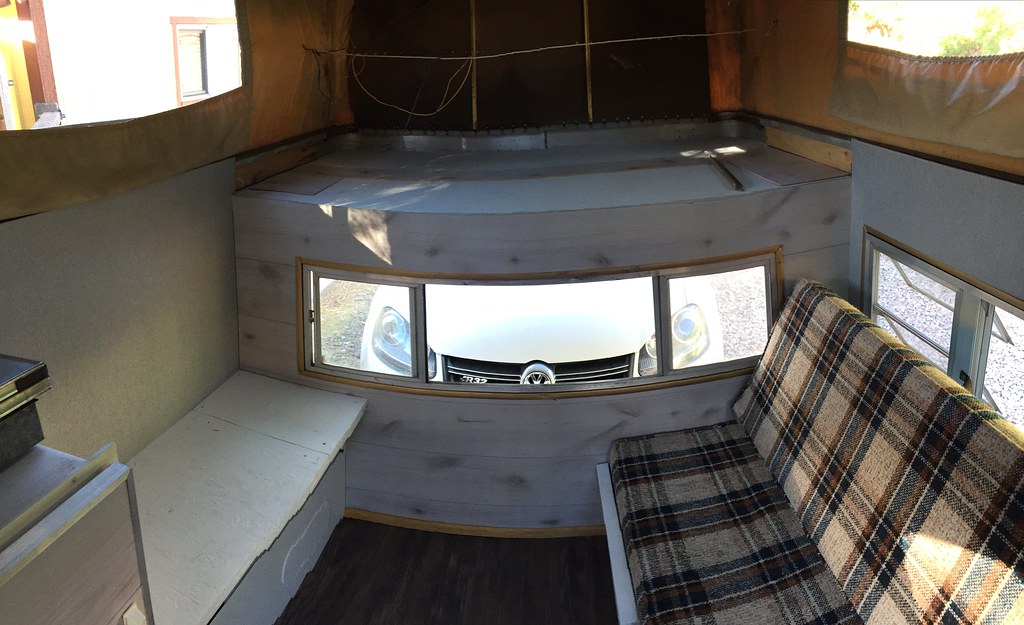
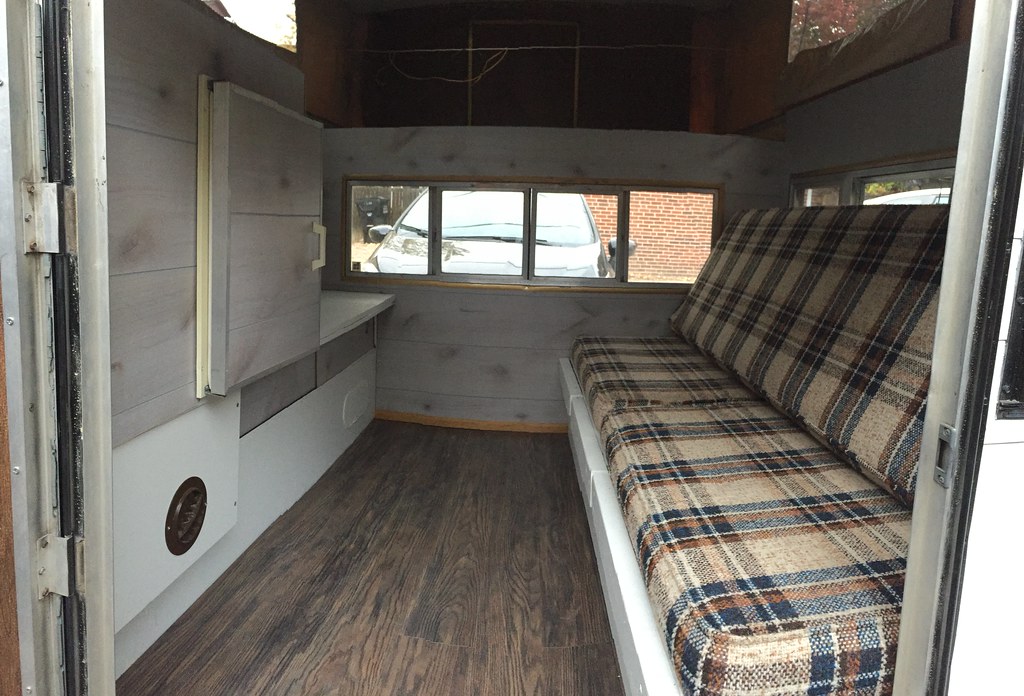
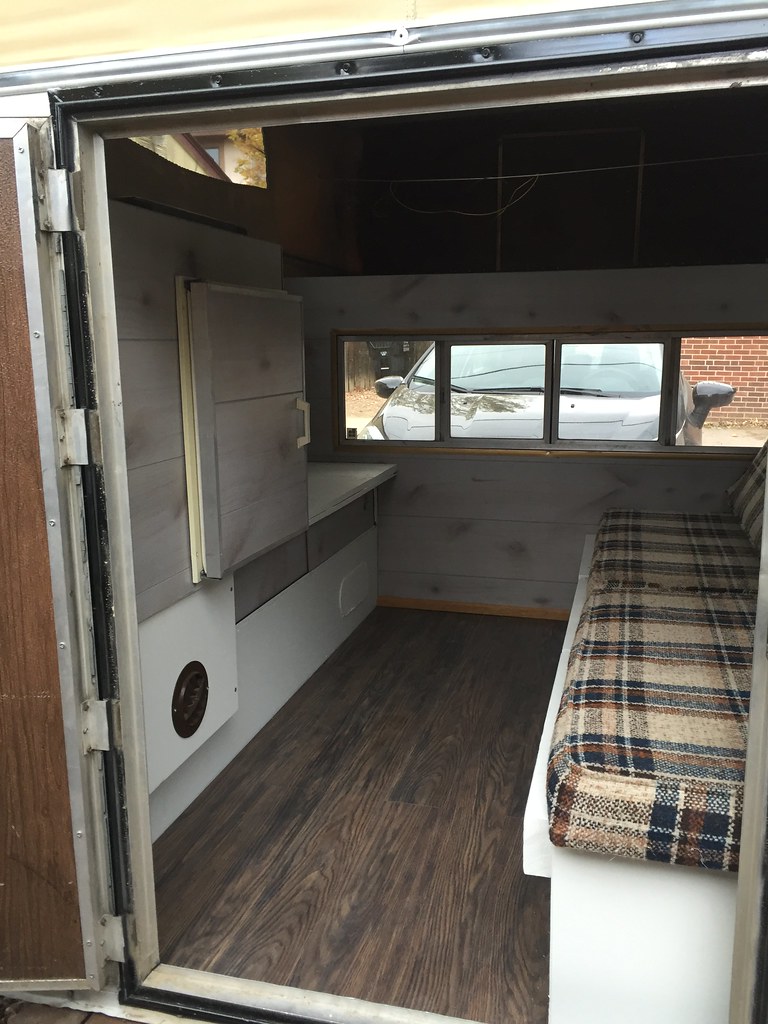
This is as far as I got last week except for cutting a piece of the old counter to cover the propane tank box and icebox and setting them in place to see what it looks like. I hope to finish most of the interior this week. Up next is sanding and painting the vertical laminate surfaces and reinstalling the bench seat.


21768070290_126620d138_b.jpg


  • 0

#22 Atl-atl

Atl-atl

    Advanced Member

  • Members
  • PipPipPip
  • 59 posts

Posted 15 October 2015 - 02:15 AM

I also went on another camping trip before I ripped apart the the camper. Forgot to post the pics first though, too excited about the remodel!

This is the trail up to Bill Moore Lake. Leaves already started turning a couple weeks ago. Breck got a dusting of snow last weekend, gonna be a good year!


21640528979_b03e361eaf_z.jpg

21836912171_034035408e_z.jpg

21639373150_2f54d6b47d_z.jpg

21836971471_259487e363_z.jpg

21639318160_09b66d8312_z.jpg

21836940501_3fc59e2081_b.jpg

21827402155_b2fc867fb8_z.jpg


Bill Moore Lake

21206353183_1993fef024_b.jpg


Aptly named "poser rock"

21204638794_18a5f10465_z.jpg


  • 0

#23 craig333

craig333

    Riley's Human

  • Members
  • 8,022 posts
  • LocationSacramento

Posted 15 October 2015 - 02:46 AM

Looking good.


  • 0

Craig K6JGV_________________________ 2004 2500 CTD 4X4 FWC HAWK 1960 CJ5


#24 Atl-atl

Atl-atl

    Advanced Member

  • Members
  • PipPipPip
  • 59 posts

Posted 15 October 2015 - 03:11 AM

So last week I got to work on the camper for a couple full days. I really started to make some progress once I got the new floors all sealed up and the interior painted. The paneling is 1/8" stuff I got from HD for $13 per 4x8' sheet, apparently its new. Looks really good, its a white/gray washed looking knotty pine. I liked it enough I decided to leave some of it exposed inside. Originally my plan was to use the fabric wall covering everywhere and put it over some basic 1/8" panel but I like the faux wood finish enough to keep some. I also managed to take apart the icebox door and replace the horrendous yellow plastic panel with matching fake wood paneling, I think it turned out really well. I replaced the two small sliding doors on the drivers side with matching paneling as well.

As for the fabric wall covering. I got an entire bolt of this super expensive woven fabric wall covering from a job site I was working on. It did not meet the QC demands of the owner and was going to get trashed. I kept it because I knew it would get used and it was perfect for this project. All it took was some 3M Super 77 and a little elbow grease. Also having a seamstress for a mom that taught me a few things over the years really helped! :sombrero: Trimming the panels to fit with a jigsaw was easier than expected, as was covering them. All I need now is a stapler powerful enough to staple the panels into the aluminum frame of the camper. I can't decide if I want to borrow one or spend $100 on a tool I might never use again. Ill probably just buy one hahaha.

I also installed the flooring. Its 12mm commercial grade laminate that was like $22 for a box of 15 square feet so I only needed two. Ive used this relatively 'cheap' stuff in some retail stores Ive built out and it has held up surprisingly well. I picked a color that is dark so it wouldn't look too dirty but had a slight gray tone over the brown that would look good with the rest of the interior.


22051319001_20977e9ee8_b.jpg


22081841231_c1dd8ea7ca_b.jpg


Here it is with the newly painted bench seat/storage bottom installed.

22046622576_85dfa45fea_b.jpg


Current view from 'upstairs' with the old upholstery cushions thrown in for the pictures.

21451688283_762d55b793_b.jpg


I haven't decided if I want to paint the window trim white or black or leave it the goldish color it is currently.


21451679673_e7b6a00c64_b.jpg


22082838401_448a5bac57_b.jpg


21885917139_421fdd9410_b.jpg


There is still a ton of work to do but its getting so close now. Today I picked up some melamine board to build the counter and I got a stone slab contact for the counter top so I need to build a template for that this weekend. I also want to finish the panel trim around the upper bed area and decide about window trim color. My mom is working on finding some slightly more modern upholstery that is still plaid and 'outdoorsy' because I don't want to feel too fancy inside and I don't want to lose the warm feeling. Once I get the counter built I will figure out what to do about hooking up the heater and cook top. I also still have a bunch of exterior stuff to work on. Im quite glad the weather is still so nice in Denver! :elkgrin:


  • 0

#25 Atl-atl

Atl-atl

    Advanced Member

  • Members
  • PipPipPip
  • 59 posts

Posted 18 October 2015 - 11:05 PM

Well I wanted to get more work done this weekend than I did but I wasn't completely lazy! Built the cabinetry except for the counter top. Ill make a template for that and get a custom top made soon. I built a ply top for now so I could locate the cooktop. Also I cut provisions for the thermostat and light switch, they are just hidden behind the paneling right now. I haven't decided if I want to keep the paneling there or go another route. For now I like it except for the vertical side that I didnt have the right scraps of paneling to keep it all horizontal.


I still have quite a few things to do but its approaching "punch list" status. Paint some trim pieces, weatherstrip the door, install new paneling on the door, cut blockoff plates for the old water fittings outside, re-seal the roof in some spots, build the new seat cushion and reupholster everything. The weather is about to turn here so I need to get at least the exterior work finished Monday and Tuesday.


The only two things that feel like they are "looming" are the wiring and the propane. The wiring is minimal but I can't make my mind up about running a battery in the camper or wiring the camper to the truck. My power needs are very minimal; one exterior light and the heater, thats it. As for the propane I really need help putting this back together. Id like to find a local guy that knows this stuff to help me out. Anyone in Colorado that can help with propane?


22286835375_8cdb8aa627_b.jpg


22297367001_ef7a6083e1_b.jpg


22099119108_3ffd11e578_b.jpg


21665797643_c8429b4fc2_b.jpg


  • 0

#26 takesiteasy

takesiteasy

    Senior Member

  • Members
  • 2,588 posts
  • LocationMinnesota

Posted 19 October 2015 - 12:51 PM

Looks great! Nice work. If it was me, I would leave the trim or paint it white. Looking forward to seeing the finished project.


  • 0
2011 Tacoma AC TRD
ATC Custom Shell

travelswithrockythedog.blogspot.com

#27 Atl-atl

Atl-atl

    Advanced Member

  • Members
  • PipPipPip
  • 59 posts

Posted 26 October 2015 - 03:43 AM

Looks great! Nice work. If it was me, I would leave the trim or paint it white. Looking forward to seeing the finished project.

Thanks! I will probably end up painting it white, black would look weird. I might wait until I get new curtains up to decide.


Edited by Atl-atl, 26 October 2015 - 03:43 AM.

  • 0

#28 Atl-atl

Atl-atl

    Advanced Member

  • Members
  • PipPipPip
  • 59 posts

Posted 26 October 2015 - 03:44 AM

So I meant to do a lot of work on the camper this weekend but it turned into spending an entire day rebuilding the door. I simply wanted to take it apart and recover the inside panel. This turned into rebuilding the whole door. The wood frame was rotten, not sure why it isn't aluminum like the rest of the camper, 1981 cost-cutting measures I guess. Oh well I had some pressure treated 2X that I ripped down to the very odd 1 5/16th" size the wood frame is made from. I recovered it with the same fabric wall covering as the rest of the camper and it turned out really well. Its getting hard to tell from the pictures but every little change/fix is making such a big difference to the "feel" of the inside of the camper. Its incredibly time consuming but Im very happy each time I run into a road block and decide to fix it the right way instead of skipping over it.


22463878692_5bf8a9fe7d_b.jpg


22451249216_81fe5a9394_b.jpg


22488249461_041d5653d6_b.jpg


22289547638_a842d95d12_b.jpg


22488248161_1ee94826ac_b.jpg


  • 0


0 user(s) are reading this topic

0 members, 0 guests, 0 anonymous users