Jump to content


Photo
- - - - -

84 Fleet - 09 Tacoma - Project


  • Please log in to reply
420 replies to this topic

#31 Living The Dream

Living The Dream

    Senior Member

  • Members
  • 464 posts
  • LocationFront Range, Colorado

Posted 23 May 2016 - 03:26 PM

QCamper,


I snapped two photos for you today.  Here is one with the front of the roof dropped but back still up.


gallery_6274_1000_963860.jpg


and then with the top all the way down. You can see the conduit does stick into the bed area.


gallery_6274_1000_598401.jpg

It just pushes into my 2in foam a bit but works okay.  Again mine is far from optimized. I think you could situate this to sit flush against the roof and take up just the 3/4in from the width of the tube.  Good luck.


Edited by Living The Dream, 23 May 2016 - 03:27 PM.

  • 0

My youtube channel about my Four Wheel Camper - https://www.youtube.com/c/timmorrissey

All about my camper - https://www.tgmorrissey.com/camper

Item I used in my build- http://bit.ly/TGMorrisseyParts


#32 PokyBro

PokyBro

    Senior Member

  • Members
  • 467 posts
  • LocationLas Vegas, Nevada

Posted 28 May 2016 - 01:45 AM

Living the dream, here is a snapshot of the water tank I offered you. It appears the same shape and size as yours, and I think it's about a 10 gallon tank.

The third photo is the water tank I'm planning to use, and where I think it will go. It's 17 gallons, I got it off eBay. I'm a little hesitant to use it though, because the wall thickness on the tank seems a little thin, as there is more give on the side surfaces when pushed on, than the original FWC tank. The battery(s) will set to the right. Anyhow, here you go.

ImageUploadedByWander The West1464399785.150911.jpg ImageUploadedByWander The West1464399806.179166.jpg ImageUploadedByWander The West1464399836.357335.jpg


Sent from my iPad using Wander The West

Edited by PokyBro, 28 May 2016 - 01:50 AM.

  • 1

1999 F250 crew cab SRW, 7.3 Powerstroke TD

1981 Grandby shortened to a Hawk

Build thread / https://www.wanderth...by-into-a-hawk/


#33 Squatch

Squatch

    Senior Member

  • Members
  • 1,281 posts
  • LocationOn the wrong side of the mountains!

Posted 30 May 2016 - 04:05 AM

Nice so far. I think you'll be glad you went all the way. When done the nagging little gremlins will be gone.


Your EMt lift panels are actually very similar to the way several factory made campers raise the roof. Many of the older wood framed models use pretty much the same thing but on the sides not the ends. Instead of manually pushing it up. There it a long enclosed screw across the camper bed edge with a crank in the middle. The EMT lift arms have an extension to the screw. You just get in and turn the crank and the top raises and lowers.


  • 1

#34 Qcamper

Qcamper

    Member

  • Members
  • PipPip
  • 29 posts

Posted 30 May 2016 - 07:10 PM

Hey Tim,


Thanks so much for the picturesm,I REALLY APPECIATE IT.  I removed the old panels and have my conduit ready.  Went to bend it this morning and realized that I need another bender.  Mine is for 1/2 inch conduit. :unsure:  

I came across another post where a guy bent his so that it locked against each other when it was extended, Pretty cool, but it might take up more space which is something I want to minimize in order to keep my mattress up top. Here is the link.

http://www.thesamba....der=asc&start=0

Do you have any issues with the way the vinyl folds in?  Any thoughts on whether it would it be helpful for the conduit to be longer or shorter horizontally to accommodate the folding of the material? I was going to make them about 60 inches wide with about 15 inch legs so that the center pivot would land about 121/2" for me.  My old panels were about 25" high.

Hope all is going well with the build on your end.


  • 1

#35 Living The Dream

Living The Dream

    Senior Member

  • Members
  • 464 posts
  • LocationFront Range, Colorado

Posted 31 May 2016 - 04:59 AM

Nice so far. I think you'll be glad you went all the way. When done the nagging little gremlins will be gone.


Your EMt lift panels are actually very similar to the way several factory made campers raise the roof. Many of the older wood framed models use pretty much the same thing but on the sides not the ends. Instead of manually pushing it up. There it a long enclosed screw across the camper bed edge with a crank in the middle. The EMT lift arms have an extension to the screw. You just get in and turn the crank and the top raises and lowers.

Thanks for the encouragement.  I am so far glad I went all the way.  And I can not take credit for the panels.  I can thank this site!  I stand on the shoulders of giants.


Hey Tim,


Thanks so much for the picturesm,I REALLY APPECIATE IT.  I removed the old panels and have my conduit ready.  Went to bend it this morning and realized that I need another bender.  Mine is for 1/2 inch conduit. :unsure:  

I came across another post where a guy bent his so that it locked against each other when it was extended, Pretty cool, but it might take up more space which is something I want to minimize in order to keep my mattress up top. Here is the link.

http://www.thesamba....der=asc&start=0

Do you have any issues with the way the vinyl folds in?  Any thoughts on whether it would it be helpful for the conduit to be longer or shorter horizontally to accommodate the folding of the material? I was going to make them about 60 inches wide with about 15 inch legs so that the center pivot would land about 121/2" for me.  My old panels were about 25" high.

Hope all is going well with the build on your end.

No worries, glad to help out.  The link is great!  Those are some really slick panels.  If you are up for it I would strive for the fancier design, but the simple one I use continues to work just fine.  I never have any problem with not having a locked extension.  Just pop it up and slide the pins in, It is very stable even before the pins are in so its not big deal.  


I do not have any problem with the vinyl folds.  However, my vinyl is very beat up, but that was before the EMT.  I would attach some elastic bands from the vinyl to the EMT so it pulls itself in when lowering. That is how the traditional panels work I believe.  With the EMT being mostly a void space the vinyl can be easily accommodated, I would not worry about the  folding too much.


Your measurments sound right.  I would support the roof with some cut 2x4s before hand.  Then mount the top bracket to the roof with some room to spare with the hanging bit (that can be cut off later with a hack saw).  Then tape up the bottom pivot piece and mock it all up.  The only issue you might want is depending on where you mount your lower bracket will make the total height of the EMT assembly a bit more than 25".  (The EMT does not mount on the very top of the lower camper frame, but inside the wall a bit).  I did not account for that and thus have a bit a sag in mine.  I think it will make a lot of sense one you start putting it together.


Living the dream, here is a snapshot of the water tank I offered you. It appears the same shape and size as yours, and I think it's about a 10 gallon tank.

The third photo is the water tank I'm planning to use, and where I think it will go. It's 17 gallons, I got it off eBay. I'm a little hesitant to use it though, because the wall thickness on the tank seems a little thin, as there is more give on the side surfaces when pushed on, than the original FWC tank. The battery(s) will set to the right. Anyhow, here you go.

attachicon.gifImageUploadedByWander The West1464399785.150911.jpgattachicon.gifImageUploadedByWander The West1464399806.179166.jpgattachicon.gifImageUploadedByWander The West1464399836.357335.jpg


Sent from my iPad using Wander The West

Rock and roll.  I will reach out via phone soon to schedule a meet up next time I am up near you.  Would love to take a working one off your hands rather than deal with patching mine.  


  • 0

My youtube channel about my Four Wheel Camper - https://www.youtube.com/c/timmorrissey

All about my camper - https://www.tgmorrissey.com/camper

Item I used in my build- http://bit.ly/TGMorrisseyParts


#36 Living The Dream

Living The Dream

    Senior Member

  • Members
  • 464 posts
  • LocationFront Range, Colorado

Posted 31 May 2016 - 05:46 AM

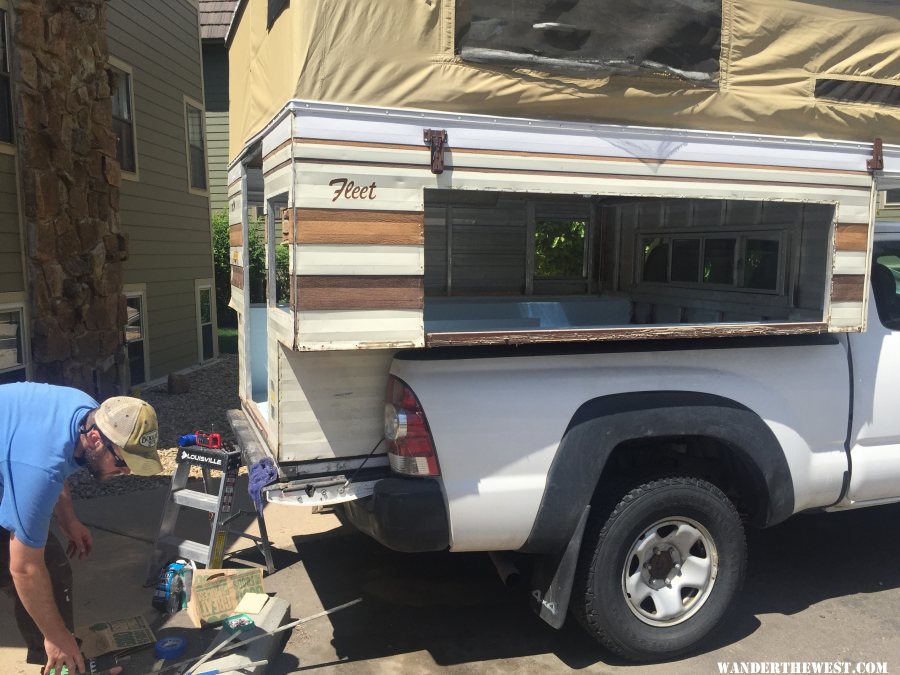
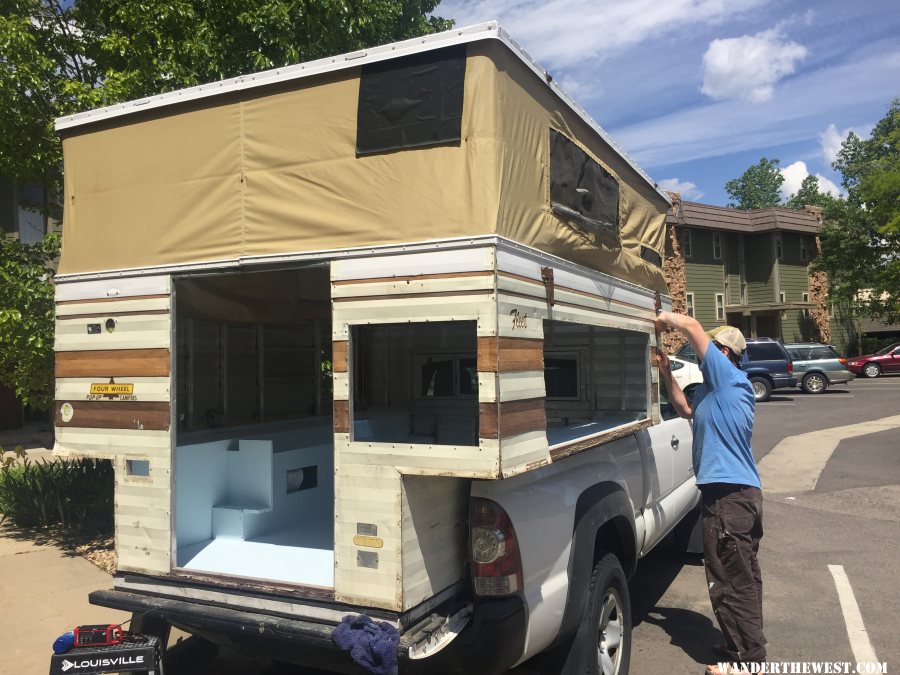
With the long weekend I had big plans to crest the project hill and start putting some of this back together!  I did not have any certain goals to get done, but I had three days and wanted the camper to finally look like something. I would like to get the shell functional within the next few weekends so I can start using the camper as a shell.  This means mostly paint and cosmetic items.  That have to be done as they are underneath everything else.  When I put this back together I am going to keep the layering in mind and always try to make it so I can get to certain items for modifications or repairs without ripping the entire camper apart again.  


Floorpack painting:


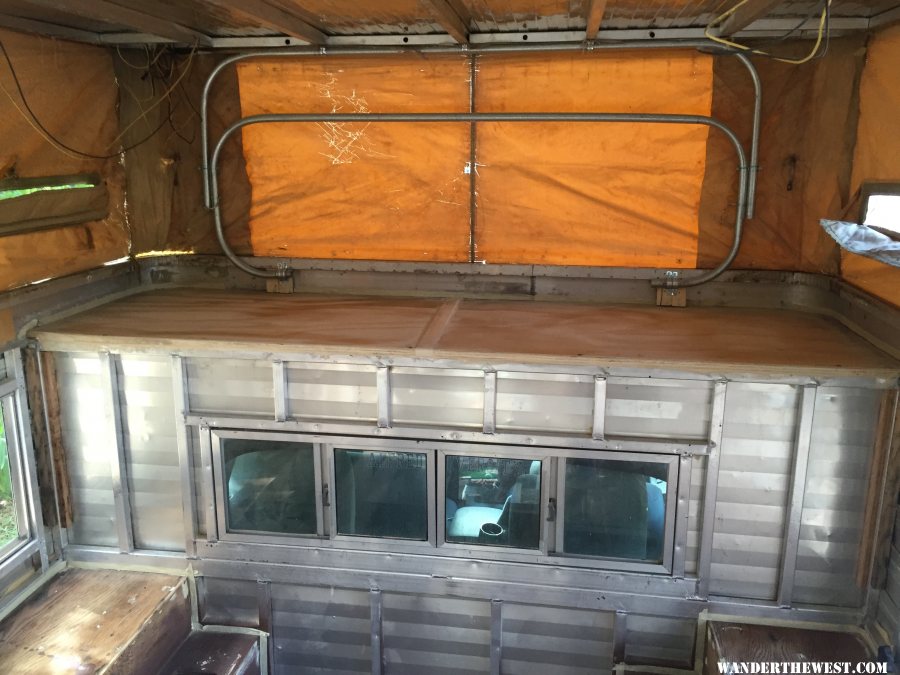
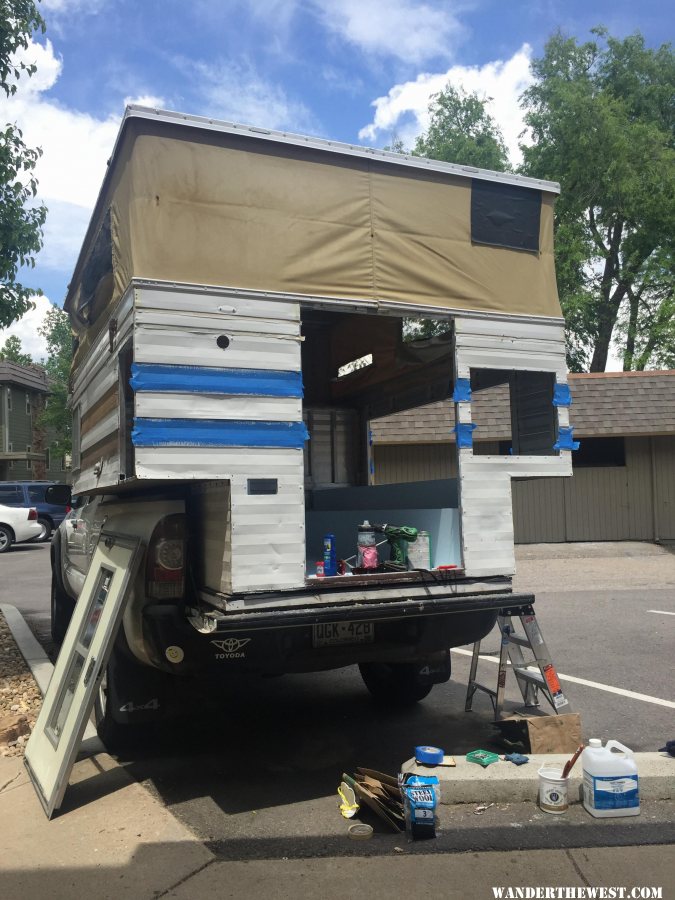
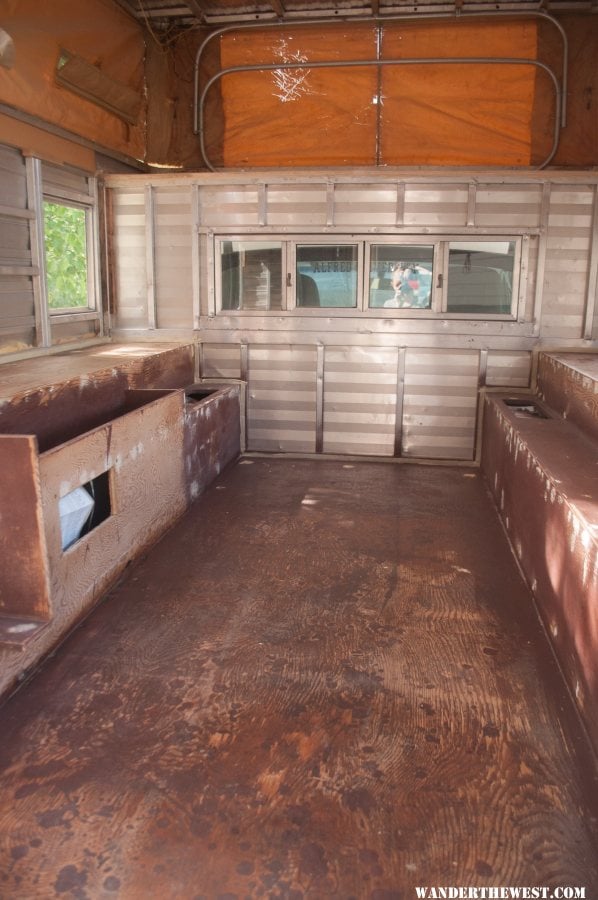
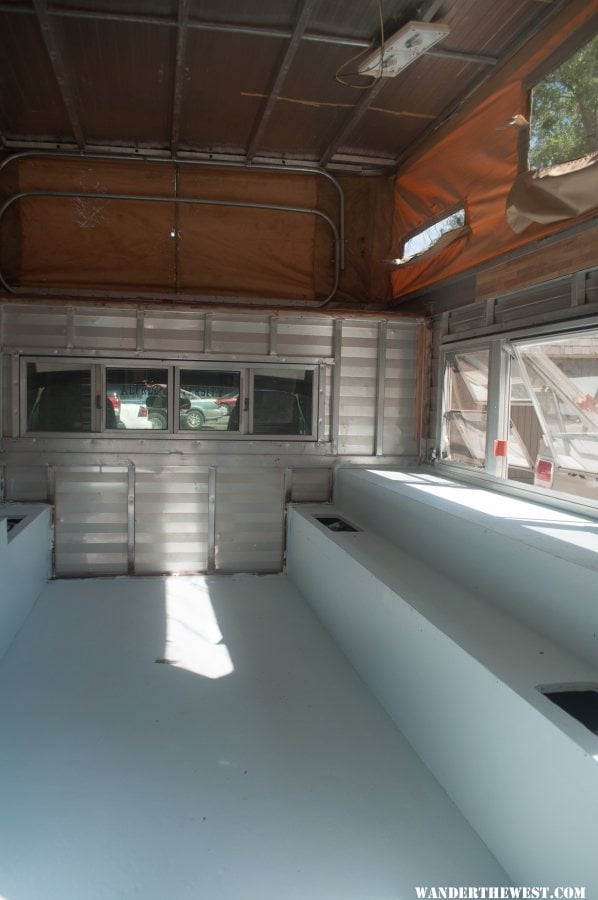
It started first thing Saturday morning with a messy construction zone of a camper.  Lucky for me I also had a few family members willing to chip in this weekend  


gallery_6274_1000_859185.jpg

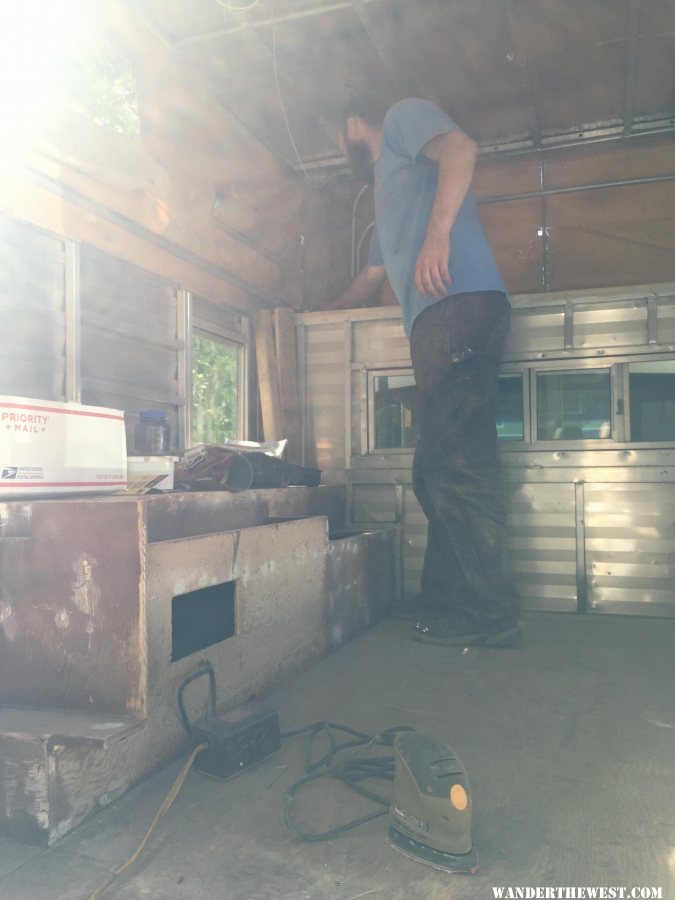
There was a lot of sanding, wood filler, sanding, choking on dust and sanding.  The floor pack was starting to take shape.   We got the windows open, did a final sweep through to get rid of the dust and give a quick once over with solvent to get ready for paint.

gallery_6274_1000_480594.jpeg

gallery_6274_1000_650700.jpeg

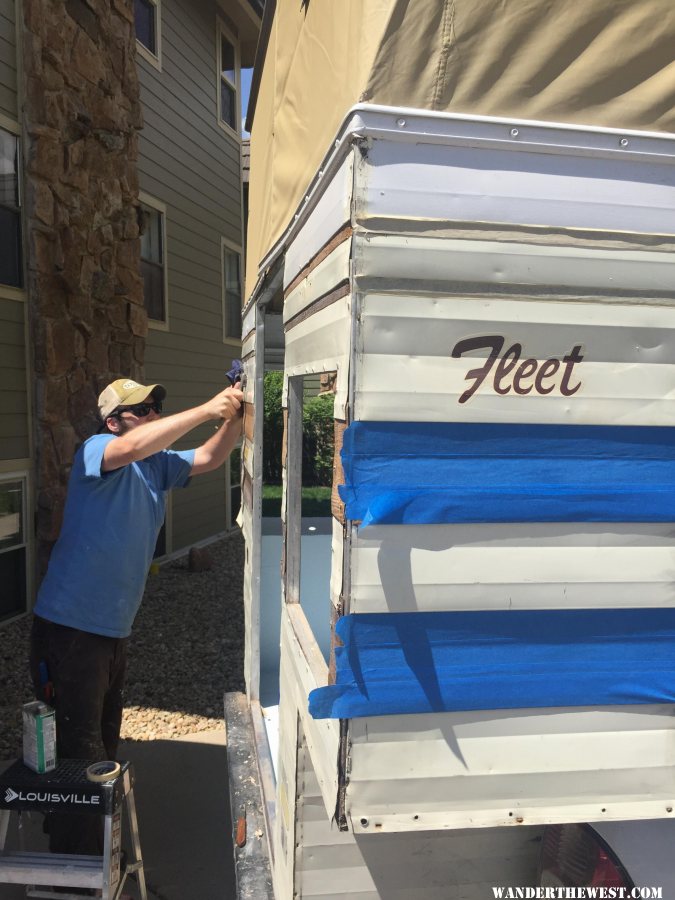
First a coat of primer with 2000 grit sanding


gallery_6274_1000_66630.jpg

gallery_6274_1000_532155.jpeg

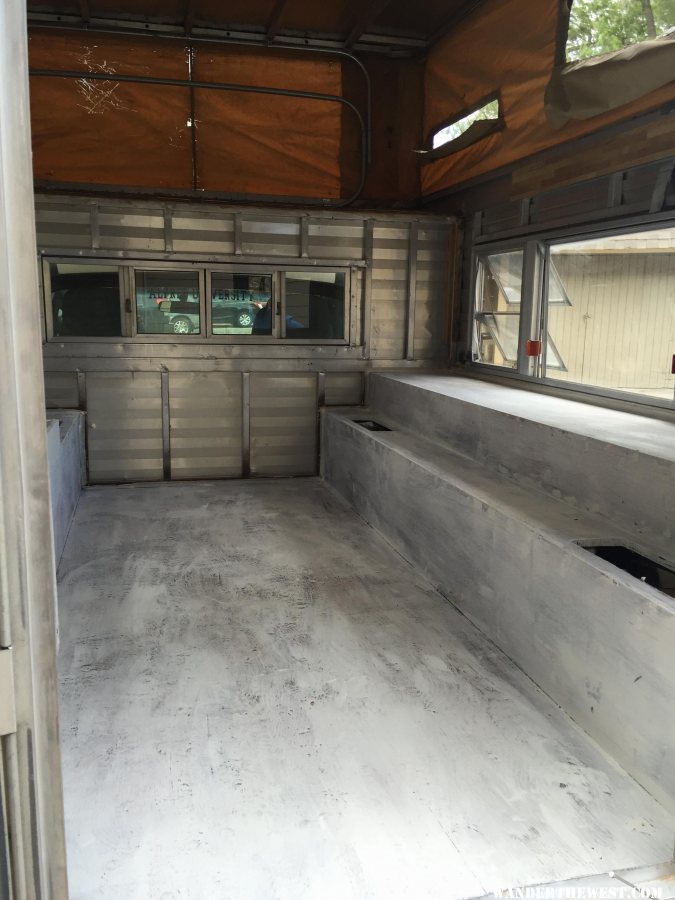
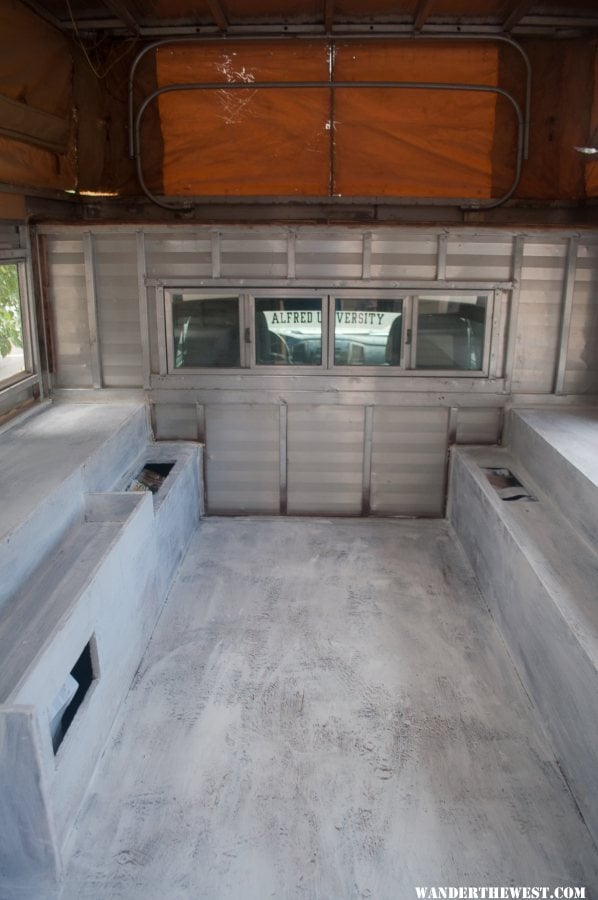
Then another coat of primer


gallery_6274_1000_739299.jpg

gallery_6274_1000_1436134.jpg

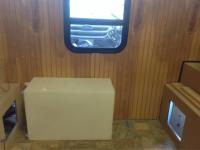
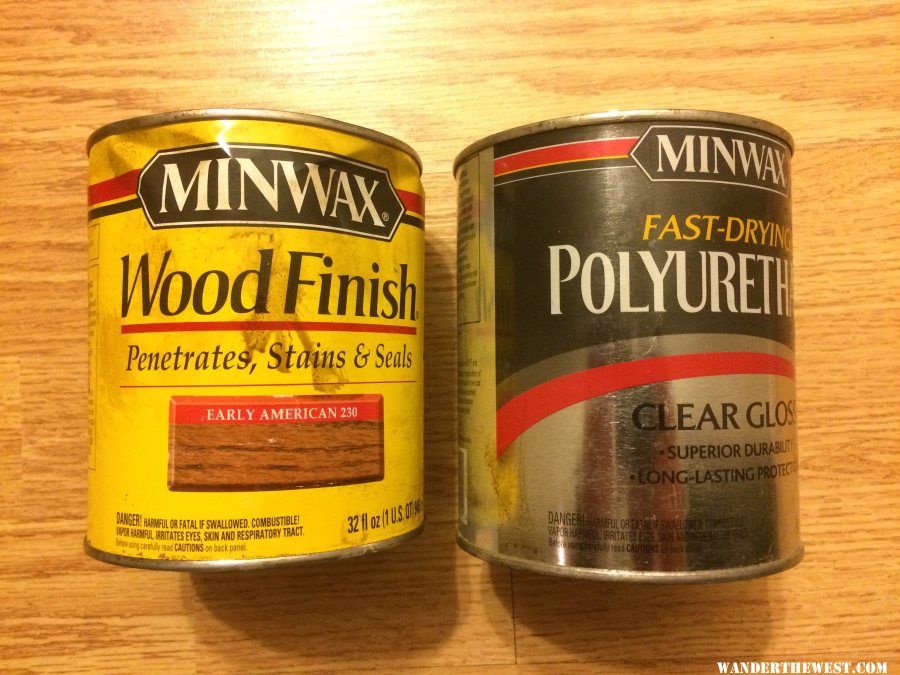
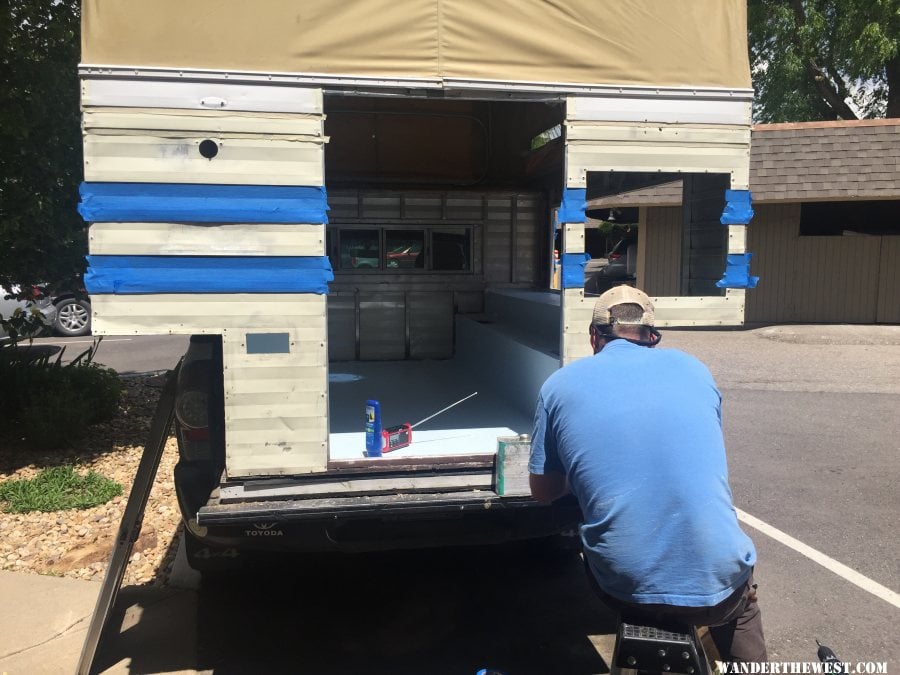
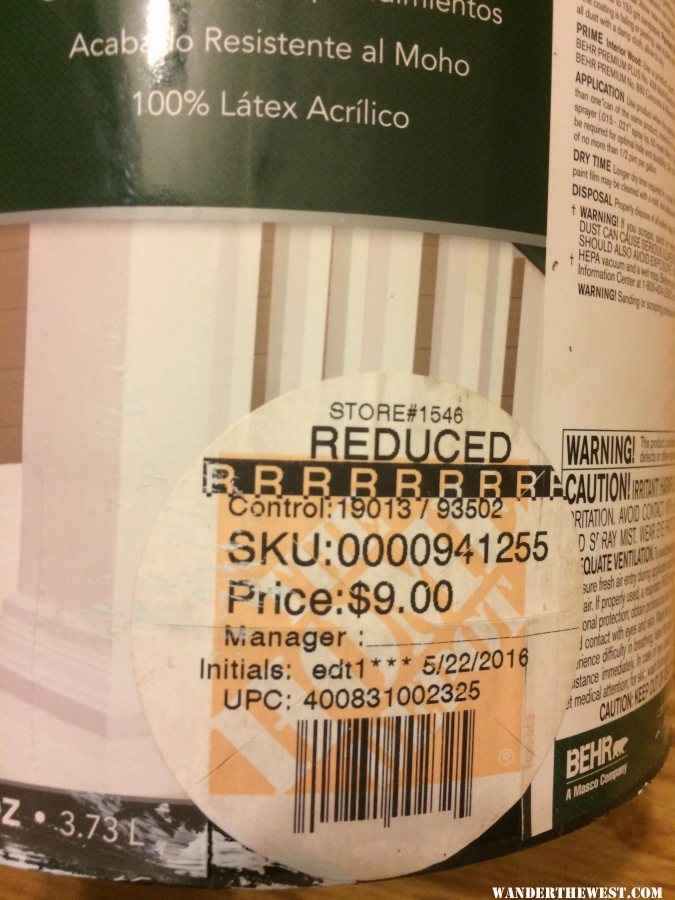
Then off to the store to find a suitable paint. I figured some deck/patio paint would do a good help to protect the wood against most moisture and abuse.  Also, I found this in the rejects pile at $9/gallon!  It is a very light blue, but since a floor, cabinet, and couch will cover almost everything I was painting today, color does not matter.  Plus by the end of the weekend, the color has really grown on me.  


gallery_6274_1000_568669.jpg

gallery_6274_1000_893024.jpg


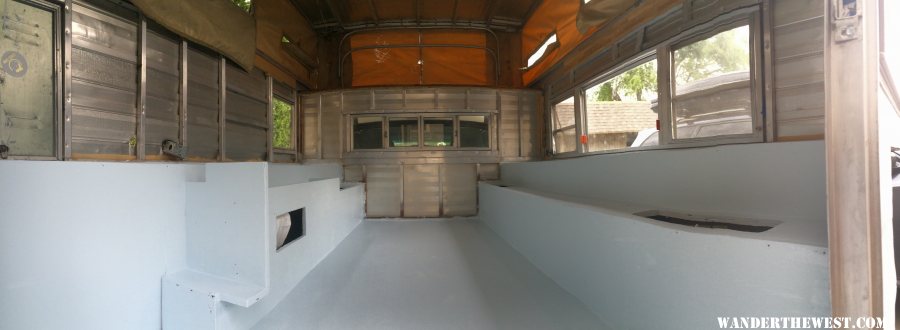
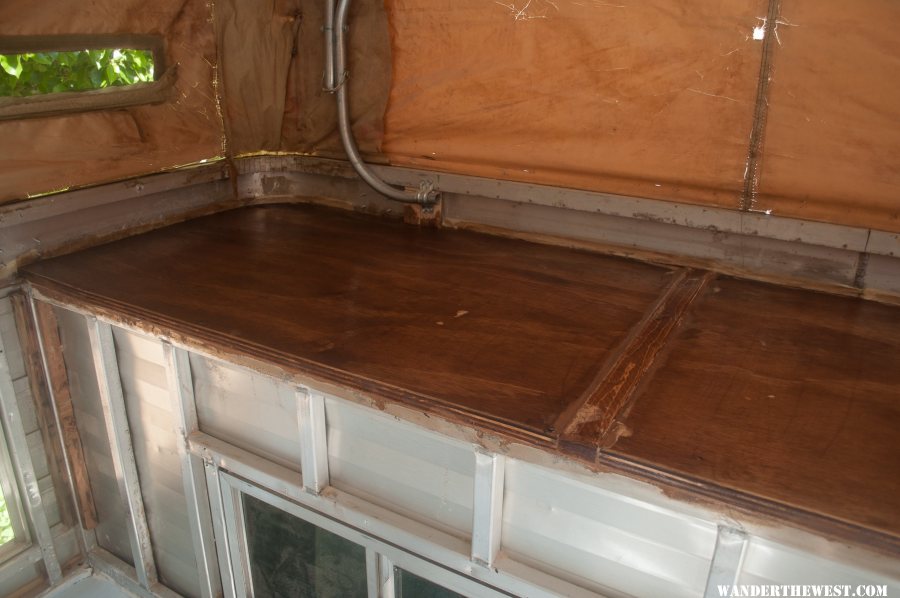
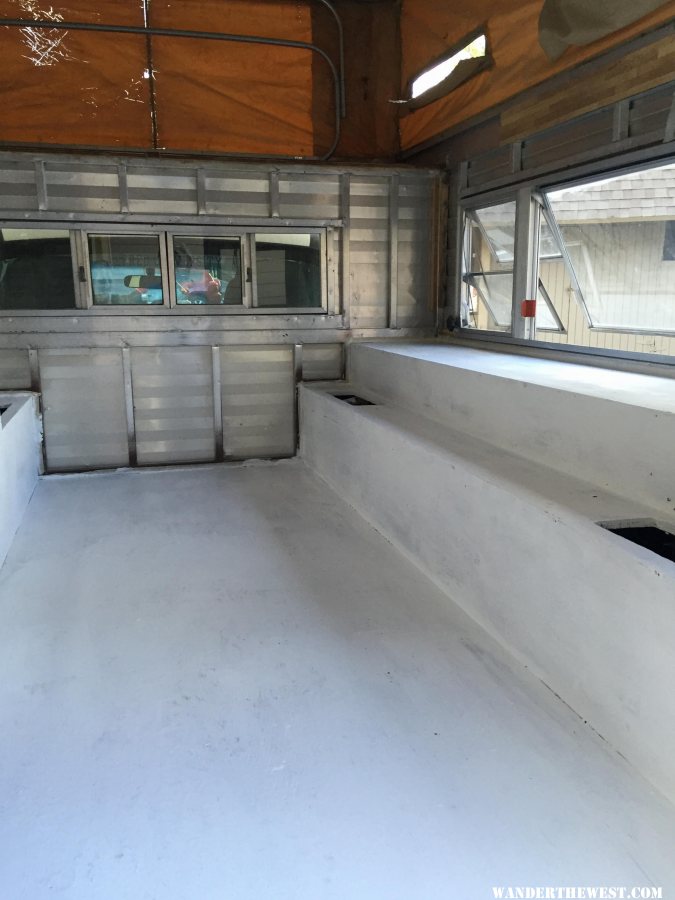
I did three coats total over two days with sanding between coats. All with a brush.


gallery_6274_1000_76215.jpeg

gallery_6274_1000_1117765.jpg


gallery_6274_1000_1395491.jpg

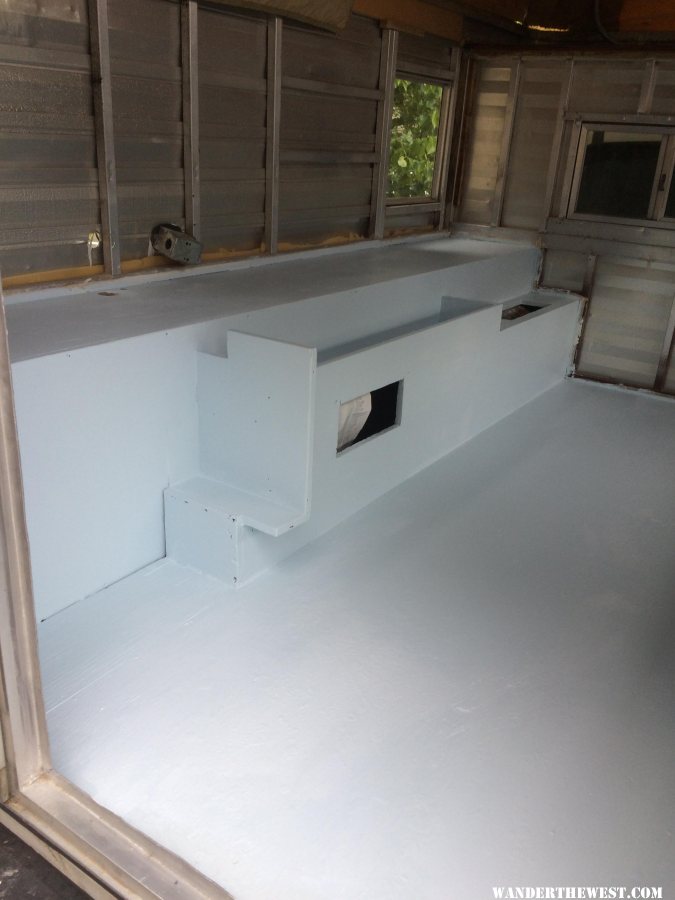
Painting is something I really enjoy, but I was certainly happy to take of the paint mask after many hours in it.  The fumes really build up in the camper even with everything open.  


gallery_6274_1000_195577.jpeg

I am quite happy with the results.  It reinforces my idea of using light colors to open up the camper.   


gallery_6274_1000_1616121.jpg


  • 0

My youtube channel about my Four Wheel Camper - https://www.youtube.com/c/timmorrissey

All about my camper - https://www.tgmorrissey.com/camper

Item I used in my build- http://bit.ly/TGMorrisseyParts


#37 Living The Dream

Living The Dream

    Senior Member

  • Members
  • 464 posts
  • LocationFront Range, Colorado

Posted 31 May 2016 - 05:46 AM

Bed area


While painting the interior I went ahead and finished the bed area too.   I simply used what the previous owner had left me.  Two stainings coats and three coats of clear with sanding between and it is a very dark, glossy look.  Hopefully this will help keep under-mattress-condensation cleanup in the winter.  I am still looking for rub rails type of item to put on the sliding portion of the bed.  If anyone has a source for some UHMWPE or similar that would help reduce wood on wood scratching I would appreciate a pointer.  


Before the bare wood, I did wood filler and aggressive sanding to smooth everything.


gallery_6274_1000_798255.jpg

When the stains comes free with the camper, you take whatever shade of wood is given.

gallery_6274_1000_1298113.jpg

Final outlook is pretty nice.  Still need to mount the pull out section but that will come after paneling.


gallery_6274_1000_119682.jpeg


  • 0

My youtube channel about my Four Wheel Camper - https://www.youtube.com/c/timmorrissey

All about my camper - https://www.tgmorrissey.com/camper

Item I used in my build- http://bit.ly/TGMorrisseyParts


#38 Living The Dream

Living The Dream

    Senior Member

  • Members
  • 464 posts
  • LocationFront Range, Colorado

Posted 31 May 2016 - 05:48 AM

Exterior Paint:


My exterior paint project continues whenever the weather is looking perfect and I have the time.  I have been slowly working my way around a side at a time.  With the long weekend I took the opportunity to tackle two sides at once.  Not to mention the large window means there is not all that much painting to be had on the passenger side.


Like every good paint project, it starts with prep!  Removing trim and windows before tape.


gallery_6274_1000_1998408.jpg

gallery_6274_1000_1458039.jpg

Then I had to say goodbye to my made in Denver sticker, with the fleet sticker not long after.


gallery_6274_1000_2136707.jpg

gallery_6274_1000_1052258.jpg

gallery_6274_1000_486391.jpg

Then we taped and primed, I went with two coats of primer.  I did not prime my first side of the camper, hopefully I do not see much difference in finish, just fewer coats of final paint.


gallery_6274_1000_349240.jpg

gallery_6274_1000_1617387.jpg

While the first coat of exterior paint dried we cleaned up the windows and trim.  We decided to go ahead and freshen up the windows with a brown coat to match the white/brown theme.  We are pretty happy with the results.  


gallery_6274_1000_1634669.jpg

We will have to do a second coat on the trim and a few more coats on the aluminum a few evenings this week.  But after many, many man hours in one weekend it was time to put the door back on and let it rest for the weekend.


gallery_6274_1000_212780.jpg

Next up this week is finish up painting two sides.  And  paint the trim.  Next weekend I hope to get the insulation and panels.  I made a call over to FWC to ask about their panels.  They claim to be using Lauan.  I found a source in denver, http://www.austinhardwoods.com/.  At only $15 a 4X8 I plan to make a visit next soon.  I looked all over for the panels and went back and forth between a few options.  Was strongly considering baltic birch too.  But I figured if FWC is using it today, Lauan must be a pretty good choice.  


Still really enjoy the project.  Thanks for reading.  Tim


Edited by Living The Dream, 31 May 2016 - 05:48 AM.

  • 0

My youtube channel about my Four Wheel Camper - https://www.youtube.com/c/timmorrissey

All about my camper - https://www.tgmorrissey.com/camper

Item I used in my build- http://bit.ly/TGMorrisseyParts


#39 OSUFlyer

OSUFlyer

    Advanced Member

  • Members
  • PipPipPip
  • 71 posts
  • LocationWahkiakum County, WA

Posted 31 May 2016 - 07:07 AM

Looks great! To source the UHMW plastic try Grainger or Amazon. Just curious as I am about to start bending EMT lift panels for my project..How sturdy is the roof against front to back forces such as wind? That's the one thing I am struggling to wrap my head around with the EMT conduit lift system.
  • 1

1997 OBS Ford 7.3 DSL 4x4
1985 Four Wheel Keystone


#40 Squatch

Squatch

    Senior Member

  • Members
  • 1,281 posts
  • LocationOn the wrong side of the mountains!

Posted 31 May 2016 - 07:12 AM

Nice job! I would give serious thought to wiring before you put anything back together. I also suggest using 2 wires not a hot and frame ground. Marine stuff is your best bet. It's made to hold up in tough environments.


  • 1


0 user(s) are reading this topic

0 members, 0 guests, 0 anonymous users