Jump to content


Photo

A 79 C/O Alaskan with some improvements.


  • Please log in to reply
54 replies to this topic

#1 ShackBait

ShackBait

    Advanced Member

  • Members
  • PipPipPip
  • 38 posts

Posted 27 September 2016 - 05:19 AM

Hey guys! Have spent a lot of hours on this site. Found info on electrical systems, plumbing, hydraulics... Was inspired by some of the beautiful campers I saw.
I picked up my Alaskan last year down in Bend Oregon. I live in nelson B.C. Built a dolly for it and rolled it into the garage to work on over the winter and have managed to get away for a few trips this summer. The wife a new baby (1 year old) and our big dog.
It has been our first experiences with a truck camper. A definite upgrade from a tent. We love it.
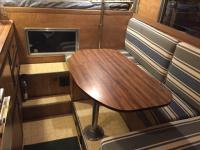
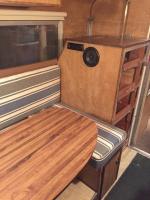
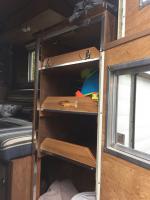
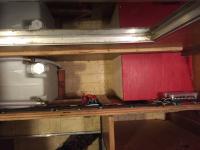
I just wanted to report on a few of the improvements I made and some fabricating I did in case someone else will find them useful. If I can help inspire a new Alaskan camper owner as you guys did for me I'd be happy.
Any questions please let me know and I'd be glad to try and help out.
So here goes.
ImageUploadedByWander The West1474953479.728200.jpg
ImageUploadedByWander The West1474953533.320017.jpg
ImageUploadedByWander The West1474953578.641979.jpg


Sent from my iPhone using Wander The West
  • 0

#2 ShackBait

ShackBait

    Advanced Member

  • Members
  • PipPipPip
  • 38 posts

Posted 27 September 2016 - 05:29 AM

Truck is a 97 f250 diesel with air bags. Hauls the camper with absolutely no problems.
ImageUploadedByWander The West1474953814.506507.jpg
Camper had original cushions. Decent condition but gross. Not the kind of cushions a wife will lay down on.
So I stripped the fabric off. Washed the foam in the tub. Pain in the ass but after being quoted $1100 for new foam and fabric from the local upholstery shop I decided it was worth the trouble. Put the time in, lots of soap, keep changing the water, stand up to dry by a register and good as new. I did order a new foam mattress for the bed. I then borrowed the mother in laws sewing machine, picked a discounted roll of fabric for $50. Got a tutorial on sewing and set to work. Ended up pretty good.


Sent from my iPhone using Wander The West
  • 0

#3 ShackBait

ShackBait

    Advanced Member

  • Members
  • PipPipPip
  • 38 posts

Posted 27 September 2016 - 05:35 AM

ImageUploadedByWander The West1474954288.183683.jpg
ImageUploadedByWander The West1474954343.118633.jpg
There was a cupboard in the back corner that was for a toilet. I removed the door (toilet was already out) and built shelves. Works well. Wife gets one, I do and the top one is for toiletries. The flip up top has a mirror installed on the bottom.


Sent from my iPhone using Wander The West
  • 0

#4 ShackBait

ShackBait

    Advanced Member

  • Members
  • PipPipPip
  • 38 posts

Posted 27 September 2016 - 05:46 AM

The wiring was a bit of a disaster. Spent a lot of time just trying to understand it. A diagram I found on this site helped a lot. I removed the old water tank and in its place installed a half size tank and built a battery box (sealed) with a vent to the outside.


Sent from my iPhone using Wander The West
  • 0

#5 ShackBait

ShackBait

    Advanced Member

  • Members
  • PipPipPip
  • 38 posts

Posted 27 September 2016 - 06:06 AM

ImageUploadedByWander The West1474955726.016247.jpg
ImageUploadedByWander The West1474955748.142784.jpg
I ran the battery cables to 2 terminal blocks to keep the wiring neat. I used a marine breaker panel that act as switches. 1- volt meter, 2- lights (installed new marine 12volt lights, sleeping area, over dinette and over sink, 3-stereo I installed, 4-fridge.
ImageUploadedByWander The West1474956274.502576.jpg
Also ordered all new roller shades.

Sent from my iPhone using Wander The West


Edited by ShackBait, 03 October 2016 - 05:14 PM.

  • 0

#6 ShackBait

ShackBait

    Advanced Member

  • Members
  • PipPipPip
  • 38 posts

Posted 27 September 2016 - 06:13 AM

The previous owner had the propane tank in the toilet cupboard. He would move it outside after he set up camp. Also the propane line ran all the way around the camper to the right side. I removed all that extra line and ran it out the rear left side and mounted the tank to rear wall of the camper. I ordered forklift propane tank mounts. Very happy with them. Incredibly strong, used bolts and fender washers to install. Also on the topic of gas I installed a canister that holds a 1 litre camp fuel bottle on the outside for the colman lantern. ImageUploadedByWander The West1474956773.720351.jpg ImageUploadedByWander The West1474956792.469304.jpg


Sent from my iPhone using Wander The West


Edited by ShackBait, 03 October 2016 - 05:15 PM.

  • 0

#7 ShackBait

ShackBait

    Advanced Member

  • Members
  • PipPipPip
  • 38 posts

Posted 27 September 2016 - 06:17 AM

When the camper is on the truck there is a space for storage between the camper and the box on the left side. Perfect fit for 2 camp chairs and our picnic table tent. I mounted a couple of fence gate latches to prevent them from falling out in transit. ImageUploadedByWander The West1474957009.968535.jpg ImageUploadedByWander The West1474957049.077265.jpg


Sent from my iPhone using Wander The West


Edited by ShackBait, 03 October 2016 - 05:15 PM.

  • 0

#8 ShackBait

ShackBait

    Advanced Member

  • Members
  • PipPipPip
  • 38 posts

Posted 27 September 2016 - 06:23 AM

I wanted a place for some fire wood and was looking around for an aluminum box I could mount on the right side. Nothing came up so I ended up mounting a double size milk crate instead. Worked great. I put in a spacer to keep it back from the camper a couple inches. I had an outboard motor cover I picked up from princess auto. I slipped it on and it was a perfect fit. Really happy with this addition. Holds a $7 bundle of fire wood they sell at the camp grounds.
ImageUploadedByWander The West1474957375.268274.jpg
ImageUploadedByWander The West1474957400.448189.jpg
ImageUploadedByWander The West1474957420.217092.jpg


Sent from my iPhone using Wander The West
  • 0

#9 ShackBait

ShackBait

    Advanced Member

  • Members
  • PipPipPip
  • 38 posts

Posted 27 September 2016 - 06:31 AM

The camper didn't have a roof rack and this was a must. It did have bolts through the side (front and back) where a roof rack may have once been. The pattern of the bolts didn't seem to match any racks I have seen on Alaskans before so it seemed buying one was not an option. So I called in a favour and went up to a welder friends shop and we made one that would use the same bolt pattern. The bolts went right through the camper and into some flat bar on the interior.
ImageUploadedByWander The West1474957846.375228.jpg
ImageUploadedByWander The West1474957865.835588.jpg


Sent from my iPhone using Wander The West
  • 0

#10 ShackBait

ShackBait

    Advanced Member

  • Members
  • PipPipPip
  • 38 posts

Posted 27 September 2016 - 06:33 AM

ImageUploadedByWander The West1474957947.375826.jpg
I used a skill saw to cut a slit in a 2" abs pipe. I slipped the pipe over the rear bar which allows me to put the canoe on the roof alone. Get the end up then it rolls the rest of the way.


Sent from my iPhone using Wander The West
  • 0


0 user(s) are reading this topic

0 members, 0 guests, 0 anonymous users