Jump to content


Photo
- - - - -

Wear & Tear on your FWC?


  • Please log in to reply
34 replies to this topic

#11 Bombsight

Bombsight

    Senior Member

  • Members
  • 721 posts
  • LocationS.E. Texas

Posted 06 January 2017 - 04:31 AM

I'm noticing the vinyl window shrinkage as well on my 2012 Eagle. I need to put a coat of paint on the wood bottom. I don't think that has been done since new.

How long have we known about the window shrinkage and has FWC's done anything to compensate (make 'em about an inch bigger) since discovery?

I'm thinking about x-lining the bottom of my Hawk. Cant see where it could hurt other than always needing a rubber mat under it. Planned on always using a super thin one anyway.


  • 0

#12 Wallowa

Wallowa

    Double Ought

  • Members
  • 2,173 posts
  • LocationNE Oregon

Posted 06 January 2017 - 05:03 AM


How long have we known about the window shrinkage and has FWC's done anything to compensate (make 'em about an inch bigger) since discovery?

I'm thinking about x-lining the bottom of my Hawk. Cant see where it could hurt other than always needing a rubber mat under it. Planned on always using a super thin one anyway.


What about using the Rhino or Line-X spray on inside the bed of the truck?  We have had it since the truck ['05 Tundra] was new; works great for securing the Hawk.  Again when we bought our Hawk in 2-16 a rubber mat under the Hawk was not recommended by FWC.


Shrinking of clear vinyl window covers [sealed by Velcro] is new one on me...perhaps they have developed folds or wrinkles due to folding when top is lowered?  That could pull them away from the Velcro.  Crimping of these is an issue depending on how the fabric folds down and if it catches these plastic windows against a hard surface such as the top of the passenger side high narrow cabinets above the side window, or dinette in our case.  Arctic Pack insulation adds to this problem.  Our right rear window ['16 Hawk] gets wrinkled when it get sandwiched along with vinyl siding and Arctic Pack material between the top of that cabinet and the end board as it comes down and is latched.


Phil


Edited by Wallowa, 06 January 2017 - 05:04 AM.

  • 0

#13 Bill D

Bill D

    Senior Member

  • Members
  • 981 posts
  • LocationEdmonton, Alberta, Canada

Posted 06 January 2017 - 06:02 AM

I copied this from the fourwh.com website.

-Service -Used Camper Support


It's a pretty good indictor of what to expect to maintain.


USED CAMPER CHECK LIST — BASIC THINGS TO LOOK FOR:

Check to make sure all of the roof screws are tight, if not hand tighten them and re-seal them with a dab of marine grade silicone once you get the camper home. Note: ALL of the newer FWC’s have a one piece, no seam, no screw roof, so you won’t have to worry about re-sealing the roof attachment screws on new Four Wheel Campers.

Check to make sure the roof does not have any holes or tears in the exterior aluminum roof skin (from trees or misc. items poking through it over the years).

Check the soft sides (pop-up up portion) of the camper for unusual wear, tears, or large holes. If there are just small pin holes, those are pretty easy to seal up or patch if needed. Our service department sells patch kits as needed.

Check the inside of the camper roof (head liner) for rips or tears, stains from possible leaks, or for mold.

Check the front and back wooden folding panels (hinged panels that allow the roof to go up & down). Check to see that the rivets are intact and that the wood is not rotten or wet. Note: The newer FWC’s use a black composite folding lift panel in the front & rear of the campers.

Take a look at the aluminum skin all the way around the outside of the camper. Check for scrapes or punctures.

Check the exterior wooded camper base (usually it is painted grey) for any abnormalities.

Check the camper tie down eye nuts in the camper base (outside of camper) to see if they have been over-tightened or might be pulling away / pulling out / crooked or bent. If you do find a bent eye nut, don’t worry, it can usually be easily replaced. Note: the newer FWC’s use a 3 bolt, stainless steel tie down brackets on the camper base. You won’t have to worry about checking these for potential fatigue on the newest FWC’s.

Check the propane box and see if everything looks as it should. Not many things to go wrong with this.

If possible, have the seller turn on items inside & outside of the camper for you.

Example: see if the lights work, see if the furnace lights, see if the refrigerator lights, see if the water pump turns on, etc.

This might not always be possible, but it is always good to poke around and play with things in the camper for a few minutes if you have the opportunity.

Check to see if they have the keys for the rear camper door.

Check to see if the camper jacks look solid and not too bent.

Check to see if the awning cranks (or manually pulls) in & out properly.

Check to see if the roof vent opens and closes and does not have any cracks in the vent lid.

But the best thing to do is just spend a few minutes looking over the camper, sitting inside, and see if you feel comfortable.

Does it look like the owner of the camper has taken care or the camper ?

Or is it abused and beaten on ?

Has the seller made any attempt to clean the camper out and make it look presentable for the new buyer ?

Will the camper fit your truck properly?

Check the used camper camper fit guide here …  “Used Camper Fit Guide“.

If we were looking to buy a used camper for someone on our staff, we would probably look at the following items above, and then just sit inside the camper for a few minutes and ask ourselves things like … “Will I be comfortable camping in this camper? Does it look nice inside ? Is it clean, or just dirty & gross?”

Or, when you are sitting in the camper, are you telling yourself … “Hey, this camper is pretty nice. It is clean. It looks to be well taken care of. Yes, I would probably be very happy & comfortable camping in this camper!”.


  • 0

#14 Squatch

Squatch

    Senior Member

  • Members
  • 1,281 posts
  • LocationOn the wrong side of the mountains!

Posted 06 January 2017 - 05:47 PM

Bombsight, I have no idea if the window shrinkage is a big picture problem or just isolated. I have 2 windows I have to stretch pretty good to make the Velcro meet well.


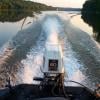
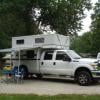
I intend to use this to coat the bottom of my camper and the platform I built to set it on. This product is very similar to Herculiner but is water based and doesn't sun fade nearly as quickly. It has the ground up car tire in the mixture. It's made for a marine environment. I coated the topsides of my bass boat with it 10 years ago and it still looks good. 

http://tuffcoat.net/


P7120028Small.jpg


P9300030Small.jpg


I hope to get this done as soon as it warms up in the spring.


My truck has line X in the bed. Good stuff but awful expensive to have the camper done with it.


  • 0

#15 Bombsight

Bombsight

    Senior Member

  • Members
  • 721 posts
  • LocationS.E. Texas

Posted 06 January 2017 - 06:56 PM

Bombsight, I have no idea if the window shrinkage is a big picture problem or just isolated. I have 2 windows I have to stretch pretty good to make the Velcro meet well.


I intend to use this to coat the bottom of my camper and the platform I built to set it on. This product is very similar to Herculiner but is water based and doesn't sun fade nearly as quickly. It has the ground up car tire in the mixture. It's made for a marine environment. I coated the topsides of my bass boat with it 10 years ago and it still looks good. 

http://tuffcoat.net/


Thanks, Squatch.

I'll definitely look into that product because I really didn't want to spend $300-$600 on X-lining the bottom.


  • 0

#16 Bombsight

Bombsight

    Senior Member

  • Members
  • 721 posts
  • LocationS.E. Texas

Posted 07 January 2017 - 01:05 AM

* Already, the board under my side dinette seats edge has peeled away because of its premature split. More than likely due to insufficient amount of adhesive.


* I'm seeing considerable oxidation on the tension tabs of the rear roof access steps.


* I had to remove all of the running lights and put black silicone between lights, seals and camper wall to keeps water out of lights and camper. Found 2 holes holding lights in place stripped upon installation.


* Had to re-glue main rear door seal back in place. Poor adhesive by seal manufacturer. More than likely will have to do it again somewhere else along it.


  • 0

#17 longhorn1

longhorn1

    Ouch, that stings!

  • Members
  • 2,826 posts
  • LocationCarmel, Indiana

Posted 07 January 2017 - 01:14 AM

* Already, the board under my side dinette seats edge has peeled away because of its premature split. More than likely due to insufficient amount of adhesive.

* I'm seeing considerable oxidation on the tension tabs of the rear roof access steps.

* I had to remove all of the running lights and put black silicone between lights, seals and camper wall to keeps water out of lights and camper. Found 2 holes holding lights in place stripped upon installation.

* Had to re-glue main rear door seal back in place. Poor adhesive by seal manufacturer. More than likely will have to do it again somewhere else along it.

Use a hair dryer, heated right up and ove glove to press tight. Two minute fix. jd

Sent from my SM-G900V using Wander The West mobile app

Edited by longhorn1, 07 January 2017 - 01:15 AM.

  • 0

http://texaslonghorns01.blogspot.com/


Ford F-250 Long bed, 2014 Grandby


#18 Bombsight

Bombsight

    Senior Member

  • Members
  • 721 posts
  • LocationS.E. Texas

Posted 07 January 2017 - 01:58 PM

Use a hair dryer, heated right up and ove glove to press tight. Two minute fix. jd

Sent from my SM-G900V using Wander The West mobile app

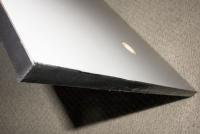
It split too much to repair. I taped the edges and rubber coated the problem area. Most likely will have to do the entire edge.

Attached Thumbnails

  • DSC06380.jpg

Edited by Bombsight, 07 January 2017 - 06:17 PM.

  • 0

#19 Seth

Seth

    Advanced Member

  • Members
  • PipPipPip
  • 97 posts

Posted 07 January 2017 - 05:09 PM

We had our first season in a 1997 Eagle. Overall, not bad at all!

Cosmetics:
Paper wood grain is peeling in several areas of the cabinetry.
Some roof screws show a little rust.

Functional:
The 3-way refer will not stay lit on propane when it's windy or on the road.
The water system needs to be gone through - brown scum is visible in the connecting tubing.
Pinholes here and there in the tent fabric - but they don't really leak at all. Bought some sealer to apply.
WHEN the top is down, minor roof leakage in two spots. Water seeps between the tent and outside trim. When the top is up, that's exterior. When it's down, the water is trapped in the folds of the tent. Fixed one side by repairing the PO's roofing tape fix for a branch ding. Will get on the other side when the weather warms up... by recaulking (no branch ding there).

That's it! IMHO not bad at all for a 20 year old camper. 2 cosmetic issues, 2 maintenance issues, 2 that relate to the tent material and installation. I could only wish FWC had used a different surface finish for cabinets, and was more consistent in caulking/sealing the roof/tent seam. As I understand it, both these issues have been addressed in manufacturing.


Sent from my iPad using Wander The West
  • 0

#20 Wallowa

Wallowa

    Double Ought

  • Members
  • 2,173 posts
  • LocationNE Oregon

Posted 07 January 2017 - 06:03 PM

It split too much to repair. I taped the edges and rubber coated the problem area. Most likely will have to do the entire edge.


Pictures?  I forgot, what year is your FWC?


Thanks,


Phil


  • 0


0 user(s) are reading this topic

0 members, 0 guests, 0 anonymous users