Jump to content


Photo
- - - - -

Solar connector mount


  • Please log in to reply
31 replies to this topic

#21 Zirdu

Zirdu

    Senior Member

  • Members
  • 110 posts
  • LocationSt. George, UT

Posted 20 December 2017 - 05:20 AM

"The hassle is dealing with a loose coil of solar wire which is pretty stiff stuff".  


I am in the process of making a folding portable solar panel.  I am using two 50 watt flexible panels.  I will wire them in series, to match the voltage of the series panels on my roof.  For the solar wire from the panel to the rear plug, I plan to use #10 AWG landscape wire purchased from Home Depot.  They sell it in bulk.  I used this for a previous solar panel I put on an old FWC I had previously, and it worked great.  It is fairly flexible, and is designed to go outdoors, so I think it will work fine..


  • 0

#22 DavidGraves

DavidGraves

    Senior Member

  • Members
  • 1,267 posts

Posted 20 December 2017 - 05:31 AM

Howdy Zirdu


Is that landscape wire something used for accent lighting?  What department did you find it in?


Many thanks


David Graves


  • 0

#23 Zirdu

Zirdu

    Senior Member

  • Members
  • 110 posts
  • LocationSt. George, UT

Posted 20 December 2017 - 03:18 PM

The #10 AWG landscape wire at Home Depot is in the bulk wire area.  They have all sorts of bulk wire for sale by the foot. It looks just like standard lamp cord wire, only bigger.  It is used in wiring up outdoor landscape lighting and landscape sprinkler systems.  Even though it is called "low voltage" wire, I think it is rated to 150 volts.  With my series wired folding panel, I will never exceed 50 volts, so it should work well. 


  • 1

#24 Timothy McGowen

Timothy McGowen

    Senior Member

  • Members
  • 409 posts
  • LocationOceanside, CA

Posted 21 December 2017 - 08:39 PM

Thought I would just say hello on the worst solar day of the year.


  • 0

2016 Ford F150 SuperCab 4X4 Lariat 2.7 EcoBoost Engine

2016 FWC Hawk Front Dinette Silver Spur


#25 RC Pilot Jim

RC Pilot Jim

    Senior Member

  • Members
  • 1,544 posts
  • LocationSan Diego Calif

Posted 30 December 2017 - 08:16 PM

You could call FWC and buy from them. Back in the day they sent them for free just by asking.


  • 0

Jim

Retired from truck camping June 2021

Our Basic Eagle/Fleet Shell Build


#26 CaptRobb

CaptRobb

    Newbie

  • Members
  • Pip
  • 2 posts

Posted 30 December 2017 - 08:17 PM

I bought my Go-Power entry plate with a two wire pigtail lead, MC-4 connectors on one end and bare on the other. 


The solar wires are stiff and do not bend 90 degrees, they require a fairly large radius bend so the hole under the connector plate should be offset from center towards the sloped front.  Oversize the hole in the camper roof so the wires can enter at a bit of an angle and then bend the other direction (sort of a lazy  "S" shape from plate entry to where they connect to camper wiring.


In this picture you see the 3M 4100 sealant around the edges (I also put it underneath the edges all around before screwing the box to the roof). The roof box is mounted under one of the solar panels.


I used high quality crimp butt connectors with shrink tubing to join the camper and solar wires.


I stuffed the wires back up into the ceiling here is a picture of the solar wires near the hole I drilled before I connected to them.  You can see where they run above the styrofoam. Also you can see the locator hole in the aluminum plate under the hole I drilled.


Everything fit up in the ceiling above the styrofoam. 
 
Here is a picture of an FWC roof frame (actually several leaning against a wall) showing an example of the aluminum plate with hole in it for solar wires.  I think this is from a newer camper than my 2007.  The front of the roof is up (top of picture) with driver side to the right


I also installed a small junction box which is large enough to screw the Solar Plate on the roof into - thus sandwiching the roof between the solar entry plate and the junction box for added strength for the Solar entry box.  This was probably unnecessary because the 3M 4100 hods very well.  I had to search an electronic supply store (like Fry' s in LA) to find a box the right size.


The cover on the junction box gave me a surface to press against when I patched (glued) the vinyl headliner).  The horizontal lift board covered this all up. (thankfully).


The green surface is a thin piece of foam insulation I had and I used it to fill up the space.


I hope this is of some help.


Regards,


Craig

Hello Craig, have a question for you. What year Grandby do you have? Mine is 2004 and getting ready to install solar myself. You mention a location for your pass-thru wiring and show a location pic but I 'm having a hard time figuring out thee location based on pic. Is this under the front lifting board?


Regards 

Robb


  • 0

#27 CaptRobb

CaptRobb

    Newbie

  • Members
  • Pip
  • 2 posts

Posted 30 December 2017 - 08:21 PM

Oops, just noticed your tag-line description, 2009 Hawk.


  • 0

#28 ckent323

ckent323

    Senior Member

  • Members
  • 1,226 posts
  • LocationSolvang, CA

Posted 31 December 2017 - 07:49 PM

CaptRobb,


I have a 2007 Keystone.


Wishing all a happy and healthy 2018!


Craig


  • 0

1993 Dodge Cummins W-250 Club Cab long bed, 2007 FWC Keystone


#29 Hansie

Hansie

    Newbie

  • Members
  • Pip
  • 5 posts

Posted 28 February 2018 - 10:12 PM

Hi All,


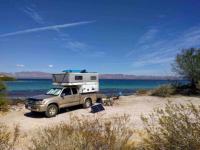
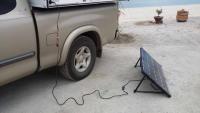
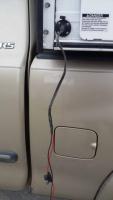
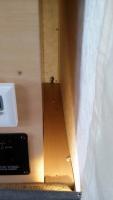
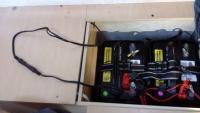
We just finished a trip to Baja with our new portable solar panel setup.  Everything worked great despite the sometimes cold and overcast weather.  The Renogy 100w solar suitcase usually topped up our dual battery setup in 3-4 hours each day.


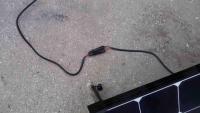
In December we purchased the Renogy 100w solar suitcase with attached Adventurer controller.  The system came with alligator clips and about 10 feet of cable with mc4 connectors inline.  We wanted to forgo the alligator clips and install an SAE plug on the exterior of our Kestrel.  We found a guy, Solar Ray, in Georgia who was able to supply all of the parts needed to complete the job.  He can be contacted at solarcapitalist.com .  Ray is very responsive to inquiries and his products are reasonably priced.


We have attached photos of the completed project below.


Cheers

Hans and Nancy

or HankMayhem if you prefer


Attached Thumbnails

  • IMG_20180222_131229.jpg
  • 20180218_134302.jpg
  • 20180218_134323.jpg
  • 20180218_134332.jpg
  • 20180218_134620.jpg
  • 20180218_134921.jpg

  • 0

#30 badtoytrd

badtoytrd

    Senior Member

  • Members
  • 210 posts
  • LocationVA...for hopefully a short period of time...with WA on my mind

Posted 21 March 2018 - 01:34 AM

I bought my Go-Power entry plate with a two wire pigtail lead, MC-4 connectors on one end and bare on the other. 


The solar wires are stiff and do not bend 90 degrees, they require a fairly large radius bend so the hole under the connector plate should be offset from center towards the sloped front.  Oversize the hole in the camper roof so the wires can enter at a bit of an angle and then bend the other direction (sort of a lazy  "S" shape from plate entry to where they connect to camper wiring.


In this picture you see the 3M 4100 sealant around the edges (I also put it underneath the edges all around before screwing the box to the roof). The roof box is mounted under one of the solar panels.


I used high quality crimp butt connectors with shrink tubing to join the camper and solar wires.


I stuffed the wires back up into the ceiling here is a picture of the solar wires near the hole I drilled before I connected to them.  You can see where they run above the styrofoam. Also you can see the locator hole in the aluminum plate under the hole I drilled.


Everything fit up in the ceiling above the styrofoam. 
 
Here is a picture of an FWC roof frame (actually several leaning against a wall) showing an example of the aluminum plate with hole in it for solar wires.  I think this is from a newer camper than my 2007.  The front of the roof is up (top of picture) with driver side to the right


I also installed a small junction box which is large enough to screw the Solar Plate on the roof into - thus sandwiching the roof between the solar entry plate and the junction box for added strength for the Solar entry box.  This was probably unnecessary because the 3M 4100 hods very well.  I had to search an electronic supply store (like Fry' s in LA) to find a box the right size.


The cover on the junction box gave me a surface to press against when I patched (glued) the vinyl headliner).  The horizontal lift board covered this all up. (thankfully).


The green surface is a thin piece of foam insulation I had and I used it to fill up the space.


I hope this is of some help.


Regards,


Craig

Craig,


Looks like great minds think alike. I purchase the same MC4 connection before I found this post. I was wondering though what size screw did you use to attach it to the roof? I was just going to use 3M 4000 to "glue" it down but the roof flexes so much I really think it needs a few screws in it.


Thanks,


Brock


  • 0

2008 Toyota Tacoma Access Cab

2011 Four Wheel Campers Fleet


https://www.theadventuresofrubyd.com


0 user(s) are reading this topic

0 members, 0 guests, 0 anonymous users