Jump to content


Photo
- - - - -

The "Get her done" look....screw, glue, gut. Repeat as needed


  • Please log in to reply
6 replies to this topic

#1 GoodMack

GoodMack

    Newbie

  • Members
  • Pip
  • 9 posts

Posted 21 June 2018 - 03:06 AM

camp strut frnt sm.jpg camp strut rear sm.jpg camp roof pv sm.jpg 
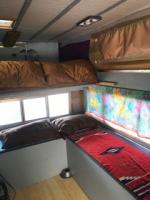
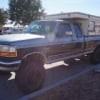
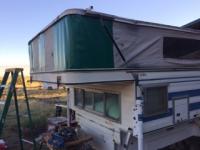
I've had this old beast almost a decade now but it was in dire need  of attention.  I had modified it to "fit " my short bed duramax - hence the wood covered compartments on either side.  One stores a pair of propane tanks, the other the elec cords as well as the  exterior shower related fuel and water hook ups, Under a time and materials budget to accommodate a long late summer expedition, I have eschewed any pretense at fine carpentry, upholstery etc


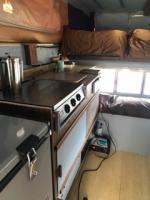
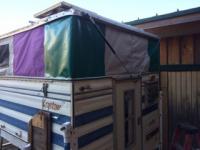
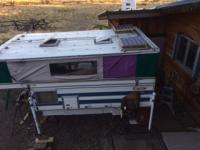
That said- its kinda coming together...  [BTW this Forum is an absolute godsend ]


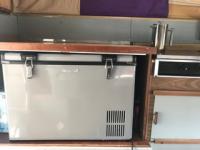
today I finished the vinyl repair panels at each corner.   we hope to get to Nova Scotia so I'll be packing another order of 18oz yinyl/polyester and a can of HH 66- the old vinyl is on its last last legs but still held the glue.   

I also installed lifting struts- those PC panels are old military surplus and purty hefty,  I got 40" because in a moment of irrational exuberance  I envisioned a taller top a la Tim .... really ?   I can be nut case....


  • 0

#2 GoodMack

GoodMack

    Newbie

  • Members
  • Pip
  • 9 posts

Posted 21 June 2018 - 03:18 AM

The interior was also inspired by this site,  I had just taken my first dive into marine carpet as I redid my Very Ancient Lund [a "Mr Pike" - it says so on the label] stem to stern so I used it for cupboard tops.  Relocated the table bracket and post to fit in the corner and then used the same cutting board I used to "extend" the counter top forward to the wall as a new much smaller table


Put in a sliding upper bunk, a couple of 6v cart batteries, an old 2500w Trace inverter left over as I upgraded my home solar set up , a switch panel for the electrics, a cut off key for the battery , LEDs and an Edgestar 63 qt fridge.  


Attached Thumbnails

  • camp inter small.jpg
  • camper kit small.jpg
  • camper frig small.jpg

  • 0

#3 Casa Escarlata Robles Too

Casa Escarlata Robles Too

    C'est la vie

  • Site Team
  • 9,293 posts
  • Locationmonterey bay area

Posted 21 June 2018 - 03:54 PM

Welcome to the site.

Looks like you have a good project there.

Frank


  • 0

2002 Tundra AC TRD 4WD Limited 2009 ATC Bobcat loaded http://sharychic.blogspot.com/


#4 GoodMack

GoodMack

    Newbie

  • Members
  • Pip
  • 9 posts

Posted 23 June 2018 - 01:49 AM

again, inspired by discussions about EMT lifter assemblies here on WTW .... Rodents had reeked havoc a couple winters back and  rear corners had leaked - the original lifting mechanism was 30% rotten, vinyl was nasty, original foam rubber had been used to create a nest in the kitchen drawer etc etc..... So I bent tubing - made some progress on hinge locations, hung thin nylon over floating floor foam insulation and have something we can live with.....camper emt lifterD.jpg


  • 0

#5 CougarCouple

CougarCouple

    Senior Member

  • Members
  • 1,376 posts
  • LocationLas Vegas

Posted 23 June 2018 - 04:07 PM

Good job on the “get’er done” project. Can’t imagine how much havoc those little rascals can do. This site is a fantastic source of information.
Welcome and congrats ont progress so you can enjoy your camper.
Russ
  • 0
F250 extended cab, Cougar from ATC. You guys rock thank you!

#6 JDeanP

JDeanP

    Advanced Member

  • Members
  • PipPipPip
  • 51 posts
  • LocationEl Paso, TX

Posted 28 June 2018 - 12:37 AM

I can dig it. It's good to see your progress.


  • 0

96 F250 7.3

80 FWC Keystone


#7 bajablanca

bajablanca

    Newbie

  • Members
  • Pip
  • 7 posts

Posted 01 February 2019 - 06:19 PM

Very cool! Did you remove all of the trim to attach the vinyl patches?
  • 0


0 user(s) are reading this topic

0 members, 0 guests, 0 anonymous users