Jump to content


Photo
- - - - -

Amateur 1980's Fleet Rebuild on 2014 Tacoma

fleet rebuild four wheel camper

  • Please log in to reply
6 replies to this topic

#1 droneboy420

droneboy420

    Newbie

  • Members
  • Pip
  • 4 posts

Posted 13 July 2018 - 05:54 AM

So here's the back story, bought this 1980's fleet off a guy on Vancouver Island last fall for about $900, the guy had a decent ad on craigslist and it looked in decent shape from the photos online. As soon as I got there I knew I was getting myself into a project but I'm just now learning the full extent of what I need to do.


When I bought the camper the front and rear lifts were almost inoperable, the canvas was obviously in need of repair or replacement and the front sleeping deck seemed pretty rotten. The stove top worked though and the seller assured me she was water tight so we loaded her up and I drove back to the mainland.


The first project was to replace the sleeping deck so I could get some use out of her before the fall. I tore out the old piece of rotting board which was in two pieces and tried to replace it with some thin plywood and 1x6 with some insulation in the middle. It took me two tries as I needed to have it in two pieces in order to install it properly. I painted it with some cheap white paint and used loads of caulking when I put it back in. Of course the real issue was the water coming in from the canvas but I hadn't realized that by then.


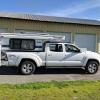
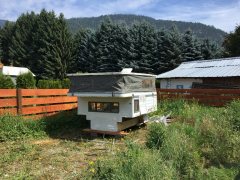
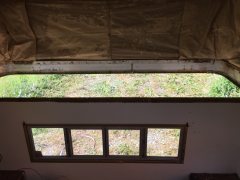
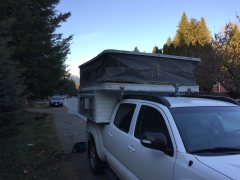
Camper from the outside.
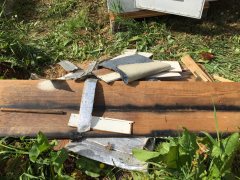
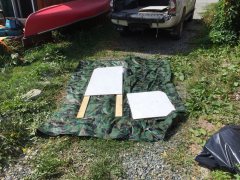
All the junk.
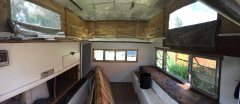
Pano of camper interior.
Missing Sleeping Deck
New Front Panel


A few weeks after finishing up the front deck rebuild I threw her back on the truck and went out to Tofino to go surfing for the weekend, it was pretty chilly and the bare aluminum frame was dripping on me at night. It rained a bit as it's prone to do in those parts and I noticed water coming in and pooling on my new sleeping deck when I had the camper popped, then I drove around with the sink plugged for a bit and when I popped it a bit later the there was about a litre of water in the sink! So I knew at this point I had a real problem on my hands. 


A few weeks later I was foolishly trying to remove the old water tank on a whim, didn't really want to be drinking anything out of a 30 year old water tank in a poorly maintained camper and had to rip out the whole counter, basically gutted it besides the fridge which luckily was working quite well. The counter was pretty rotten so I guess it was going to need to happen sooner or later.


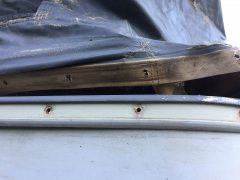
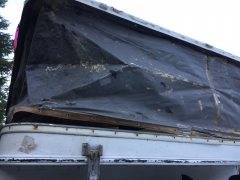
The next step was taking the shitty canvas off which turned out to be pretty easy all things considered, just needed to unscrew about a thousand screws where it attached to the outside of the camper and bob's your uncle. Threw a tarp over the old gal and stored it in a construction site for 8 months.


IMG 4577
IMG 4576
IMG 4575


  • 0

#2 droneboy420

droneboy420

    Newbie

  • Members
  • Pip
  • 4 posts

Posted 13 July 2018 - 06:28 AM

Fast forward to this week, finally got her out of storage and back up to the house, had trouble getting her unloaded onto the uneven driveway with the old sketchy jacks but we managed.


My first order of business logically is getting the bird waterproof, I bought some new Vinyl off Bear Creek Canvas this winter for around $600 USD which was by far the cheapest option I found outside of doing it myself, looks pretty legit though we'll see if it fits soon.


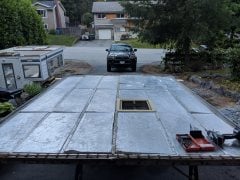
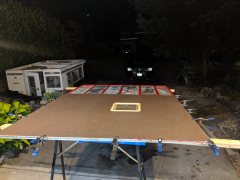
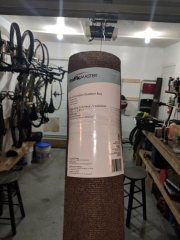
I took the roof off yesterday and after watching a few tutorials on here I decided it was a good call to do the ceiling while the canvas is off, I looked into getting the headliner everyone recommends but it was way over my budget ($220 CAD) and would take at least a week or two to ship here. I went down to home depot instead and started looking around for a replacement and found two light rolls of waterproof indoor/outdoor carpet, the colour wasn't my first choice but beggars can't be choosers. So I picked that up and also grabbed some material to rebuild the lifts. Again I saw some cool solutions on here with EMT Conduit but the idea of bending it and getting everything 90 degrees and measured properly seemed a bit above me so I bought some galvanized steel piping instead. But we'll get to that later. 


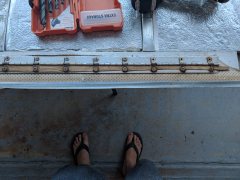
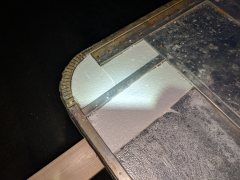
Last night I went around the outside of the camper roof and removed hundreds of little rusty staples that were attaching the roof to the frame. That took a decent amount of time. Then I stripped off the remaining headliner and filled in the gaps in the insulation with some cheap white foam insulation I had lying around. One of the pieces of frame was bent as well so I brought it back to near straight with some clamps and a few 2x4s.


IMG 20180711 201151
IMG 20180711 201155
IMG 20180711 214716
IMG 20180711 220225
 

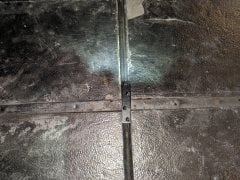
One of the pieces of framing was cracked so I attempted to fix it with a small metal bracket I had, screwing into the frame was useless, I had the drill on a low setting but the screws just spun when I got them in. So  I turned it around and drilled into the cylindrical bit of the frame that runs width wise and it took a lot better and felt good and tight.


IMG 20180711 221158


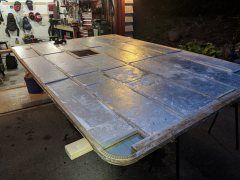
My buddy mentioned that I should create a vapor barrier so I took some red tuck tape and went around the whole frame closing any gaps between the frame and the insulation. Then I started on laying the carpet down.


IMG 20180711 232253
IMG 20180711 223807
IMG 20180711 214748
 

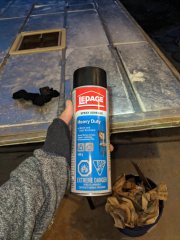
I had bought some multi-use spray on adhesive and started by clamping one side and spraying the frame and the insulation and then the carpet and pressing firmly. It didn't feel like it was working too well but I got about half the carpet done and clamped some key areas then called it for the night.


On my lunch break today I went out and checked and the adhesive had actually firmed up over night and felt pretty good, there were a few spots that needed some touching up around the edges but not too bad. I cut the other piece and covered the front and sprayed it on as well touching up where necessary. 


IMG 20180712 132701


After work I was feeling pretty good about making some progress when I flipped over the roof and took a good look at what the previous owner had done fiberglassing the screws with something that looked like carbon fiber, and there's a crack in the vent. My friends were saying it was probably better off replacing, but it was definitely a stressful idea to consider. 


IMG 20180712 195823


I decided to take a break on the roof and clean up the camper as it was sitting. After mulling around and taking some screws out here and there I noticed the frame above the door is fully snapped in two places, basically above each corner of the door. A bit of a surprise but I should have seen it coming. I've got no idea how to weld something like that and I was hoping to stop short of really digging into the camper but I need to come up with an idea to mend that piece of the frame before I put the lifts in. This baby is a real can of worms.

I'm thinking of just screwing/gluing a big strip of steel or aluminum on the top and front of the broken frame, maybe the back too if I can swing it. That's  probably the easiest fix I can think of, we'll have to see what they have at the home depot tomorrow.


  • 0

#3 Andy Douglass

Andy Douglass

    Senior Member

  • Members
  • 207 posts

Posted 13 July 2018 - 10:35 AM

I saw somewhere that FWC changed the frame design at some point, one of the reasons being issues with cracking on the rear wall. You might want to look into what they changed in the framing and think about at least seeing what it would cost you to have someone fab/weld the rear wall frame to current standards. I would be worried about a bandaid fix on those frame breaks not lasting long. But you never know, some of those little angle brackets that you can get at any hardware store through-bolted at the breaks might last for years.


  • 1

#4 BBZ

BBZ

    Senior Member

  • Members
  • 666 posts
  • LocationGolden, CO

Posted 13 July 2018 - 12:41 PM

Nice.. you have a project on your hands now!!


I basically did the same thing this year, drove to Cheyenne for a camper that seemed to be in decent shape only to get home and realize it was a total gut job.. I stripped down to the frame and rebuilt it all. My friend is a welder and he suggested not welding the soft aluminum as when its old sometimes it doesn't work. I used L brackets where there were are few broken welds and it worked well. 


I will attach the link to my build.. I learned a lot and if you have any questions, fire away. Good luck! In the end it was worth it, but a lot of work. 


http://www.wanderthe...ect-90s-granby/


  • 1

2023 F-150 Scab HDPP + 2013 Grandby Shell +


https://www.wanderth...ect-90s-granby/


#5 droneboy420

droneboy420

    Newbie

  • Members
  • Pip
  • 4 posts

Posted 13 July 2018 - 06:18 PM

Nice.. you have a project on your hands now!!


I basically did the same thing this year, drove to Cheyenne for a camper that seemed to be in decent shape only to get home and realize it was a total gut job.. I stripped down to the frame and rebuilt it all. My friend is a welder and he suggested not welding the soft aluminum as when its old sometimes it doesn't work. I used L brackets where there were are few broken welds and it worked well. 


I will attach the link to my build.. I learned a lot and if you have any questions, fire away. Good luck! In the end it was worth it, but a lot of work. 


http://www.wanderthe...ect-90s-granby/


Thanks for the heads up, I'll definitely check out your build. I've basically got it torn down to the fridge and walls right now, hoping that's as far as I'll go for now haha.


  • 0

#6 shellback

shellback

    Senior Member

  • Members
  • 336 posts
  • LocationWagontown,PA

Posted 14 July 2018 - 11:50 AM

Not sure if the term "braze" is correct, but you can weld or "braze" aluminum with a torch.They sell aluminum brazing rods and you have to use a torch with MAP gas. Try a google search. I repaired some joints on my FWC that way.


  • 0

#7 Frankstoneline

Frankstoneline

    Newbie

  • Members
  • Pip
  • 6 posts

Posted 24 July 2018 - 04:59 PM

Did Bear river know the necessary info about your canvas? Does it have the windows/vents/etc. that the original had? Interested to hear your experience fitting it to the camper!


Edited by Frankstoneline, 24 July 2018 - 05:00 PM.

  • 0


Also tagged with one or more of these keywords: fleet, rebuild, four wheel camper

0 user(s) are reading this topic

0 members, 0 guests, 0 anonymous users