Jump to content


Photo
- - - - -

1983 keystone build in Bigsky Country


  • Please log in to reply
46 replies to this topic

#31 Bigskyxj

Bigskyxj

    Advanced Member

  • Members
  • PipPipPip
  • 57 posts
  • LocationMontana

Posted 28 November 2018 - 03:18 PM

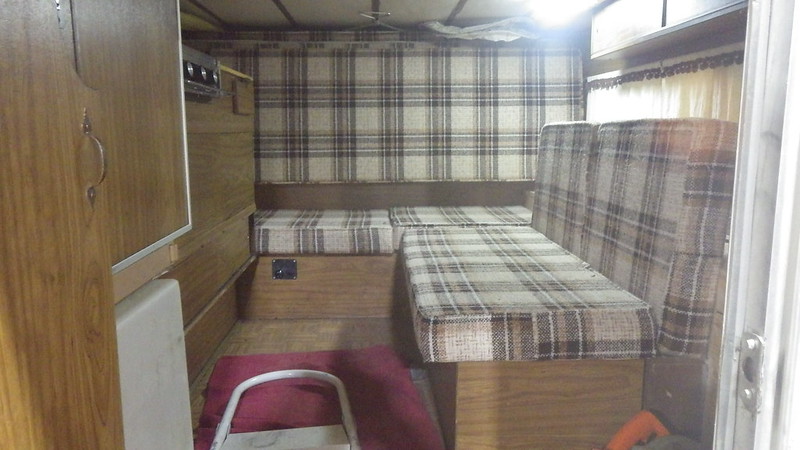
One small issue that I ran into after narrowing the floor was that the front couch cushions wouldn't fit anymore. They were 6" too wide so I pulled some staples back and peeled the fabric back and cut one cushion down to the appropriate size. it makes for a pretty short couch. but it will make a great sleeping area for my youngest son.
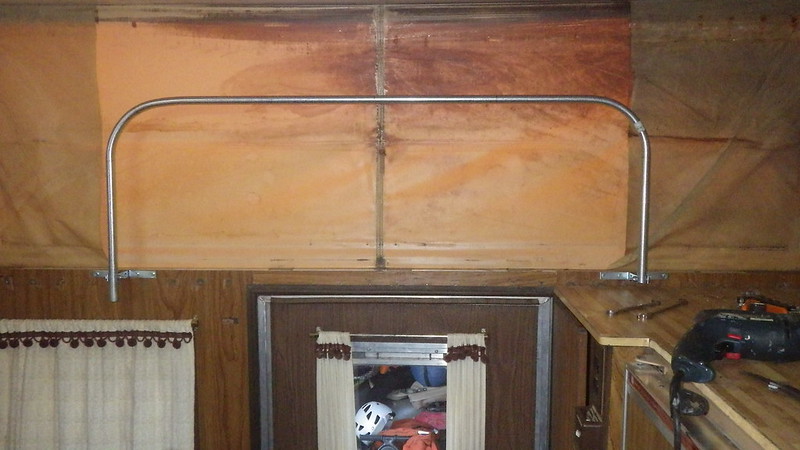
 

Before:


45177736635_c91960b08f_c.jpgIMGP0311 by bigskyxj, on Flickr
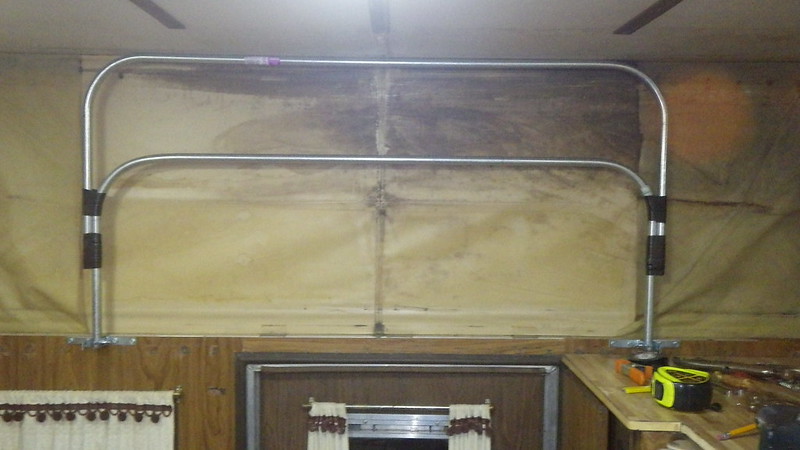


After:


44273224380_101b66ec57_c.jpgIMGP0313 by bigskyxj, on Flickr


  • 0

#32 Ourayphotography

Ourayphotography

    Senior Member

  • Members
  • 146 posts
  • LocationColorado

Posted 09 December 2018 - 02:07 AM

Looks good. How is the condition of your canvas?


  • 0

#33 Bigskyxj

Bigskyxj

    Advanced Member

  • Members
  • PipPipPip
  • 57 posts
  • LocationMontana

Posted 09 December 2018 - 02:39 AM

Looks good. How is the condition of your canvas?


Canvas is in pretty good condition.no holes or tears.
  • 0

#34 Bigskyxj

Bigskyxj

    Advanced Member

  • Members
  • PipPipPip
  • 57 posts
  • LocationMontana

Posted 09 December 2018 - 10:15 PM

There are a few pieces of the aluminum siding that have holes in them from things hitting the camper. Does anyone know where to get new siding and also how the different pieces of siding are attached to each other? They almost look like they just overlap but have sort of a groove on each piece that hooks together but I can't quite figure it out.
  • 0

#35 BBZ

BBZ

    Senior Member

  • Members
  • 666 posts
  • LocationGolden, CO

Posted 10 December 2018 - 01:25 AM

There are a few pieces of the aluminum siding that have holes in them from things hitting the camper. Does anyone know where to get new siding and also how the different pieces of siding are attached to each other? They almost look like they just overlap but have sort of a groove on each piece that hooks together but I can't quite figure it out.

I have an old Granby we re did.. I thought I was going to keep the siding as it had a few holes.. just depends where they are.. It is installed top down, typically with 3 pieces.. impossible to get top one out without removing bottom pieces. Its pretty cheap to get new siding, maybe $350 for full camper here in Denver.  Any RV siding place will have it.. Matching existing is a completely different story.. What do you have more of? Time or Money.. 


  • 0

2023 F-150 Scab HDPP + 2013 Grandby Shell +


https://www.wanderth...ect-90s-granby/


#36 Bigskyxj

Bigskyxj

    Advanced Member

  • Members
  • PipPipPip
  • 57 posts
  • LocationMontana

Posted 10 December 2018 - 06:38 PM

I have an old Granby we re did.. I thought I was going to keep the siding as it had a few holes.. just depends where they are.. It is installed top down, typically with 3 pieces.. impossible to get top one out without removing bottom pieces. Its pretty cheap to get new siding, maybe $350 for full camper here in Denver.  Any RV siding place will have it.. Matching existing is a completely different story.. What do you have more of? Time or Money..


Thanks for the info. All my holes happen to be on the bottom layer. As far as matching goes I'm not too worried about that.
  • 0

#37 Bigskyxj

Bigskyxj

    Advanced Member

  • Members
  • PipPipPip
  • 57 posts
  • LocationMontana

Posted 16 December 2018 - 02:55 PM

Yesterday I started making the new lifter panels. I decided to go with the EMT Conduit Lifter panels. 


Obviously my factory lift panels are pretty deteriorated. This is what the rear looks like. The wood was pretty warped and the top hinge was starting to come detached.


45426520905_7f399f5b44_c.jpgIMGP0325 by bigskyxj, on Flickr


The front is even in worse condition and in deed of replacement too.


46339246911_d97b9641a4_c.jpgIMGP0322 by bigskyxj, on Flickr


45426523685_7cfcc2298e_c.jpgIMGP0321 by bigskyxj, on Flickr


  • 0

#38 Bigskyxj

Bigskyxj

    Advanced Member

  • Members
  • PipPipPip
  • 57 posts
  • LocationMontana

Posted 16 December 2018 - 03:06 PM

After drilling out ll of the rivets along the top hinge and removing all of the 1/4" screws along the bottom hinge I was able to cut the short fabric pieces that pull the canvas in while the top is being lowered. All the years of moisture building up behind the lifter panels have stained the material behind it. 


46339246061_9b730f7dab_c.jpgIMGP0329 by bigskyxj, on Flickr


32467067058_1e4a4ba564_c.jpgIMGP0330 by bigskyxj, on Flickr


Next I decided that I wanted my lifter panel to be slightly wider than the middle three aluminum roof beams. I measured everything out to make sure I knew where my pivot points were going to land and proceeded to make my first two bends on the lower lifter panel.


32467065188_38a17d34bb_c.jpgIMGP0331 by bigskyxj, on Flickr


  • 0

#39 Bigskyxj

Bigskyxj

    Advanced Member

  • Members
  • PipPipPip
  • 57 posts
  • LocationMontana

Posted 16 December 2018 - 03:16 PM

After I made the bends on the lower panel I bent the top lifter and used electrical tape to hold the two pieces together so that I could take them over to my drill press and punch a couple holes without everything moving around on me.


32467063908_a364596173_c.jpgIMGP0332 by bigskyxj, on Flickr


31393643907_c3d74dd3c6_c.jpgIMAG0549 by bigskyxj, on Flickr


Unfortunately I screwed up and drilled the holes for my center pivot point 1.5" too low and it wouldn't allow the two pieces to collapse correctly. I had to take everything back out and drill the center holes in the correct place. It wasn't a real big deal and I am pretty happy with how it all turned out. I learned a few things and it should make things a little easier when i do the front panel now that I have made a few happy mistakes.


  • 0

#40 Bigskyxj

Bigskyxj

    Advanced Member

  • Members
  • PipPipPip
  • 57 posts
  • LocationMontana

Posted 16 December 2018 - 03:18 PM

On a side note, does anybody have any ideas as to what I can use to clean the inner fabric to remove the stains caused by all of the years of moisture?


  • 0


0 user(s) are reading this topic

0 members, 0 guests, 0 anonymous users