Good to know about the 50lb struts, thank you. I hadn't thought about the force they exert when closed.


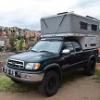
Eagle Shell buildout
Started by
Thevulture
, Nov 05 2018 11:42 PM
22 replies to this topic
#11

Thevulture
-
- Members
-

- 39 posts
Advanced Member
- LocationLos Angeles
Posted 07 November 2018 - 09:21 AM
#12
jimjxsn
-
- Members
- 599 posts
Senior Member
- LocationRoxborough Park or Buena Vista CO
Posted 07 November 2018 - 04:02 PM
Thevulture,
Really nice build so far. I like your thinking. Keep it coming.
Reminds me of my old setup which I loved...

~Jim2000 Tundra AC- 2000 FWC Ranger
2017 Tundra DC - 2017 ATC Panther
#13
bj40
-

- Members
-
- 26 posts
Member
- LocationPortland, OR
Posted 08 November 2018 - 04:17 PM
Vulture,
Thanks for sharing your build process. I like the simplicity of what I think you are trying to do. I have a new Ocelot shell on my truck and hope to get stuck into my build in the new year. My intention is to keep it simple and light. I will be keeping on eye on how you proceed to see what I can learn. You seem to have made an excellent start.
#14
longhorn1
-

- Members
- 2,826 posts
Ouch, that stings!
- LocationCarmel, Indiana
Posted 10 November 2018 - 05:12 PM
Great job.
#15
Thevulture
-
- Members
-
- 39 posts
Advanced Member
- LocationLos Angeles
Posted 04 February 2019 - 08:23 AM
I finally got around to installing my Propex 2 weeks ago. I used the Propex thru hull as my vent/intake, it looks really nice, but it's more designed for boats with thin hulls. If I were to do it again I would use something different. I had to remove quite a bit of material from the inside of the camper to make it work. It's not pretty, but no one will ever see either.
Here are photos from the outside and inside (hose clamps were eventually installed to secure the intake and exhaust)


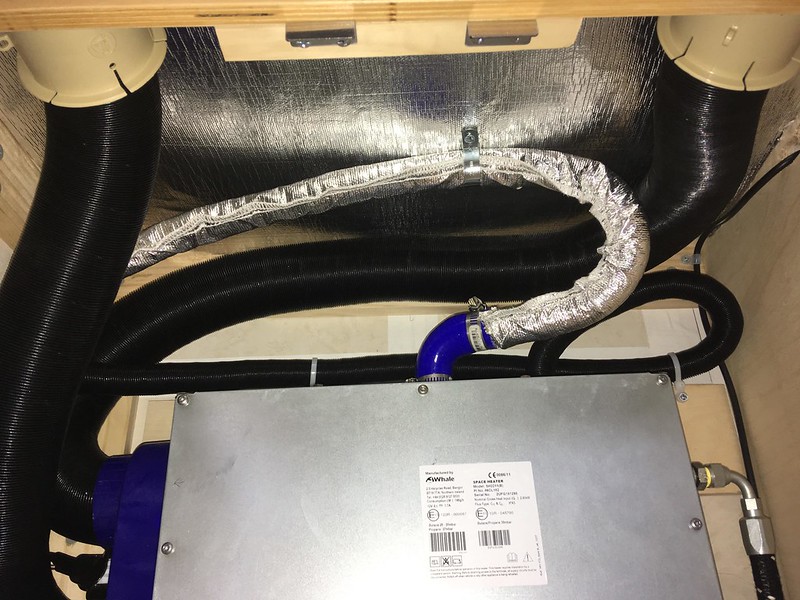
One of the main reasons I went with the HS2211 was because it can be mounted on it's side, this allows me to still have a little bit of storage. Instead of using copper tubing I had hose made, it allowed me to get it through the super tight areas. I used a fiberglass heat sleeve to cover the exhaust to keep it cooler and avoid burning anything, I don't know if it's 100% necessary, but I like the peace of mind. I plan on eventually taking a IR temp reading, I'll share the numbers. I also put some aluminized heat barrier to reflect any heat on the counter top. Also not 100% sure if it's necessary, but the peace of mind is nice. Both were purchased off of Amazon.
I was originally planning on mounting the thermostat low, near my CO monitor (the black rectangular area below the cabinet), but after reading more I learned that it should be mounted higher. It's now in a convenient spot on the corner.


I plan on doing the first night with the heater this week when I go skiing up in Mammoth. I'll let you all know how it goes. Thanks for the kind words and checking out my build.
Edited by Thevulture, 10 May 2020 - 03:16 AM.
#16
Thevulture
-
- Members
-
- 39 posts
Advanced Member
- LocationLos Angeles
Posted 09 May 2020 - 09:11 PM
It's been awhile since I gave an update on my build. I also realized my links weren't working, sorry. I've had the Propex installed for about 16 months now and I have used it multiple nights during the winter. It works really well, but can be a bit finicky to get started. I usually have to hit the reset button on it and I am glad it is not installed outside and I can get to it. After using this setup quite a few times I think I would change where I have the vents and put them lower. I also use a piece of the ducting to focus the hot air in different directions, this is really nice on single digit nights.
#17
Thevulture
-
- Members
-
- 39 posts
Advanced Member
- LocationLos Angeles
Posted 12 May 2020 - 11:00 PM
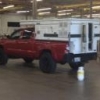
I just installed a 3.5 Fuelpax and mounting plate from Rotopax. I removed the wall on the inside to see where the frame was and taped it off on the outside. Before I bought it I made templates to make sure it would fit. I ended up having to use aluminum bar as a spacer so the can wouldn't rub the jack plate bolt. Overall, I'm very pleased with it and it's nice to have this extra "insurance" when going out.


Edited by Thevulture, 12 May 2020 - 11:04 PM.
#18
Mic
-
- Members
-
- 74 posts
Advanced Member
- LocationRichmond, Texas
Posted 13 May 2020 - 01:24 PM
That sure fits your truck nicely!
#19
Wandering Sagebrush
-

- Site Team
- 10,576 posts
Free Range Human
- LocationNortheast Oregon
Posted 13 May 2020 - 01:38 PM
Well done.
I am haunted by waters
#20
stclair
-
- Members
- 233 posts
Senior Member
Posted 17 August 2021 - 04:23 PM
Reading through your thread again as we consider building out our shell or just finding another Eagle with factory options. Nice work on those cabinets! I think not having the factory propane storage cabinet, or option to add one is a big reason we are thinking about getting another Eagle. Our rollover is on the driver's side, so not an option....unless we reverse that. Any updates? Thanks!


0 user(s) are reading this topic
0 members, 0 guests, 0 anonymous users

