Jump to content


Photo
* * * * * 1 votes

1980 Granby Rebuild for 2nd Gen Tacoma


  • Please log in to reply
80 replies to this topic

#1 a8ksh4

a8ksh4

    Senior Member

  • Members
  • 109 posts
  • LocationSacramento, CA

Posted 24 November 2018 - 01:46 AM

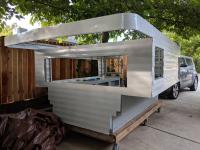
Edit - updating with a more recent photo to hopefully get rid of the blurry old one that shows up by default for the post... :o

IMG_20190531_184430.jpeg


My wife and I picked up a super fresh 1980 Granby earlier this week!  It's a piece of work, and we're super excited about rebuilding it and making something nice to live in.  We saw the graigslist add and new it was the right one for us:

Desc
 

We made a $20 deposit on this $100 camper last Thursday, and picked it up Tuesday, which was an adventure.  The only rental trailer I could find that would actually fit the camper didn't have a ramp, and we ended up getting the trailer half-under it while lifted by cable jacks, got some straps around it, and started pulling it onto the trailer!  The guy that sold it to us was a great sport when we realized that I only had 47 of the $80 that we still owed him after we loaded the trailer and had to write him a check for the rest (I felt really bad about that, but he said it was okay vs. going to the ATM and returning).

02
01
00
03


The camper definitely needs some work; the top was bent up, the canvas needs to be replaced, and the camper won't fit on our truck, so needs to be narrowed up at the base.  There are some high points though:  It looks like many of the trim pieces are still with the camper, like the propane box trim and door and edging for the dismantled top.  Also, the siding is actually in really good shape. There's a dent by the propane box, but it'll smooth out.


We're going to try to make this thing as waterproof as we can, maximize interior space, keep costs low, and build it into something that we can use for years and years, skiing, adventuring, etc.  We are planing a month-long road trip next September, so need to have something functional by then. 


Edited by a8ksh4, 03 June 2019 - 05:47 PM.

  • 0

#2 klahanie

klahanie

    Senior Member

  • Validating
  • 932 posts
  • LocationSW BC

Posted 24 November 2018 - 04:47 AM

The camper definitely needs some work...


Winner ! Understatement of the Year !


:D


but, you've the right attitude, so ...no bother, eh?!


subscribed :popcorn:


  • 0

#3 a8ksh4

a8ksh4

    Senior Member

  • Members
  • 109 posts
  • LocationSacramento, CA

Posted 24 November 2018 - 06:06 AM

We did a bunch of interior demo today and really got a look at what we're working with:

* The top looks much better than I expected; someone must have tried to lift it at the middle of each side and bent the two outer edge tubes, but we should be able to straighten them and possibly add some reinforcement. The tubes along the middle of the top are straight, and it seem strong lifting it from the ends.  The sheet metal on the top is less good... it has some cracks that run up the edge a few inches into the top, so will need some work to seal. 

Bent top tube

* We stripped the paneling and insulation out of the interior.  The aluminum tubing looks great at both ends.  There aren't any cracks in the welds, as far as I can tell.  The aluminum all looks really solid.  

Welds look good up front

* We were able to pull out the interior panels intact enough that we should be able to trace them for replacements.  

* The tub had rot around the propane box and it looks like the tie-down bolt had pulled through there.  

Rot by the propane panel


I have a couple of questions for anyone on here who knows:

* Does anyone know how to disconnect this cover from the heater vent?  I don't think I can remove the heater without taking it off, but don't see any obvious way to disconnect it.  Also, does it appear complete or missing any parts?

Heater Vent
* And what was this thing used for? It connects to a tube that went to something that was long ago removed.  Was this the fill port for the water tank?  There's also a hose-spigot port on the side of the camper with similar tubing attached inside. 
Mystery Thing


More photos!


  • 0

#4 CougarCouple

CougarCouple

    Senior Member

  • Members
  • 1,376 posts
  • LocationLas Vegas

Posted 24 November 2018 - 11:00 AM

Hello a8ksh4
Congratulations on your find. Yes on the water fill. Hose spigot might have been the tank drain. Get the make and model for the heater. Might could download instructions on the web.
Happy Thanksgiving, and welcome to WtW

Russ
  • 0
F250 extended cab, Cougar from ATC. You guys rock thank you!

#5 shellback

shellback

    Senior Member

  • Members
  • 336 posts
  • LocationWagontown,PA

Posted 24 November 2018 - 12:50 PM

I rebuilt a 1979 Grandby last year, here's the link. http://www.wanderthe...66-1979-granby/

On your heater question, I couldn't remove that part either. I believe the vent tube slides over the heater exhaust tube, and over time they rust up and freeze together. I had to saw the tube in half from the inside of the camper. This obviously destroys both the heater and the vent. I wasn't concerned about that myself, as I wasn't interested in trying to use a 38 y/o propane heater.


  • 0

#6 shellback

shellback

    Senior Member

  • Members
  • 336 posts
  • LocationWagontown,PA

Posted 24 November 2018 - 01:00 PM

Looks like your bed panel is 2 pieces. I imagine it's been replaced. With the camper finished, doing it in 2 pieces is about the only way it can be done. I'd replace it with 1 piece while you have it tore down.


  • 0

#7 Old Crow

Old Crow

    Searching....

  • Members
  • 1,059 posts
  • LocationSouth Central PA

Posted 24 November 2018 - 02:49 PM

That exhaust vent looks like the one in this Atwood Heater Removal video (starting at about 7:30 into the video) and Wayne also had problems removing his.  In any case, it appears the exhaust tube assembly should just pull out after removing the exterior screws (if it weren't for the rust).   I wonder if it would help to heat it.


Also- if you can find a model number on the furnace and post it, I'd appreciate it as I'm trying to understand what furnace models were put in what model-year FWC and ATC campers.


.


Edited by Old Crow, 24 November 2018 - 02:54 PM.

  • 0

'01 FWC Hawk shell on a '13 Tundra Double-Cab  + '19 Ford Transit van with Quigley 4x4 option


#8 PokyBro

PokyBro

    Senior Member

  • Members
  • 467 posts
  • LocationLas Vegas, Nevada

Posted 25 November 2018 - 04:27 PM

a8ksh4,


First congratulations on your camper purchase, and and welcome to the forum!


just wanted to answer your two questions. The plastic thing on the exterior is for sure a gravity water fill cap, to confirm what has already been suggested.


Secondly, regarding the furnace vent. It looks like you have already removed the two screws, so if it is still stuck, it is likely due to two reasons. The vent piece has a piece of pipe that slides over a slightly smaller pipe on the furnace side and could have some rust between the two making it hard to remove. The more likely culprit is some old butyl tape sealing the the chrome exterior flat plate to the camper wall. In colder weather it won't have much flex, so heating it carefully with a propane torch might help, while at the same time using a flat , stiff putty knife and wedging it down between the plate and the camper wall and pulling outward with gradual pressure on the handle. It should start to release and pull away. It will be a little delicate in that you don't want to bend either the vent cover or the siding, but that old butyl tape is pretty tacky, and holds on pretty tight. It will come out with some effort, though.


Hope that is helpful. Keep us posted on your progress, and lots of luck on your rebuild.


Poky


  • 0

1999 F250 crew cab SRW, 7.3 Powerstroke TD

1981 Grandby shortened to a Hawk

Build thread / https://www.wanderth...by-into-a-hawk/


#9 a8ksh4

a8ksh4

    Senior Member

  • Members
  • 109 posts
  • LocationSacramento, CA

Posted 25 November 2018 - 05:04 PM

Old Crow, the heater is an FA 7912, 1200btu, made by hydro flame corp.
  • 0

#10 a8ksh4

a8ksh4

    Senior Member

  • Members
  • 109 posts
  • LocationSacramento, CA

Posted 26 November 2018 - 06:17 AM

Alright, all it took was a bit of scraping on the silicone caulking and jiggling for the vent to come out. Thanks for the info and advice, Old Crow and Poky!

Had to jiggle it a bit
Surprisingly little rust
There was no rust in this one.  How do most folks feel about these 38 year old heaters?  I have a Wave 3 that I could use, too, but I like the idea of a built-in heater that doesn't add humidity and has a thermostat.  
Dog is uncertain
Still uncertain about the 40 year old heater.
 
We pulled the canvas all the way off today;  didn't get a good photo of it, but it's dried rock-hard in some spots, and generally really crusty.  We got the interior stripped the rest of the way today and started pulling more of the trim off.  
Not sure what we've gotten ourselves into!
Pretty bare-bones now
 
I think we're going to use water jugs under the sink for fresh and grey water, so the water fill and dump get to be removed from the camper sides.  
 
Bucket list of next stuff to work on:
  • Strip remaining trim, clean all siding and aluminum sheet on the roof, and glue/rivet patches over any holes and cracks. 
  • Paint the siding and roof
  • Firm up measurements for the canvas and get some material on order (and research cost of contracting this out)
  • Stitch canvas
  • Wire roof for lights and fan; Insulate roof. 
  • Build lift panels (or similar mechanisms)
  • Install headliner, canvas, and top/wall trim
  • Track down some cable lifts or corner lifts and install corner brackets.  
  • Now that we're mostly waterproof, replace the plywood tub.  
  • Wire the walls for lights, charging, etc.  
  • Install wall insulation and side panels
  • Deck out the interior with all the good stuff.  
  • Install mounting brackets in the truck bed (already have airbags for the extra weight). 

That's all!  I think the canvas is the priority as it's the hardest part. :)  


  • 0


0 user(s) are reading this topic

0 members, 0 guests, 0 anonymous users