Jump to content


Photo
* * * * * 1 votes

1980 Granby Rebuild for 2nd Gen Tacoma


  • Please log in to reply
80 replies to this topic

#51 a8ksh4

a8ksh4

    Senior Member

  • Members
  • 109 posts
  • LocationSacramento, CA

Posted 22 August 2019 - 10:07 PM

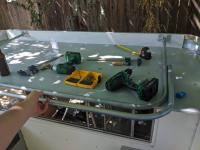
I bought a couple of 100w solar panels and am planning to at least install the mounts for them on the roof before I put it up on the camper.  I could use the z-brackets at the front of the roof, but was thinking I'd use 1" angle aluminum at the back end of the panels so I could bridge their weight across all of the roof beams (about 40" back from the front).  I need to think about this... probably the most confusing thing for me is which adhesives to use for which stuff. 

* I could simply put butyl tape under the spots where the aluminum angle crosses beams and have screws through, or I could lay a bead of self leveling sealant under the whole thing and over the screws, or ... ?

* And if I use z-brackets at the front and aluminum angle at the back, do I have to worry about them catching air and lifting the roof?  Maybe aluminum angle at front and back would be best. Hmmm. Or maybe I can just use the z brackets at front and back and just put one screw into each bracket toward the back where they cross the beams in the roof.  


Edited by a8ksh4, 22 August 2019 - 10:08 PM.

  • 0

#52 a8ksh4

a8ksh4

    Senior Member

  • Members
  • 109 posts
  • LocationSacramento, CA

Posted 23 August 2019 - 04:12 AM

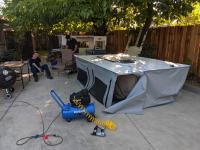
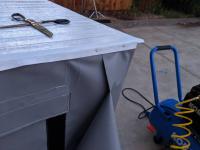
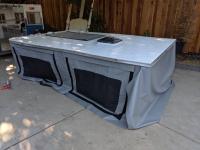
More progress today! The vinyl is installed, mostly, in the top. I got some help from my buddies to hold it up and make a first round with a few staples. I made some measurements and figured I had it a little too low and made a second round shifting it up another inch and pulling and resetting the staples as I went.

For anyone doing this, I'd suggest getting your vinyl centered and putting a staple about every 18 inches. Then go back around replacing the staples as you tighten and adjust it.

I set some glue at the top of the corner where the ends join and will finish trimming it and glue that entire seam after it's installed on the bottom half of the camper.

MVIMG_20190822_181303.jpeg
IMG_20190822_195906.jpeg

Bending the metal over the edge is sort of an iterative process. You have to work along the entire edge starting the bend, and then make a few more passes along it, eventually using a hammer to crisp up the corner and staples to hold it down as you work along it. Slow and steady!

In case it's helpful to anyone, I'm using a 1/4 inch (narrow) crown stapler with 1/2 inch long galvanized (zinc coated) staples. I wish I'd bought this at the start off my build, as it would have been very helpful with the plywood assembly! I'm sure it'll be an indispensible tool for future projects.

Edited by a8ksh4, 23 August 2019 - 01:43 PM.

  • 0

#53 a8ksh4

a8ksh4

    Senior Member

  • Members
  • 109 posts
  • LocationSacramento, CA

Posted 25 August 2019 - 01:27 AM

Getting closer. The roof is assembled. I sort of screwed up and cut the aluminum too short around the sides, so on one side I was just barely able to get it tucked behind the trim, and I doubt any of the screws holding the trim on are through the aluminum skin. I might add a couple rails on the top along the to sides just to help hold the skin down so I don't have to worry about the staples coming out and it coming apart. Tbd!

IMG_20190824_140312.jpeg IMG_20190824_172000.jpeg IMG_20190824_172649.jpeg
  • 0

#54 a8ksh4

a8ksh4

    Senior Member

  • Members
  • 109 posts
  • LocationSacramento, CA

Posted 26 August 2019 - 03:54 AM

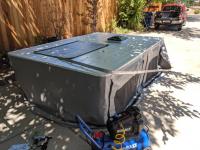
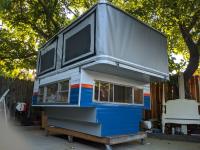
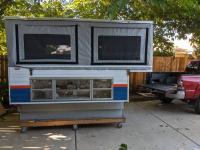
The top is on now. Lots of work this weekend...
IMG_20190825_184550.jpeg IMG_20190825_165901.jpeg IMG_20190825_145738.jpeg IMG_20190825_114223.jpeg MVIMG_20190825_114151.jpeg
  • 0

#55 a8ksh4

a8ksh4

    Senior Member

  • Members
  • 109 posts
  • LocationSacramento, CA

Posted 26 August 2019 - 02:16 PM

On the To-do list today:
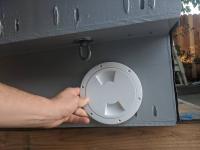
* reaming out the holes for the conduit lock pins so I can try raising and lowering the top. I was planning to use bolts with wing nuts for the lock pins, but if they're consistently to hard to get in and out, then maybe actual pins would be better.
* buying turnbuckles (about 6"long) and cutting access holes for them. I got some 6" boat deck caps to put over the access holes.
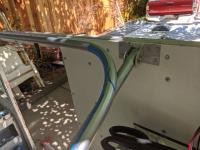
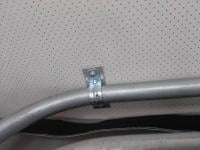
* Adding some backup plates to the conduit lifters at the top. I missed the aluminum on half of the screws for the u-clamps that hold the bar to the roof, so I figure I can add a backup plate to get some additional screws into the roof tubes and give me something to screw the second screw for each u-clamp into.


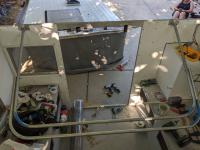
IMG_20190826_070734.jpeg IMG_20190826_070714.jpeg


The bed mount bars for the Tacoma are in front of and behind the wheel wells.  I put turnbuckle mounts on the camper offset two inches side-to-side and front-to-back from the bed mounts.  This puts the turnbuckle mounts pretty far forward on the camper.  I'm planning to pack it with weight forward, so maybe this is okay.  It just looks a little weird.  


IMG_20190826_070747.jpeg


Edited by a8ksh4, 26 August 2019 - 03:41 PM.

  • 0

#56 CougarCouple

CougarCouple

    Senior Member

  • Members
  • 1,376 posts
  • LocationLas Vegas

Posted 26 August 2019 - 04:04 PM

Hi and Morning
Hitch puns might be the answer as they have a small ball under spring pressure. Stops them from falling out.
Might want to wait on turnbuckles and get actual measurements.
Remember to put your access on the inside, although it does look good there. :) coming along, first trip where??
  • 0
F250 extended cab, Cougar from ATC. You guys rock thank you!

#57 a8ksh4

a8ksh4

    Senior Member

  • Members
  • 109 posts
  • LocationSacramento, CA

Posted 27 August 2019 - 02:02 PM

You might be right about the hitch pins. I ran the drill through the holes with the roof up, though, and the bolts go on/out a lot easier now.

First trip was going to be to Utah, but we're seeing that a lot of passes we wanted to go are still as how as Sacramento, so we're heading further north, like Oregon and Idaho. I can't wait to have a little time off of work!
  • 0

#58 CougarCouple

CougarCouple

    Senior Member

  • Members
  • 1,376 posts
  • LocationLas Vegas

Posted 27 August 2019 - 10:53 PM

Hi
Was thinking the HPins might be easier. Excited for y’all. Haven’t been to Oregon , but we just did Idaho and man what a green state ( well we’re we were) have fun.
Russ
  • 0
F250 extended cab, Cougar from ATC. You guys rock thank you!

#59 CougarCouple

CougarCouple

    Senior Member

  • Members
  • 1,376 posts
  • LocationLas Vegas

Posted 28 August 2019 - 02:35 AM

Mr a8ksh4
Did you see this not sure if need one but saw it and thought I'd pass it on.

Russ
  • 0
F250 extended cab, Cougar from ATC. You guys rock thank you!

#60 a8ksh4

a8ksh4

    Senior Member

  • Members
  • 109 posts
  • LocationSacramento, CA

Posted 28 August 2019 - 03:30 AM

Hey Russ, What did I miss?   I'm really looking forward to Idaho.  I think I went to an archery shoot in Idaho many years ago with my parents.  I recall it being beautiful.  My wife and I are pretty loose in our travel planning. We're basically going to pick a national park whenever we want to move on and go there.  It's hard to say exactly where we'll go.   I mainly want to get out of the Sacramento heat and the valley smog. We've been talking about moving to Oregon; it'll be fun to get to drive through a few places over the next few weeks and see what looks good.  


I think I'll stick with the bolts and wing nuts to secure the lifters.  They're a little harder to get in and out, but I think they'll be stronger if I can tighten up the bolts after I put it up.  


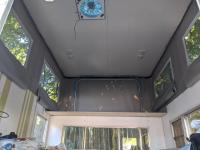
Small progress today.  I got the top lowered for the first time this evening and found that I need to shorten the lower lever on my conduit lifter on the back of the camper by the door.  When the front is lowered and I got to lower the back, the lever part of the lifter hits the ceiling.  And the conduit isn't so strong sideways that it's actually useful having such a tall lower part of the lever.  Not sure if that makes sense.


Anyway, I can take the back lifter apart and shorten the lower half to make it work better.  I think this won't be too hard to do with the roof down.


Advice for anyone else doing this, it's probably best to totally attach your roof with the lifters before you ever get around to attaching the vinyl sides.  It's hard to adjust and change stuff once the vinyl's on because it's heavy and everything is under tension.  


I'm working on mounting the solar panels... this is really the last thing I have to do before I put the camper on the truck and roll over to lowes to buy the correct length turnbuckles. 


I feel totally out of energy tonight (6am run might have done this).  I'm having a beer now sitting with the dogs.  I'm gonna try to get everything wrapped by Saturday AM so we can hit the road!  


--Dan


  • 0


1 user(s) are reading this topic

0 members, 1 guests, 0 anonymous users