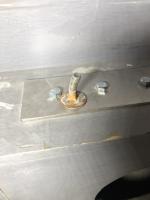
Looks good! And great upgrade without much pain since you had full access. I haven't replaced my tie-in on the rear driver's side because it looks like it's concealed by a small storage area with 6-inch high sliding doors that sits on top of the wheel wells and below the sink cabinet. When you removed your galley do you recall if you had to sequentially remove everything from sink downward to access the screws for that small storage area? I haven't stripped out my galley yet, but I did install 3 of the four tie-ins, as I had the full bench seating (now removed) which gave me easy access to that side.
As you customize your new interior you might want to give some thought to weight distribution and placement. One thing that always concerns me about my eagle is the appliances, gas tank, furnace, and water tank are all on the driver's side. And my truck has it's own fuel tank on that side, which in total is too much weight on one side of the truck. I am going to try to reposition the LP tank to a lower location and the same for the water tank to keep the center of gravity lower and forward of the rear axle if possible.
If my memory serves me right that small storage box was separate. However, I didn’t see this until the end and took that out last. Believe it was secured with several screws along the back, directly into the base of the camper. It was one of the few pieces that did not have all the L-brackets holding it together so it came out solid.
Weight distribution was terrible for me. All of it on driver side and high. The water tank was placement was my biggest concern. Going to build a box that will move the water tank down to floor in center of camper. Will serves as a bench/a little kore storage as well. Going to leave the LP tank where it is. Too much trouble to move for me.