Jump to content


Photo
- - - - -

anchor points on remodeled vintage Fleet camper

installation tie downs happijack anchor points Sierra 1500

  • Please log in to reply
18 replies to this topic

#11 Desheezy

Desheezy

    Member

  • Members
  • PipPip
  • 16 posts

Posted 14 October 2019 - 05:05 PM

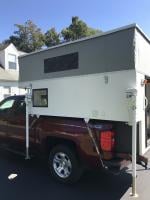
My '83 Fleet flew off on the freeway a week after purchase because the seller installed it with only two ratchets in the back, connecting my truck bed bolts to the d-rings he had drilled into old, weak, splintering wood.


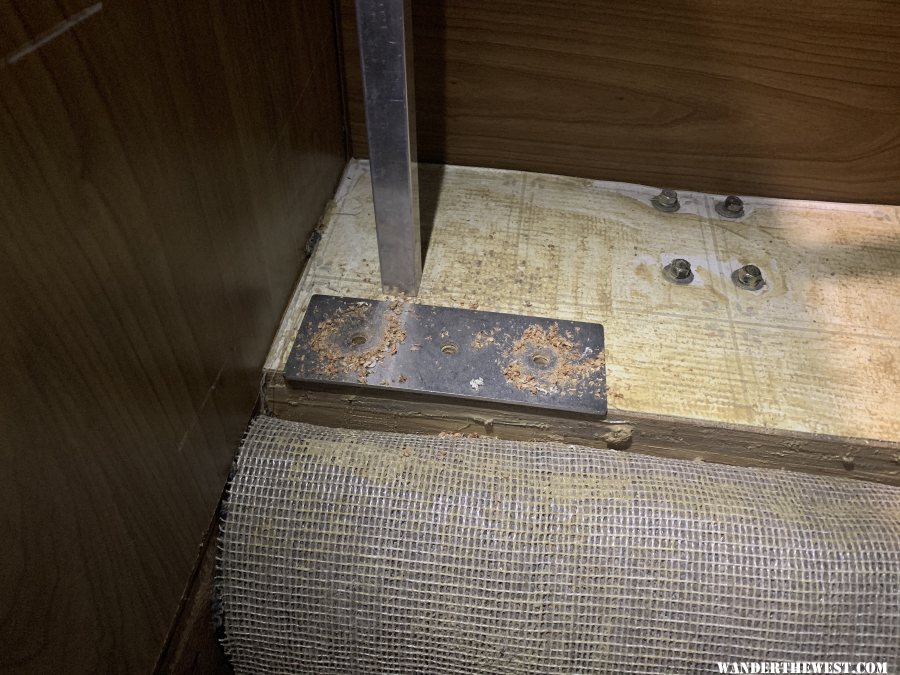
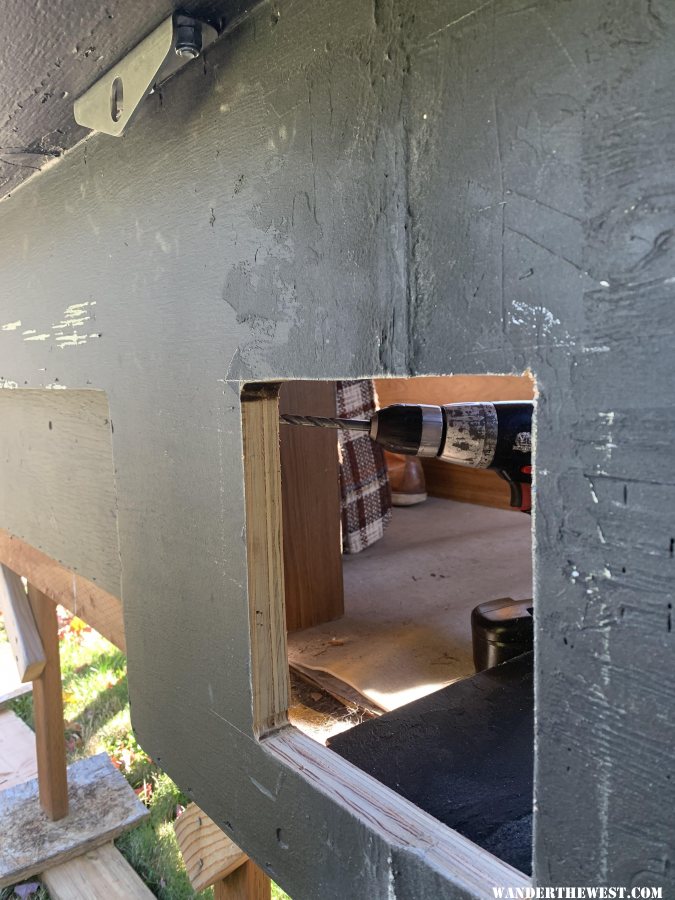
Few months later, I managed to get it out of the yard and into my yard, replaced one side of the floor pack, and working on the other side today. AFter I paint the wood, I'll re-attach the 3 tripod jacks (it was designed that way and I don't want to spend the money for a 4th jack right now). I'll probably put a plate on the interior side of each of those for stability.


Then, I'm getting a friend to cut me 8 steel plates to sandwich the 4 corners for GRADE 8 BOLTS like what you see in the link below:


http://www.wanderthe...n-camper/page-3


I'll have those 4 corners attached to the bolts in my truck bed with turnbuckles, and then use ratchets to connect the three jackstand mounts to the frame of my truck. A guy at the tow yard I picked it up from secured it to my truck that way- two ratchets on the single mount on the driver side going opposite directions, and hooking to the frame, and one ratchet each on the two mounts on passenger side, hooking to the frame. And it seemed sturdy enough... for being attached to rotted wood, but now with fresh wood, an interior plate on each mount, and the four corners sandwiched and secured, it should never fly off again!


I sure hope not. THat was a sad day, BUT I've learned a LOT since. I'll be posting my re-build soon.


  • 0

#12 shellback

shellback

    Senior Member

  • Members
  • 336 posts
  • LocationWagontown,PA

Posted 14 October 2019 - 08:20 PM

IMG_0458 (3).jpg I have a 1979 Grandby 8 footer that I rebuilt completely. I use the Happijac mounts on my truck and Torklift Fastguns. When I built the camper I mounted 4"angle aluminum brackets under the wings in a position to pull forward on the front and aft on the rear mounts. The angle brackets are through bolted to the aluminum frame and also the plywood wing material. I used this system because my wife is handicapped and I remove the camper at each campsite for her access. I do have electric remote control jacks to speed the process. Here's a picture.


Edited by shellback, 14 October 2019 - 08:23 PM.

  • 0

#13 m.r.h.

m.r.h.

    Senior Member

  • Members
  • 121 posts

Posted 31 October 2019 - 04:09 AM

I got to my install this evening. Things well pretty well, minus the bolts that hold the new tie downs to the camper were too short. I am a little confused as to why but there is some extra ply wood in places. I will get some longer bolts tomorrow and finish things off. Everything is measured out to drill into my truck bed tomorrow. I will post some photos once it is all finished up.


  • 0

#14 Wandering Sagebrush

Wandering Sagebrush

    Free Range Human

  • Site Team
  • 10,575 posts
  • LocationNortheast Oregon

Posted 31 October 2019 - 12:50 PM

I suspect the extra plywood is used as a backing plate to help distribute the forces from the turnbuckles.  

I got to my install this evening. Things well pretty well, minus the bolts that hold the new tie downs to the camper were too short. I am a little confused as to why but there is some extra ply wood in places. I will get some longer bolts tomorrow and finish things off. Everything is measured out to drill into my truck bed tomorrow. I will post some photos once it is all finished up.


  • 0

I am haunted by waters


#15 m.r.h.

m.r.h.

    Senior Member

  • Members
  • 121 posts

Posted 31 October 2019 - 05:44 PM

I was thinking the same thing but strange that it runs along the entire length of the camper. Really helps distribute forces I guess. There was also some extra/back up plywood in places where the floor pack had been re-done so it would fit in a modern truck. It was nice to finally start digging into the camper and some remodel ideas have been going through my head. 


  • 0

#16 m.r.h.

m.r.h.

    Senior Member

  • Members
  • 121 posts

Posted 07 November 2019 - 10:01 PM

So I finally got time finish installing the hangers on the camper and eye bolts in my truck. I had to do a little demo (pulling back some carpet and cutting holes) but things went "smooth" until I went to turn buckle everything into to place. Keep reading to learn more.


Explaining in words is tough so hopefully the photos will help as well. The photo shows the front of my camper where I drilled holes for the plates. You can see the old hangers still installed. The hardest part was lining things up from the inside of the camper so the external part of the hanger sits close to the camper. See the second photo it should make sense. I have very very very little clearance with a newer truck and an older wide camper. 


gallery_9228_1331_3542456.jpg


This photo shows you the access door I made. Pretty scary putting a big hole on your camper. My jig saw skills could use some work but it works. Also you can see the location of the hanger needing to be as close to the side of the camper as possible. 
 
gallery_9228_1331_1259821.jpg
 
The install of the eye bolts on the truck was straight forward. The hardest part I ran into is getting the eye bolts as close to the edge of my truck bed as I wanted. Under the truck there is as weird ridge that was in the way. So I had to move the eye bolts in a little bit. Which I thought was going to be fine until I put my camper on......
 
Many of you know this but modern truck beds aren't perfect rectangles (the tail gate is a little bit more narrow than up front near that cab) My eye bolts were drilled and just so happen to be the exact width of my camper. When I backed my truck into the camper and lowered it down I learned this. Also this narrow part of the truck bed meant I didn't have enough room between the camper and bed rail to hook the turnbuckle. 


So now I need to drill some new holes in my truck bed. Also going to a fab shop to see if they will make me new hangers that hang down an extra 2.5-3 inches so I can get the turn buckle hooked. 


This project has had it bumps, but now I know that I need to replace my lift panel (some of the rivets are popping) and find a very small leak in my roof. Good thing it hasn't started raining or snowing yet. 


  • 0

#17 Vic Harder

Vic Harder

    Doctor Electric

  • Site Team
  • 4,948 posts
  • LocationCalgary, Alberta

Posted 07 November 2019 - 11:22 PM

good pics and write-up.  Instead of getting new hangers made, consider using some caribiners or quick connects.  


  • 0

#18 m.r.h.

m.r.h.

    Senior Member

  • Members
  • 121 posts

Posted 08 November 2019 - 12:12 AM

I tried to squeeze some quick links in there but there wasn't enough room for them with the bed rail being so close. I thought about adding the length via some tubular webbing loops but that seemed slightly temporary. Since the edges on the hanger are squared off the webbing would wear down with time. Don't want to have to write a post about my camper flying off while cruising down the highway. I put lots of thought into other options and adding length to the hangers seemed like the best option. 


  • 0

#19 m.r.h.

m.r.h.

    Senior Member

  • Members
  • 121 posts

Posted 09 March 2020 - 11:40 PM

So it has been a while but I had some new hangers made. They charged me maybe $20 for the two? I don't know as I had a bunch of other welding done on some stuff and it was just all rolled in. 


These are a copy of what FWC send me, with 3 inch extensions. My camper fits my bed very very snugly (you will see in the photos some scraps in the paint on the camper from baking into and pull out from the camper. I have learned many lessons on precision backing and raising my camper up a bit extra to make it easier) and since it isn't a perfect rectangle the hangers got in the way of the bed rails. It was so tight that quick connect didn't fit. 


I installed these a while ago and got it all connected to my truck and forgot to take a photo. Took my camper off yesterday and remember to snap this to share. 


New hangers

  • 0


Also tagged with one or more of these keywords: installation, tie downs, happijack, anchor points, Sierra 1500

0 user(s) are reading this topic

0 members, 0 guests, 0 anonymous users