Jump to content


Photo
- - - - -

New Granby Home Build


  • Please log in to reply
97 replies to this topic

#21 Overland Hadley

Overland Hadley

    Senior Member

  • Members
  • 1,365 posts
  • LocationLake Superior North

Posted 29 September 2011 - 02:21 AM

Hadley,
The interior paneling is a vinyl covered 1/4" ply.The aluminum skin on the inside might work ok.Thats the way Airstream did my 1990 excella.But it is cold to the touch in the winter.


It might through them for a loop for a half second, esp. on how to price it, but in reality it would save time/materials on the build so there should be a win/win common ground on deleting that. No point paying for all the materials/time if you're going to tear it out when it gets to you. I'm assuming you're ordering a 100% shell though, otherwise I can see issues with trying to have them do this.

However it could be tricky based on some of the trip work (top edge of the lower camper, where the cabover meets the front wall, etc.) that are normally on the outside of the interior walls. Also the window trim rings might not fit right w/o the paneling (but could probably just have some scraps stuck in for shipment purposes.

Final thought is if you know what paneling you'd really want to use see if they'd consider installing it.

Just spit balling here.


Thanks for the info and ideas.
  • 0
Nathanael - Large Format Landscape Photography
www.KuenzliPhotography.com

2012 Four Wheel Camper - The FWC Build
"If life was fair, Utah would be closer to home" DD

#22 Overland Hadley

Overland Hadley

    Senior Member

  • Members
  • 1,365 posts
  • LocationLake Superior North

Posted 29 September 2011 - 02:22 AM

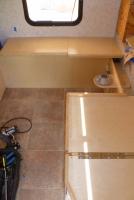
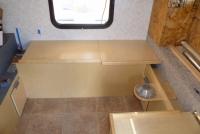
Some shots of the trimmed out bulkhead and my dinette with backrest.


Looking good. Very nice work.
  • 0
Nathanael - Large Format Landscape Photography
www.KuenzliPhotography.com

2012 Four Wheel Camper - The FWC Build
"If life was fair, Utah would be closer to home" DD

#23 Bisleybud

Bisleybud

    Advanced Member

  • Members
  • PipPipPip
  • 63 posts
  • LocationTucson ,Arizona Territory

Posted 01 October 2011 - 01:18 AM

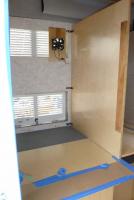
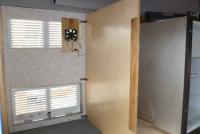
Here are some pictures of the forward locker.22 gal. water tank and the 2-31 series AGM batteries in this area.I went with the raised table leg for more foot room.

Attached Thumbnails

  • P1010069 (427x640).jpg
  • P1010065 (640x427).jpg

  • 0

#24 highz

highz

    Retreaded

  • Members
  • 1,816 posts
  • LocationSacramento Mountains, NM

Posted 01 October 2011 - 02:09 AM

Sure is looking good so far.
  • 0

'99 Ford Ranger XLT, '08 FWC Eagle
-------------
“the clearest way into the Universe is through a forest wilderness.” - John Muir


#25 ski3pin

ski3pin

    Belay On

  • Site Team
  • 15,316 posts
  • LocationSierra Nevada Range

Posted 01 October 2011 - 04:06 AM

Sure is looking good so far.


Yes, we're enjoying watching your build. Thanks!
  • 0

2003 Ford Ranger FX4 Level II 2013 ATC Bobcat SE "And in the end, it's not the years in your life that count. It's the life in your years."- Abraham Lincoln  http://ski3pin.blogspot.com/


#26 Mark W. Ingalls

Mark W. Ingalls

    Senior Member

  • Members
  • 1,248 posts
  • LocationHouston, TX

Posted 01 October 2011 - 12:04 PM

Nice woodwork, 'bud.
  • 0

#27 Bisleybud

Bisleybud

    Advanced Member

  • Members
  • PipPipPip
  • 63 posts
  • LocationTucson ,Arizona Territory

Posted 03 October 2011 - 01:55 AM

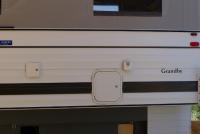
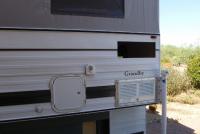
I thought I would take a day off woodworking and put some more holes in my new Grandby. I had the factory frame the wall for a standard Grandby so I could put in my water inlet, 120V power input, furnace outlet and 3 CU FT frig. I had the factory frame my water inlet 3 inches lower than standard so I could lower my countertop as my wife is only 5 foot tall. I was not planning on a HWH so lowering the water inlet was not a problem.

Attached Thumbnails

  • P1010070 (640x427).jpg
  • P1010079 (640x427).jpg
  • P1010082 (640x427).jpg

  • 0

#28 Bisleybud

Bisleybud

    Advanced Member

  • Members
  • PipPipPip
  • 63 posts
  • LocationTucson ,Arizona Territory

Posted 05 October 2011 - 01:56 AM

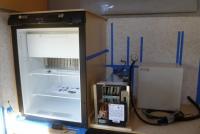
Got my 3 cu. ft. 2 way frig so I thought I would get it in.This is the frig. the wife wanted.I went back and forth on 12V or propane. I need all the amps I can get for my HF ham radio. So, I hope it will work ok. Furnace will be next, neat unit Atwood 8012 only draws 1.8 amps..

Attached Thumbnails

  • P1010084 (427x640).jpg
  • P1010085 (640x427).jpg
  • P1010087 (640x427).jpg

  • 0

#29 pods8

pods8

    Senior Member

  • Members
  • 2,552 posts
  • LocationThornton, CO

Posted 05 October 2011 - 02:52 PM

Furnace will be next, neat unit Atwood 8012 only draws 1.8 amps.


I picked up the same one for my build. Interested to see how it installs/fires up for you since you're cruising along on this interior build and will have it fired up while I'm still building my shell. :P
  • 0

2022 F350 7.3L; family trailer at the moment and some aluminum stuck together to eventually form another truck camper


#30 Bisleybud

Bisleybud

    Advanced Member

  • Members
  • PipPipPip
  • 63 posts
  • LocationTucson ,Arizona Territory

Posted 10 October 2011 - 02:55 AM

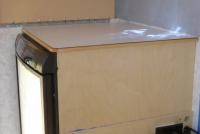
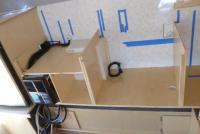
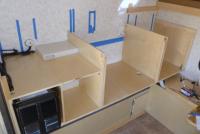
Got the frig top on. Maple trimmed white mica. I will make the top removeable so I can get to my frig fan from the top. Started to do some wiring,frig 12VDC and 110VAC done,furnace 12VDC wired running T-stat wires to the bed side passenger cabinet easy on in the morn from bed.110VAC to A/C done, aux outlet on passenger self done w/12VDC there too.Got the galley area dividers in .I am taking the counter top to within 1" of the front wall but not tying to it .Will start lower cabinet this week,waiting on IOTA distribution panel.

Attached Thumbnails

  • P1010090 (640x427).jpg
  • P1010092 (640x427).jpg
  • P1010093 (640x427).jpg

  • 0


0 user(s) are reading this topic

0 members, 0 guests, 0 anonymous users