Jump to content


Photo
* * * * - 5 votes

Building Our New Camper


  • Please log in to reply
270 replies to this topic

#11 Lighthawk

Lighthawk

    Weekend warrior

  • Members
  • 3,319 posts
  • LocationNevada City, CA

Posted 11 November 2013 - 04:20 AM

Happy Vets Day and BDay, Ski.  SR says, "many happy returns"


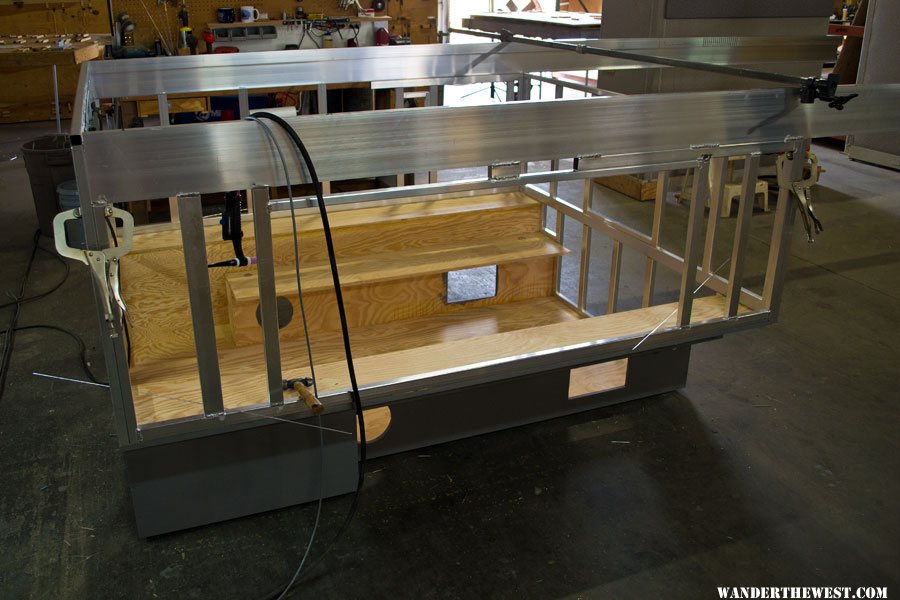
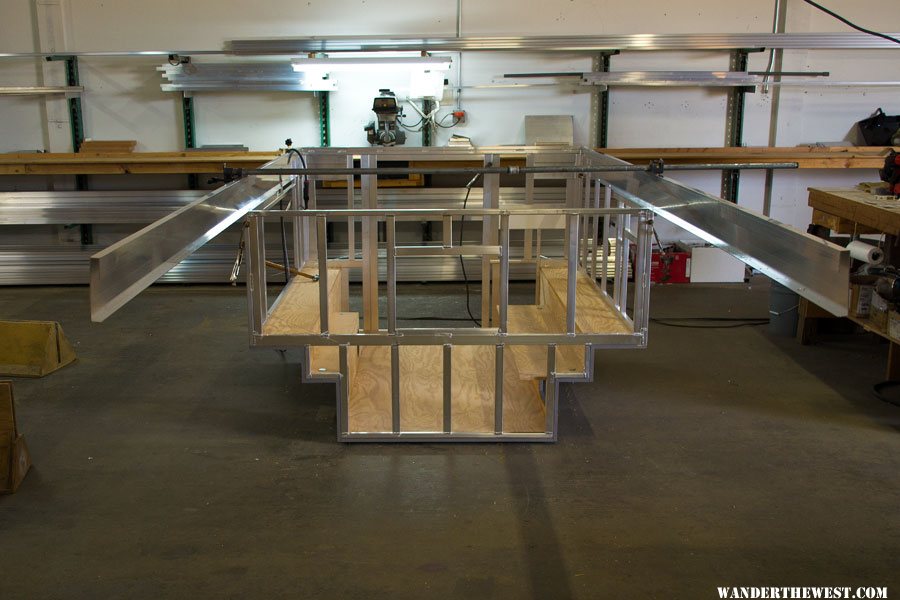
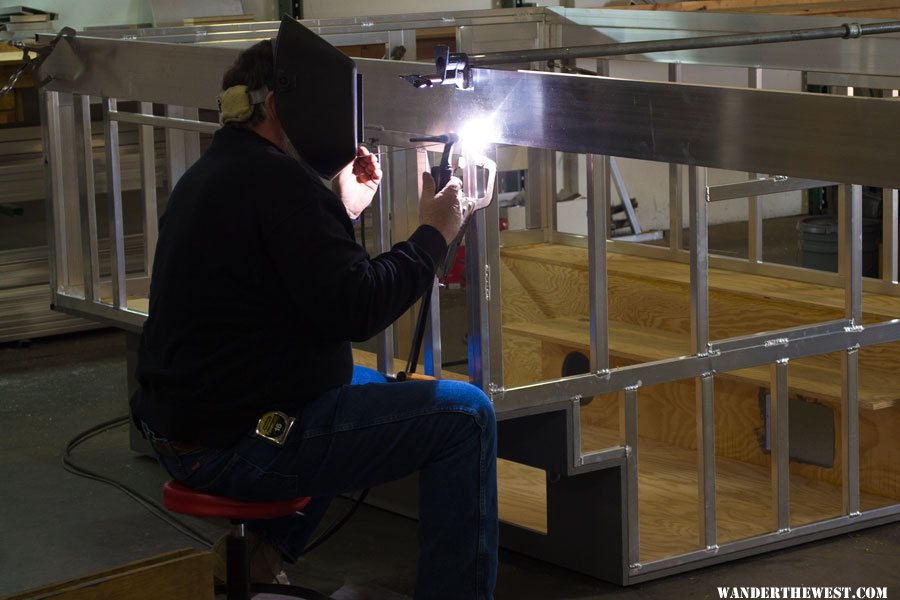
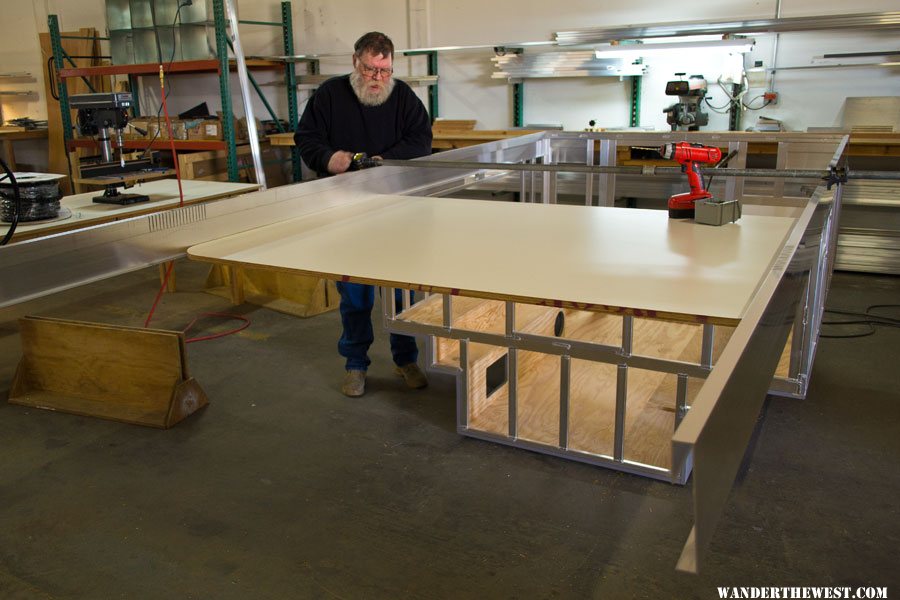
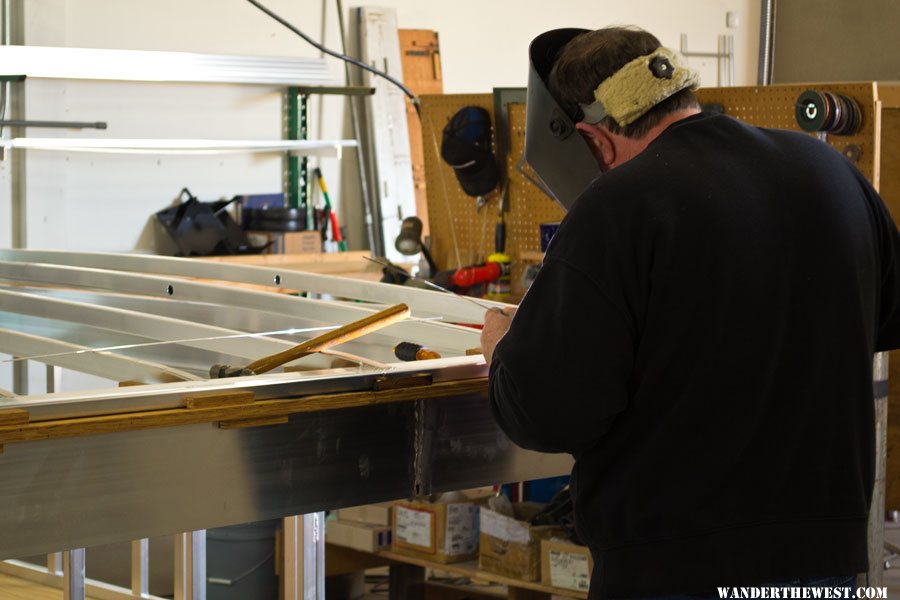
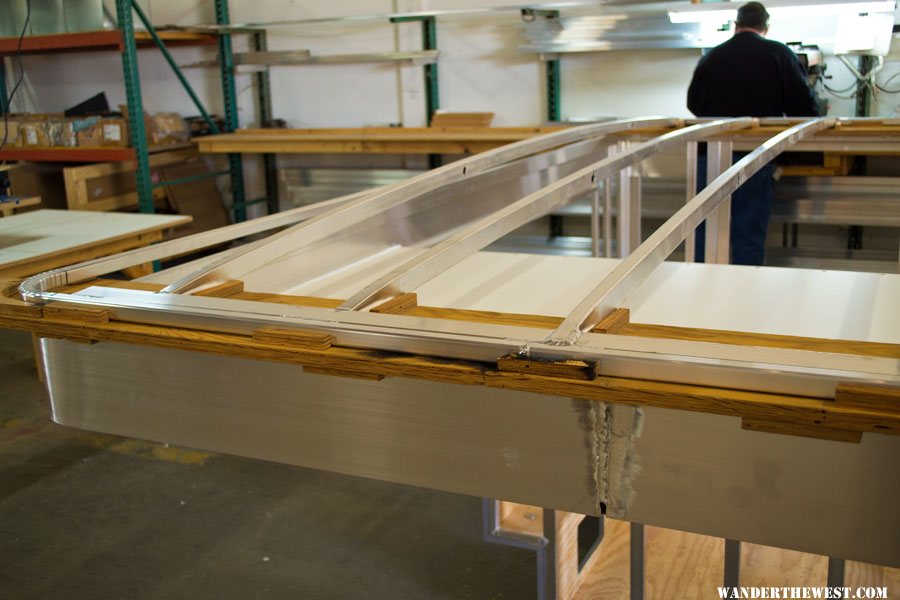
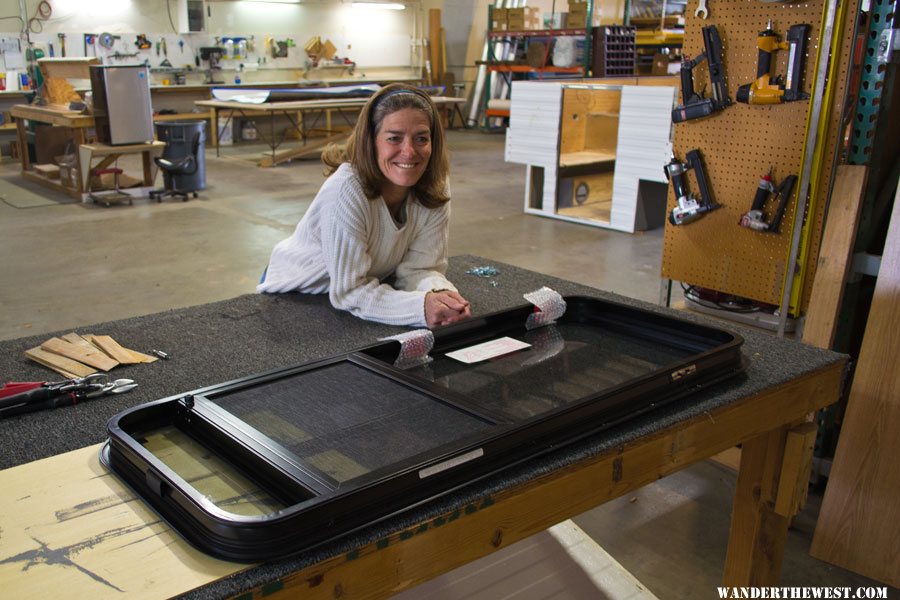
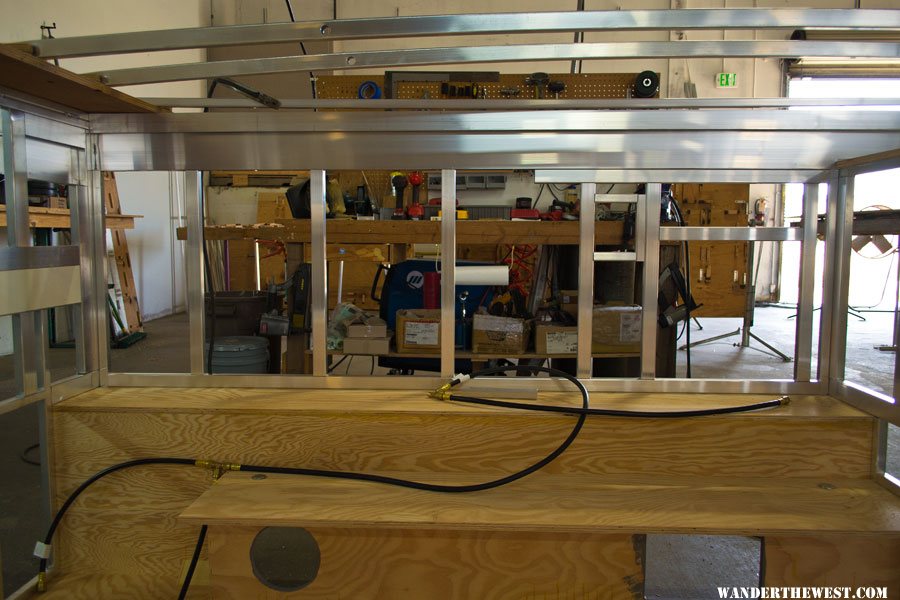
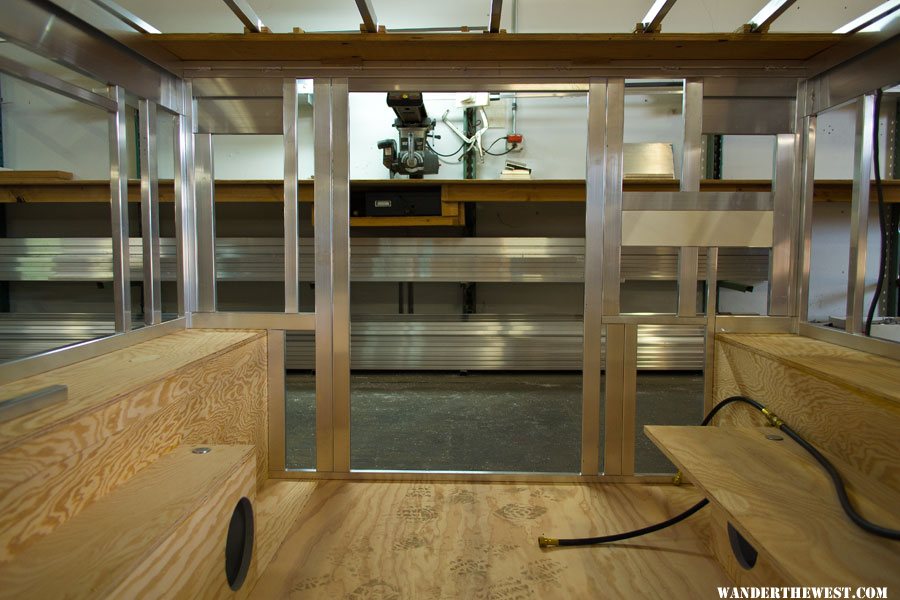
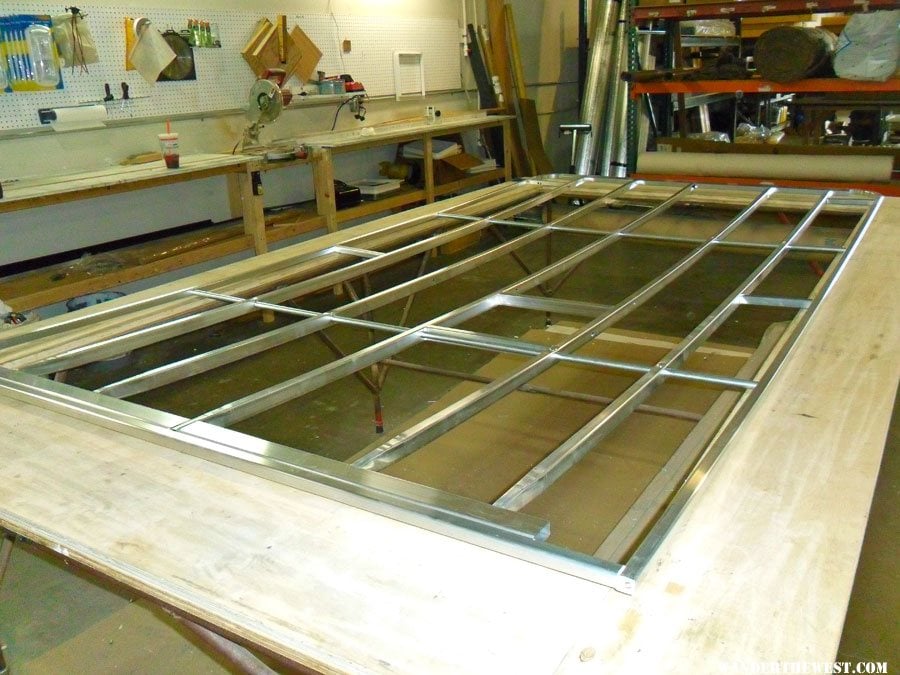
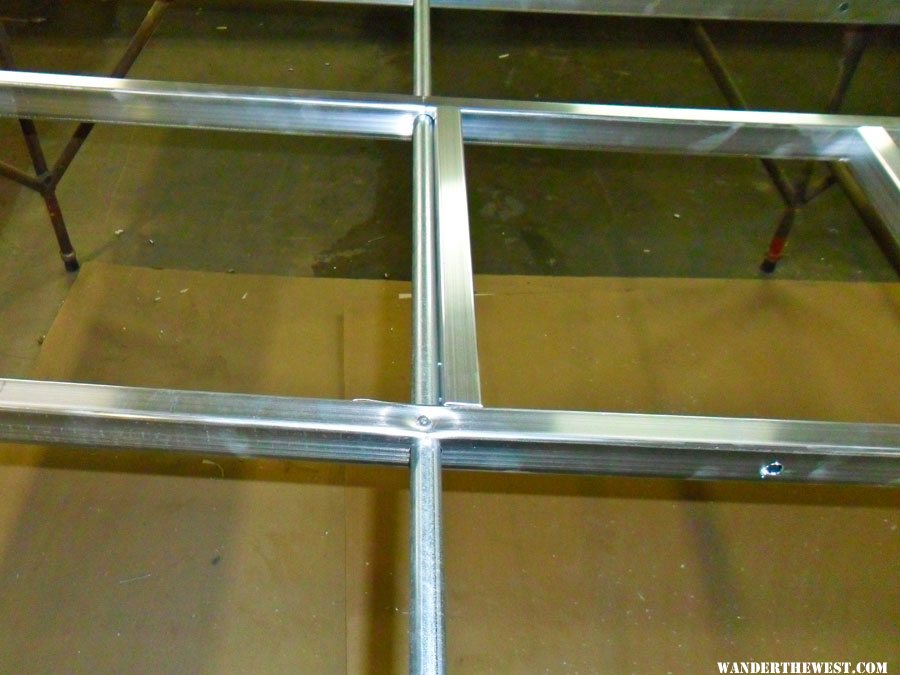
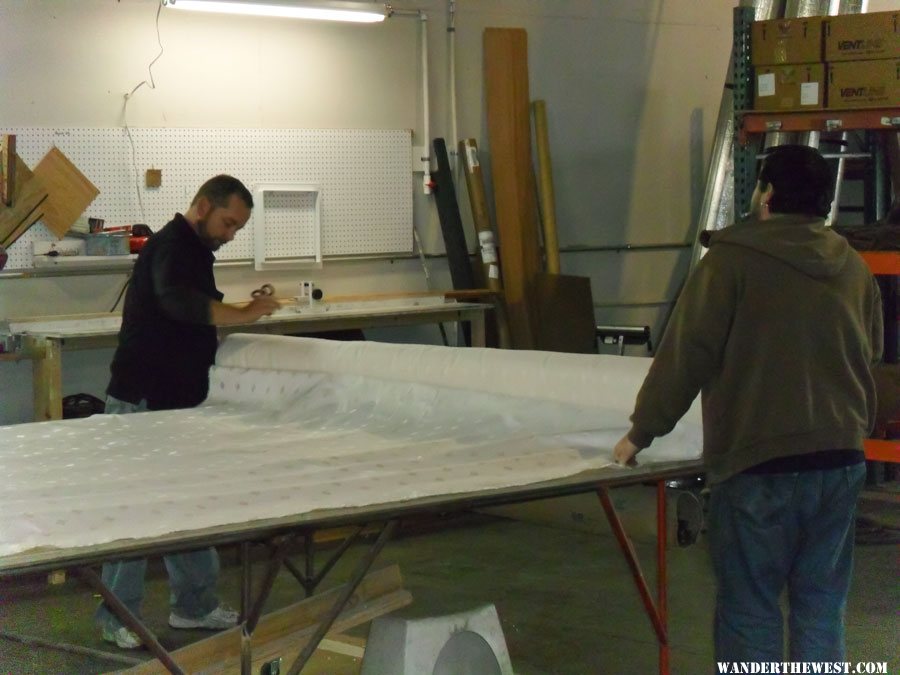
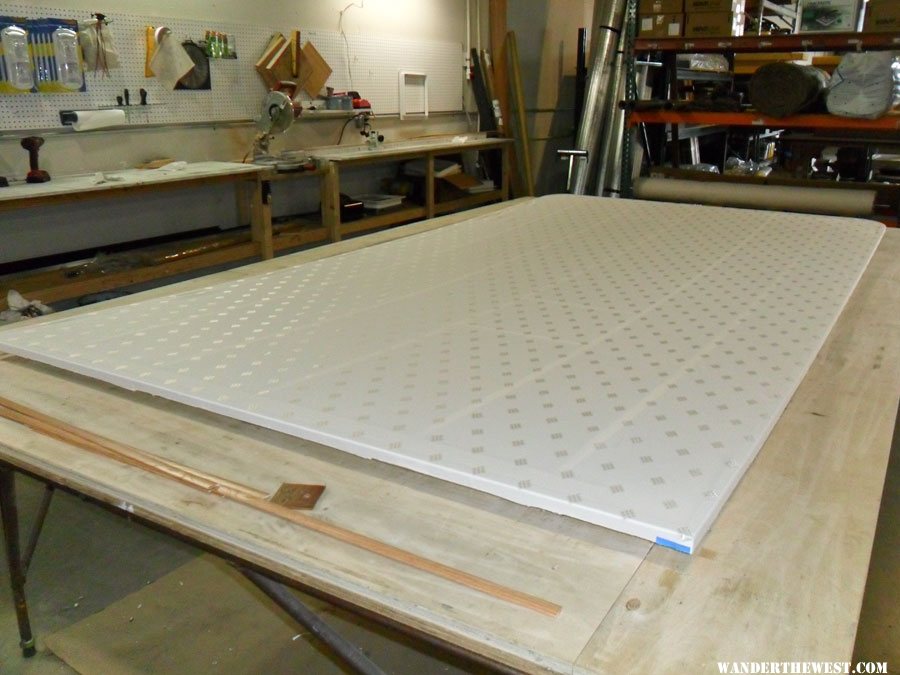
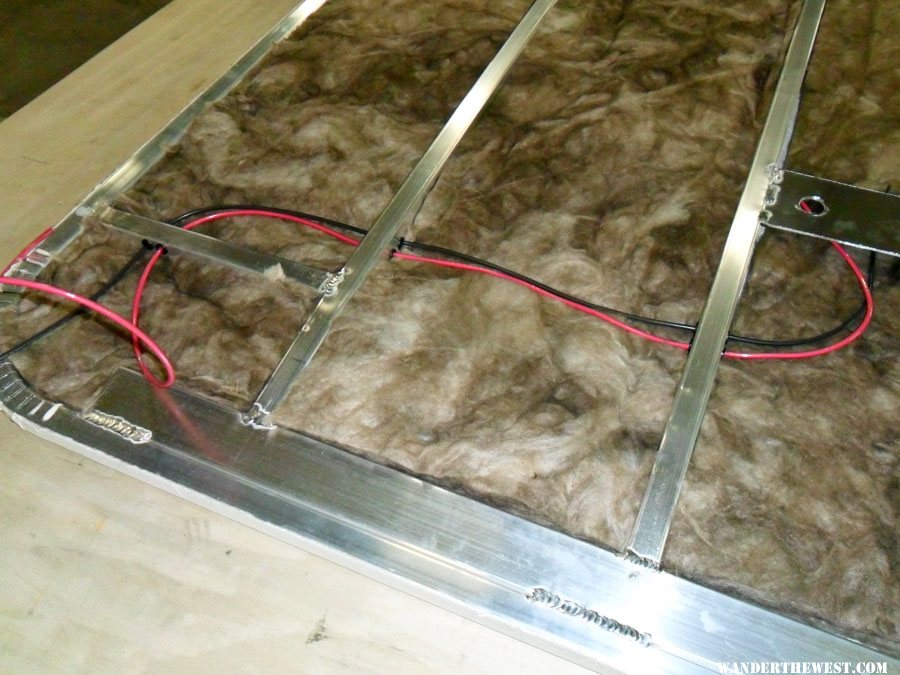
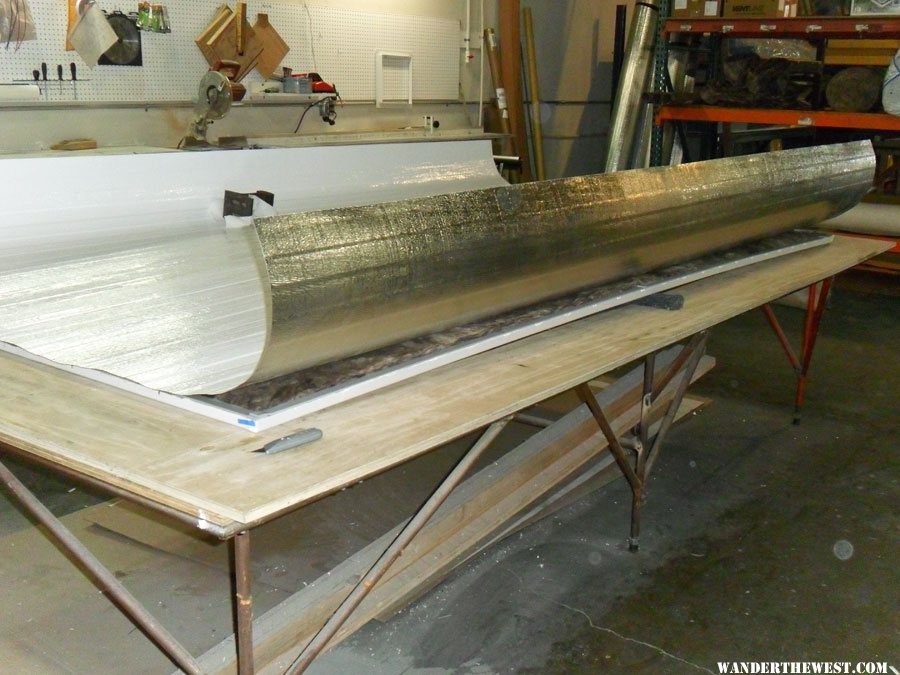
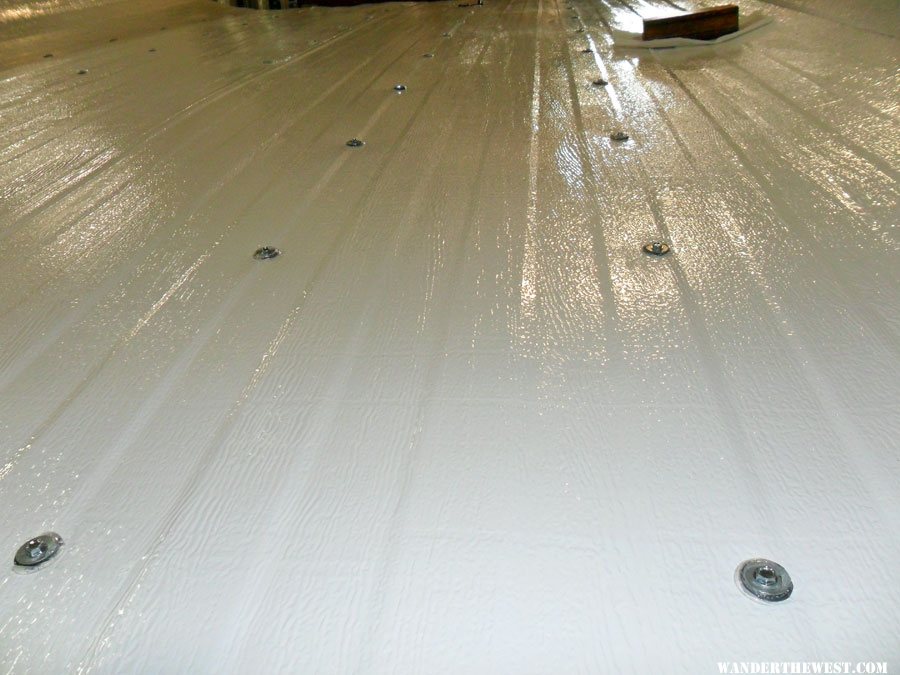
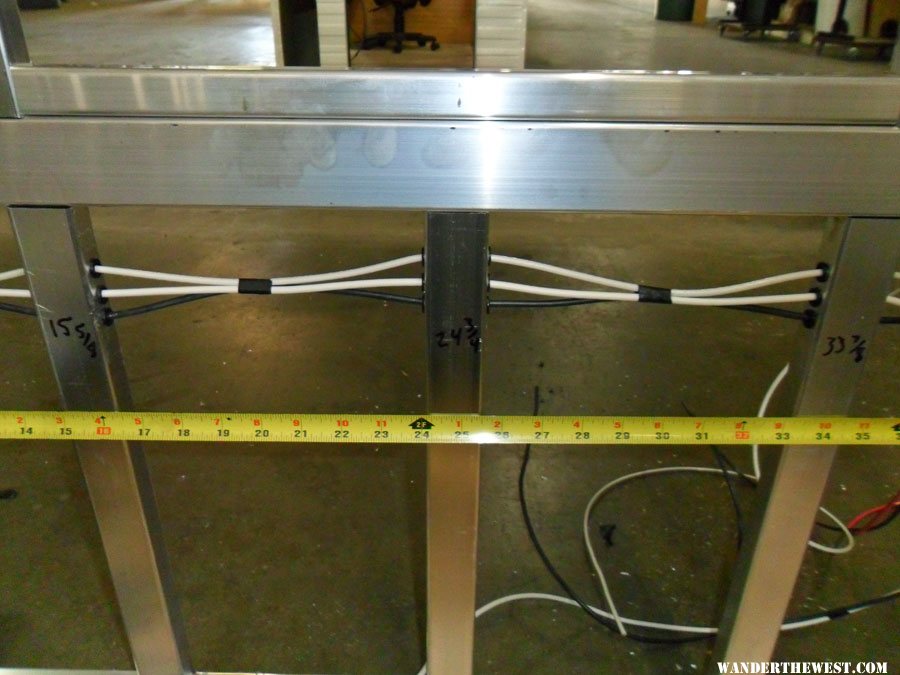
Really cool that you and the Lady are intimately involved with the build.  I was able to tour FWC factory and take photos, which certainly helped me understand my camper, since I was also new to the truck camper world.


Looking forward to the build out.


  • 0

2021 RAM 3500 Crew 4x4, 6.4 hemi/8 speed trans with 4.10 gears, Timber Grove bags, Falken Wildpeak 35" tires.

OEV Aluma 6.75 flatbed, Bundutec Odyssey camper on order for 2024

For this year we're still using our 2008 FWC Hawk with victron DC-DC charger, 130w solar, MPPT controler

with 2000w inverter and external 120v output and 12v solar input with 100w portable solar.   http://lighthawkphoto.com


#12 craig333

craig333

    Riley's Human

  • Members
  • 8,014 posts
  • LocationSacramento

Posted 12 November 2013 - 01:42 AM

Interesting to see all the jigs they use for assembly. Thanks for bringing us along.


  • 0

Craig K6JGV_________________________ 2004 2500 CTD 4X4 FWC HAWK 1960 CJ5


#13 ski3pin

ski3pin

    Belay On

  • Site Team
  • 15,316 posts
  • LocationSierra Nevada Range

Posted 12 November 2013 - 04:18 PM

We spent the morning of my birthday back down at All Terrain Campers. Our camper was upright, the frames for the sides were completed and ready to be joined to the main unit.
 
gallery_1902_710_87653.jpg
 
 
gallery_1902_710_73016.jpg
 
 
Jeff started in on the welding.
 
gallery_1902_710_40256.jpg
 
 
The ply for the cabover was put into place……………………………
 
gallery_1902_710_86231.jpg
 
 
………………………………and screwed to the frame along with a bead of sealant. It looked like all those holes I drilled were working out.
 
gallery_1902_710_76650.jpg
 
 
The frame was shaped around the front and screwed in place prior to welding the ends together.
 
gallery_1902_710_26802.jpg
 
 
Marty invited the Lady along for a quick trip to the flooring store to pick out what she wanted. That was pretty cool!
 
The roof was laid out over the frame and the long ribs were cut and arched.
 
gallery_1902_710_53012.jpg
 
 
This is a well designed and incredibly strong frame work for the roof.
 
gallery_1902_710_12715.jpg
 
 
There was lots of welding to get done.
 
gallery_1902_710_51563.jpg
 
 
gallery_1902_710_13773.jpg
 
 
gallery_1902_710_7233.jpg
 
 
Our new camper is really starting to take shape! But along with that, the ATC guys have to deal with a really anxious costumer. She is working on her patience and getting better. It’s just that she knows how much fun and adventure is out there.
 
gallery_1902_710_8541.jpg
 
 
We went over layout of our propane lines and the routing of wiring in the walls.
 
gallery_1902_710_94822.jpg
 
 
We enjoyed seeing our new interior taking shape. We will spend a lot of quality time inside this camper quickly becoming our new home away from home.
 
gallery_1902_710_58252.jpg
 
 
gallery_1902_710_61074.jpg
 
 
To be continued………………………………………………………


  • 0

2003 Ford Ranger FX4 Level II 2013 ATC Bobcat SE "And in the end, it's not the years in your life that count. It's the life in your years."- Abraham Lincoln  http://ski3pin.blogspot.com/


#14 Casa Escarlata Robles Too

Casa Escarlata Robles Too

    C'est la vie

  • Site Team
  • 9,286 posts
  • Locationmonterey bay area

Posted 12 November 2013 - 09:13 PM

Thanks Ski.Interesting to see just how much bow is in the roof ribs.That must change some when to roofing is installed!

I see a bow in my roof but nothing that dramatic.

Looks great.

Frank


  • 0

2002 Tundra AC TRD 4WD Limited 2009 ATC Bobcat loaded http://sharychic.blogspot.com/


#15 imix

imix

    Advanced Member

  • Members
  • PipPipPip
  • 99 posts

Posted 14 November 2013 - 05:11 PM

I love seeing how much care and attention goes into building an ATC, always wondered how the front of the cabover was bent/welded. I am sure the same care goes into building an FWC, but one can feel the good vibes that Jeff and Marty are puttin' in to your camper.


Just think, you will have photos/memories of the entire life of your camper, how many people can say that? Almost none.


  • 0

#16 Dughlas Stiubhart

Dughlas Stiubhart

    It's good to be Stew

  • Members
  • 1,474 posts
  • LocationSE CO

Posted 14 November 2013 - 05:49 PM

It's great to see you, The Lady, Marty and Jeff hard at work.  Hope to see you soon in your new All Terrain Camper


  • 0

Stew


2007 Custom All Terrain Camper Panther Shell on 2012 Toyota Tundra 4x4 in SE CO


#17 ski3pin

ski3pin

    Belay On

  • Site Team
  • 15,316 posts
  • LocationSierra Nevada Range

Posted 15 November 2013 - 03:28 PM

A big thank you to the ATC crew sharing the following photos of the roof construction.

The completed roof frame with the cross members in place.


gallery_1902_710_98328.jpg


gallery_1902_710_8021.jpg


Chad and Brad rolled the interior fabric over the frame.


gallery_1902_710_32295.jpg


And it is soon in place.


gallery_1902_710_102180.jpg


A view of the top of the roof with internal wiring and insulation in place.


gallery_1902_710_52407.jpg


Including the wires to the solar panel plug.


gallery_1902_710_89127.jpg


The aluminum sheeting is installed.


gallery_1902_710_119727.jpg


gallery_1902_710_104455.jpg


The crew at ATC have been wonderful to work with. How can you thank guys enough for providing a series of photos of the interior wiring and framing? They are just great people.


gallery_1902_710_36766.jpg


To be continued………………………………………………………


  • 0

2003 Ford Ranger FX4 Level II 2013 ATC Bobcat SE "And in the end, it's not the years in your life that count. It's the life in your years."- Abraham Lincoln  http://ski3pin.blogspot.com/


#18 Dughlas Stiubhart

Dughlas Stiubhart

    It's good to be Stew

  • Members
  • 1,474 posts
  • LocationSE CO

Posted 15 November 2013 - 03:51 PM

So that's what my camper's roof looks like on the inside!


  • 0

Stew


2007 Custom All Terrain Camper Panther Shell on 2012 Toyota Tundra 4x4 in SE CO


#19 craig333

craig333

    Riley's Human

  • Members
  • 8,014 posts
  • LocationSacramento

Posted 15 November 2013 - 09:35 PM

I'b a bit surprised they're not using rigid insulation. All those pics are gonna be great to have down the road when one day you want to modify or repair something. 


  • 0

Craig K6JGV_________________________ 2004 2500 CTD 4X4 FWC HAWK 1960 CJ5


#20 ckent323

ckent323

    Senior Member

  • Members
  • 1,227 posts
  • LocationSolvang, CA

Posted 15 November 2013 - 10:21 PM

It appears that there is no insulating material between the Aluminum ribs and the Aluminum roof sheet (I can't tell for sure).  If not that creates a large thermal "short" allowing direct thermal conduction from inside to outside (heat moves from hot to cold).


Seems to me a thin layer of insulating material (a sheet or tape) between each rib and the skin would minimize the thermal short and help cut down heat loss.  Filling the Aluminum channel with form would also help as well as minimize a volume where vapor can condense and the leak out.


I have noticed ice forming on screw heads in the ceiling of our FWC and that got me wondering if the aluminum frame is in thermal contact with the skin.  I think it is.


If there is more information on this I am interested in reading about it.


Regards,

Craig


  • 0

1993 Dodge Cummins W-250 Club Cab long bed, 2007 FWC Keystone


1 user(s) are reading this topic

0 members, 1 guests, 0 anonymous users