


What is your target dry weight of flatbed plus camper and what is the payload on your Tundra? The aluminum should help but seems like this is cutting it close. Beautiful design and fabrication!

28 replies to this topic
#12

CamperCamper
-
- Members
- 122 posts
Senior Member
Posted 27 May 2017 - 06:17 PM
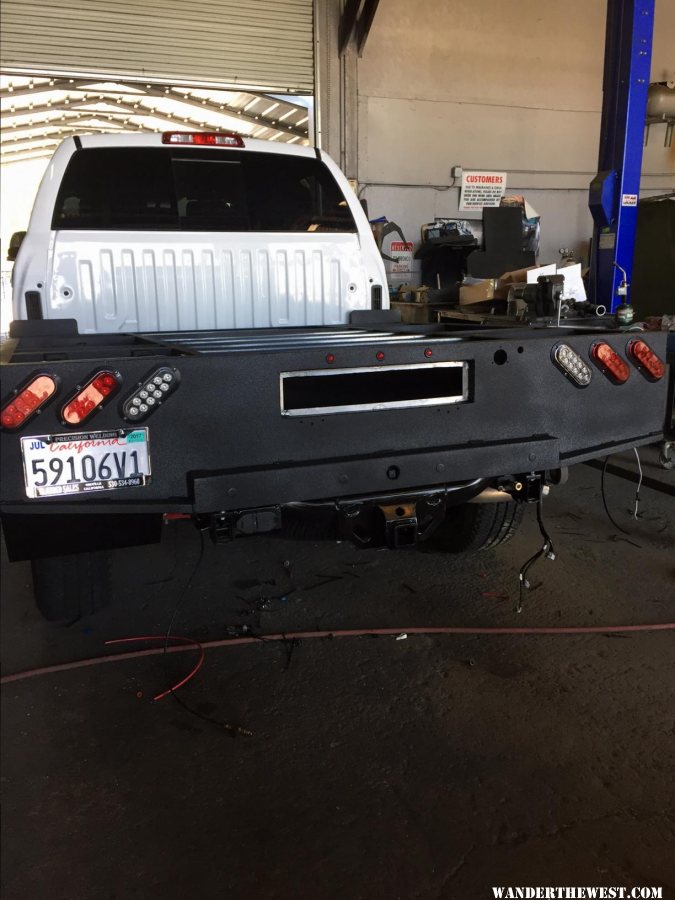
...many flatbeds suffer from serious problems filling the gas tank properly because you have dropped the angle of the filler tube.
Steve
Right you are Steve! And, I appreciated your forewarning when I was planning my build. I addressed the issue with all I spoke with before choosing Precision Welding for the build. They nailed the angle. Bought my first tank of gas on the way home without a hiccup!
#13
CamperCamper
-
- Members
- 122 posts
Senior Member
Posted 27 May 2017 - 06:21 PM
I am curious what you are using for your stealth step - I have tried various options and none have been to my liking. I usually end up using the tire for quick in and out.
Rando, I will have to keep you in suspense until I get the camper installed and confirm that it indeed works as planned. I plan to do a write up on the ladder system (which incorporated and improved upon your original plan with the Little Giant) next week after making sure all is well. No point in showing great design that fails the functionality test!
#14
rando
-

- Members
- 1,638 posts
Senior Member
- LocationColorado
Posted 27 May 2017 - 11:11 PM
One other suggestion - which may be a bit on the late side - consider some sort of fuel storage in your flatbed arrangement. Like water, fuel is really heavy, so down low under the flatbed is the perfect place to store it, preferably in front of the wheels. With our Fleet/Tacoma combination we get pretty abysmal fuel economy (15-16 mpg average, less off road) which means we often need to carry extra fuel, and I am guessing you will be in the same situation. I have mounted two 3 gal rotopax under the bed in front of the drivers side wheel. This has been a really convenient place to carry fuel, but in hindsight I wouldn't recommend the rotopax. If you could fit one or two standard 5 gal fuel cans somewhere under there, that would be awesome.
2016 Fleet Flatbed
2016 Toyota Tacoma
#15
CamperCamper
-
- Members
- 122 posts
Senior Member
Posted 04 June 2017 - 03:27 PM
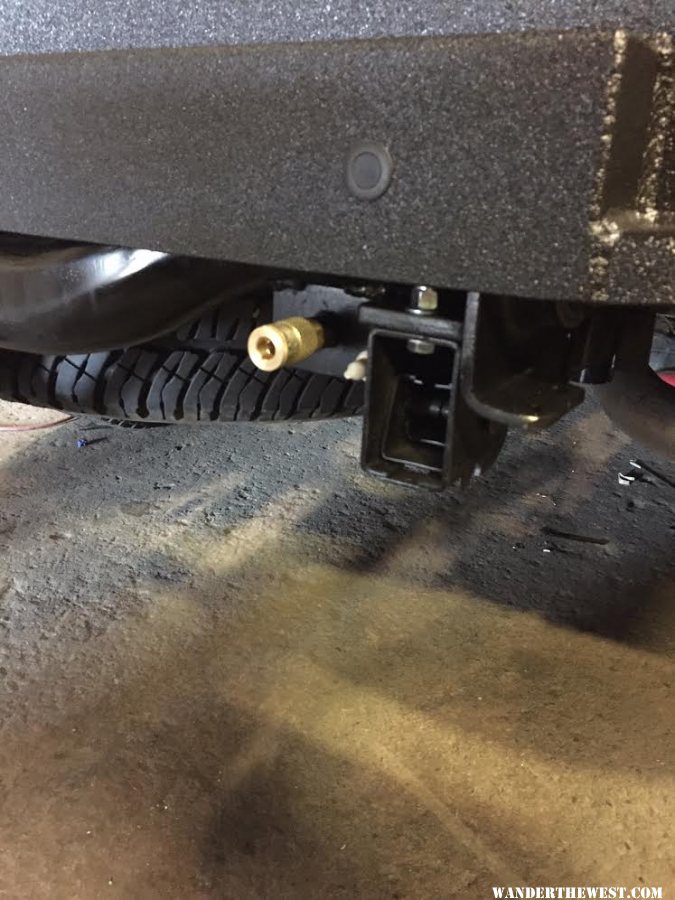
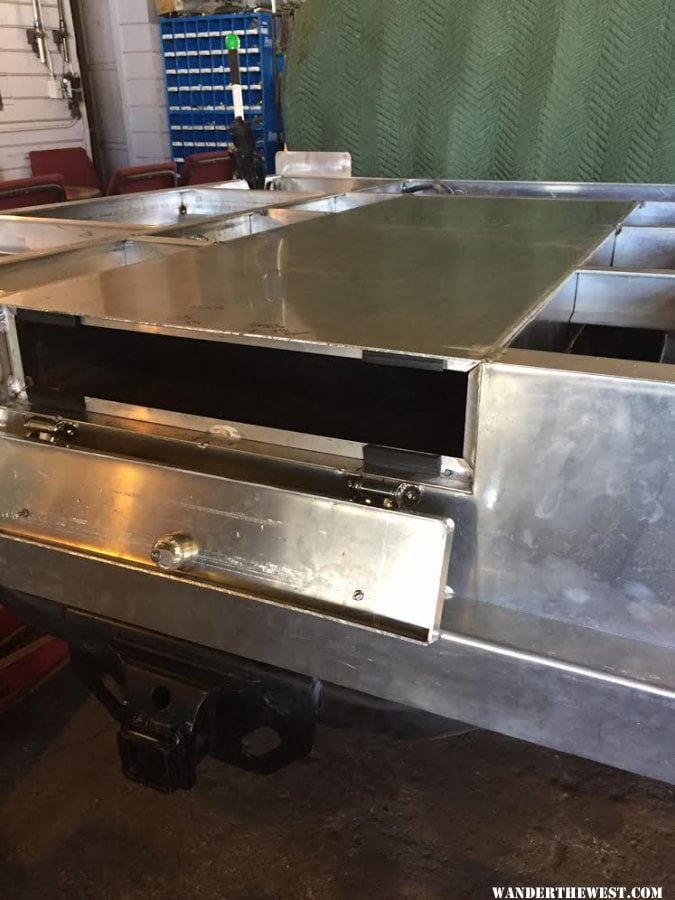
The bed was equipped with a Viair compressor mounted above the right front box.
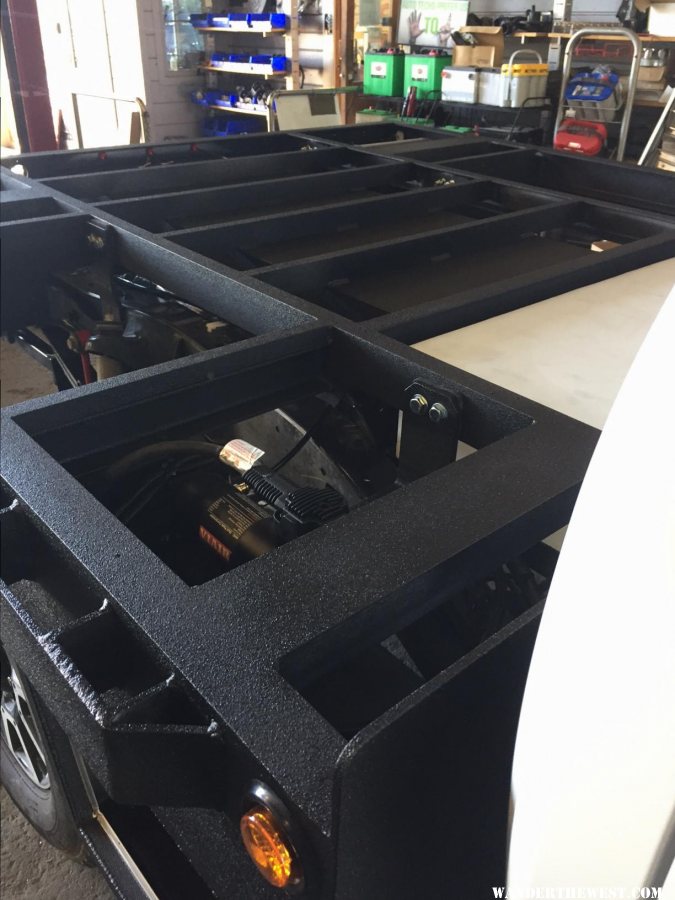
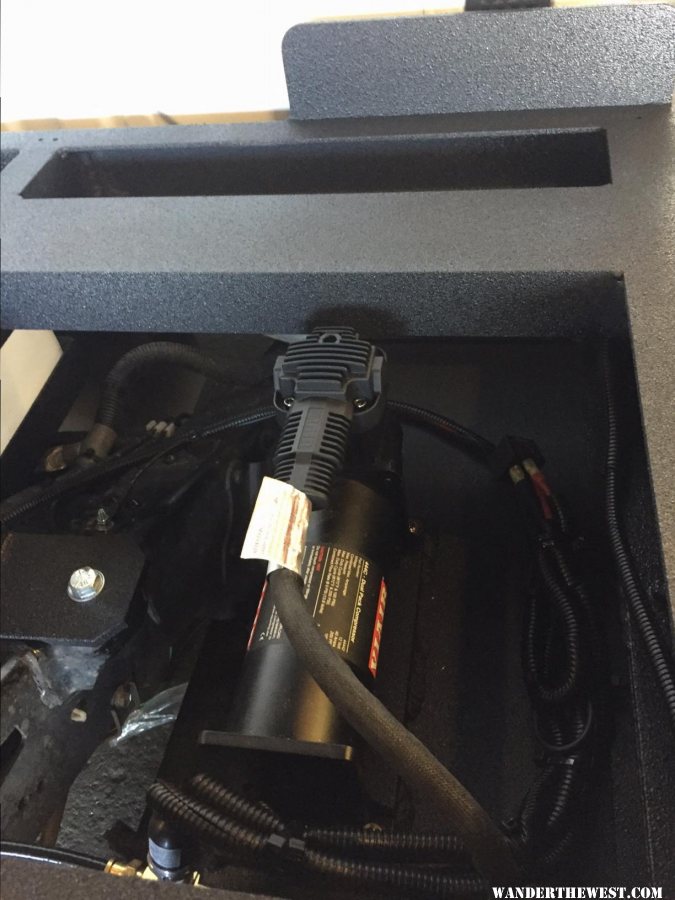
An air tank was mounted above the left rear box.
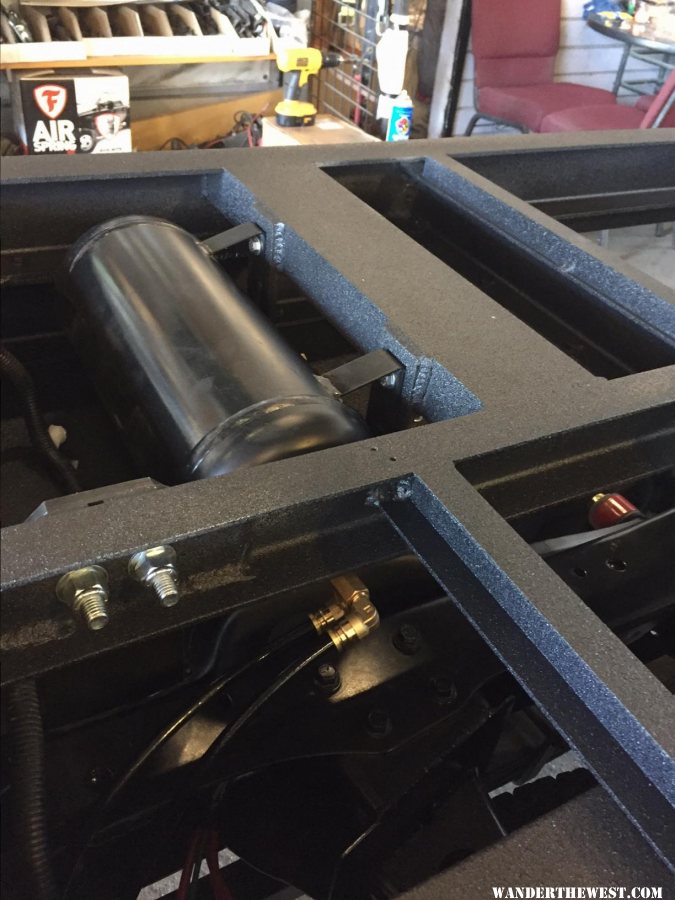
An on/off rocker switch, pressure gauge and fill/release switch were mounted in cab inside of the center console.
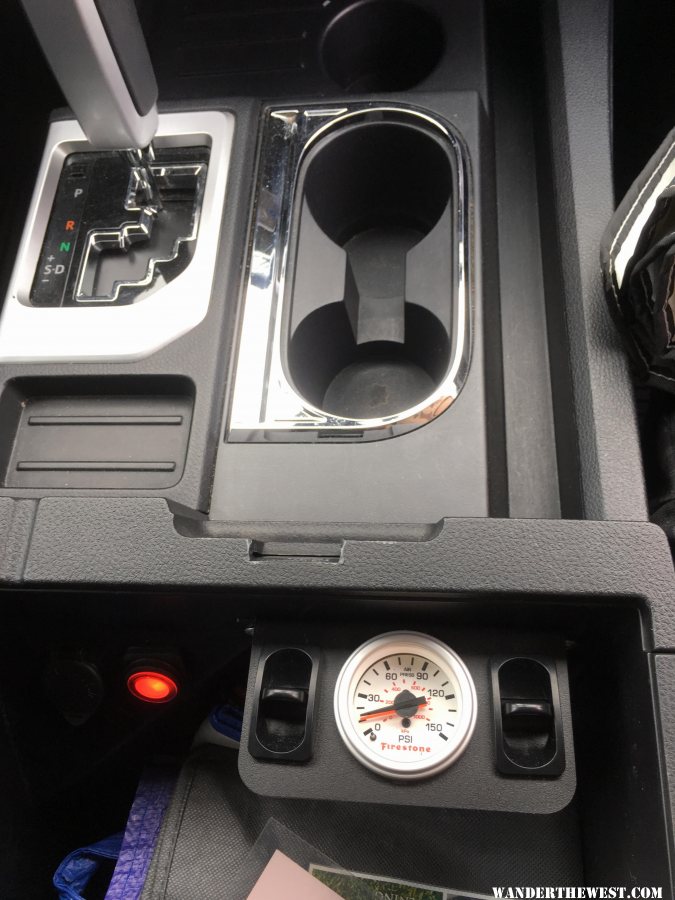
A quick connect air valve and independent schrader valves (if compressor fails) were mounted just below the rear apron.
Edited by CamperCamper, 05 June 2017 - 11:32 PM.
#16
CamperCamper
-
- Members
- 122 posts
Senior Member
Posted 06 June 2017 - 12:13 AM
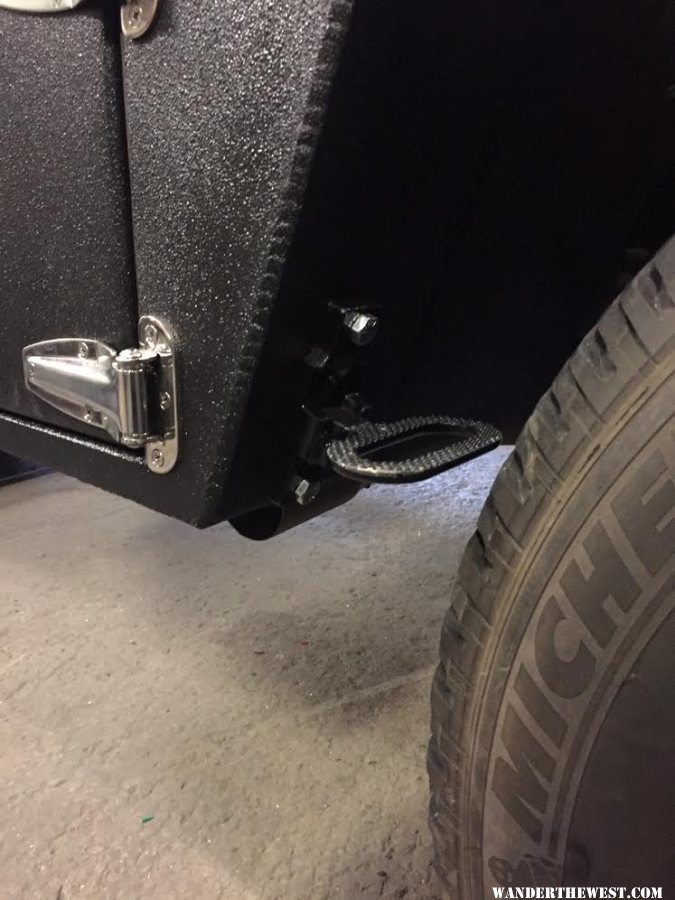
Entry into a FWC flat bed is challenging due to the height of the bed and the absence of the rear step bumper (since the entry door is moved to the side of the camper). Traditional entry method has been by use of an attachable step similar to the Brophy scissor step. I found the steps to be heavy (up to 45 lbs-depends on number of steps required) clunky and bulky They created a storage problem in addition to the weight.
My solution was inspired (as most things I have done-modifications of great ideas found on this forum) by similar solutions. I started with a Little Giant safety step ladder and removed the rear tripod leg and safety rail. Looking for a way to attach it to the bed, I found a patented hook system that drops over the top of the rub rail. The rail hooks are permanently attached to the top of the Little Giant ladder. It was an expensive solution but the hooks are patented and the ladder that comes with the hooks has steps that are too narrow for my taste. So I ended up with two ladders that were taken apart and put back as one unit to fit my needs. I am getting close to retirement age and want a safe, secure platform for entering the camper as I age. The Little Giant provides a very wide and stable step to reach that objective and the hooks give me a stable attachment that should last for as long as I will be camping. As an added bonus, this solution weighs in at less than 8 lbs!
Here is a link to the to the semi flatbed ladder if someone thinks they would not mind a narrow ladder with thin steps: http://www.discountr...562990000003198
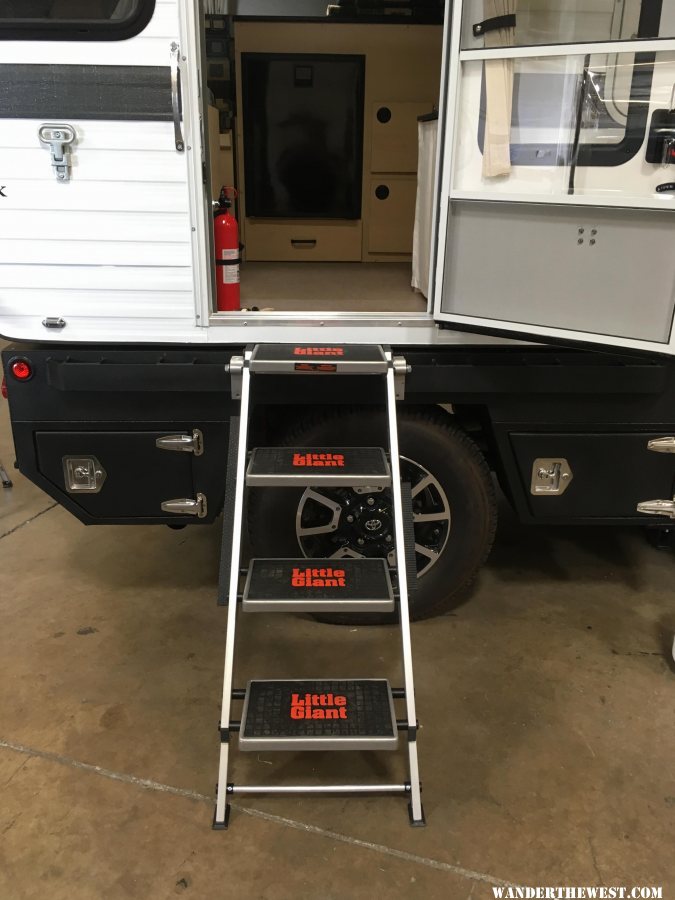
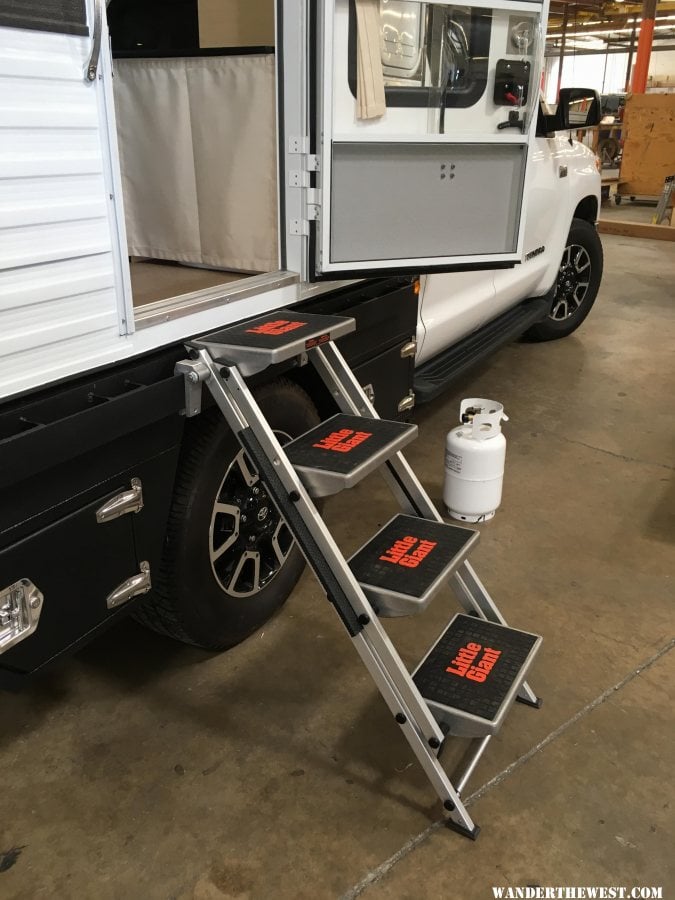
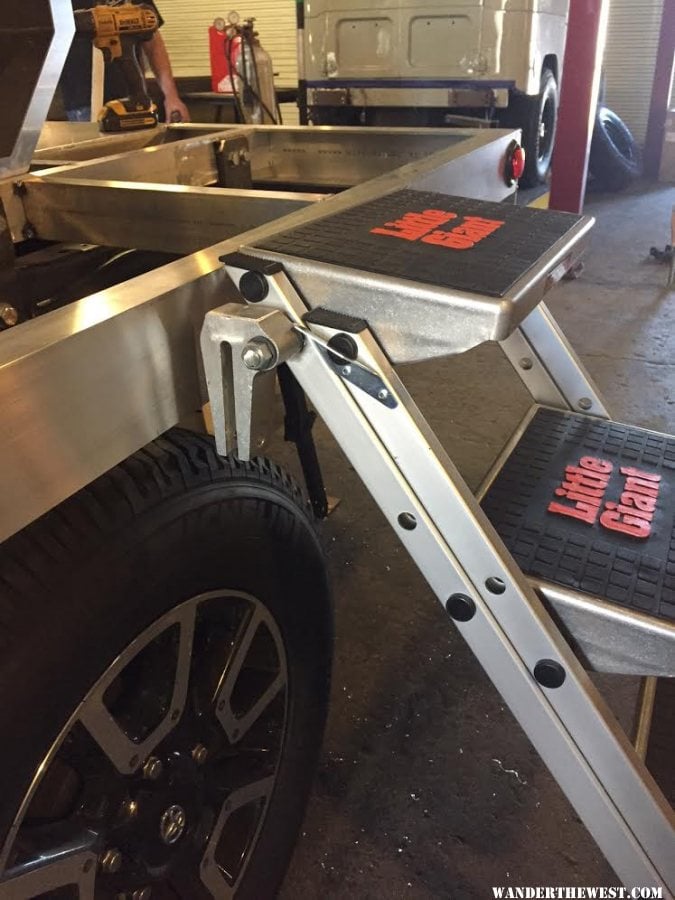
A sealed, (waterproof, dust proof) lockable storage box was built into the rear of the bed. Sealing it from the elements was made easier by building a tray that does not roll out. The ladder is light and it easily slides in or out of the box. We did explore building a storage box into the side of the bed and having a ladder drop straight out of the box but that would have required raising the bed structure 4 inches higher and I did not want to further raise the height and C.O.G of the build so that idea was scrapped.
Another goal for the build was to provide entry into the camper for quick uses such as a stop at a store or pulling over on the side of the road for lunch and needing to access/place things inside the camper. In those instances, deploying a full entry ladder is not practical and may not even be possible. After all, it is bad manners to run your entry ladder half way across a one person sidewalk in a small Baja village!
To solve this problem and make entry quick and easy, we reinforced the right rear box at the wheel well to support a fold down step similar to those that FWC installs on the rear of the slide in campers. It works well and for the younger members will prove to be plenty enough height to accomplish the task. I can use it and get inside the camper but it is still too much of a stretch from it to the inside for an aging hip and back. A second step that hangs from the rub rail and is stashed inside the right rear box is being fabricated and I will update this post with a second photo when that is completed.
Edited by CamperCamper, 06 June 2017 - 03:54 AM.
#17
CamperCamper
-
- Members
- 122 posts
Senior Member
Posted 06 June 2017 - 12:41 AM
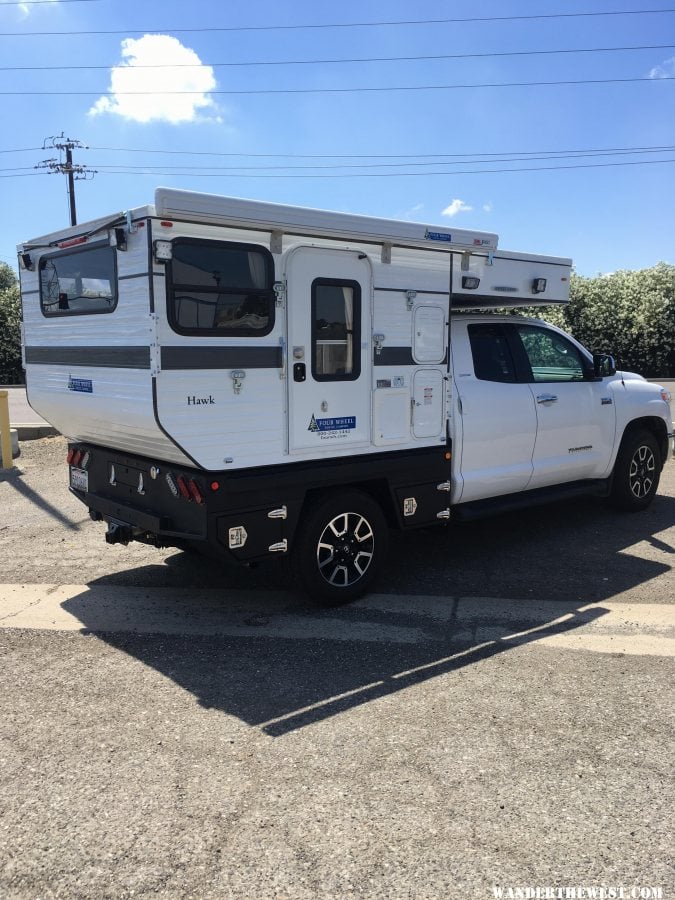
What is your target dry weight of flatbed plus camper and what is the payload on your Tundra? The aluminum should help but seems like this is cutting it close. Beautiful design and fabrication!
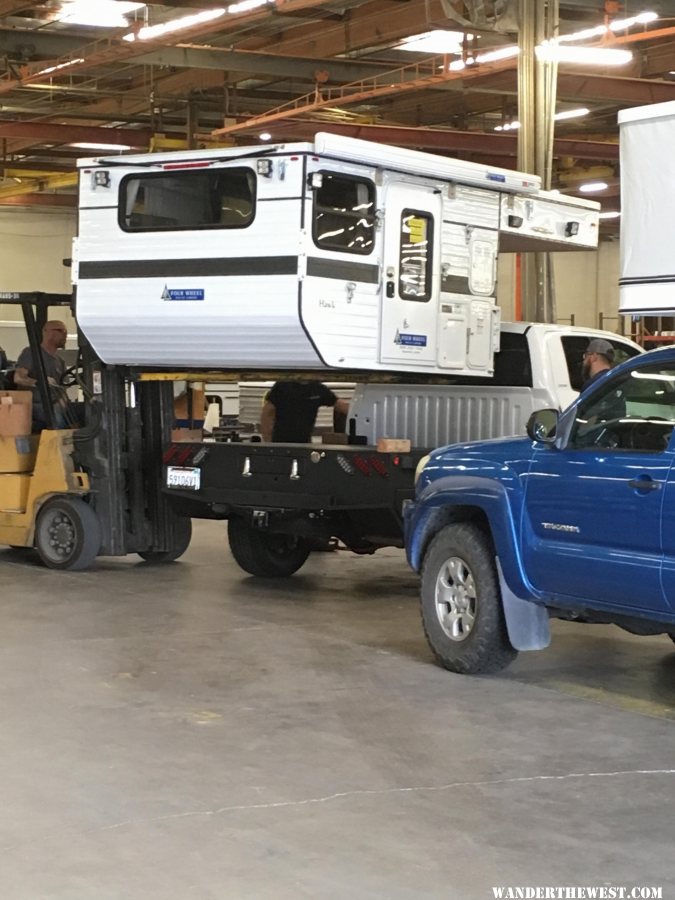
The Tundra is a 1/2 ton truck. Put a decent amount of options on it, two people, a full tank of fuel and a small bag of apples and you are pretty much over GVWR. That having been said, any camper on a 1/2 ton truck will push the GVWR in a New York minute (they tell me that is real fast). But, I believe you can properly build this vehicle platform to support a flat bed Hawk. This particular Tundra has been carrying a well appointed slide in Hawk for two years and 28,000 miles. It has performed flawlessly and has taken me to some very remote locations.
The vehicle was built with Load Range E rated tires, Firestone Ride Rite Airbags, a TRD sway bar and a custom spring pack built by Deaver Springs in the L.A. area. You can read about it here. http://www.wanderthe...per#entry139286
The flat bed Hawk is around 300 lbs more weight than the slide in and it does shift more of the weight to the rear wheels and off of the front wheels (not sure why just yet). It is carrying the load much differently than it carried the slide in Hawk. I will get it dialed in soon and most likely will be visiting Deaver once again to tweak the spring pack so that it supports the load properly. My goal is to utilize the air bags strictly for balancing the load and not supporting it. I like it when I can run with no more than 15 psi in the bags.
I will post an update to my truck build post when I get it all figured out.
Edited by CamperCamper, 03 November 2017 - 02:26 AM.
#18
CamperCamper
-
- Members
- 122 posts
Senior Member
Posted 06 June 2017 - 12:51 AM
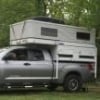
Last Wednesday was the day that I have been patiently (yeah right) waiting for since January. I visited the factory in Woodland and the folks in the shop did a great job getting the new camper mounted to the flat bed. Then I spent the next 4 days getting familiar with how it all worked and figuring out where to put all of my gear. Way too much time was spent in the parking lots at Target and Bed Bath & Beyond for my tastes. But, I now have all of my gear stowed away and the camper is now back at the builder's shop (Precision Welding) for some final tweaks. Once I get it back, I can get weighed and finish up with the suspension mods. I am planning a fall trip to Canyon de Chelly and Albuquerque with some long week ends at the coast before that this summer.

Edited by CamperCamper, 06 June 2017 - 12:58 AM.
#19
nikonron
-

- Members
- 576 posts
Senior Member
- Locationowensboro,ky
Posted 06 June 2017 - 01:11 AM
Wish Toyota would build a 3/4 ton Tundra, don't know why they don't. Looks good! Ron
#20
fireball
-
- Members
- 222 posts
Senior Member
- Locationcentral PA
Posted 12 June 2017 - 02:39 AM
Thanks for documenting your build!


Also tagged with one or more of these keywords: Flat Bed, Flatbed


0 user(s) are reading this topic
0 members, 0 guests, 0 anonymous users

