Jump to content


Photo
- - - - -

Four Wheel Blazer Pop-up, Finally found one

K5 Blazer 4wc 4wheel FWC pop-up camper crawlabago

  • Please log in to reply
268 replies to this topic

#21 Zoomad

Zoomad

    Senior Member

  • Members
  • 289 posts
  • LocationColorado

Posted 10 September 2017 - 06:55 PM

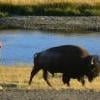
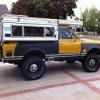
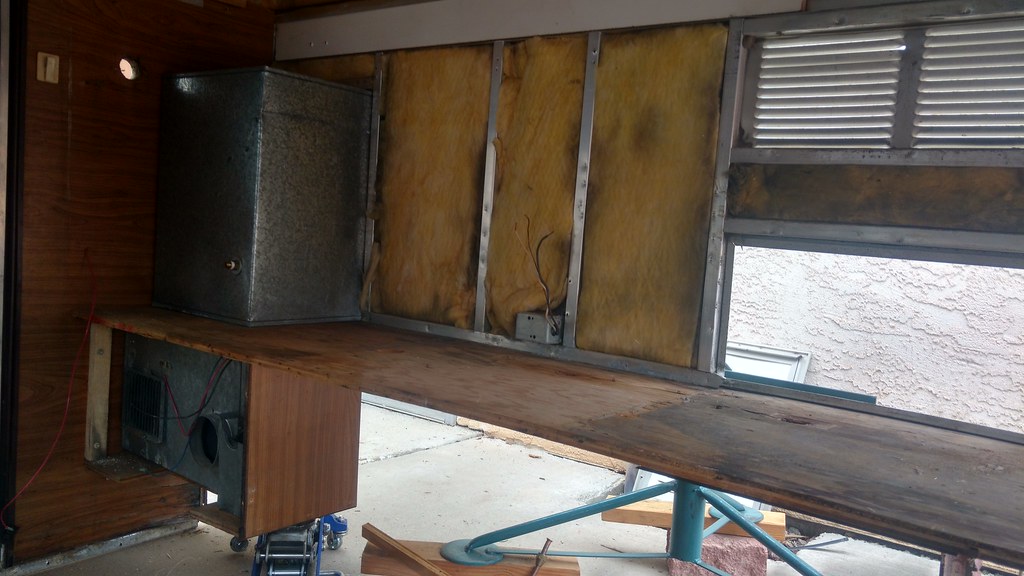
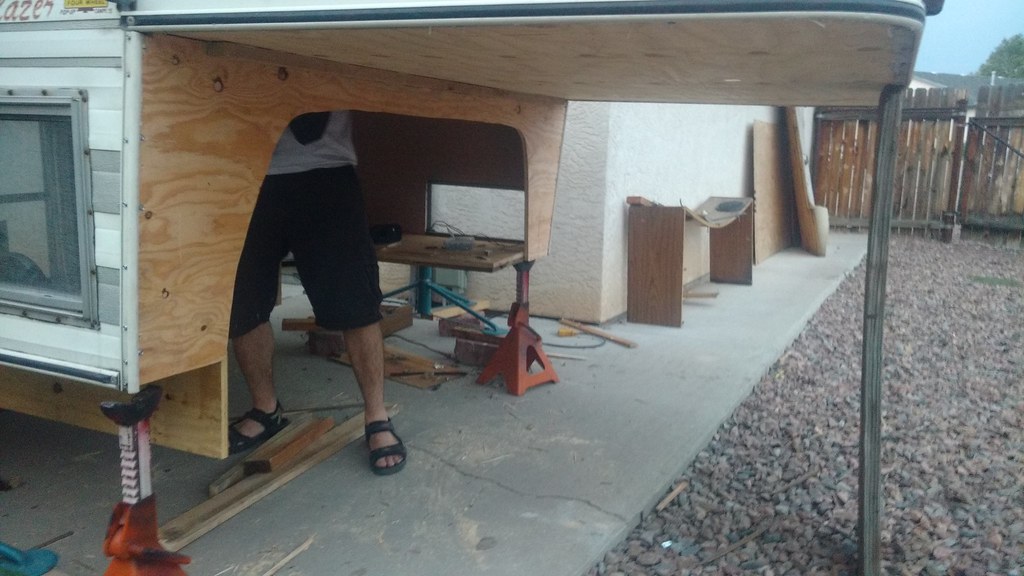
Ok people here's a quick update of our progress on the Blazer FWC.   My buddies and I have spent 3 different weekends on teardown and the beginning of the reassembly process.  Word to those squeamish.  We tore this thing up.  


Here's the two worst parts of the camper.  Coincidentally, they are the only parts in the structure FWC used particleboard on.  


36684659802_0f37d18e70_b.jpg
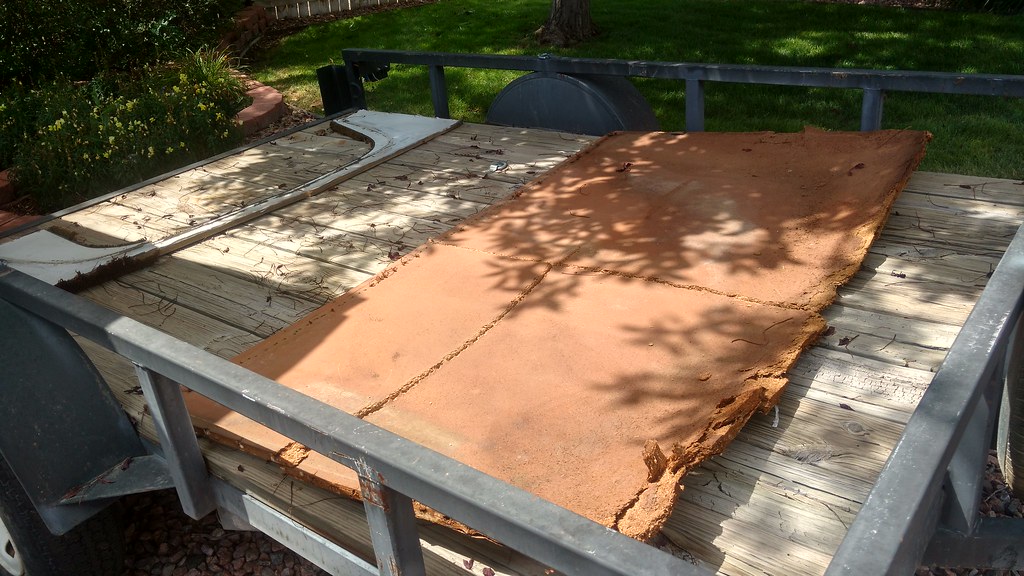
IMG_20170826_135322625_HDR by Rob Zulian, on Flickr


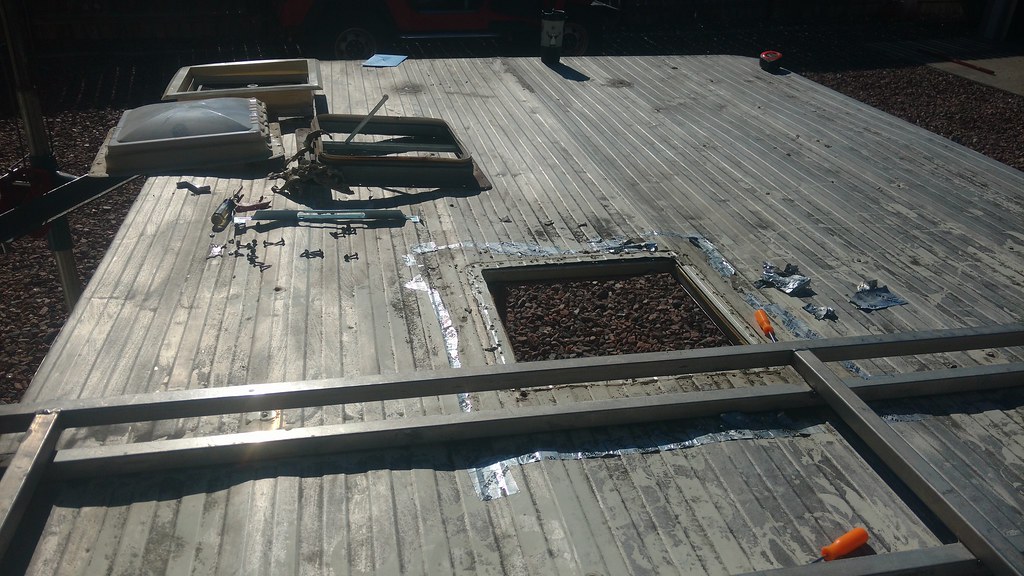
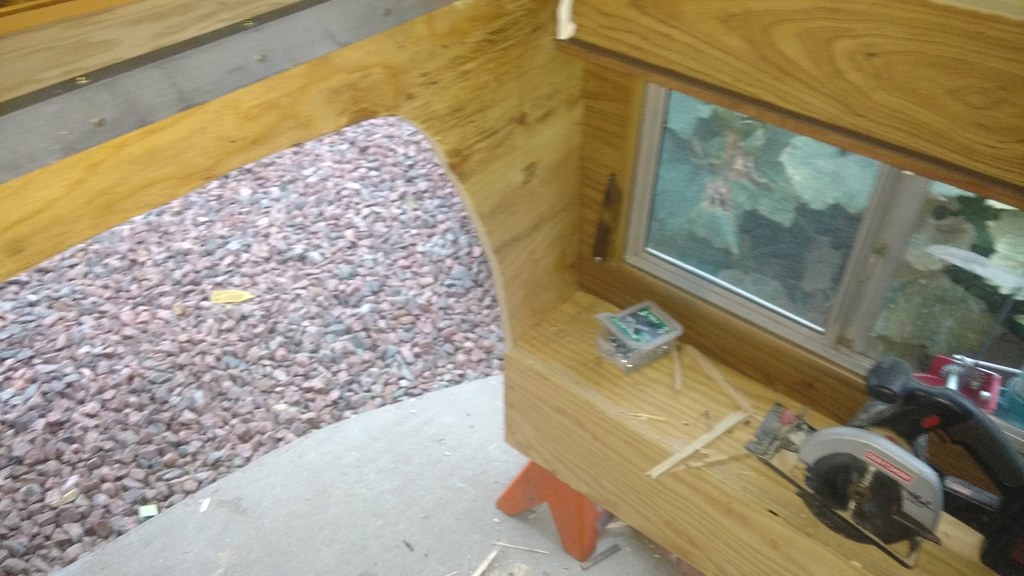
Teardown in progress.   

36855638515_0077d9ab5e_b.jpgIMG_20170826_135341609 by Rob Zulian, on Flickr
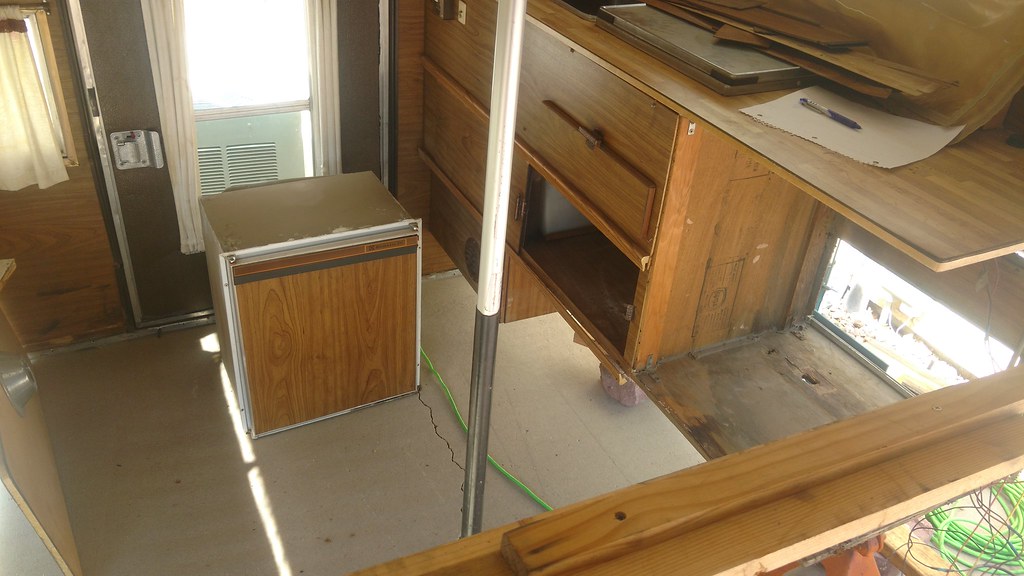
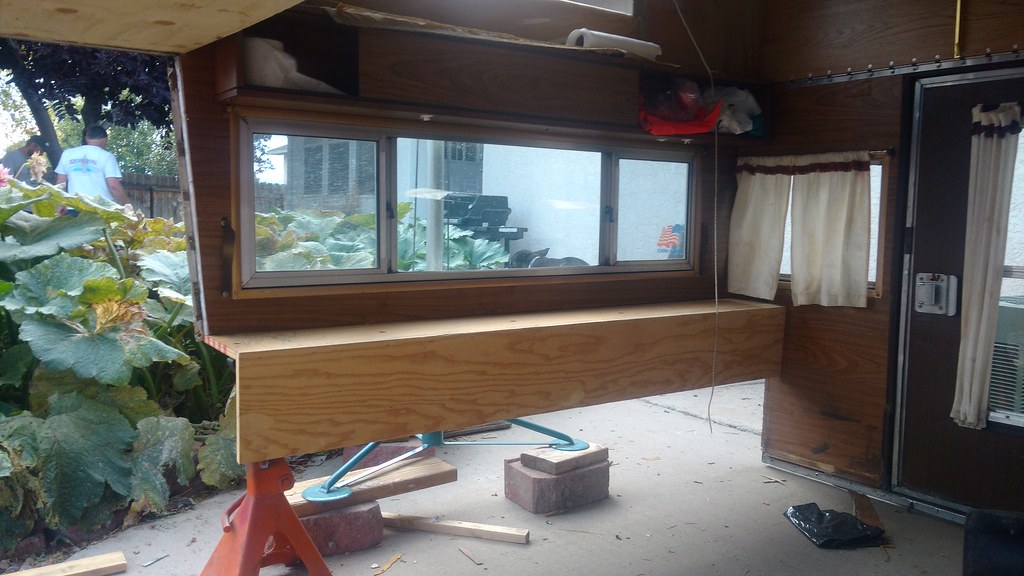
 

Wide open.  

36021147984_37b24b6bca_b.jpgIMG_20170826_135353249_HDR by Rob Zulian, on Flickr
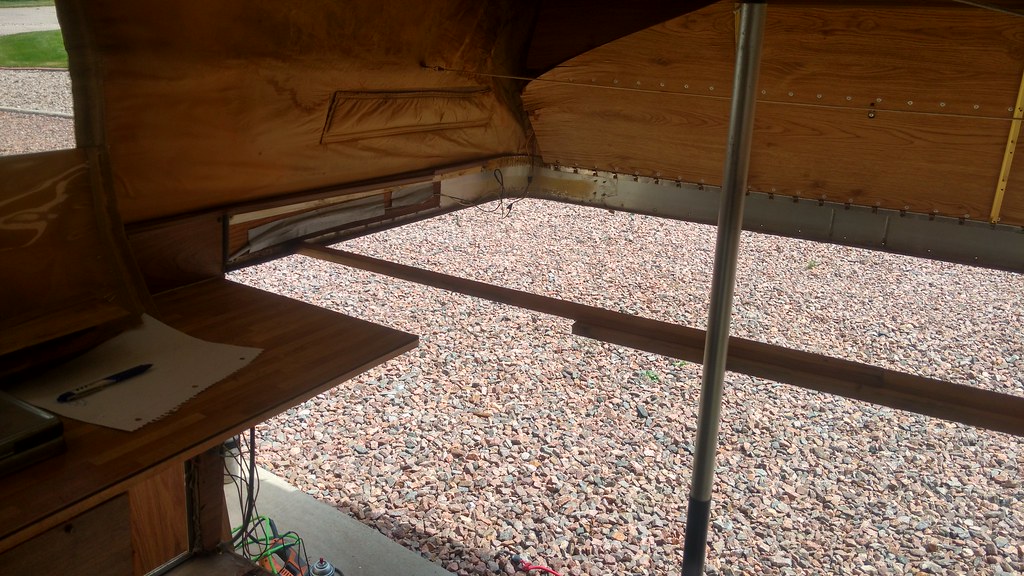
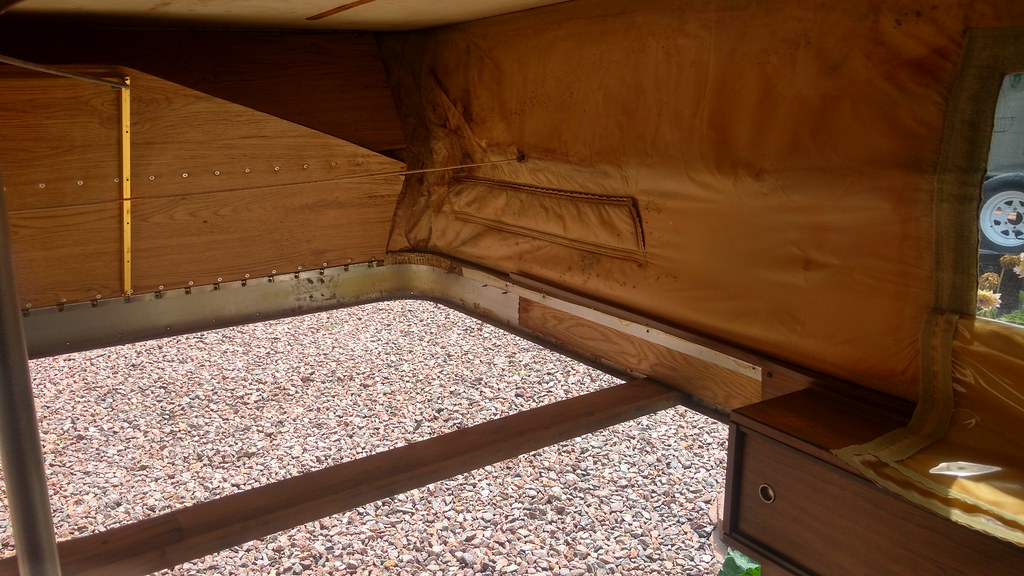
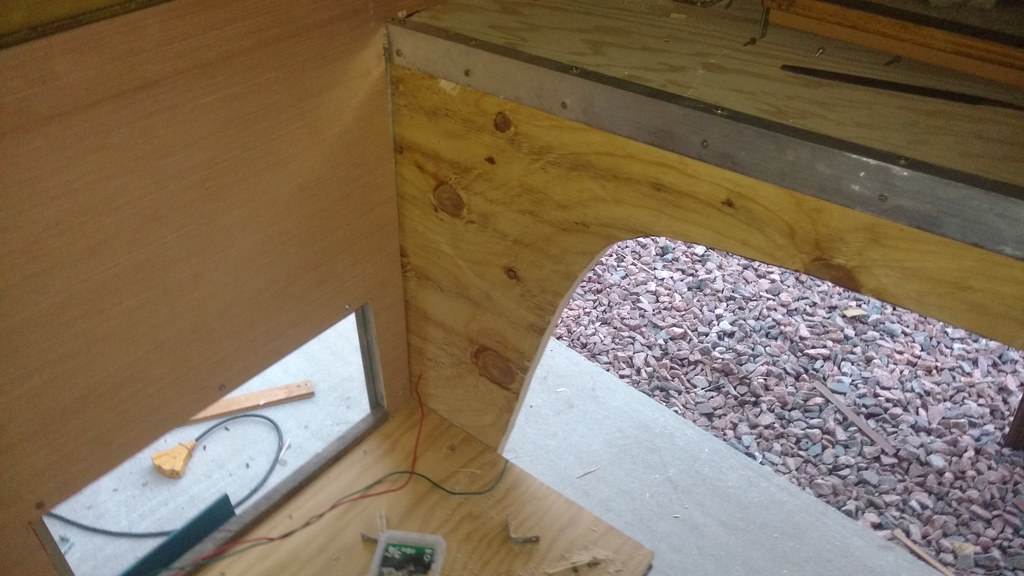


Other side.

36684653382_feabb7c984_b.jpgIMG_20170826_135357066_HDR by Rob Zulian, on Flickr


Fridge area.

36855632555_e04791c9e2_b.jpgIMG_20170826_135401086_HDR by Rob Zulian, on Flickr


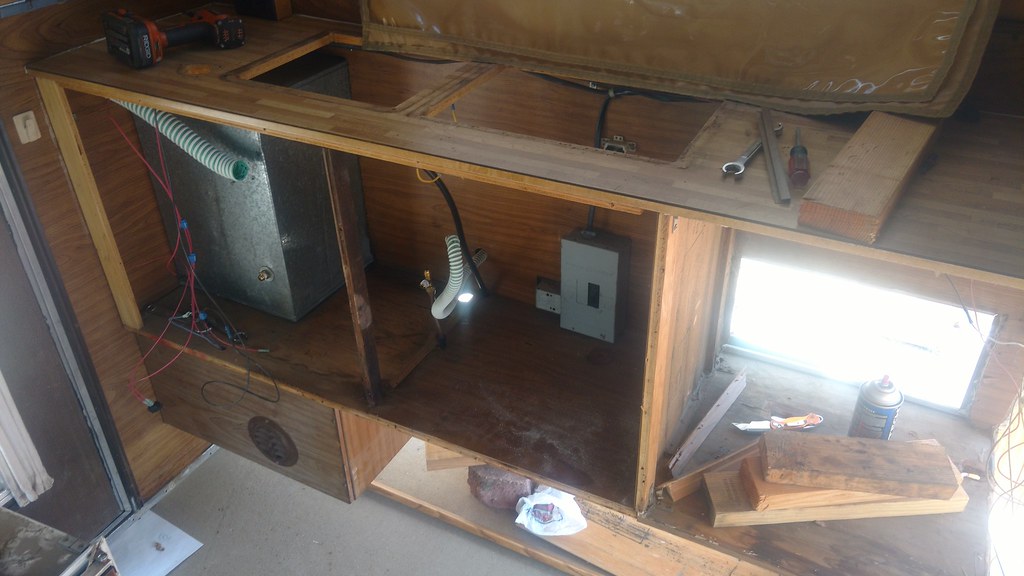
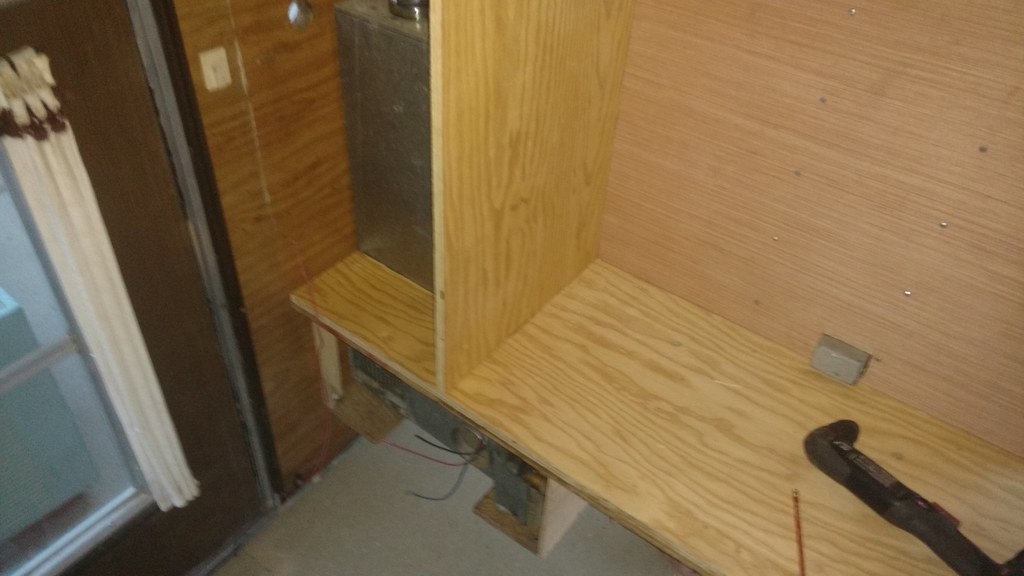
At this point a stage of "might as well" set in.  After brainstorming, knowing my intended use and what I want in here we decided to gut the cabinet.   Sink, water tank and stove got pulled.  My rear bumper setup will include room to carry 4 Scepter cans (2 fuel, 2 water) so carrying water inside is not a priority.  This also kills the required maintenance of Winterizing the water system and gains valuable storage space. The stove isn't a necessity inside for me.  When camping I'm more inclined to cook outside.   I'll have a camp stove to use outside that will tie into the camper's onboard propane tank for the furnace.  The goal here is freeing up space for a modern 12v chest fridge and allow my driver's seat to go fully back and recline for my driving comfort.  

36021140644_0d9cc56c49_b.jpgIMG_20170827_122533857 by Rob Zulian, on Flickr


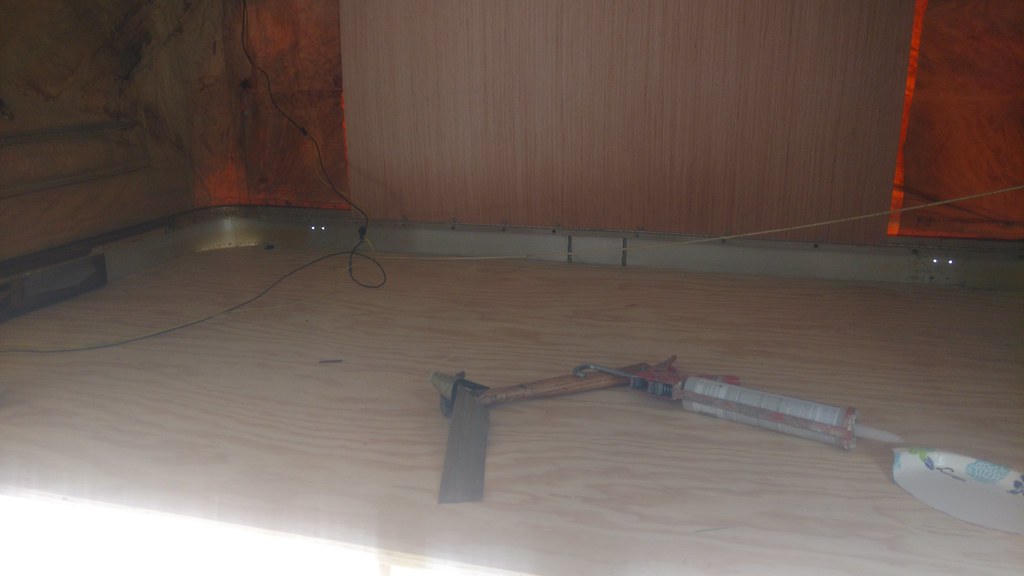
The Cab-over floor has been replaced here.  We doubled up 5/8" and 1/2". Overall thickness is just a 1/16th of an inch more than the original floor.  They were joined with PL400 and zinc plated flush mount screws.  We also had to repair/replace the forward lift panel and you can see we went with a different setup than stock.  We had perfectly replicated the stock panels, cleaned up the hinges, but when we went to rivet the parts together we discovered the FWC rivets are a flush mount/thin design that I couldn't find that day.  This is just a single panel hinged at the bottom as a proof of concept.   This will probably change.  

36684647792_115285033c_b.jpgIMG_20170827_122542713 by Rob Zulian, on Flickr


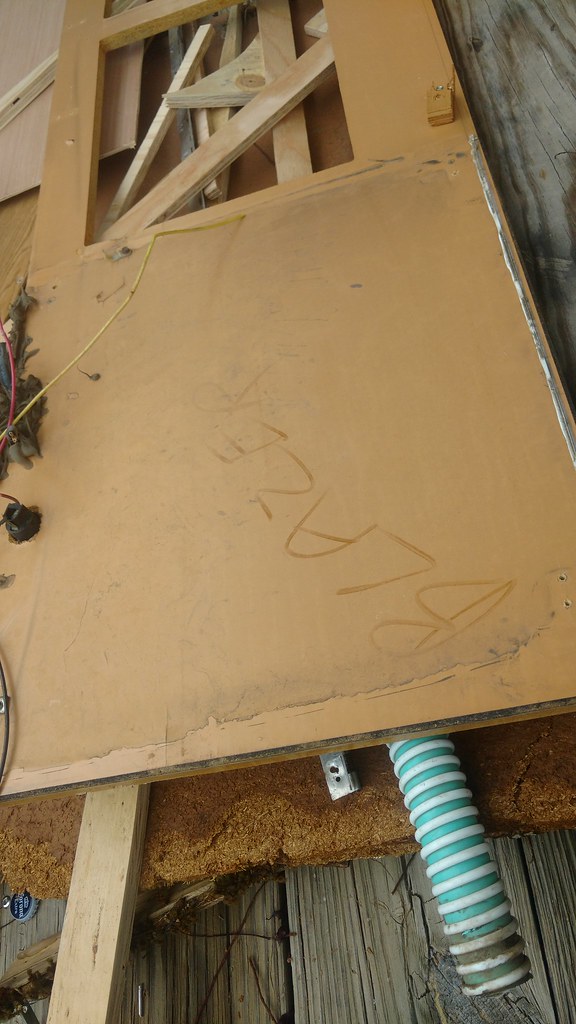
We did find some factory ID marks on the bottom of the countertop in our teardown..

36459226470_a114e6015f_b.jpgIMG_20170827_153850750 by Rob Zulian, on Flickr


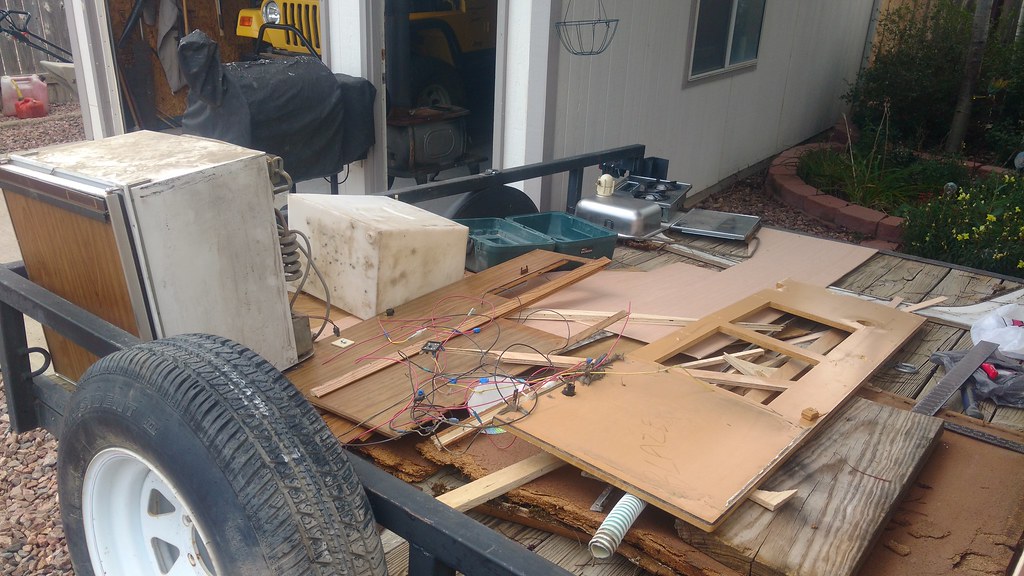
Some of the distruction.

36459224780_8122219303_b.jpgIMG_20170827_153854990 by Rob Zulian, on Flickr


Clean slate.  

36684631872_5faf8f36dc_b.jpgIMG_20170827_154418120_HDR by Rob Zulian, on Flickr


Rebuilding begins.  

36459217180_bcdcc14d6e_b.jpgIMG_20170827_162619748 by Rob Zulian, on Flickr


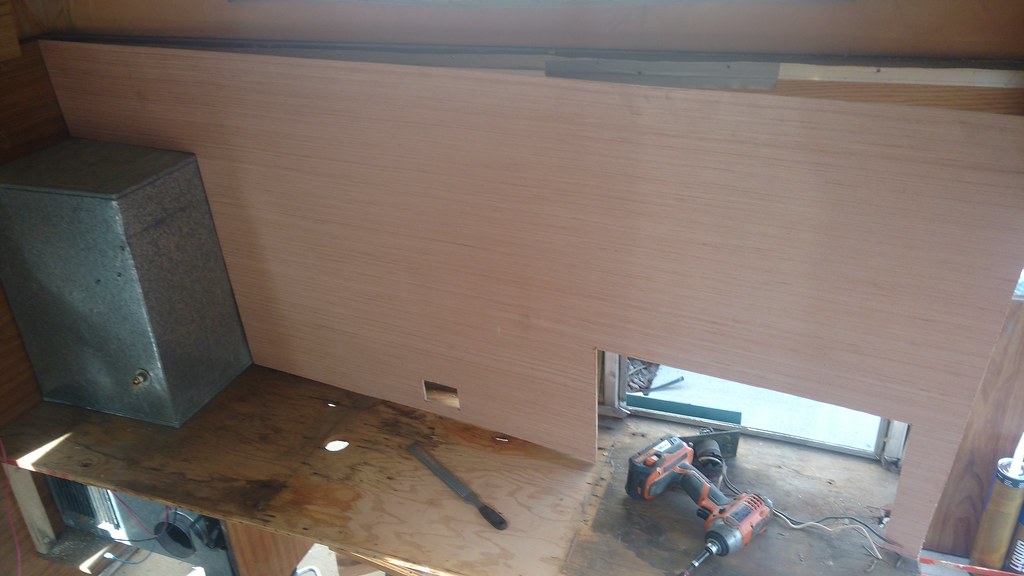
Passenger side wood was completely replaced.  

36737188210_09bc39a360_b.jpgIMG_20170909_172350175 by Rob Zulian, on Flickr


Rather than replacing the driver's side we doubled up and tied it into the wall. 

36945828416_684741ccee_b.jpgIMG_20170909_172354905 by Rob Zulian, on Flickr


Front cab wall installed.  We added an oak block to gusset the joint between the cab-over floor and front wall.  This tied the sides together and really brought the rigdity back to the structure.   It's solid now.  

36963520302_3b0785dede_b.jpgIMG_20170909_191516905 by Rob Zulian, on Flickr


From the inside. 

36737185390_76c99cbafb_b.jpgIMG_20170909_191559917 by Rob Zulian, on Flickr


Passenger front corner.  We will be adding oak blocking to gusset the horizontile and vertical corners here.  

36737183100_978c5585b0_b.jpgIMG_20170909_191608145 by Rob Zulian, on Flickr


Drivers side front corner.  This area is altered from stock.  The front cab wall in stock form had a smaller asymetric opening that went all the way to the inside edge of the cabinet floor.  Problem for me is it blocks the seat back from reclining to a comfortable angle for me with the seat all the way back.  So we cut the opening to match the other side the corner of the floor might have to come out, but we need to get the camper back in the truck to know for sure.  Really the vertical wall was the biggest issue.  We'll see when it's back on the truck.

36963516842_f902528f20_b.jpgIMG_20170909_191613533 by Rob Zulian, on Flickr


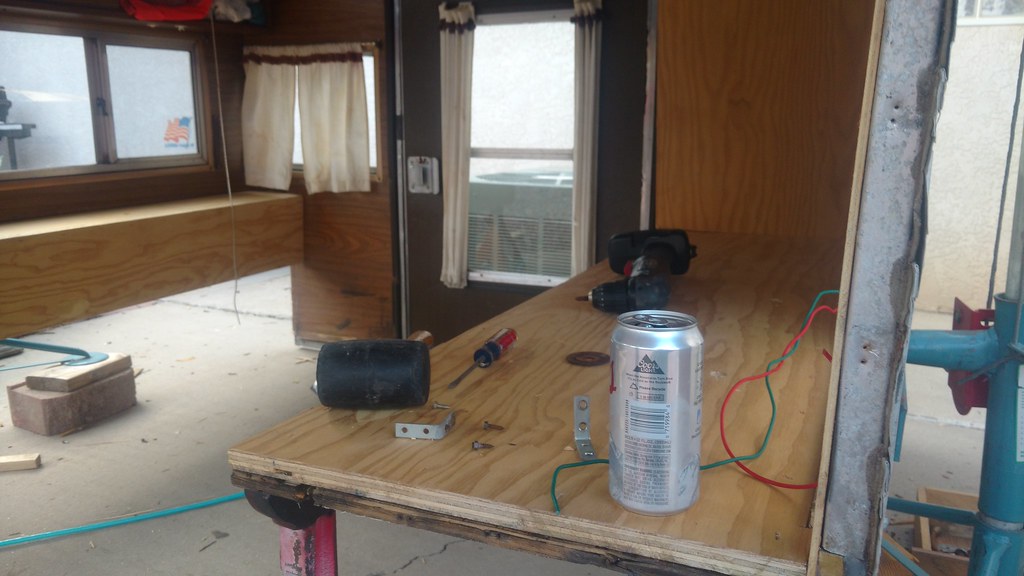
Beginning of the cabinet.  

36945825026_3da230f3ff_b.jpgIMG_20170909_191620794 by Rob Zulian, on Flickr


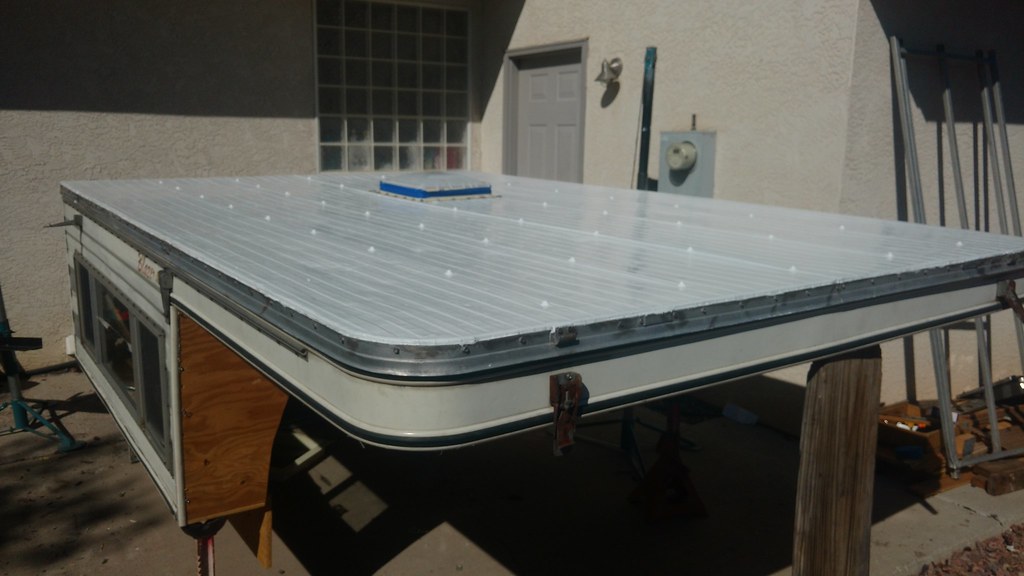
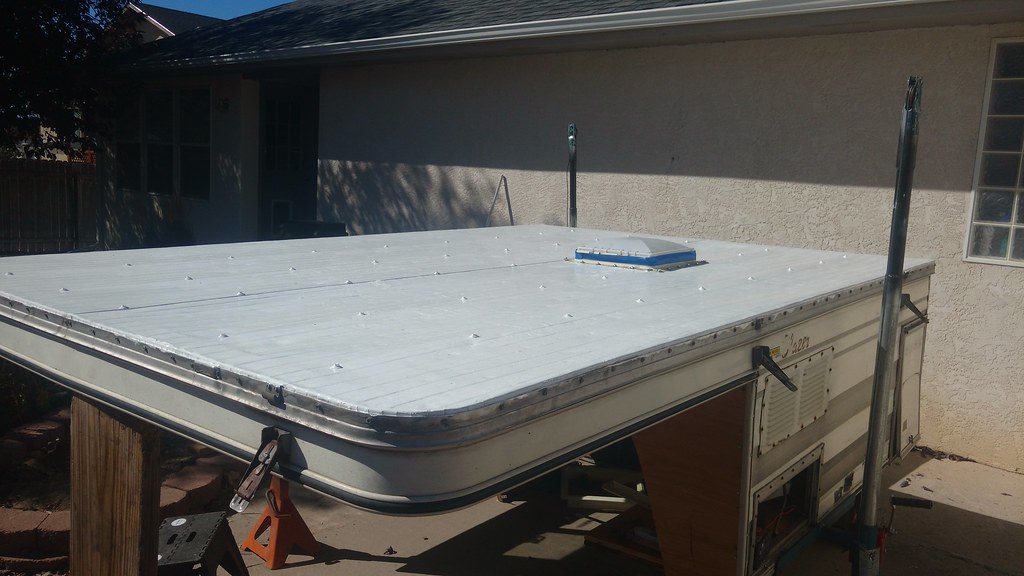
We got a lot done so far.  Still need to stain and seal the wood.  Need to fix the roof, reseal and install the new roof vent.  


  • 0

#22 Wandering Sagebrush

Wandering Sagebrush

    Free Range Human

  • Site Team
  • 10,576 posts
  • LocationNortheast Oregon

Posted 10 September 2017 - 07:48 PM

Wow, that's coming along nicely!!
  • 0

I am haunted by waters


#23 takesiteasy

takesiteasy

    Senior Member

  • Members
  • 2,588 posts
  • LocationMinnesota

Posted 11 September 2017 - 01:41 PM

Quite the project! Thanks for posting your report- it is fun to follow along.


  • 0
2011 Tacoma AC TRD
ATC Custom Shell

travelswithrockythedog.blogspot.com

#24 Casa Escarlata Robles Too

Casa Escarlata Robles Too

    C'est la vie

  • Site Team
  • 9,287 posts
  • Locationmonterey bay area

Posted 11 September 2017 - 08:09 PM

Looks like it's coming along.

That's a big project.

Thanks for the up date.

Frank


  • 0

2002 Tundra AC TRD 4WD Limited 2009 ATC Bobcat loaded http://sharychic.blogspot.com/


#25 Old Iron

Old Iron

    Member

  • Members
  • PipPip
  • 18 posts
  • LocationSanta Ana, CA

Posted 24 October 2017 - 12:04 AM

Zoomad - Welcome to the Four Wheel Camper Blazer club! I've got mine mounted on my 72 Blazer.


I see that you are redoing all of your cabinetry. Would you be willing to sell a piece or two from your demo pile? In particular, I need the cabinet portion that is located under the fridge and to the right of the heater (long, rectangular sliding doors and shelf), if you still have them.


Thanks


  • 0

#26 CougarCouple

CougarCouple

    Senior Member

  • Members
  • 1,376 posts
  • LocationLas Vegas

Posted 24 October 2017 - 02:34 AM

Zoomad
Wow ,looking good there. You should really like the like new camper you and friends breathed life into. Great job.
Russ
  • 0
F250 extended cab, Cougar from ATC. You guys rock thank you!

#27 MattC

MattC

    Advanced Member

  • Members
  • PipPipPip
  • 70 posts

Posted 24 October 2017 - 11:11 AM

Cool stuff

glad to see you rescuing this old school stuff.


  • 0

#28 Zoomad

Zoomad

    Senior Member

  • Members
  • 289 posts
  • LocationColorado

Posted 25 October 2017 - 03:45 AM

Zoomad - Welcome to the Four Wheel Camper Blazer club! I've got mine mounted on my 72 Blazer.


I see that you are redoing all of your cabinetry. Would you be willing to sell a piece or two from your demo pile? In particular, I need the cabinet portion that is located under the fridge and to the right of the heater (long, rectangular sliding doors and shelf), if you still have them.


Thanks

Thanks for the welcome to the FWC Blazer camper club.  I've checked out yours through some detailed searches when I've been researching the subject.  Just a word of warning, ideas might be stolen...LOL.  


I'm not sure what I have left out of the Demo pile.  Next time I'm over there I'll look.  John's got my stuff piled up near the camper.  I'll let you know.  (got the PM)


Zoomad
Wow ,looking good there. You should really like the like new camper you and friends breathed life into. Great job.
Russ

I'm itching to use it.  The last camping/wheeling trip proved it would have been worth it's weight in gold.  Should be fun!


Cool stuff

glad to see you rescuing this old school stuff.

Thanks!   These items are too cool to let fade away.   


We got  a little bit done during our last work session.   Main target was the roof.  Winter is coming and we need this sucker sealed up as it might have snow sitting on it sooner or later.   I had a new to me roof vent a co-worker pulled from a RV he parted out to install.  I picked up some fresh screws in a slightly larger diameter but with rubber/metal washers under the head.  Got some stuff to put on the roof as well.  


Started out removing the busted vent and cleaning up every dollop of silicone somebody put on every stinking bolt in the roof.  We also removed the rack to allow better access to reseal.  We took a wire wheel to peel up/remove the rest of the garbage smeared on in other spots over the rest of the roof.  

37672586606_a080103342_b.jpg


We cleaned/scrubbed the roof and let it dry completely before sealing it up.  Due to it being Sunday and a lack of RV stores locally I picked up a couple of quarts of Flex Seal and a handful of brushes from the local wally world.  The stuff actually covered nicely but it took four of us working feverishly to spread it out and get solid coverage.   As it was, the can said it would cover 37.5 square feet.  My lying ass it would.  One can covered one half of the roof, exactly. Good thing I bought two.  Need to do one more coat at least.  

37672581876_a08b9d5908_b.jpg


37463172200_1ea157b6bf_b.jpg


You'll also see in the above pic the modification made to the camper jacks.  Rather than what I talked about doing before making it adjustable, we just added 12" near the top with some 1/4" wall iron pipe John had laying around.  It worked perfectly and should allow us to lift the camper without the Jenga puzzle to reach the lifted Blazer.  


Also, the plan for using the front of a Blazer top to make the connection between the camper and Blazer more sealed is getting clearer.   Another guy on CK5 that found a killer 77 Blazer with FWC camper on it a few weeks after I found mine has started a discussion with me.  It's interesting to see the minor differences made in a few years between our campers.  His does have bolts attaching the forward wall to the vertical end of the Blazer cab.  A free Blazer fiberglass top was found on Craigslist in Denver (he lives up there) and he went and picked it up for me.  He even chopped off what I didn't need to make it easy to transport.  


img_20171004_173208723-1-jpg.247273


This is still more than I need, but we can whittle it down to only fill the gap between the Blazer roof and the front wall.  It might require a slight recess being cut into the wood of the front cab wall to allow it to fit but at least I'll be able to bolt it in right and use the factory Blazer top seals to seal it up.  The small section of top will be bonded to the front cab wall.  


The end result should be something like this (thanks for the pic K5nutt!)

36430583584_25536446d0_z.jpg


  • 0

#29 ntsqd

ntsqd

    Custom User Title

  • Members
  • 2,881 posts
  • LocationNorth So.CA

Posted 25 October 2017 - 12:14 PM

Cool!


The core of cK5 is a good group, the vigilante's not so much. Spent a lot of time there when I had the Subs.


  • 0
Thom

Where does that road go?

#30 Old Iron

Old Iron

    Member

  • Members
  • PipPip
  • 18 posts
  • LocationSanta Ana, CA

Posted 25 October 2017 - 07:48 PM

Zoomad - Steal away on anything I have done. That is the point of posting up here! Thanks for looking into your scrap pile. Hopefully you find some or all of that piece I need. If not, I would still be interested in whatever scrap wood paneling you have. I have not been able to find matching wood paneling anywhere, and could use your scrap to build more cabinetry that matches the existing. Thanks.


  • 0


Also tagged with one or more of these keywords: K5, Blazer, 4wc, 4wheel, FWC, pop-up, camper, crawlabago

0 user(s) are reading this topic

0 members, 0 guests, 0 anonymous users