Jump to content


Photo
- - - - -

How-To: Late-model Hawk Coversion, Tundra to Ram/Ford/Chevy build


  • Please log in to reply
23 replies to this topic

#1 River_Rat

River_Rat

    Advanced Member

  • Members
  • PipPipPip
  • 66 posts
  • LocationNorthern Idaho

Posted 08 September 2019 - 03:12 AM

I wanted to post up on how I converted my 2018 Hawk (Tundra Build) to fit into my new Ram 3500, but I wasn't sure of the best name for this thread. The "un-tundra" build or something came to mind, but hopefully (if you're here) you have purchased a FWC Hawk from someone who had originally bought it for a Toyota Tundra, but now owns an Ford, Chevy, GMC, or Ram truck. -or- you can pass this along to someone who is in a similar situation as I found myself. I'm not 100% positive on the Titan XD, and some years of the F150 have a slightly taller bed. Be sure to measure, many times...

I've owned several Tundra's over the years; great pickups, and made right here in the USA by fellow Americans, albeit backed by a Japanese owned company on Japanese owned land in San Antonio, TX. (on a old cattle ranch dating back to 1794)

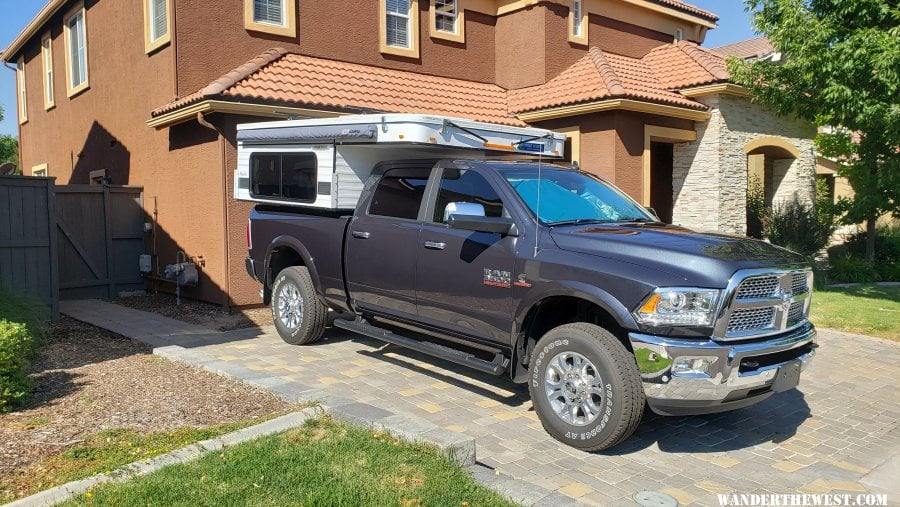
The time came for my wife and I to upgrade to my last pickup before I retire from my current career. so we just bought a leftover 2018 Ram 3500 Crew Cab Short Box, 6.7L Cummins, in Laramie trim level. This included pretty much everything but the adjustable pedals (factory 5th wheel & goose-neck hitch's also included). They were discounting them by about $11,000 since the 2020's where arriving on the lot, and they gave me $22,000 for my 2012 Tundra (and I only paid $29,000 for it in 2013).

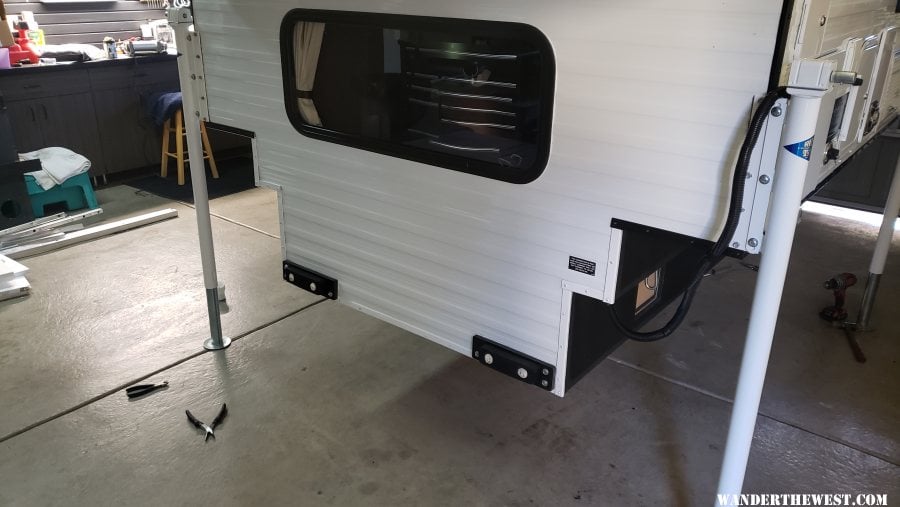
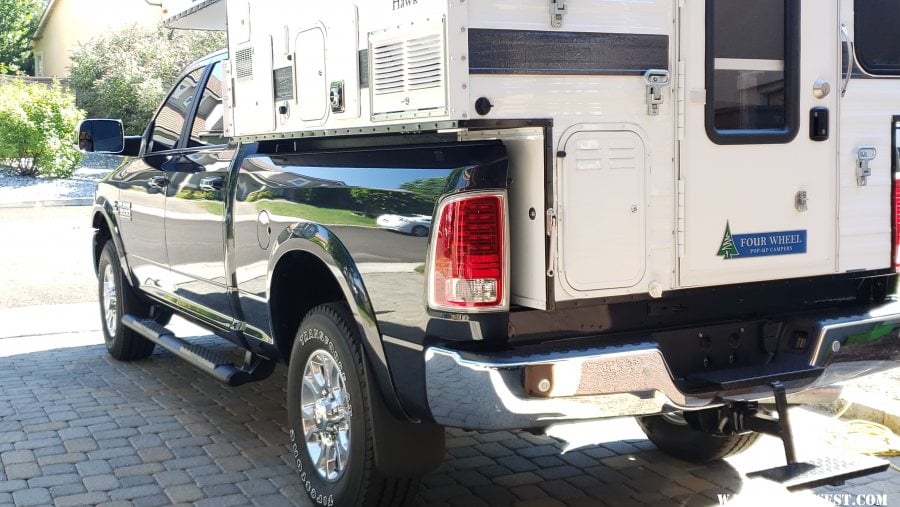
One problem: When I installed the FWC eyebolts and loaded my Hawk it sat way up high in the Ram. The Tundra's have a 23" box and most others are just over 20" sidewall height. The almost 3 inch difference was just too much for me to take, and It looked rather strange and wasn't as aerodynamic as I'd have liked - so I decided to modify it.

After taking a look at things and calling FWC (who was very helpful by the way) I was informed that I could do it myself or bring it into them for a hefty fee.

I wanted to post up here how I did this in hopes that it would help others out who may be in the same situation. If need to clarify anything please post up or contact me and I'll get into more detail for you.

Here's the new Ram:

gallery_7168_1354_3338595.jpg


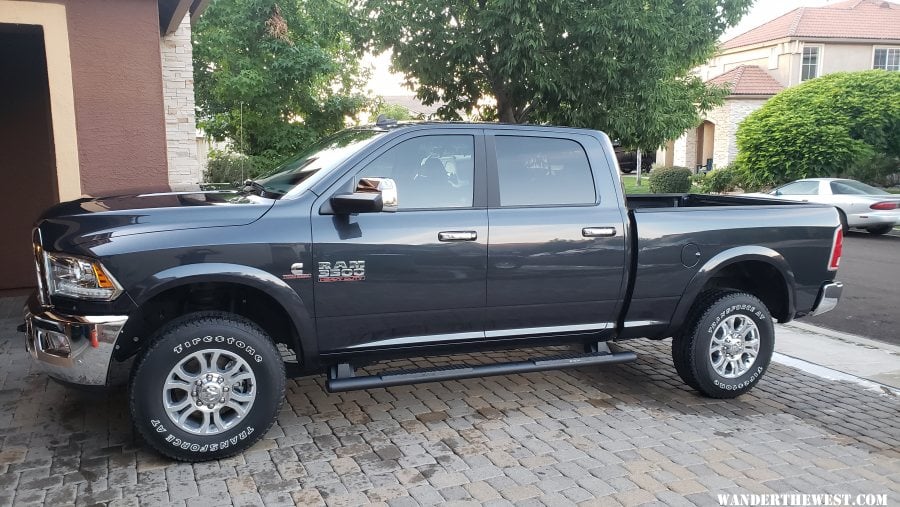
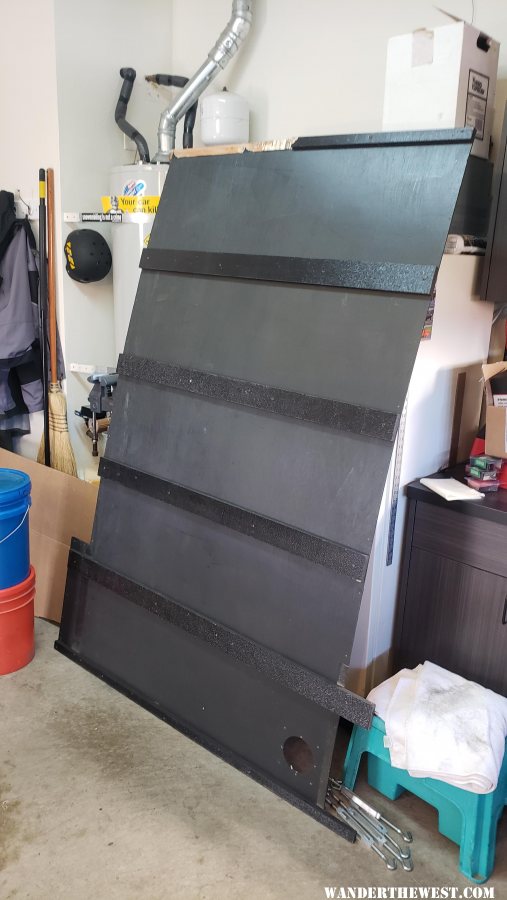
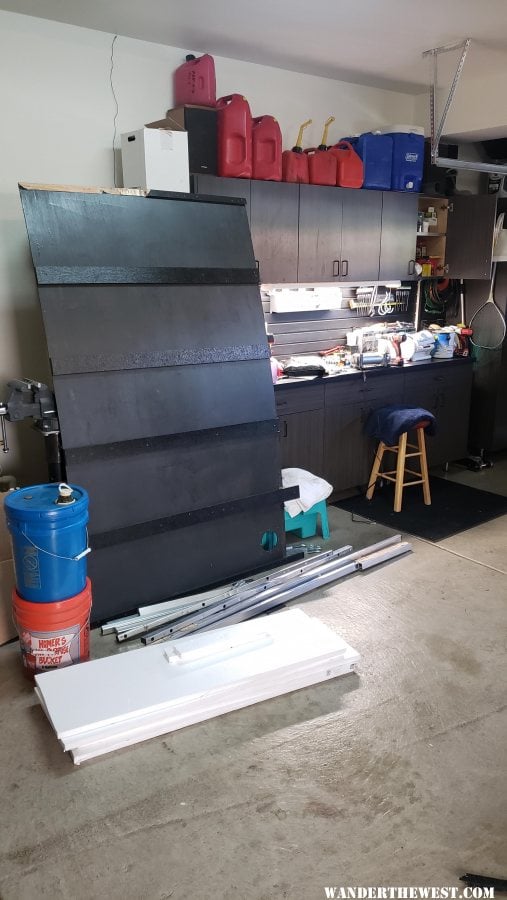
First step I did was to remove it from my roller-pallet and lift it up a bit:

gallery_7168_1354_2787205.jpg

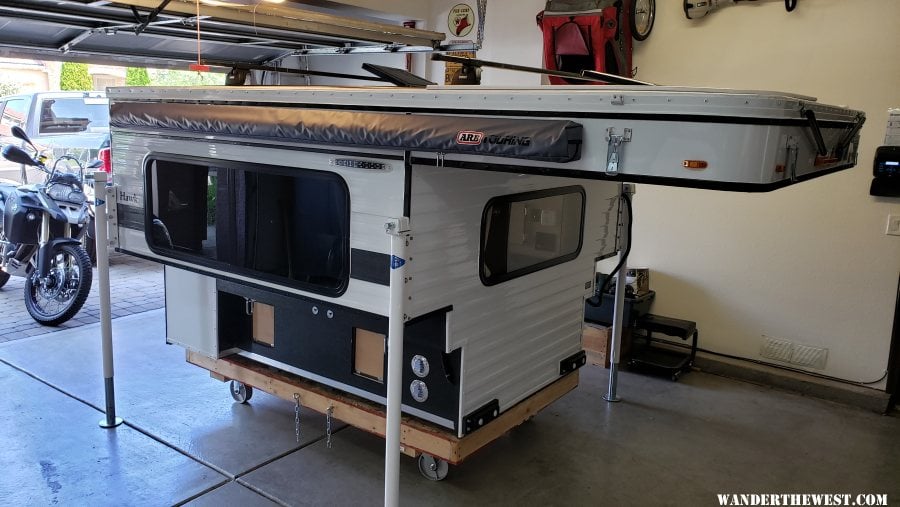
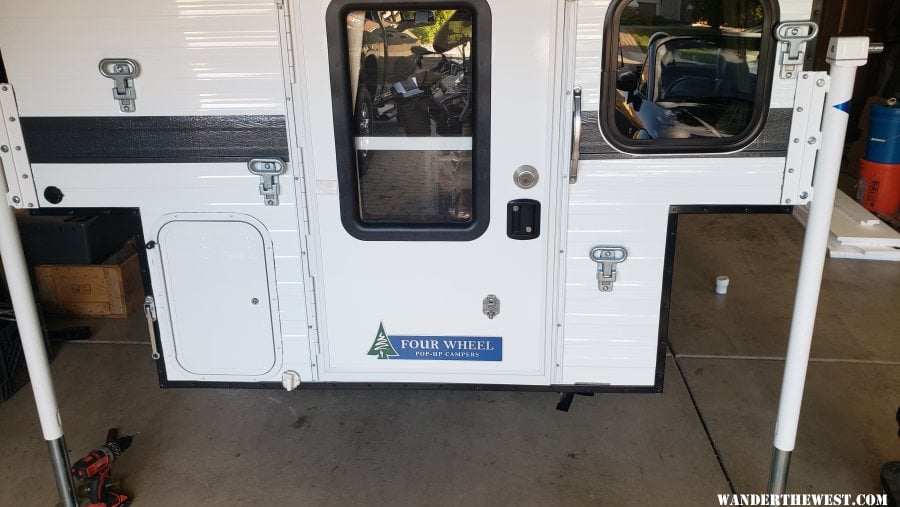
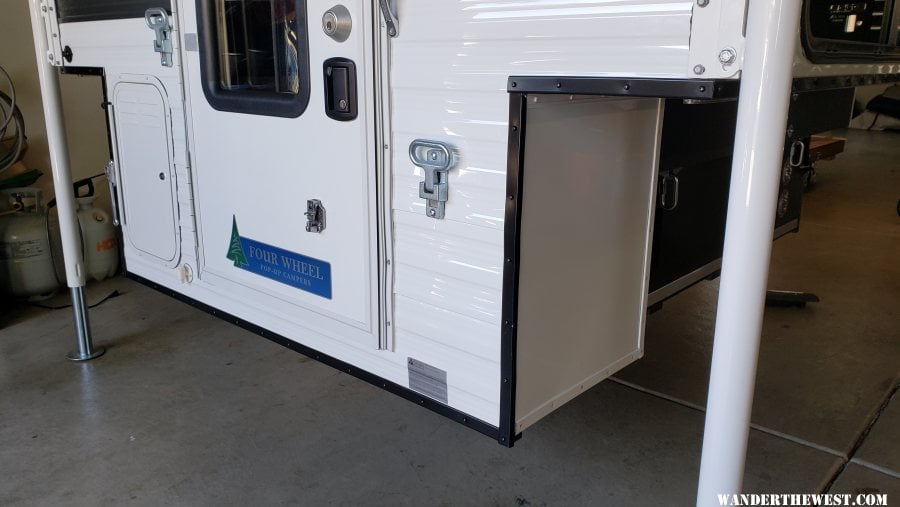
Another photo of removing the camper from my storage box, take note of the aluminum 'pallet' or 'floor pack' near the bottom of the camper that FWC installs onto their standard Hawk when ordering it to fit a Tundra (their Tundra build)

gallery_7168_1354_1463615.jpg


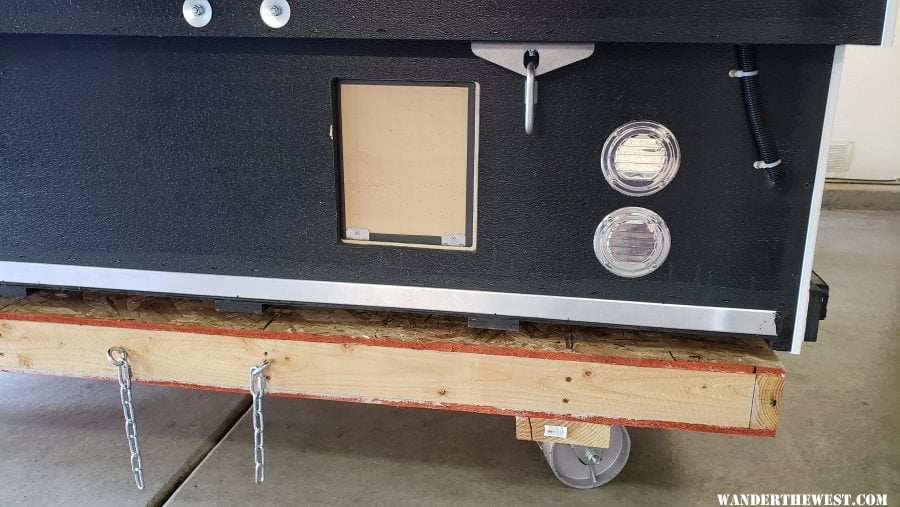
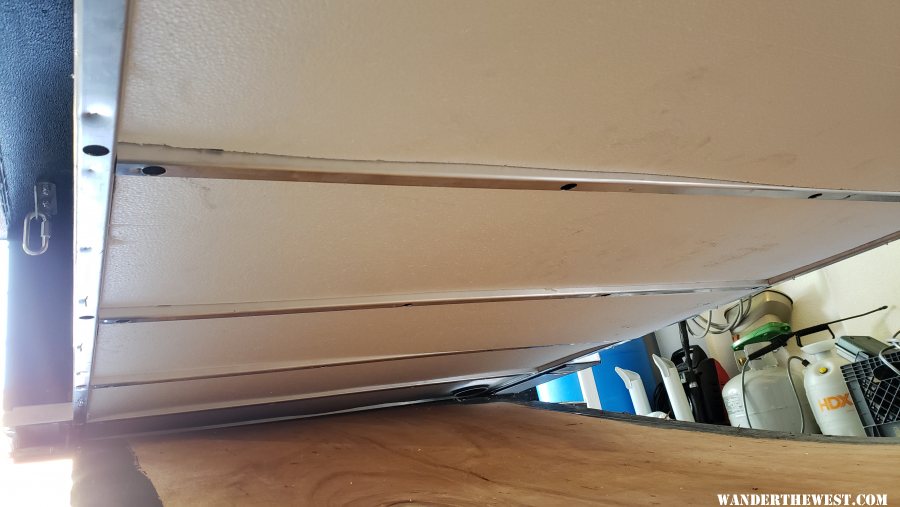
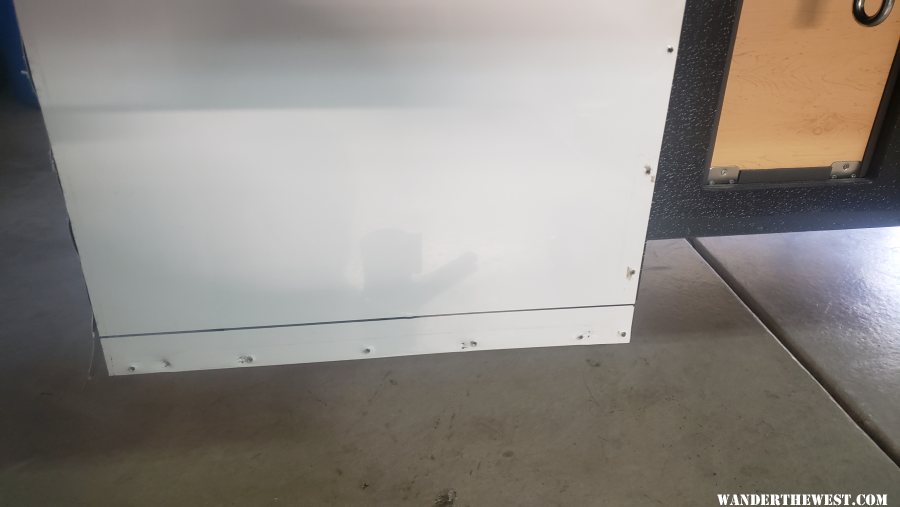
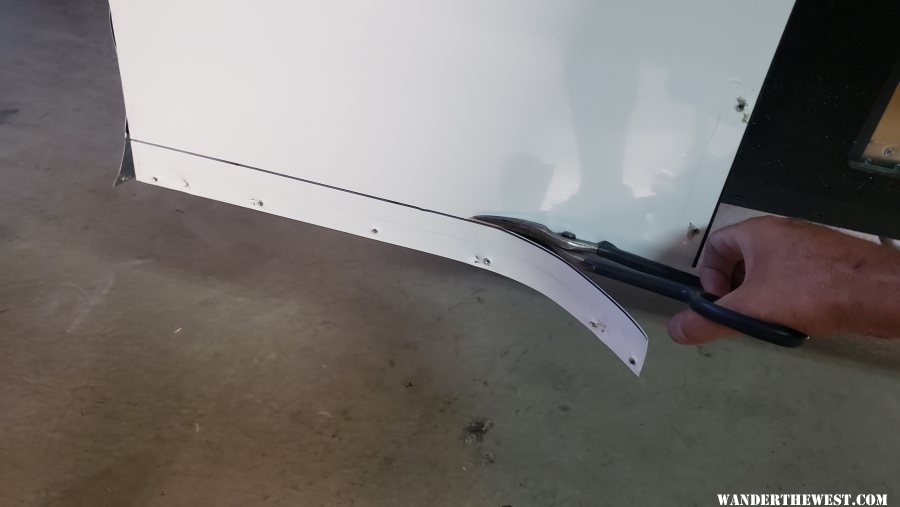
In this photo below, notice the factory VIN sticker near the bottom right. Later on in my thread you'll see that sticker almost disappear due to the shortening of the camper by nearly 3 inches. I'm literally removing that entire bottom below the rear door.

gallery_7168_1354_1035817.jpg

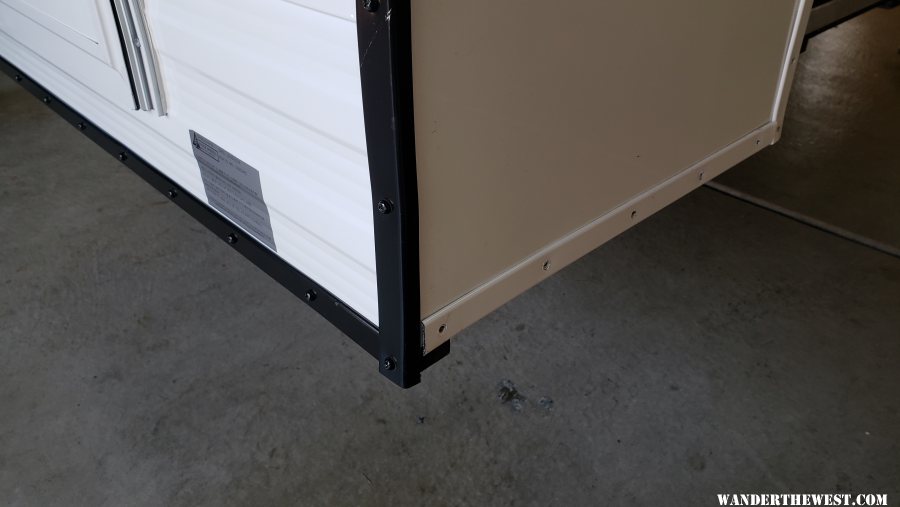
I'm showing this picture below because I used my camper storage box as a staging area to hold all the trim pieces - which had to be laid out so that they can go back onto the camper in the exact same spot so all the holes still line up.

gallery_7168_1354_1030380.jpg

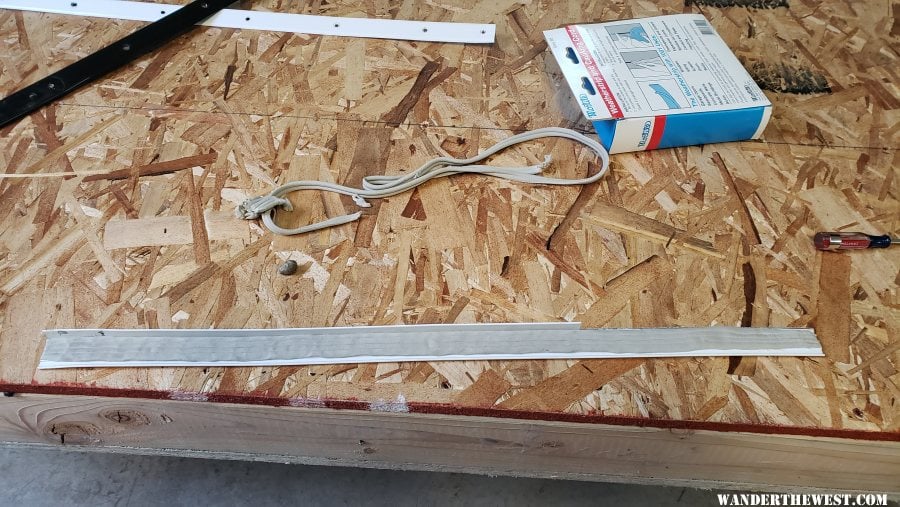
Once the camper is in the air, you have to start removing the front bumpers first.

gallery_7168_1354_494080.jpg

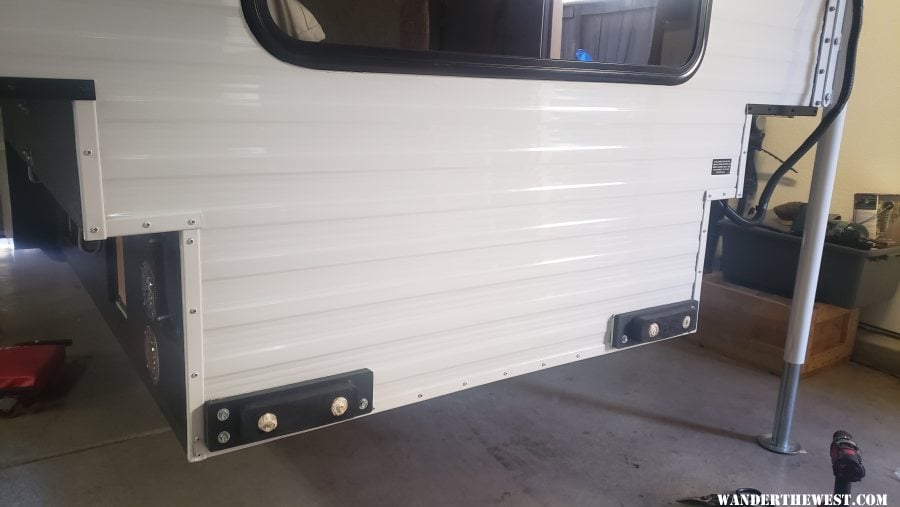
Removing the front bumpers, take note of how they are situated so you can get them in the same spot on the shortened camper.


Notice that I had originally cut my bumpers in half after ordering. This slides the camper forward right up almost against the front wall of your pickup. After measuring the new Ram this will prove to be an excellent option for this new truck as well, and it sits about 1/4" away from the front wall, just like the Tundra

gallery_7168_1354_1946115.jpg

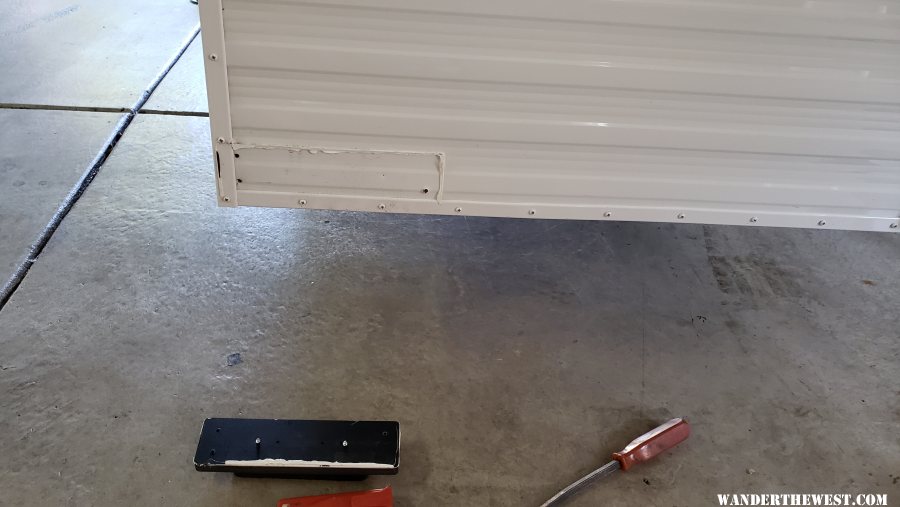
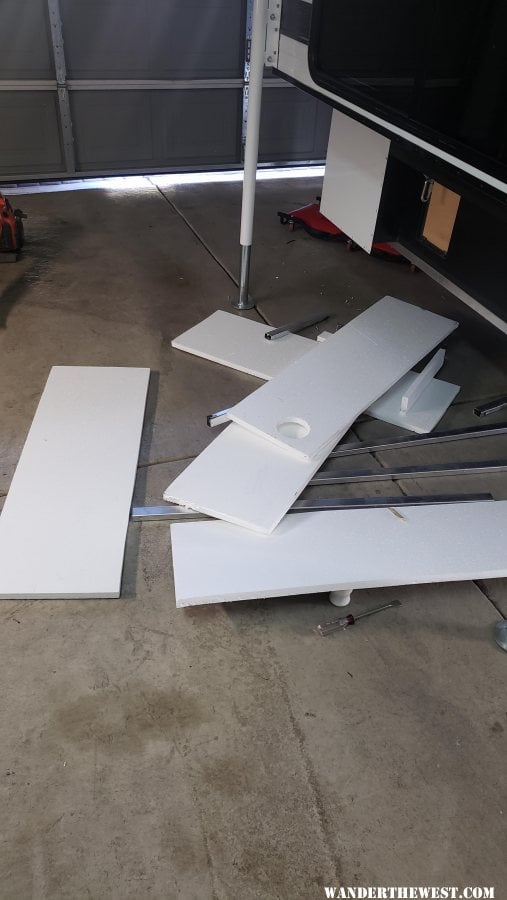
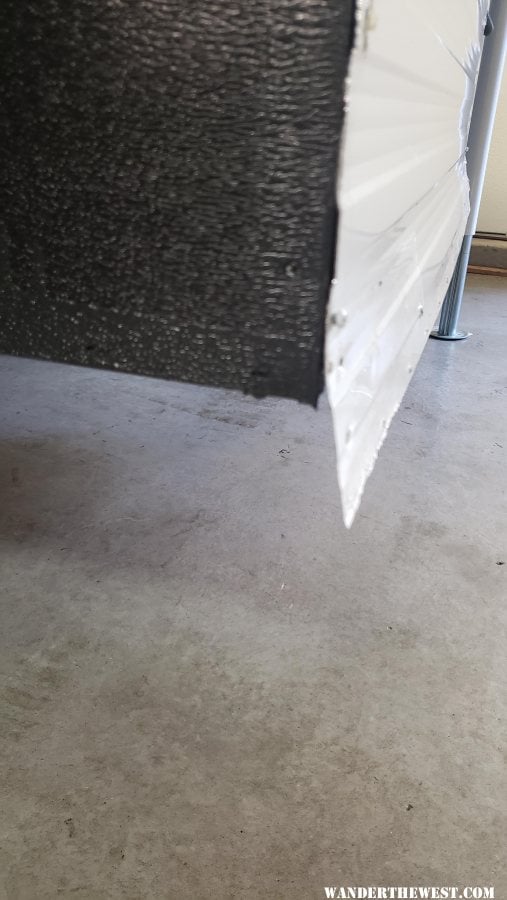
Once the bumpers are unbolted, go ahead and remove all of the trim pieces and take note of where each piece was removed from so you ca re-install later. Notice that in the below picture I've already began pulling the little staples from the tin siding, and separating/pulling the siding from the frame.

gallery_7168_1354_1995934.jpg

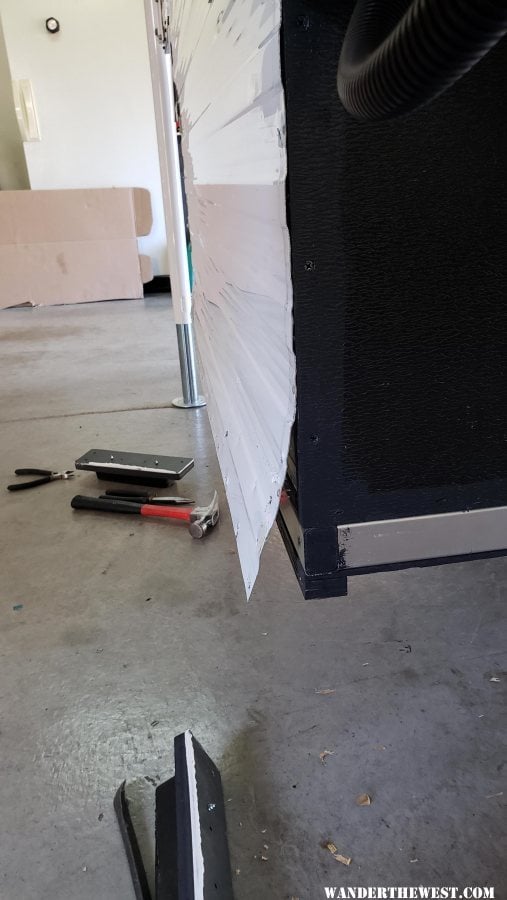
I took photo's of how each piece of siding was mounted, so I knew where it went when I was done. Also, take note of the VIN sticker for later!

gallery_7168_1354_912459.jpg


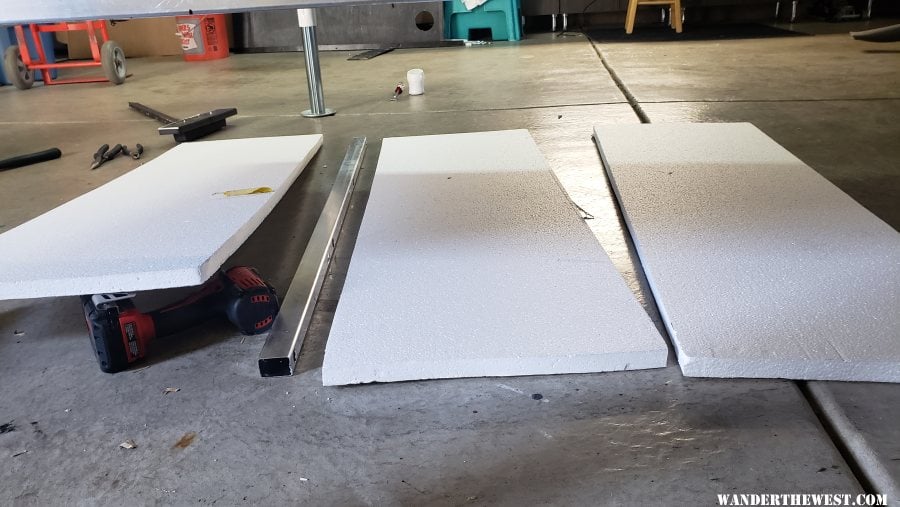
Trim laid out like it was removed:

gallery_7168_1354_1984698.jpg

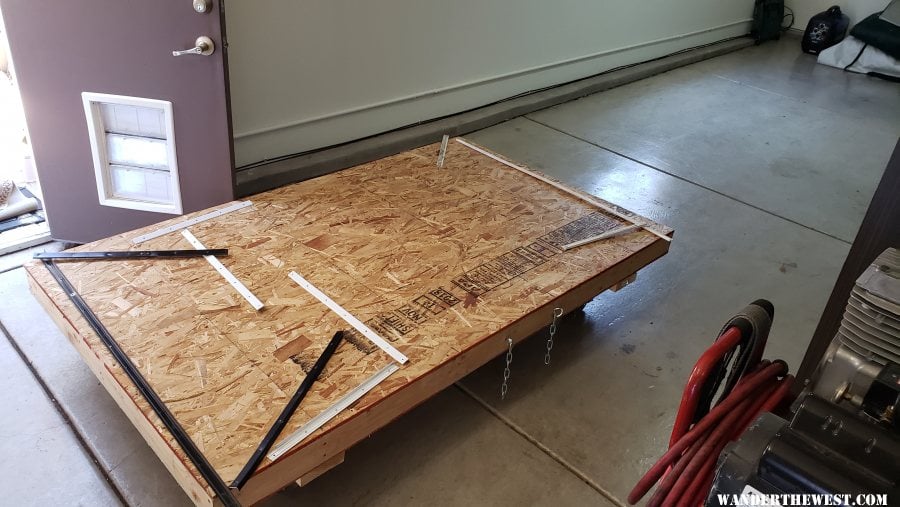
Trim off, siding pulled away:

gallery_7168_1354_886337.jpg

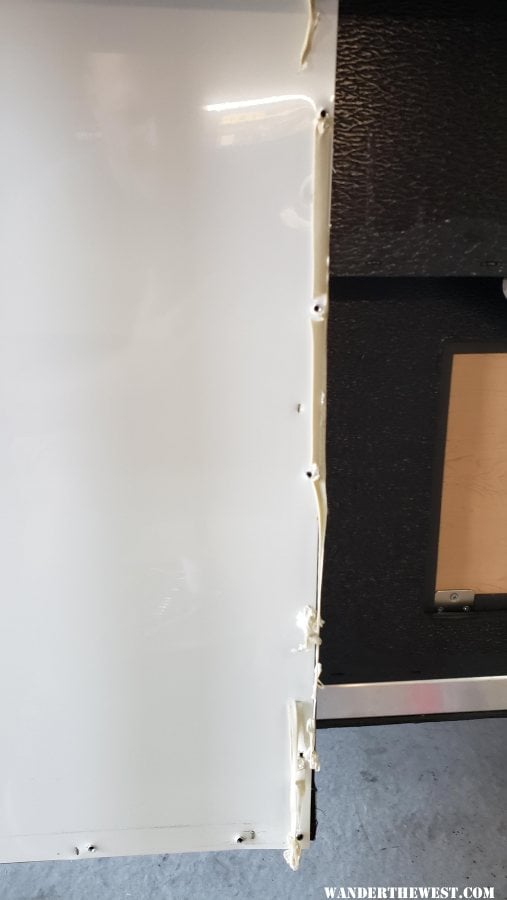
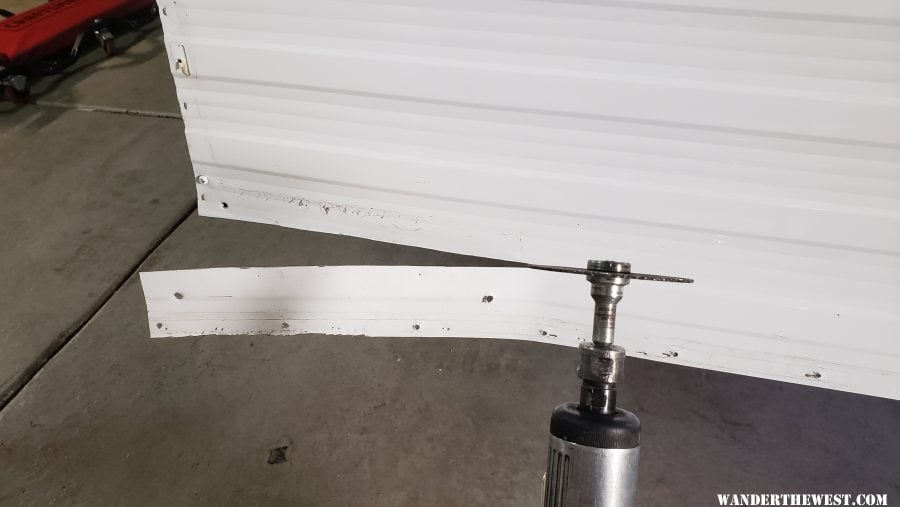
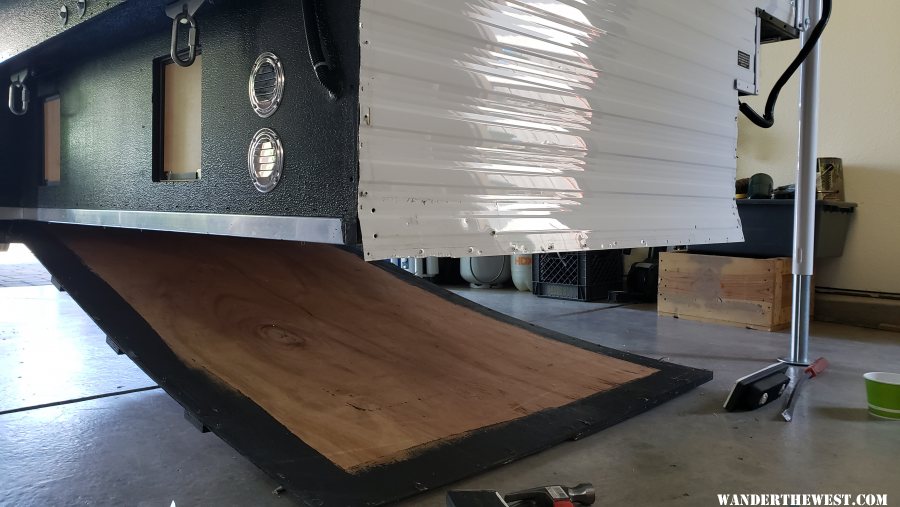
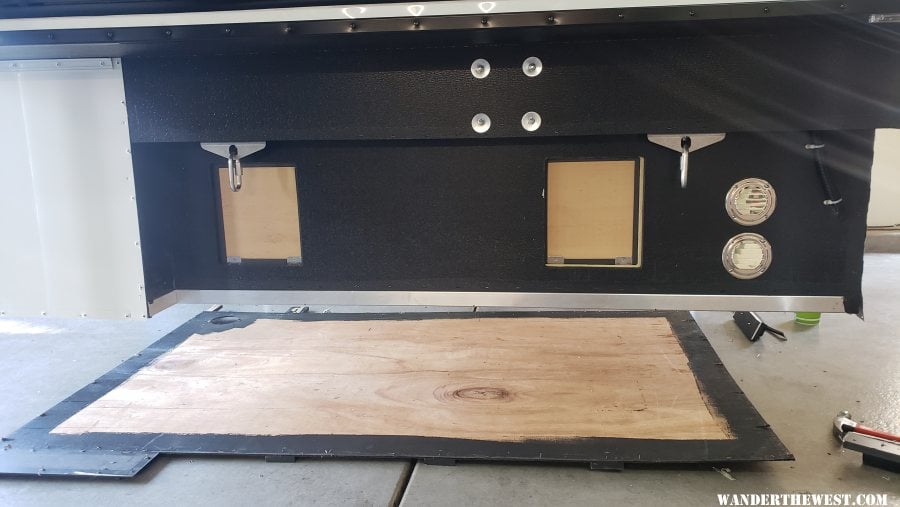
Use hammer and nail puller to pry the staples out of the wood for the bottom plywood:

gallery_7168_1354_2330121.jpg


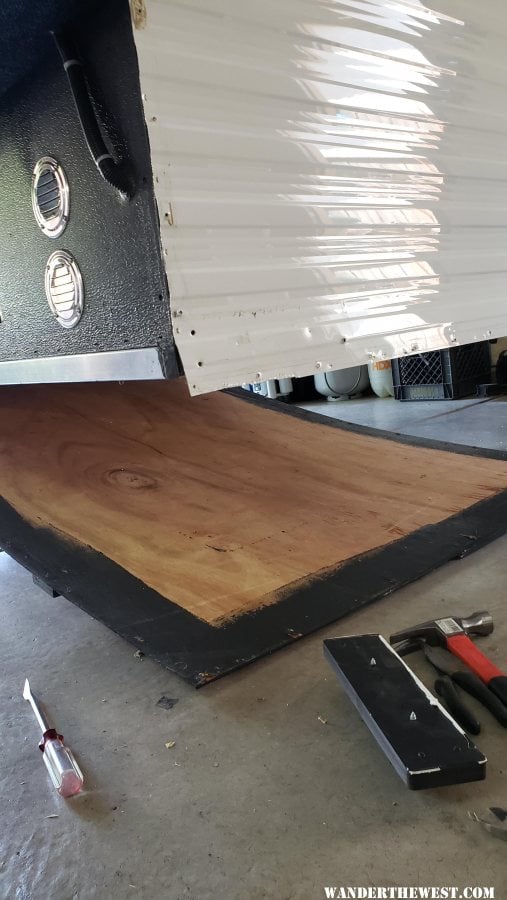
Once you get all of the staples, the plywood will fall to the ground. FWC paints all the exposed wood with a flat black, outdoor acrylic paint (primer/paint combo). the main boards come as Gorilla Guard, but if you have bare wood, be sure to just paint them like FWC does so the don't rot over wet/dry cycles.


gallery_7168_1354_2665854.jpg


gallery_7168_1354_2271555.jpg


Part2 on next post:


Edited by River_Rat, 09 February 2024 - 09:06 PM.

  • 0

#2 River_Rat

River_Rat

    Advanced Member

  • Members
  • PipPipPip
  • 66 posts
  • LocationNorthern Idaho

Posted 08 September 2019 - 03:36 AM

This is a good view showing what the Tundra "Floor Pack" looks like.  You can see the extra foam-board insulation used inside of the aluminum box frame (which is strong by the way).  Those larger holes you see are where you put your socket to unbolt the aluminum frame from the main hawk frame.


gallery_7168_1354_2096401.jpg


Floor is leaned up against my garage freezer in this photo:


gallery_7168_1354_140348.jpg


And here is the entire floor pack unbolted, and torn apart/off of the bottom of the stock FWC Hawk.


gallery_7168_1354_1895830.jpg


You have to use a 3/8" (sorry, maybe 5/16") socket/wrench to unbolt the floor pack tubing, and just tear it off of the bottom.  There's no neat way of doing this.  It's kinda sad when you do this, because you can tell some craftsman did an excellent job cutting each piece of metal and building this floor pack. 


gallery_7168_1354_1069480.jpg


Another photo of the floor pack and insulation removed:


gallery_7168_1354_805016.jpg


Mess all cleaned up, and floor pack entirely removed.  Notice you can't see the floor pack anymore in the below photo.  It's just a normal FWC Hawk build now, not the Tundra pack at the bottom.    Now it's time to start trimming siding and re-installing the alum trim:


gallery_7168_1354_1222408.jpg


The below photo shows what the front of the camper looks like.  You see the siding hanging down below the floor, because the floor-pack is gone now.  I had to trim all of the siding (front, back, and wings) before re-installing the trim pieces (which will also need trimmed/shortened).  Be careful when trimming the aluminum trim pieces so as to keep the holes aligned for installation later:


gallery_7168_1354_2013710.jpg


There's a couple of ways to do this.  Below, I'm using a pneumatic cutoff tool.  In another photo (and location) I'm using tin snips which was a lot quicker.  Choose your tool according to what your needs are.  Some places I needed one tool since the snips would not fit. 


gallery_7168_1354_377943.jpg


Measure twice, mark and cut once.  The below photo is the passenger side wings toward the back. 


gallery_7168_1354_1680156.jpg


gallery_7168_1354_2049028.jpg


Once everything is trimmed/cut, go ahead and replace the RV putty from the trim pieces.  On some pieces, the caulk/putty came off with the trim and tore.  I waned to be sure I got this onto every piece to avoid any leaks. 


gallery_7168_1354_1030380.jpg


Trim and front bumpers re-installed in the photo below:


gallery_7168_1354_494080.jpg


Trim/bumpers re-installed.  In most cases, you can set the trim piece up to the camper skin, and start the screw with a power driver.  It will sink right into the skin and go into either a new hole, or in some cases the original hole you removed it from (location dependent)  Looks like factory work:


gallery_7168_1354_1477723.jpg


In the below photos, the camper is all trimmed out.  Notice as you scroll down that the floor pack is gone.  Also notice the VIN sticker is gone:


gallery_7168_1354_794593.jpg


gallery_7168_1354_332033.jpg


gallery_7168_1354_1224482.jpg


gallery_7168_1354_1291115.jpg


"Are you done yet Dad?"


gallery_7168_1354_1785680.jpg


Finished product below:


gallery_7168_1354_2463144.jpg


View looking down the side.  3/4" clearance here, and a little over an inch above the cab.


gallery_7168_1354_591678.jpg


Total time was about 4 hours.  My next post will describe some considerations for the new floor.


Edited by River_Rat, 09 February 2024 - 09:23 PM.

  • 0

#3 River_Rat

River_Rat

    Advanced Member

  • Members
  • PipPipPip
  • 66 posts
  • LocationNorthern Idaho

Posted 08 September 2019 - 03:48 AM

Remember the original plywood that I removed?  on the photo below you'll see that FWC started using 3" wood slats on the bottom of the plywood at some point in time.  This was due to seeing some rot in the floors of some of the much older campers.  Think of this as a type of sacrificial wood slat that will keep the plywood floor off of your truck bed - and from sitting in the water.  These can get wet and yet be replaced if they are damaged from the wet/dry cycles.  The floor packs are extremely difficult to replace if they get rotten, and these slats prevents that.  I cut some 1/2" plywood and painted them with the flat-black outdoor acrylic paint/primer combo to seal the wood - and I fastened it to the bottom of the camper by screwing it right to the factory plywood in the same location that I measured from the plywood I removed.   


Below you see the 3" slats (just above the pups). I just created my own and screwed them into the bottom of the camper.  


gallery_7168_1354_519404.jpg


I was going to just leave them off, but this is a great idea to keep airflow under the camper so that things stay dry (and not rot) if water pools in your pickup bed. 


REAR of camper BEFORE:   (note the VIN sticker)


gallery_7168_1354_548344.jpg


Rear photo of camper AFTER.  VIN sticker almost gone since that material has all been removed. 


gallery_7168_1354_1291115.jpg


Cab clearance is great.  The cabover bed sits right at the sunroof, and the sunroof vent opens upward just right.


gallery_7168_1354_2511170.jpg


Ram trucks are strange.  The beds are shorter in the front than in the rear, but you can hardly tell.  


gallery_7168_1354_1307359.jpg


Let me know if you have any questions and I'll try and answer them as fast as I can.  


I hope this helps someone dig into it if they have the same issue and are contemplating the same job.  It was about a 6 out of 10 on a scale of difficulty, but you do need some specialty tools.  What I'm saying is that it wasn't that hard if you have the right tools, and are willing to take the risk.  For me it was well worth it.  I had some time on my hands one Saturday, and I was confident that the floor-pack would come off without much trouble.


Let me know how I can help ok. 


Edited by River_Rat, 09 February 2024 - 09:24 PM.

  • 1

#4 norcalhusky

norcalhusky

    Advanced Member

  • Members
  • PipPipPip
  • 96 posts

Posted 08 September 2019 - 04:35 AM

I have the same combo camper/truck and was considering doing this. Its driving me crazy the gap between the bed and camper side..


  • 0

#5 Mighty Dodge Ram

Mighty Dodge Ram

    Senior Member

  • Members
  • 1,003 posts
  • LocationClose to the edge...

Posted 08 September 2019 - 03:08 PM

Quite brave of you...well done!
  • 1
Richard
1996 Dodge Ram 1500 4x4, lightly lifted, ARB bumper/Warn winch, BFG AT/KO2, Snugtop shell. SOLD! But not forgotten!
2002 Chevy 2500HD XC LB 6.0L 4X4, Leer Hi-Rise shell, completely stock...for now!

#6 Jollyrogers

Jollyrogers

    Senior Member

  • Members
  • 147 posts

Posted 14 September 2019 - 12:53 PM

So if I have a ram model HAWK, and want to go to a Tundra, I need to add about 3” to the bottom to make things clear?

Been having issues with my diesel, and thinking of going to a 6.4L 2500 or a Tundra. Based on all the recalls and quality of the Ram vs my past experiences with Toyota, I was contemplating a Tundra. But payload is also a concern.
  • 0

#7 River_Rat

River_Rat

    Advanced Member

  • Members
  • PipPipPip
  • 66 posts
  • LocationNorthern Idaho

Posted 21 September 2019 - 06:04 AM

Yes. I think there's a thread on here showing a nice pallet/platform build for tundra installs.

I miss my tundra, it was a solid truck and i think it was built with much more quality parts & craftsmanship. The Ram/Cummins is in an entirely different class, and we plan on RV'ing full-time out of a large 5th wheel. With the built-in 5th wheel hitch and brake controller the Ram is plug-n-play for our needs.

The Tundra will handle the Hawk just fine for ya, and likely take you more remote places. This Ram is a huge/ heavy pig. It seems like the motor weighs more than the entire Tundra did. You can't even tell the camper is on back, except that the truck rides a little smoother and MPG drops by about 1 or 2.
  • 1

#8 Jollyrogers

Jollyrogers

    Senior Member

  • Members
  • 147 posts

Posted 21 September 2019 - 11:22 AM

Thanks for the reply. I got another Ram 2500 this week, but went with the 6.4L. I wanted out of the diesel after my limp mode experience due to the SCR. The Tundra payload is why I went back to the Ram. I can definitely tell the heavy diesel isn’t under the hood or weighing down the front suspension. Now I need to get a mount kit for my Hawk.
  • 0

#9 Oakleyrossi

Oakleyrossi

    Advanced Member

  • Members
  • PipPipPip
  • 57 posts
  • LocationLake Tahoe

Posted 21 September 2019 - 09:33 PM

River_Rat... Great update. 2018 hawk on a 2012 Tundra and currently contemplating a new 2500 Dodge or 2500HD Chevy. Besides the height which I know will be an issues on both truck any issues with width at the wheel well? Your photos and description makes it seem like a pretty doable job but that was a serious commitment and well done. Still not sure I would have the courage to tear in and start this process but one way or another I will have address it I imagine. Wont be able to live with he gap that will exist. Out of curiosity what was the cost for FWC to address?


  • 0

#10 Oakleyrossi

Oakleyrossi

    Advanced Member

  • Members
  • PipPipPip
  • 57 posts
  • LocationLake Tahoe

Posted 21 September 2019 - 09:34 PM

I also just noticed your only an hour away from me so maybe I could meet up for additional comments and questions once the new tuck is acquired. 


  • 0


0 user(s) are reading this topic

0 members, 0 guests, 0 anonymous users