Jump to content


Photo

92 Jayco Sportster 8' rebuild in the States with support from Deutschland

92 Jayco Sportster rebuild slide in camper truck camper

  • Please log in to reply
135 replies to this topic

#71 corybrown50

corybrown50

    Senior Member

  • Registered (Tapatalk)
  • 182 posts
  • LocationCincinnati, OH

Posted 15 July 2019 - 03:37 PM

I had to get 12' wood, and the smallest I could find quickly was 2x4x12, so I got out my old school joiner and planed it down to 1".....


GOT SAWDUST???


48290299477_df02059273_z_d.jpg


So, after a it of finessing....I was able to replace the rear wood, and put in the center support....


48290195746_0d8827ef3c_z_d.jpg


Instead of factory staples.....I used these "mending plates"....hopefully they are stronger than the factory staples......


48290299257_3afcefbacd_z_d.jpg


I added back in the new stainless eyes for the lift....don't worry about the clearance light, they are being replaced....on order and coming Wednesday.....


48290299277_afe3f06a70_z_d.jpg


Ok, so....a major question.....


How do I make sure that the that the roof is sloped up.....The wood I bought was fairly straight, with a slight bow that I faced up to allow the curve to create drainage. Once in place, the weight pushed it down. How can I support the roof up so I make sure I don't get a low point in the middle for water to pool?


HELP!!!!


  • 0

#72 corybrown50

corybrown50

    Senior Member

  • Registered (Tapatalk)
  • 182 posts
  • LocationCincinnati, OH

Posted 15 July 2019 - 09:24 PM

I'm thinking that if I support the roof from the inside, creating the slight positive arc that I need, then glue and screw the middle rib, allow to cure.....that should allow it to remain?


  • 0

#73 corybrown50

corybrown50

    Senior Member

  • Registered (Tapatalk)
  • 182 posts
  • LocationCincinnati, OH

Posted 17 July 2019 - 03:59 PM

Trying to kick it up even more lately. I've only got 8 nights and 3 full days to get finished. 


And of course......the rain is back......


Don't get me wrong, we need it pretty badly, but what I need is clear 70 degree days.....good luck with that in July I guess. 


I went out last night after the rain came through yesterday and found water inside of course....


So, I've got to get the center ridge off and reinstalled with fresh sealant. The last owner had an oversized ac unit on top that had been removed. Of course, the weight stretched the aluminum skin a bit.....


48308127707_9c1fcda008_z_d.jpg


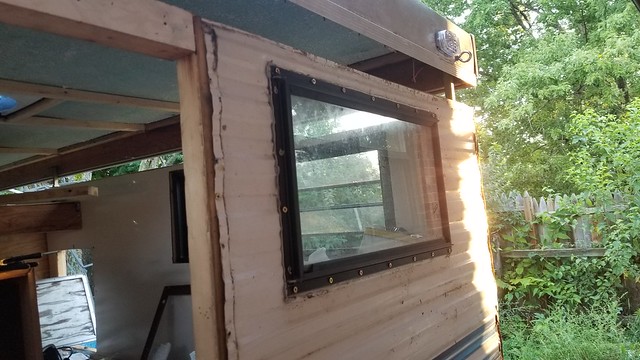
After removing the center ridge outside. I started framing up the inside a bit more. 


48308015211_9987f8ff29_z_d.jpg


Once finished, I used Sikaflex 221 between the skin and the center post, braced it up, then started reattaching the center ridge from the outside. I'm hoping the artificial arc I created with with the support inside stays once I take it out after curing today. 


48308127542_ae88658be8_z_d.jpg


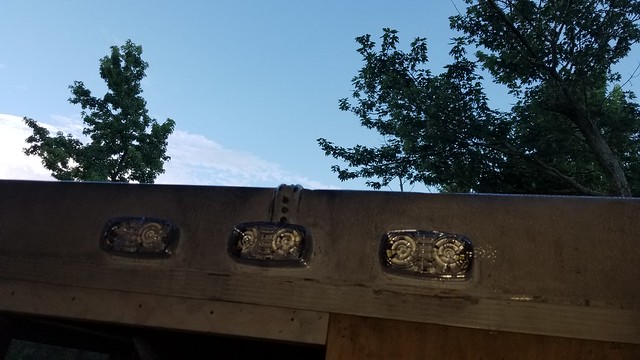
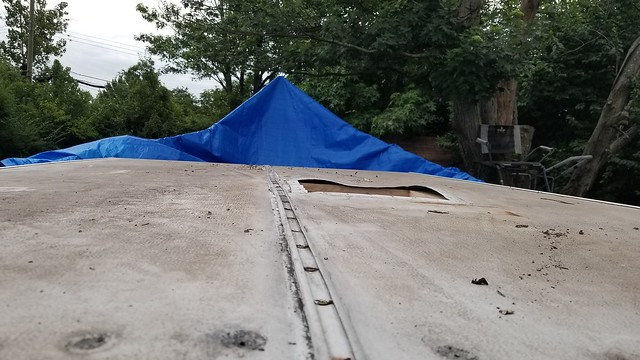
Here's a shot showing just how warped the skin is before securing down. 


48308015036_557d17dacc_z_d.jpg


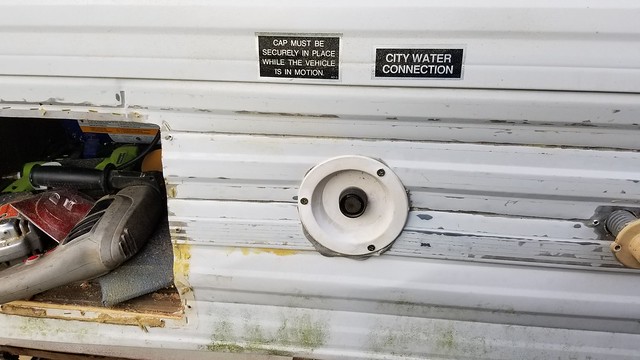
A gift from a friend replaces the sheet of acrylic that was put in the hole from the ac unit from the past owner......


48308015041_1e02402cb8_z_d.jpg


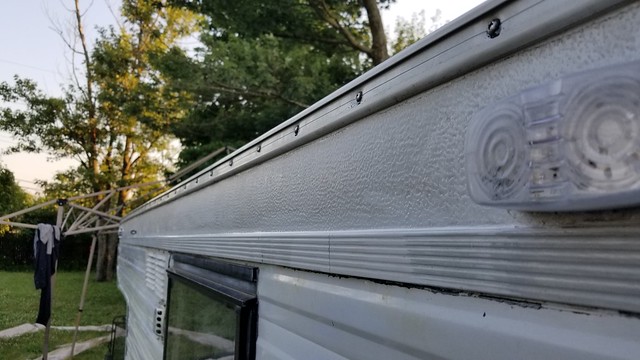
Got everything installed with butyl tape so far.....haven't had time to seal completely yet. My buddy that works at a dealership has offered to come over and do that all "right" for me. He is way more meticulous on that stuff than I am, and I am more than willing to accept the help. I got everything covered just in time last night before the clouds started rolling in again......


48308127317_b65f9a7dba_z_d.jpg


Pray for me everyone......I'm working super hard on this to try and get done this done so I can take the family camping. So far I have missed the major part of the kids summer break and all the little stuff that we do......I hopeful to make it up with a big trip right before they go back to school. This plays a major part in those plans......


  • 0

#74 corybrown50

corybrown50

    Senior Member

  • Registered (Tapatalk)
  • 182 posts
  • LocationCincinnati, OH

Posted 18 July 2019 - 06:02 PM

Well, unfortunately the tarp wasn't set down well enough for the storm that was blowing in last night. I came out in the afternoon to see everything blown off and the inside was all wet. Cleaned it all up as best I could and opened everything up to let it hopefully air/dry out. 


More of a fidgety night last night on the camper. I got the front plywood installed mostly (still need the arced metal attached, but will put that in from the inside before putting in the top panel and insulation). 


48316473382_1010554552_z_d.jpg


Added some new jewelry to the old girl.....all the clearance lights were junk, so I replaced them all with clear lens leds. I definitely like the cleaner look. Also an added benefit with these is that they are 3 wire.....so I can wire them for braking and turn signals. No excuse for anyone behind me to say they couldn't see my lights. 


48316352881_cbeec10bb0_z_d.jpg


And the back.....lots of clearance lights on her....not sure if it was factory or added some time after. 5 red in the back, 2 red in the back sides, 2 yellow in the front sides, and 2 yellow in the very front. 


48316473387_1e65ed345f_z_d.jpg


I wanted to play a bit with a new toy.....a decal remover.....4" wide decal remover. I'll put in before and after pics later, but I can tell you that it is difficult at times to use and does burn through the paint in the aluminum high points. 


48316352716_29eb37a210_z_d.jpg


And lastly......the holes in the roof from the past owner putting a 2x4 across the inside of the roof to support it......drilled straight through the roof down into the 2x4.....left 15 holes for patching. I siliconed the washers outside and inside, and the bolt going through. It's ugly right now and I will clean it up later, but hopefully it will not leak again there.....as you can see, trying to squeeze every little bit of time out of each day......


48316352701_04ca654822_z_d.jpg


Still a lot of work to do......I have 7 nights and 2 full days left to be able to work on it......keep praying for me!!!


  • 0

#75 Manfred65

Manfred65

    Senior Member

  • Members
  • 230 posts
  • Locationnear Augsburg, Bavaria, Germany

Posted 19 July 2019 - 04:07 AM

Cory, we wish you the very best with your roof and that you get it sealed. Ours still leaks and we cannot find it. The shape was the same mess like yours. We sealed the center-line between the Aluminium sheets, between Aluminium and upper profile and the screws separately. Then sprayed it with white tinted Raptor-Liner. It leaked somewhere in the center line, added another layer of Raptor-Liner....than tried another roof sealant. I am going to plan B: Building a new roof or let it build by one of my manufacturers in the US. Container shipping is free in my own container.


The exterior roof lights on mine work nearly the same like yours...ok mine sits in a Longbed and the taillights are full visible.

2 White LED front, 2 Amber to the sides and 5 red ones on the back. The middle three work as brake lights too.


  • 0

2000 Ford F-250 SuperDuty SC LB 7.3 Lariat
1992 Jayco Sportster 8ft Popup

http://www.wanderthe...8ft-renovation/

BundutecUSA, TravelLite and Palomino TruckCamper Sales in Germany and Europe


#76 corybrown50

corybrown50

    Senior Member

  • Registered (Tapatalk)
  • 182 posts
  • LocationCincinnati, OH

Posted 19 July 2019 - 03:53 PM

Thanks Manfred.....I'm glad someone is reading this.....and I really appreciate the reply.


We'll use Dicor Lap Sealant tonight to try to seal everything up as my buddy is coming over for it. Lots of gaps with adding to the structural integrity of the camper.


I took a note from you on signing the work.....I had wife and kids sign the back before adding the outer skin.....


48322774162_fc016b2783_z_d.jpg


Here's some pictures of the stickers removed with the decal remover......a good bit of burn through on the paint. Looks like I'll be touching it up with some sort of stripe after the camper is camp ready......


48322774147_efbed09cae_z_d.jpg


48322656006_1a13fd4984_z_d.jpg


  • 0

#77 corybrown50

corybrown50

    Senior Member

  • Registered (Tapatalk)
  • 182 posts
  • LocationCincinnati, OH

Posted 19 July 2019 - 04:14 PM

I had to add a bit for overlapping on the front. I went to my local Menards (FAVORITE HARDWARE STORE!!! Great employees very willing to help with out of the box thinking. Thank you Menards Reading/Glendale!!). I found a metal carpet border that turned out to be aluminum. Easy to bend and added butyl tape underneath and screwed on to take up the gapping. 


48322774332_f1469e7ef8_z_d.jpg


With the outer trim added....


48322774237_8a5cd1c27c_z_d.jpg


Started adding back on the exterior bits for sealing tonight.....


48322655876_b99e7e2b32_z_d.jpg


48322655676_1b3dc66db3_z_d.jpg


48322655751_d6a2ca74ee_z_d.jpg


And covered the signatures and added the last window back in....


48322655376_667c2d6d53_z_d.jpg


48322655351_ae015498e3_z_d.jpg


48322773402_ccf8c25e4b_z_d.jpg


Now for the list of what is left......


  1. Seal roof
  2. Seal outside
  3. Door frame 
  4. clean and install canvas
  5. finish hinges and support for over cab bed
  6. finish bed side seating with supports and cover
  7. rewire exterior lighting
  8. install new faucet and pump.....pump may wait until later as we will have water source at campground
  9. insulate roof and reinstall aluminum roll
  10. reinstall hanging cabinet
  11. cut opening for new refrigerator and install
  12. create bedding supports for removable cot
  13. install passenger side lift
  14. install new bolts for roof lift
  15. install vinyl floor
  16. install lp closet and lp lines
  17. create closet storage area for inside camper
  18. create front side under seat storage area for water and battery storage (also may wait)
  19. larger opening in driver side bedside for ac to slide through.

KEEP PRAYING FOR ME!!! That's a long list with 6 nights and 2 days to go..... If I can kick 2 a night and 4 each full day I'll be good.....and nothing else pops up.....


  • 0

#78 corybrown50

corybrown50

    Senior Member

  • Registered (Tapatalk)
  • 182 posts
  • LocationCincinnati, OH

Posted 20 July 2019 - 03:49 PM

Update from last night.....my buddy came over and was like a monkey in the trees on the roof.....scary to me as I'm almost 300#, but he said he's been on worse....


We got the roof sealed almost completely.....a few areas he didn't like the fit and finish that I needed to get tighter before sealing. 


Silicone around the outer edge of the roof and sides.....


48330539647_9ee66829ef_z_d.jpg


48330539662_c63540760d_z_d.jpg


He's got a keen eye.....he found some small holes we'll have to address


48330539557_19ce333fcc_z_d.jpg


Dicor self leveling around the vent and the holes that were previously repaired......We'll add Dicor to the center line as well as soon as Amazon's 2 day shipping of the insert arrives on day 3 or 4  :(


This stuff is really cool....and is one of the only things that will stick to itself, unlike silicone for repairs....


48330539557_19ce333fcc_z_d.jpg


48330539557_19ce333fcc_z_d.jpg


I also got the LP closet back in......


48330539737_5248617687_z_d.jpg


So.....here's the list today......


  1. Seal roof
  2. Seal outside
  3. Door frame 
  4. clean and install canvas
  5. finish hinges and support for over cab bed
  6. finish bed side seating with supports and cover
  7. rewire exterior lighting
  8. install new faucet and pump.....pump may wait until later as we will have water source at campground
  9. insulate roof and reinstall aluminum roll
  10. reinstall hanging cabinet
  11. cut opening for new refrigerator and install
  12. create bedding supports for removable cot
  13. install passenger side lift
  14. install new bolts for roof lift
  15. install vinyl floor
  16. install lp closet and lp lines
  17. create closet storage area for inside camper
  18. create front side under seat storage area for water and battery storage (also may wait)
  19. larger opening in driver side bedside for ac to slide through.


2 items down......it was smoking hot out there last night and is expected to be hotter today.....I'll try to stay hydrated, and of course.....PRAY FOR ME!!! God is on my side.....I need to stay moving forward on everything....Looks like rain for tomorrow afternoon....then I leave for a work trip Monday and will return Friday, then a week of final push to be at least camp ready for the following weekend......I love deadlines!!


  • 0

#79 Wandering Sagebrush

Wandering Sagebrush

    Free Range Human

  • Site Team
  • 10,583 posts
  • LocationNortheast Oregon

Posted 20 July 2019 - 04:12 PM

Nice work Cory, but be careful, heat stroke isn’t something that’s any fun.
  • 0

I am haunted by waters


#80 corybrown50

corybrown50

    Senior Member

  • Registered (Tapatalk)
  • 182 posts
  • LocationCincinnati, OH

Posted 20 July 2019 - 05:38 PM

I'm thinking about removing the heater and putting a window ac unit there.....Don't really plan on too much cold camping right now. Anyone remove their heater and use electric or catalytic instead? Not sure if the heater even works yet.......
  • 0


Also tagged with one or more of these keywords: 92 Jayco Sportster, rebuild, slide in camper, truck camper

0 user(s) are reading this topic

0 members, 0 guests, 0 anonymous users