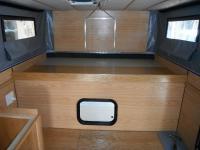
A couple coats clear urethane bring out the grain of the oak and matches the camper paneling. Next I built a funky shelf to hold whatever, in the space below the refer.

 3 votes
New ATC Ocelot Shell Buildout
Started by
Ambling1
, Jun 11 2014 07:09 AM
75 replies to this topic
#22

Ambling1
-
- Members
-

- 76 posts
Advanced Member
- LocationSonoran desert
Posted 12 June 2014 - 07:27 PM
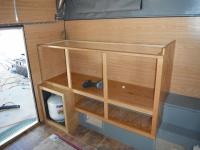
A refer shelf for the Engle45 that ties into and is supported by the two sides of the water tank box.
Attached Thumbnails

#23
Ambling1
-
- Members
-
- 76 posts
Advanced Member
- LocationSonoran desert
Posted 12 June 2014 - 07:39 PM
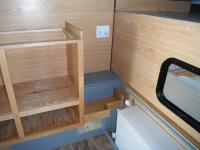
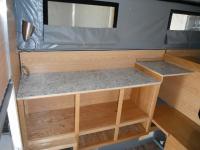
Adding the top for the water tank box, then building the bed slide and side supports.
Attached Thumbnails
#24
Texan76
-

- Members
- 110 posts
Senior Member
Posted 12 June 2014 - 08:36 PM
How did you attach the cabinet frame to the camper? Did you screw into the aluminum frame studs or the wood wheel well or both?
#25
Ambling1
-
- Members
-
- 76 posts
Advanced Member
- LocationSonoran desert
Posted 13 June 2014 - 04:28 AM
Texan, At this stage I have two screws holding the face frame to the rear wall up by countertop level to keep it plumb. The top 1x2 framing at countertop level is just floating at this stage. The 1/2" plywood is screwed to the floor pack. If I take out the screws from the plywood and those two other screws, I can lift this section out as a unit. The vertical section of plywood is off the side wall by an 1/8".
#26
Ambling1
-
- Members
-
- 76 posts
Advanced Member
- LocationSonoran desert
Posted 13 June 2014 - 04:47 AM
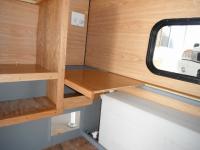
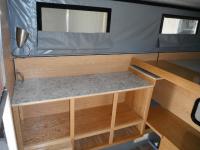
Countertops are built out of quality plywood and Formica. In these pictures the plywood edges are still raw. I will finish the edges with 1/4" oak. Tops are temporarily in place.
Attached Thumbnails
#27
Ambling1
-
- Members
-
- 76 posts
Advanced Member
- LocationSonoran desert
Posted 13 June 2014 - 05:05 AM
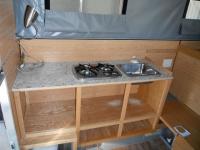
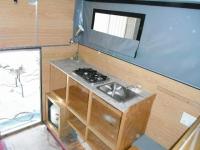
Made the cutouts for the stove, sink, and faucet and dropped them into place.
Attached Thumbnails
#28
Ambling1
-
- Members
-
- 76 posts
Advanced Member
- LocationSonoran desert
Posted 13 June 2014 - 05:50 AM
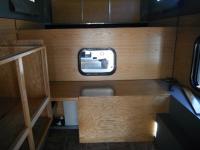
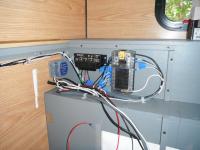
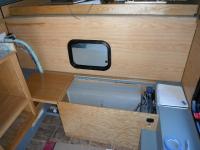
Started running 12v wiring. The water tank fill and vent lines are installed. 12v receptacle in corner above fill tubing is for the Engle45. Another view of the funky shelf.
Attached Thumbnails
#29
Ambling1
-
- Members
-
- 76 posts
Advanced Member
- LocationSonoran desert
Posted 13 June 2014 - 06:16 AM
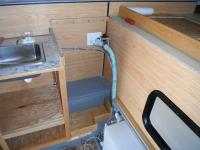
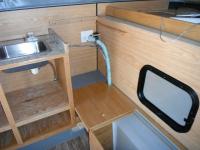
View of sink drain through cabinet floor to outside of camper.
Attached Thumbnails

#30
Ambling1
-
- Members
-
- 76 posts
Advanced Member
- LocationSonoran desert
Posted 13 June 2014 - 03:50 PM
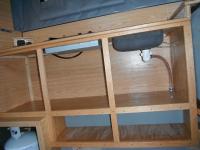
Reinstalled the refer shelf and added a double USB port receptacle at tank step area. Extra hole is for a standard 12v receptacle.
Attached Thumbnails


0 user(s) are reading this topic
0 members, 0 guests, 0 anonymous users

