Jump to content


Photo
* * * * - 2 votes

Homemade thermal pack

thermal pack arctic pack

  • Please log in to reply
20 replies to this topic

#11 RnK

RnK

    Advanced Member

  • Members
  • PipPipPip
  • 37 posts
  • LocationMontana

Posted 02 December 2014 - 07:01 PM

Inspired by Ski3pin's excellent writeup, we are about to start sewing on a thermal pack ourselves (using the Evolution fabric and experimenting with polyester batting and ripstop nylon behind).  This is a bit of an adventure for us as neither of us are big sewers.  We are wondering if Ski3pin or anyone else could tell us why they hemmed the top and bottom of the panels but not the sides.  We are quite willing to hem the tops and bottoms, just wondering if there's a reason it's needed.

Once again, we probably wouldn't be tackling this without that very clear writeup by Ski3pin.  Thanks!


  • 0

2004 Tundra 4x4 Dbl. Cab

2014 Hawk Shell


#12 ski3pin

ski3pin

    Belay On

  • Site Team
  • 15,316 posts
  • LocationSierra Nevada Range

Posted 02 December 2014 - 07:53 PM

Inspired by Ski3pin's excellent writeup, we are about to start sewing on a thermal pack ourselves (using the Evolution fabric and experimenting with polyester batting and ripstop nylon behind).  This is a bit of an adventure for us as neither of us are big sewers.  We are wondering if Ski3pin or anyone else could tell us why they hemmed the top and bottom of the panels but not the sides.  We are quite willing to hem the tops and bottoms, just wondering if there's a reason it's needed.

Once again, we probably wouldn't be tackling this without that very clear writeup by Ski3pin.  Thanks!


I believe we did hem the sides also. The fold over is held in place with the outside line of stitching down the velcro. I'll check when it stops raining (I hope not soon!) to raise the top. The ends that stuff behind the lift panels are not hemmed and show no unraveling, so other than appearance, is it necessary?


We also made a minor design change where the fabric goes behind the lift panels. I have some photos somewhere............or I'll take some new ones. :)


  • 1

2003 Ford Ranger FX4 Level II 2013 ATC Bobcat SE "And in the end, it's not the years in your life that count. It's the life in your years."- Abraham Lincoln  http://ski3pin.blogspot.com/


#13 Beach

Beach

    Senior Member

  • Members
  • 866 posts

Posted 02 December 2014 - 08:44 PM

Previous owner and his wife made my thermal pack out of moving blankets, they do the job very well.
  • 0

#14 RnK

RnK

    Advanced Member

  • Members
  • PipPipPip
  • 37 posts
  • LocationMontana

Posted 02 December 2014 - 09:28 PM

Although the info at Seattle Fabrics states 54” wide, it came 55” wide. This allowed a ¾” wide hem on both the top and bottom edges leaving an overall finished width of 26”, perfect! The vertical edges are not hemmed.


Ski3pin, we were referring to this quote from your writeup, but we may have misinterpreted it or maybe you changed your method at some point.  Thanks for the quick reply!


  • 0

2004 Tundra 4x4 Dbl. Cab

2014 Hawk Shell


#15 ski3pin

ski3pin

    Belay On

  • Site Team
  • 15,316 posts
  • LocationSierra Nevada Range

Posted 02 December 2014 - 09:50 PM

We also made a minor design change where the fabric goes behind the lift panels.


I posted an update on the original topic -


Here


  • 0

2003 Ford Ranger FX4 Level II 2013 ATC Bobcat SE "And in the end, it's not the years in your life that count. It's the life in your years."- Abraham Lincoln  http://ski3pin.blogspot.com/


#16 RnK

RnK

    Advanced Member

  • Members
  • PipPipPip
  • 37 posts
  • LocationMontana

Posted 02 December 2014 - 10:09 PM

I posted an update on the original topic -


Here


Great idea. 


  • 0

2004 Tundra 4x4 Dbl. Cab

2014 Hawk Shell


#17 BillM

BillM

    Senior Member

  • Members
  • 293 posts
  • LocationReno

Posted 04 December 2014 - 07:07 AM

Reflectix


  • 0

Billm


2008 Frontier with a 2010 Eagle shell


#18 RnK

RnK

    Advanced Member

  • Members
  • PipPipPip
  • 37 posts
  • LocationMontana

Posted 18 December 2014 - 09:36 PM

So we tackled the Thermal Pack, with meager-to-rusty sewing skills, a new sewing machine (from Costco, a Brother XM3700,$89.99), an excellent write-up from ski3pin (and Barking Spiders).  And some free time.


We did everything as detailed in their post except hem both the top and bottom edges.  We only hemmed the opening edge, which is our case is the top (we plan to open our windows from the top down).  Everything was pretty straightforward with the exception of sewing through the hook velcro which seemed a strain at times on our machine.  As with many aspects of this project, not real pretty but it seemed to work.


First stage complete.  Five panels to a side.


gallery_5403_824_72629.jpg


Then we went out on a limb.  It seemed to me that, with all the convection in the air space behind what is basically a curtain, some real insulation might be a great help.  At the same time we wanted to be able to open the windows and if possible leave the pack in place when the top comes down.  We came up with the idea of adding some polyester batting to the outdoor side of the thermal pack and covering it with something thin - ripstop nylon is what we decided on.  We sewed the nylon to each of the backs of the center and window sections (along 3 edges) and then slid in the batting before sewing the final seam. Then we made "pillows" for the fore and aft sections - that is sections of batting covered in ripstop that are inserted when the top is up but then can be removed when the top comes down, reducing the bulk at the corners.  Here are some pics:


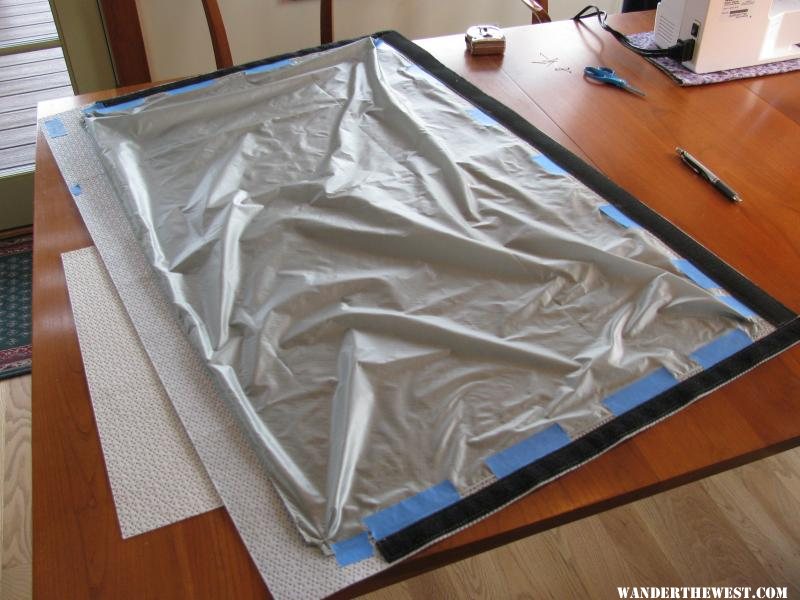
The ripstop, gathered a bit at the corners to allow for the loft of the batting.  It's about to be sewn on the three sides with the tape and then in goes the batting


gallery_5403_824_53947.jpg


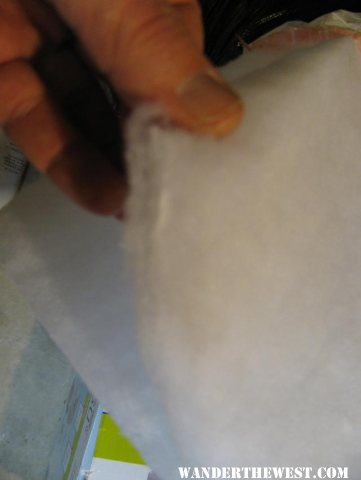
Polyester batting, about 3/4 - 1" thick, but pretty light.


med_gallery_5403_824_10032.jpg


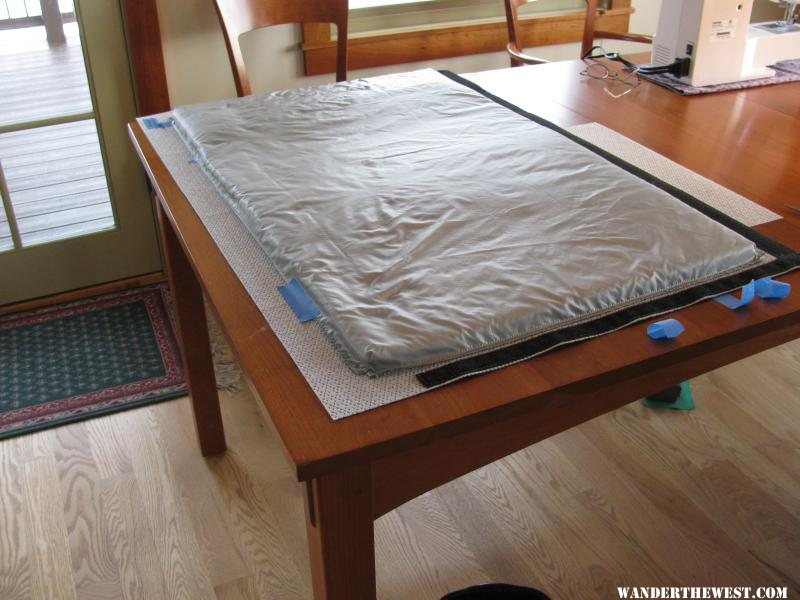
The batting in and ready to be sewn shut.


gallery_5403_824_12247.jpg


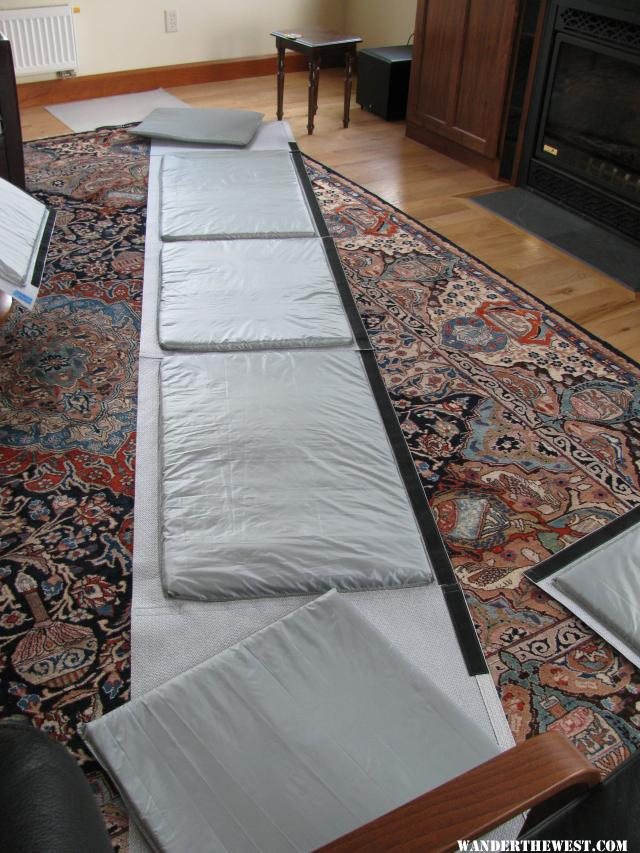
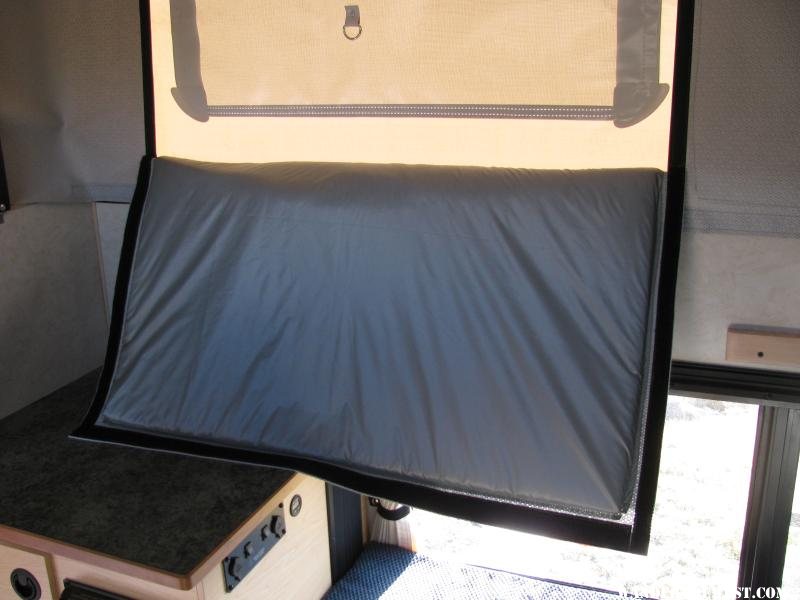
One side finished, with the loose pillows at the ends.


gallery_5403_824_10805.jpg


Here it is, hung in the camper.  So far, when we want to lower the top, we just open the thermal pack windows, pull out the pillows from the corners and use the bungees on the pop-up's windows.  It has saved us learning how to sew buttonholes and seems to work fine.  The corners, without the pillows, seem to close easily and only required a small adjustment on a couple of the roof latches.


gallery_5403_824_44649.jpg


One problem we had was when I opened a thermal pack window - I got to the end of the velcro and it ripped the fabric (more easily than I would have imagined).  We hadn't sewn the opposing velcros together at the end of the run (lower end in the photo above), just the fabrics.  I think if we had we would have had a more positive stop and nothing would have ripped.  We will fix that, notch the corners as per ski3pin's update and attach some velcro to grab the rolled up windows.

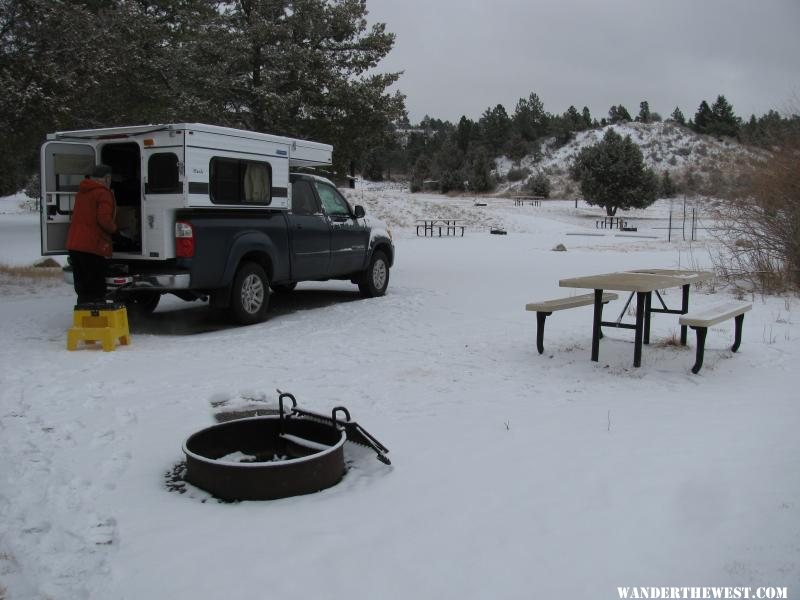
All that said, so far we consider it a great success.  We had only camped a couple of times in cold weather but took it out this week in Montana winter and it seemed to perform admirably.  There was some condensation in the morning - we toweled it off as others have advised.  We kept the thermostat at 42 at night and it probably was upper teens, low 20s outside.  It was very comfortable and the heater didn't seem to run an excessive amount, though we don't have much previous experience to compare it to.


gallery_5403_824_3782951.jpg


We were glad to have the Thermal Pack along...


gallery_5403_824_49111.jpg


Costs for the project were about the same as ski3pin's, with the additions of $43 for the ripstop nylon from Seattle Fabrics and $24 for the batting from Joanns (at a 40% off sale).  We spent a lot of time on it as we had to make up a lot as went along, but we are very happy with the result!


Cheers,

Robert


  • 0

2004 Tundra 4x4 Dbl. Cab

2014 Hawk Shell


#19 Casa Escarlata Robles Too

Casa Escarlata Robles Too

    C'est la vie

  • Site Team
  • 9,285 posts
  • Locationmonterey bay area

Posted 18 December 2014 - 10:37 PM

That's a good looking job.

Your idea of the extra batting seems to have been a good idea.

Thanks for sharing.

Frank


  • 0

2002 Tundra AC TRD 4WD Limited 2009 ATC Bobcat loaded http://sharychic.blogspot.com/


#20 billharr

billharr

    Senior Member

  • Members
  • 2,824 posts
  • LocationStockton CA

Posted 19 December 2014 - 12:24 AM

Planning on another trip to the east coast in March. I know I will want a Thermal Pack for the trip.  I feel confident doing a lot of things on the camper. But I do know what I can and can not do. The wife said her old machine would not sew that much velcro, so I would be looking at a new machine. I might save 2 bills after buying a new machine and making my own Thermal Pack. However with my sewing skills not sure how it would look and fit. One screw up and I would not save any money.  I so I took my own advice and just ordered a Thermal pack from FWC. 


  • 0


0 user(s) are reading this topic

0 members, 0 guests, 0 anonymous users