Jump to content


Photo
- - - - -

Keystone Rebuild - Narrow Floor Pack, Redo Interior, Paint Exterior

rebuild narrow floor pack

  • Please log in to reply
112 replies to this topic

#31 Colorado CJ

Colorado CJ

    Advanced Member

  • Members
  • PipPipPip
  • 60 posts

Posted 24 April 2015 - 02:18 AM

Time for a small update, did a little more work on the camper.

First, I tensioned the spring piano hinges to be able to install the front lifting panel.

camper-build-24_zpsnvdbatqt.jpg

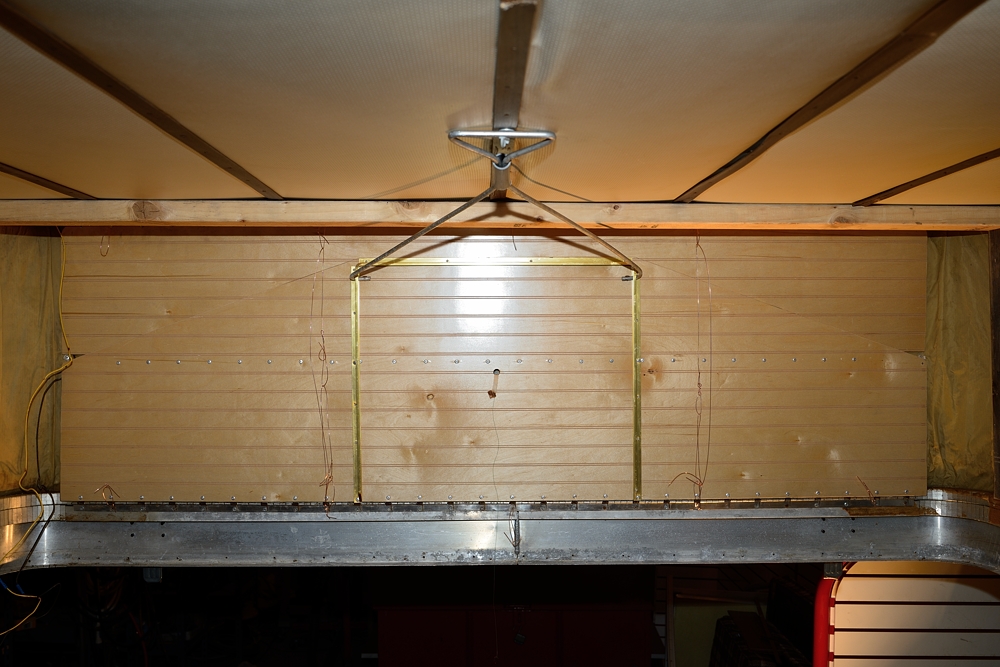
I then started by riveting in the top of the panel. Because I am using the same hinges in the same places, I could rivet back into the original holes in the roof. This meant I didn't need to measure or make sure the roof would be aligned with the camper, so it was a quick install. I also tied some fishing line to the center elastic and fished it through the hole in the lift panel. This made it easy to reinstall all the elastic like the original.
camper-build-25_zps2kvt0pca.jpg

The front now lifts up and down extremely easily. All those little springs on the 3 hinges really help with lifting force. They nearly lift the roof by themselves.

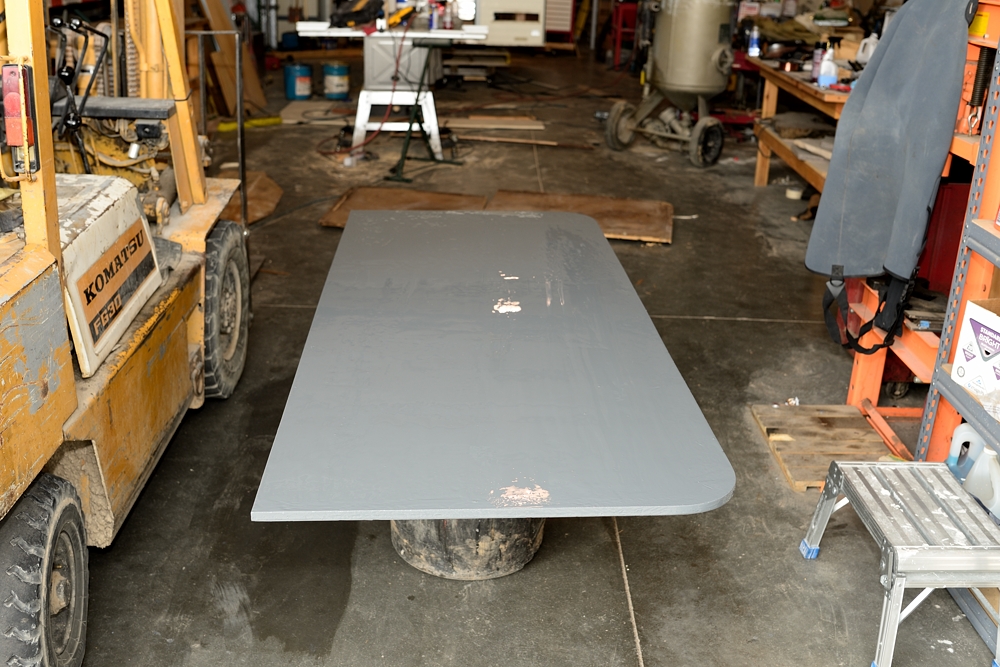
I then measured and cut a new cabover wood piece. Since I want this one to last, I coated the new cabover wood with some 2-part polymide epoxy.
camper-build-26_zpszykxikz6.jpg

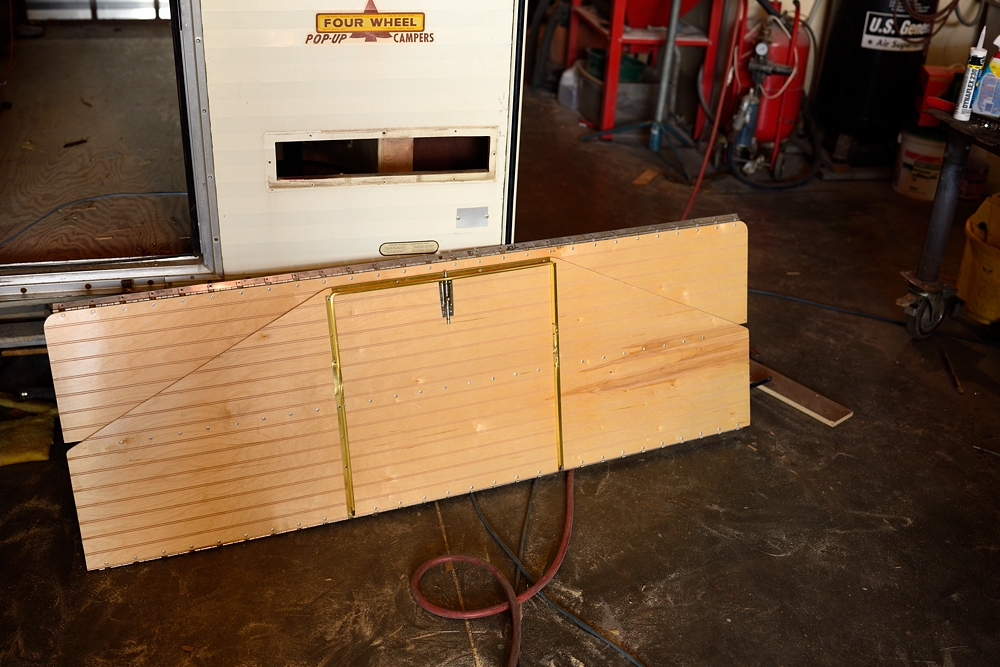
While the epoxy was drying, I rebuilt the back lift panel. This one went much faster than the front, completing it in a couple of hours.
camper-build-27_zpskginmavw.jpg

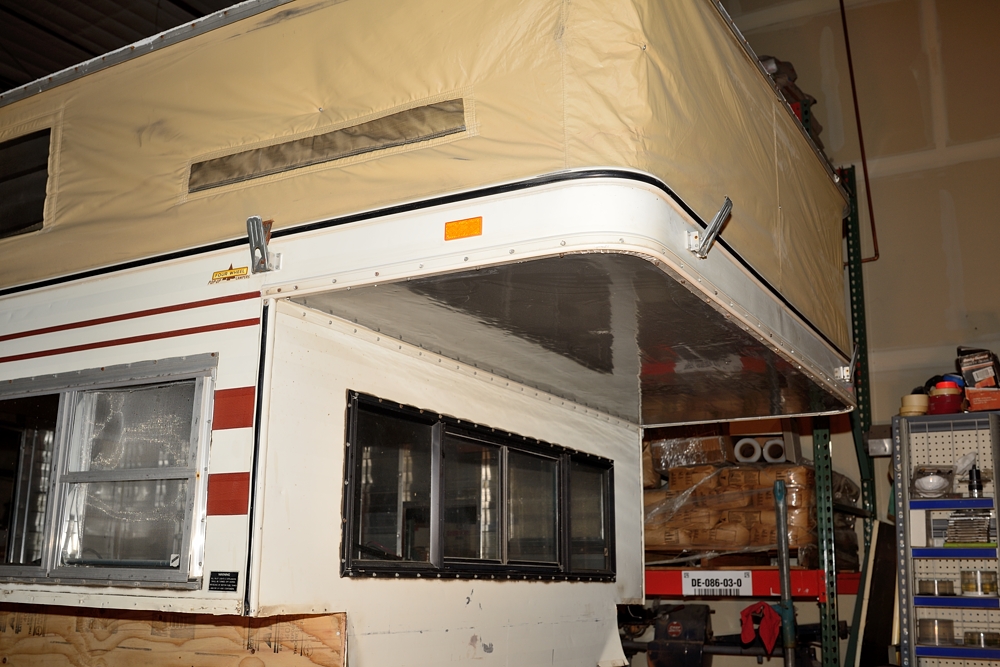
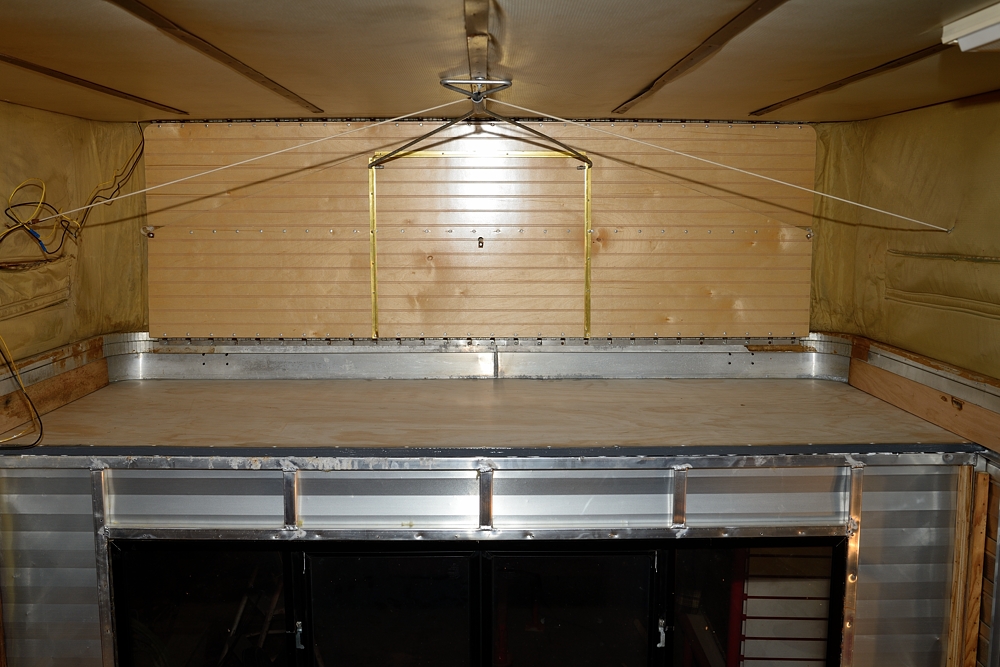
After it dried, I brought it into the camper and slid it in place. I then lifted up the edges and applied lots of caulking around the edges before screwing it all in. I then applied some putty tape and installed the trim piece to the outside. I'm going to leave off the plastic insert as I'm going to be painting the outside shortly.
camper-build-28_zpsrdjc4bbz.jpg

camper-build-29_zpscoswwlfm.jpg

Before I can start installing the inside paneling, I have to run all the wiring and install all the lights I'm going to have on the camper. So, I first decided to replace the old outdated tail lights with some new LED tail lights.

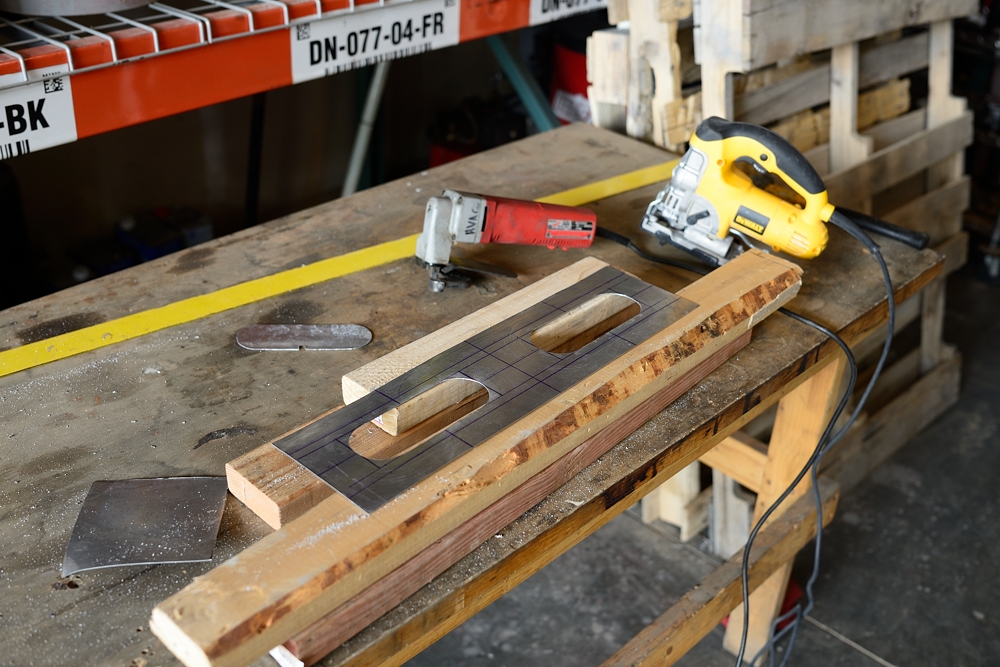
I got a sheet of aluminum and started up my snipper and cut it down to size. I then measured up the lights I am installing and used a jigsaw to cut the cutouts.
camper-build-30_zpsbnaobdek.jpg

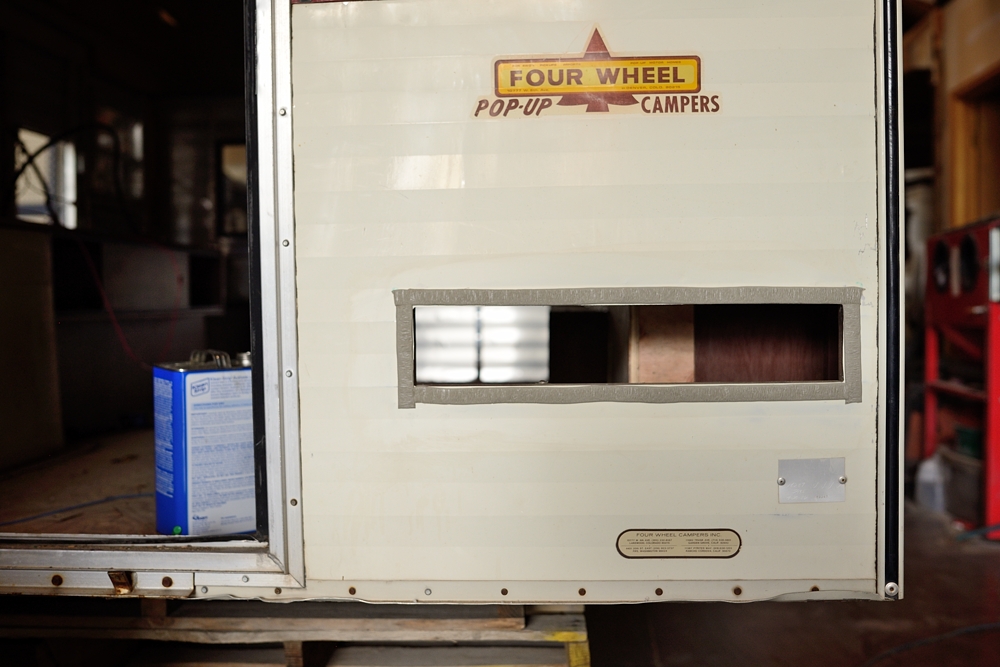
I cleaned up the area around the old lights and applied some putty tape
camper-build-31_zpsqzjgwpqm.jpg

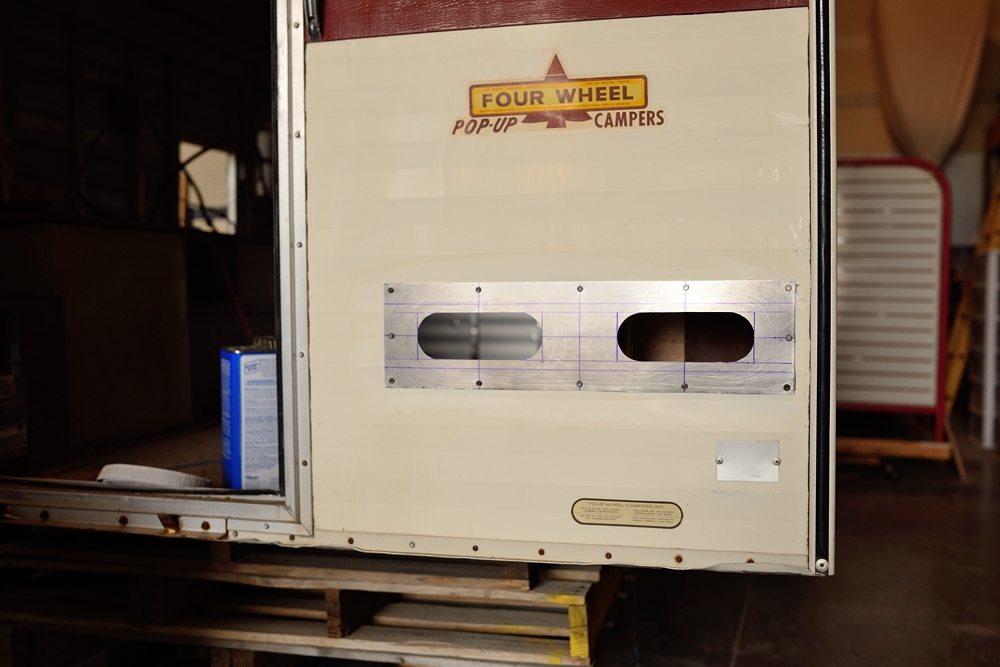
I then screwed the new plate down to the camper and caulked the edges.
camper-build-32_zps3zrvzc2e.jpg

Finally I popped in the lights. When I permanently mount the lights after I paint the exterior, I will calk the rubber gaskets in and calk the lights in to make sure the area is 100% sealed.
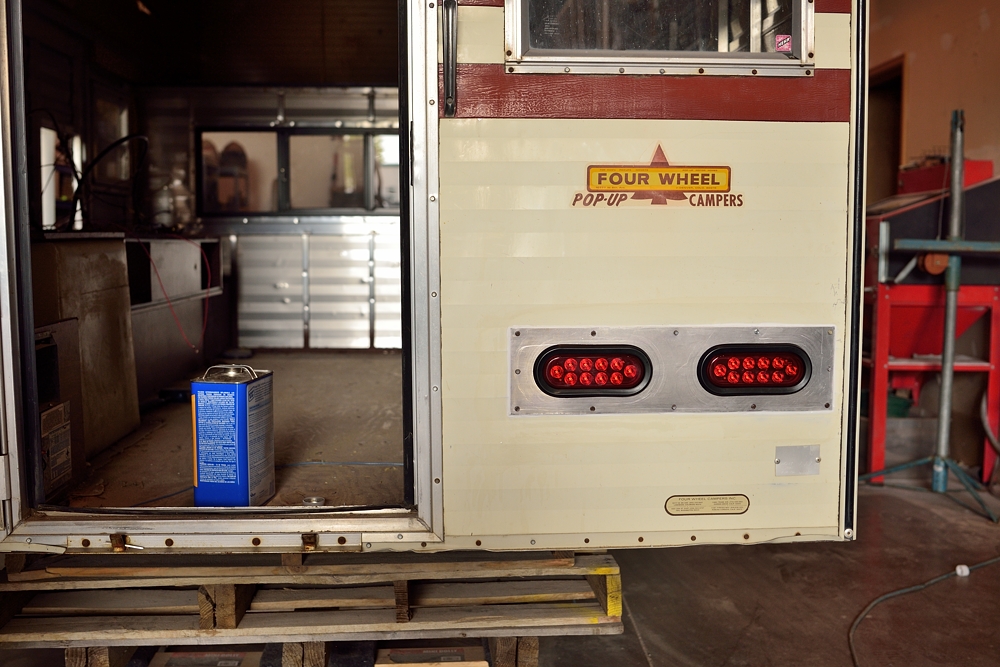
camper-build-33_zpsdwgd63cp.jpg

Quite the difference from the old tail lights.
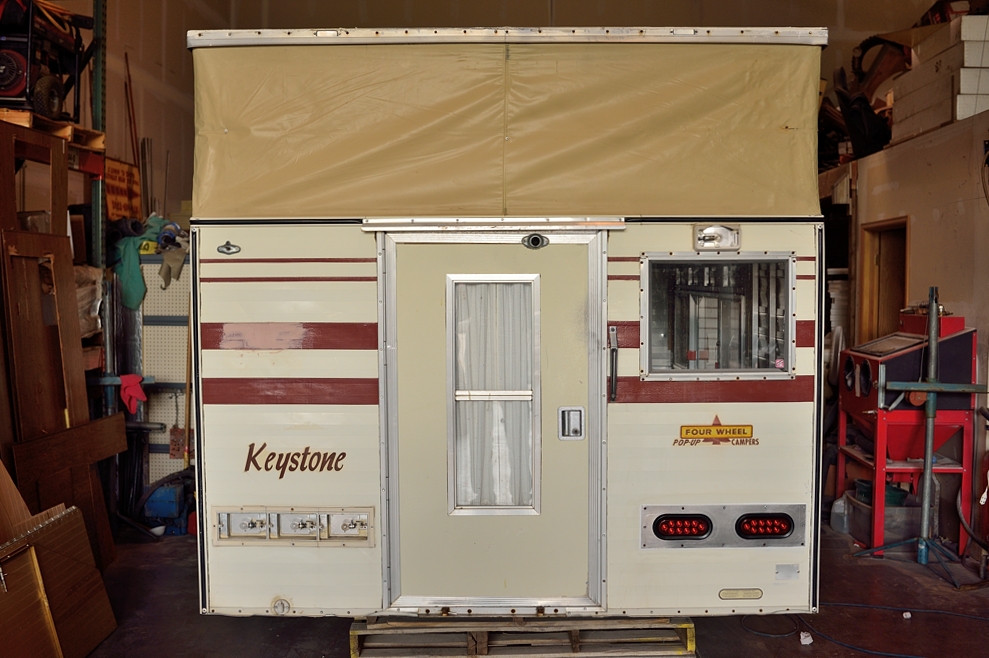
camper-build-34_zps7hd8zcoe.jpg

I then installed an LED light to the top right of the camper. This will serve a dual function of a backup light and will be wired to a switch to turn on inside the camper. An identical light will be put on the left side of the camper. I will be replacing the porch light with a new updated unit
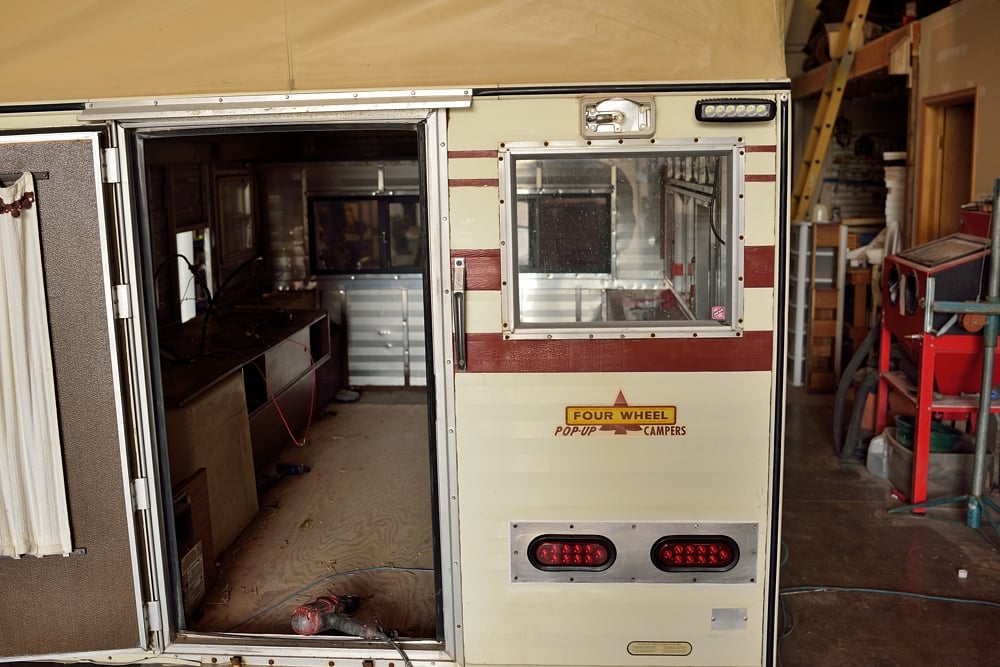
camper-build-35_zpscdps8h8n.jpg

Tomorrow, I'll finish the left side tail lights and get all the wiring done to the back end so that I can install the back paneling and the lift panel.

Edited by Colorado CJ, 24 April 2015 - 03:28 AM.

  • 0

#32 takesiteasy

takesiteasy

    Senior Member

  • Members
  • 2,588 posts
  • LocationMinnesota

Posted 24 April 2015 - 02:43 AM

Nice work! Looks great. Thanks for posting your progress. It is fun to follow along.


  • 0
2011 Tacoma AC TRD
ATC Custom Shell

travelswithrockythedog.blogspot.com

#33 Wandering Sagebrush

Wandering Sagebrush

    Free Range Human

  • Site Team
  • 10,575 posts
  • LocationNortheast Oregon

Posted 24 April 2015 - 02:58 AM

Not only do you have the tools and shop, but the skills to use them. Excellent work!
  • 0

I am haunted by waters


#34 billharr

billharr

    Senior Member

  • Members
  • 2,824 posts
  • LocationStockton CA

Posted 24 April 2015 - 03:16 AM

Really nice job on the lift panels. Thank you for posting, I am enjoying your build.


  • 0

#35 craig333

craig333

    Riley's Human

  • Members
  • 8,014 posts
  • LocationSacramento

Posted 25 April 2015 - 05:33 AM

We really should sticky this one!


  • 0

Craig K6JGV_________________________ 2004 2500 CTD 4X4 FWC HAWK 1960 CJ5


#36 Lotsapapa

Lotsapapa

    Member

  • Members
  • PipPip
  • 11 posts
  • LocationNathrop,Co

Posted 26 April 2015 - 09:00 PM

I am really enjoying watching this build of yours.
You are doing a first rate job on your camper and it is inspiring me to find a clean used FWC and try to do something similar. I'm looking forward to see how you paint the camper.
And I must say, I definitely have a little garage/tool envy watching this.

EM
  • 0

#37 poriggity

poriggity

    Member

  • Members
  • PipPip
  • 26 posts
  • LocationLake Arrowhead, Ca

Posted 27 April 2015 - 03:38 AM

Great looking build.. love to see that someone has guts to cut up a camper to make it fit!

Sent from my SAMSUNG-SM-G900A using Wander The West mobile app
  • 0

#38 wuck

wuck

    Senior Member

  • Members
  • 329 posts
  • LocationPollock Pines, Sebastopol CA

Posted 28 April 2015 - 02:40 PM

CCJ - Looking good, nice work!


The cabover wood/bed on my Hawk is sagging an inch or so in the middle, there is some evidence around one corner of some water damage. So, I'm thinking of replacing it (someday :). Hard to tell from your pics, I'm wondering if this is done from the outside? If I don't have to rip out the interior, it'll happen sooner rather than later. FWC has been using "Lumber Core" sheeting for quite a while now, I hear originally they were particle board. What material did you use?


  • 0

Pat

'04 FWC Hawk

'15 F250 SD SuperCab / Short Bed

SuperDuty Mileage (Fuelly)

Trip Photos on Flickr 


#39 Colorado CJ

Colorado CJ

    Advanced Member

  • Members
  • PipPipPip
  • 60 posts

Posted 28 April 2015 - 03:51 PM

Thanks everyone!

CCJ - Looking good, nice work!

The cabover wood/bed on my Hawk is sagging an inch or so in the middle, there is some evidence around one corner of some water damage. So, I'm thinking of replacing it (someday :). Hard to tell from your pics, I'm wondering if this is done from the outside? If I don't have to rip out the interior, it'll happen sooner rather than later. FWC has been using "Lumber Core" sheeting for quite a while now, I hear originally they were particle board. What material did you use?

I used 3/4" birch ply for my cabover. What I did to remove it was, first unscrew the screws on the inside lip from the inside, then unscrewed all the screws from underneith and around the outside edge. I then took a sawsall and cut it right down the middle It was easy to remove this way.

On the inside, to install a new board, you have to push back the oak beams that are on each side of the cabover (these give strength to the overhang). To do this, you need to remove a few screws in the top of the paneling (very easy), then pull the paneling slightly away and slide the oak boards back.

The cabover wood is installed from the inside of the camper.

After you cut and coat your new cabover wood, you have to put one side in the correct place, then put pressure against the other side of the camper to slightly flex the top of it. This lets that side of the board fit into its spot.

Finally, before screwing it in, lift all the edges of the board and apply a good caulk liberally to the edges where it meets the aluminum. Then screw down.

Get some putty tape (availavle in any rv store), and stick it to where the the lower trim piece mounts, then mount the trim piece and caulk the edges of it for additional protection.


It seems like it is a big project, but it is really much easier than it looks. The longest time spent was waiting for the epoxy to dry on the cabover wood before I could install it.

Edited by Colorado CJ, 28 April 2015 - 03:53 PM.

  • 0

#40 Colorado CJ

Colorado CJ

    Advanced Member

  • Members
  • PipPipPip
  • 60 posts

Posted 29 April 2015 - 12:06 AM

I've been busy lately with work, so not much to report on today.  

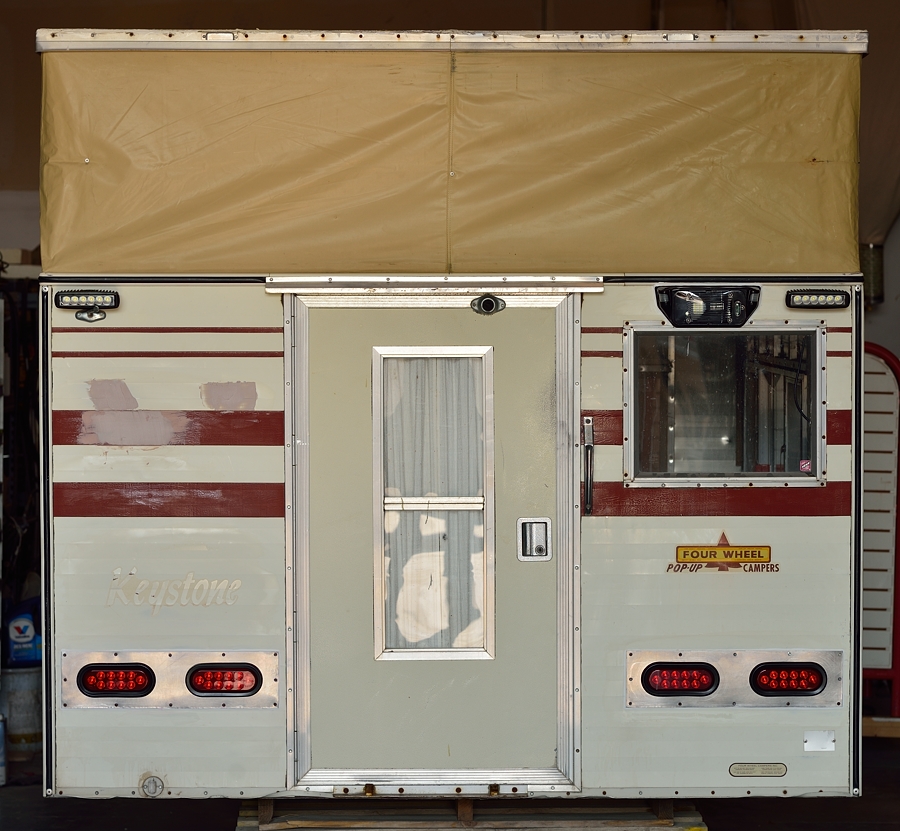
I tapped the rest of the dents out and applied bondo to the areas.   I also finished up the tail light mounting and backup light mounting on the drivers side and installed a new porch light.

I think I'll have some time to work on it tomorrow.  Hopefully I can get all the lights wired up so that I can insulate and panel the back end.  I have to do this before I can install the back lifting panel as it is installed over the inside paneling there.

Anyway, here's how the camper sits now.

camper-build-36_zps6o8rwhvl.jpg


  • 0


0 user(s) are reading this topic

0 members, 0 guests, 0 anonymous users