Here are some pictures of some modest modifications I have made to my 2014 Grandby:
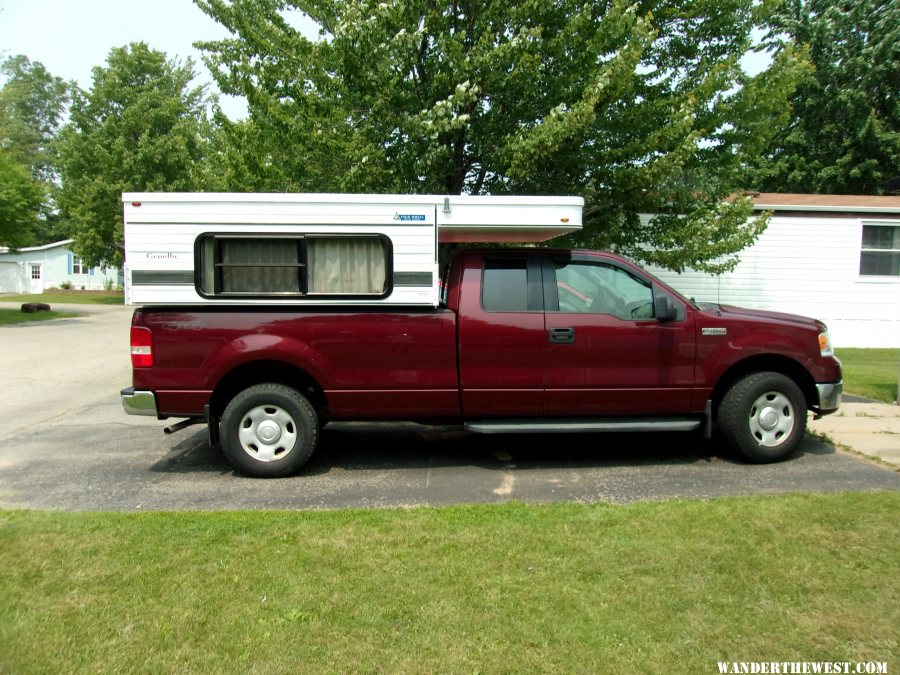
Here's my baby. It sits nicely on my 2006 Ford F150. I installed load bearing shocks (the kind with the spring on the outside) before the camper was installed. No noticable sag even fully loaded. Seems to ride better fully loaded, also. 5.4 liter V8 engine pulls it easily with no strain. Brakes work great. Yes, I have a factory tow package.
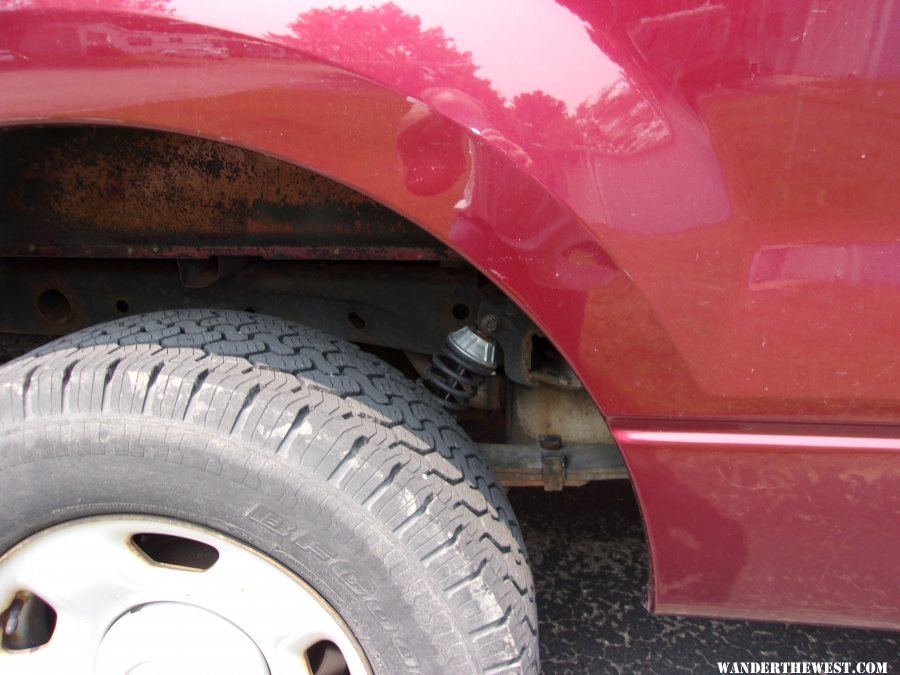
Hard to get a close up of the load bearing shocks but here it is:
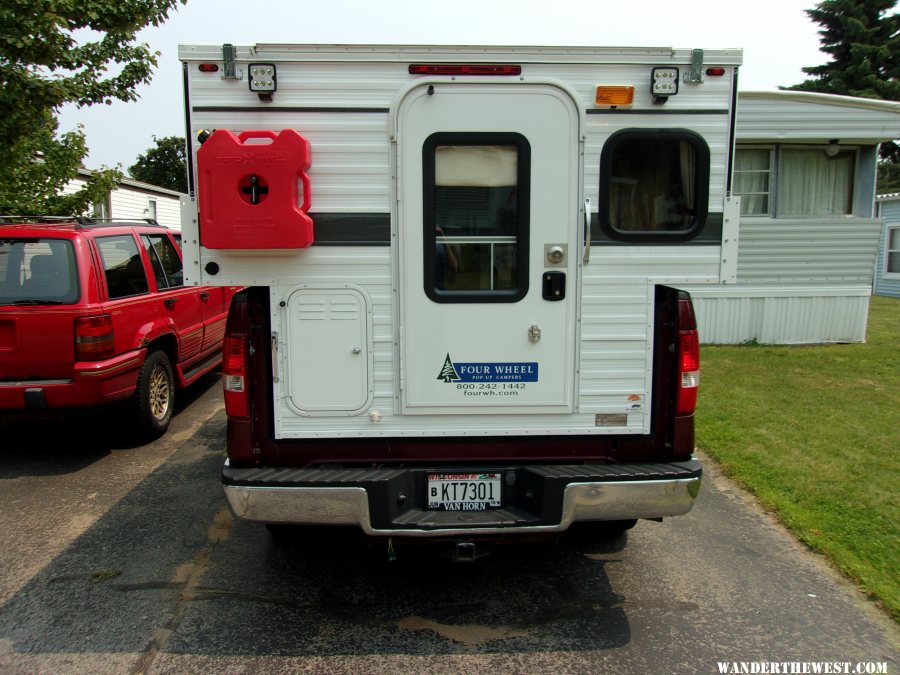
First mod was mounting RotoPax gas can to back of camper. Carriage bolts that came with the RotoPax were too short (the rear wall is TWO INCHES thick!). 2.5" carriage bolts were perfect size. Most of the work was done outside by opening the vent panel for the fridge. Still had to pull the fridge out of the cabinet just a bit to make room to work. RotoPax was positioned so as not to interfere with the door when in the latched open position.
Second mod was so simple I'm almost embarrassed to mention it. I took the back off from the rollover couch. I'd rather have a bench I can lay back on than a couch to sit on. The back of the roillover couch was so far forward there was barely enough room to lay on it without falling off the edge. I will likely never sleep four people in my camper, and if I ever do, three of them will be women and they'll all be sleeping with me in the cabover bed, so no need for that rollover couch. The brackets to which the back was attached also held the cushions in place, so my tool guy fabricated new brackets from 2' angled aluminum. They look quite nice. My tool guy does very aesthetic work.
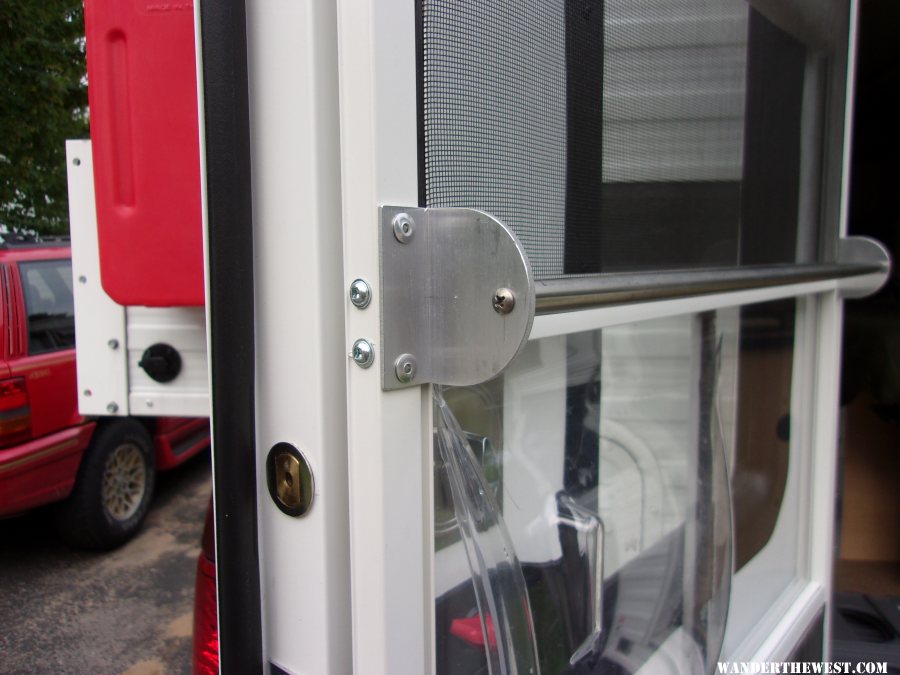
Mod three was to install a bar/handle to the interior of the screen door. I bought one of those RV screen door bars from Camping World, and after installing it we discovered that the door wouldn't close because of the angled aluminum door frame on the camper. So now I had four screw holes in my screen door.The solution: my tool guy fabricated a door bar using some angled aluminum left over from the couch cushion brackets, and a piece of stainless steel tubing he had laying around. Again, he did a very nice job. I am amazed when I watch him make a few measurements and then create stuff before my eyes. This is probably my favorite mod because I use it every time I open the door. It also serves double duty as a towel rack.
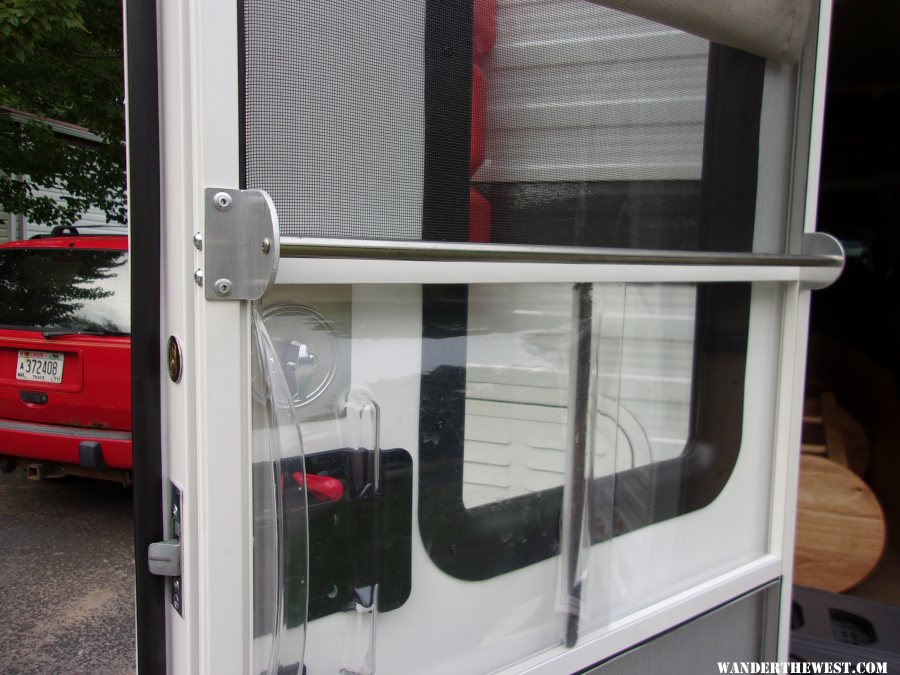
Another pic of the door bar:
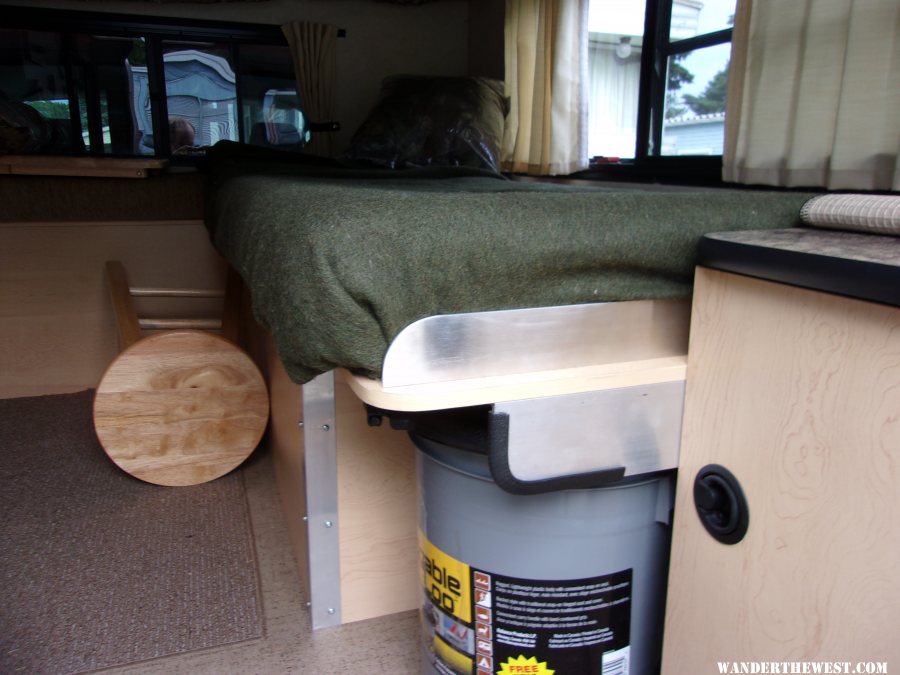
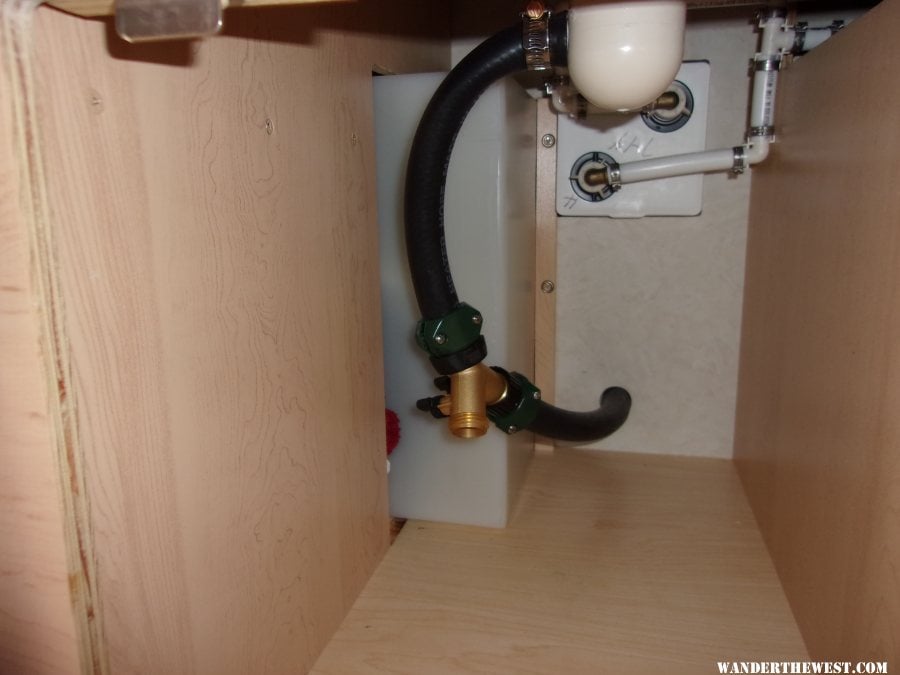
Mod 4: I decided against fabricating a gray water pipe and opted instead to put a valve on the drain hose under the sink. Now I have the option to drain my gray water either outside, or if I don"t want to go out, I can drain it to a container inside, or both (although I can't imagine why I would want to drain it both inside & outside at the same time, but if the need ever arises I can do it!).
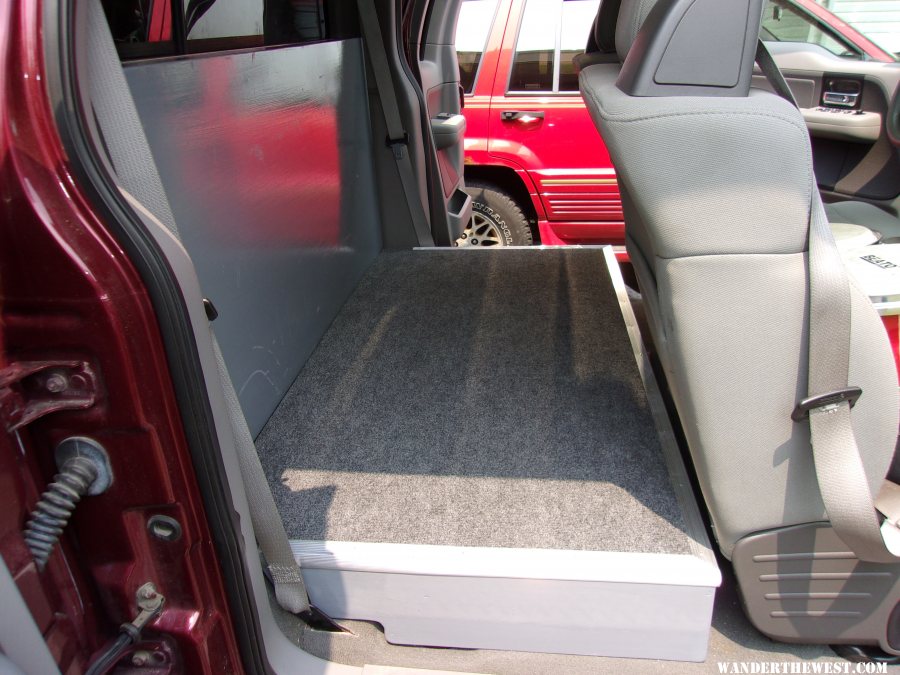
Mod 5 is a mod to the truck. I removed the back seat in the extended cab (a HUGE job - see my previous post on the subject). I told my tool guy that I wanted a flat floor in the ext cab area and also a back wall to make storage easier. This is what he came up with:
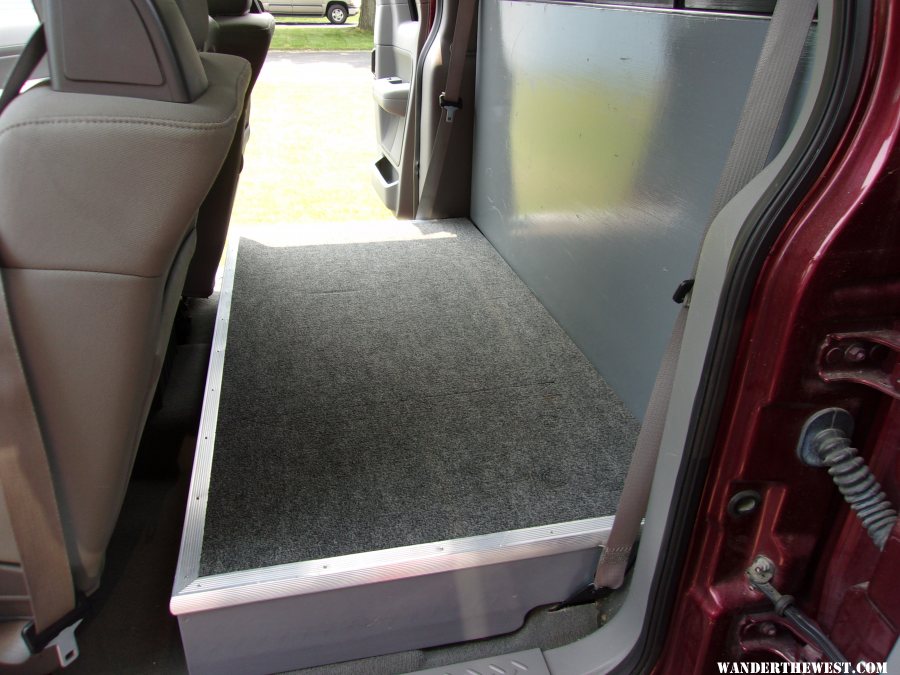
Tire jacks, jumper cables & other equipment I hope I never have to use are stored underneath. Here's a pic from the other side:
My tool guy is amazing. I tell him what I want, he takes a couple of measurements, tells me what materials I need, then he becomes a whirling dervish and in no time he creates something that never existed before. He even works on my guitars, and I'm damned picky about that. I think I'll give him a rest now, but I'm already mulling over some ideas for additional mods next year.
Edited by 2020, 05 July 2015 - 08:53 PM.