Jump to content


Photo
* * * * * 1 votes

Full build - Reconstructing a 1981 Grandby into a custom Hawk!


  • Please log in to reply
306 replies to this topic

#301 PokyBro

PokyBro

    Senior Member

  • Members
  • 467 posts
  • LocationLas Vegas, Nevada

Posted 15 June 2021 - 04:22 PM

Tim, thanks for checking in, nice to hear from you, and also glad to see your recent posts, and the changes occurring in your life. Growing families are a joy, and bring new adventures and ways of doing things. Best wishes in your future journeys!


Well, speaking of changes, we made a choice to add another major change in our life. With the housing market so crazy everywhere, and to us, particularly in Utah, we were having a challenge finding a new house that met our needs in Utah, after selling our home of 25 years in Colorado a couple years back. We’ve been renting since that time, and I have really not enjoyed this situation, when having the capacity to own. Back at the end of December 2020, I retired from pharmaceutical sales after 34 years, when offered an early retirement program package from my previous employer, which I have really been enjoying the new found freedom. We have children and grand kids in Utah, but also many family members in Las Vegas, and found ourselves pulled from both directions when trying to buy a new house. In the end, a good opportunity presented itself, and we purchased a new house in north west Las Vegas. My wife’s parents are getting up there in age and she wanted to be a bit closer to be a help as needed in the near future. So, now we are now new residents of Nevada! My wife and I both grew up in the Las Vegas valley, so it’s not completely foreign to us, and is close to many outdoor opportunities in Nevada, Arizona, Utah, and California, but not limited to just that. Anyhow, a new chapter in life for us.


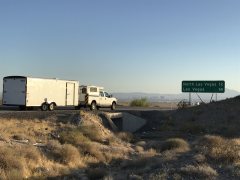
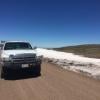
Moving our household belongings from the rental and storage unit in Utah took several trips, but the old Superduty with the 7.3 Powerstroke diesel performed the job well. I borrowed an 8’x20’ cargo trailer from my brother-in-law, and pulled that, along with the FWC on board (since I didn’t have a place to drop it), for several loads, and got the job done. I averaged 11 Mpg, which was I thought was very reasonable, and had no vehicle problems, but blew 3 trailer tires that had to be replaced under warranty, even though they were about five years old, which is largely the reason they gave way. We had plenty of help loading and unloading from family members which was a blessing. Unfortunately in the process, I suffered an inguinal hernia that will need to be repaired, but all is well.


F250 Superduty, FWC, and 8’x20’ loaded cargo trailer.


Anyhow, an update to my huild thread, that will tie into future posts, which will cover a few uncompleted tasks on the build, and some adventures.


More to come!
 

Poky


  • 0

1999 F250 crew cab SRW, 7.3 Powerstroke TD

1981 Grandby shortened to a Hawk

Build thread / https://www.wanderth...by-into-a-hawk/


#302 PokyBro

PokyBro

    Senior Member

  • Members
  • 467 posts
  • LocationLas Vegas, Nevada

Posted 20 September 2021 - 04:21 AM

Greetings!


Well, in my previous post, I shared that I had moved to Las Vegas earlier in the summer. The first few months were busy with going to various doctors to undergo surgery for bilateral inguinal hernia. Everything went well, but the recovery took awhile, and limited my activities significantly. That said, over the last month I’ve been able to get started on a number of tasks, which included finishing one significant part to my build. As I have been renting for the last several years, I haven’t had my tools and a place to do things.

 What was left to be done? After all this time, I had not finished the galley with doors and drawers, so it finally got done. Kind of embarrassing, to be honest, but that was the case, it didn’t keep us from using the rig. So, below I wanted to share how things turned out, and a little on how to’s.


First, here is a shot of what the galley looked in the build process, before adding the counter top, stove, fridge, sink, furnace and electrical. After that was all installed, the camper as used as is.


Cabinets installed
 
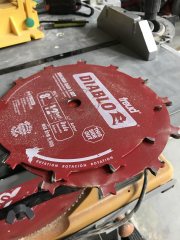
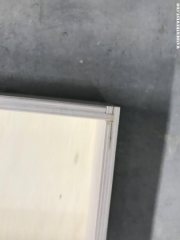
The first thing I did was to build the drawer boxes. I came across a nice YouTube post on a very strong joint that is very straightforward and relatively easy to do if you’re pretty capable on a table saw. It’s called the quarter/quarter/quarter approach. By using a a dado saw blade set set to 1/4”, you then adjust the the blade height, and width from the the saw fence all to 1/4”, and never have to readjust anything through the whole process, once you have cut the sides, front and backs to size. As you can see, the joint comes out looking nice, but is also very strong, and long lasting. I should never have a problem with the drawers coming apart.
 
Dado blade
At work on table saw
Drawer joint - quarter/quarter/quarter method
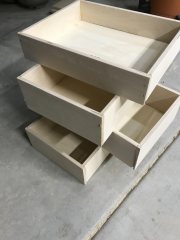
Completed drawer boxes
 
Here’s the link that describes in detail the quarter/quarter/quarter method.


I completed these drawer boxes at my son’s house prior to moving to Vegas. Once I could get back at it, I moved on to preparing to finish the the cabinet door and drawer fronts. I wanted to have the finished product look and function as nice as possible. I like how the factory FWC cabinets look, and tried to construct mine similarly. Of course my interior is more classic with wood tones, but that was what I initially chose from the beginning, with stained cabinets similar in color and tone to the beaded paneling I put on the walls. 
 

The first thing was to make sure everything was sanded properly, and I used 150 grit sand paper, which was fine enough for my purposes. I used Minwax stain, and used the same color (Ipswich) I had used on the installed cabinets. However, I used different wood this time, which was 12mm Baltic Birch, vs the birch plywood I purchased from Home Depot earlier. I wasn’t careful enough, and failed to compare the tone with a sample at the onset to what as in the camper. Big mistake on my part, because, much to my dismay, the stain color applied to this Baltic Birch, turned out to be much paler than the other cabinets. It’s possible that there was a variance from what I used earlier in the cabinet staining, but I don’t think so. So I had to strip the stain off the boards, re-sand, and start over. Problem was I couldn’t find a stain color Minwax offered that matched close enough, so I had to mix my own to get it to match correctly, and it turned out very close.


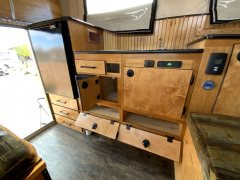
I used Watco lacquer finish in satin, which was a little difficult to acquire, allowing to me to use my HVLP gravity sprayer with the reservoir on top of the spray gun. It is so much easier to get a nice smooth surface once completed. I applied three layers. Next I used a router to chamfer the edges on front and back of the boards, which gave me a slight bevel, vs just leaving the edges of the boards flat, and more prone to splintering. Then I taped off all the edges with blue painters tape, and applied Rustolium flat black paint on the edges. This helped to continue my efforts to keep a black contrast to the cabinets. I found drawer handles, hinges, and slam latches on Amazon. The slam latches were a little scary to install, because if I measured wrong, it could mean redoing that board with all the processes described above. I used some practice boards to calculate placement properly, and it it worked out fine and they function superbly. I also found some drawer/cabinet catches to keep the drawers closed while traveling, since I used side mount drawer slides. Here’s how it turned out.


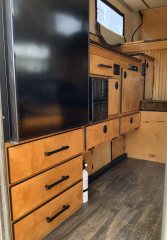
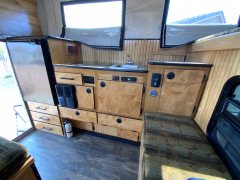
Completed drawers and doors
Wide angle of galley
Open cabinets
 
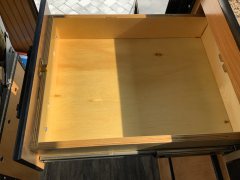
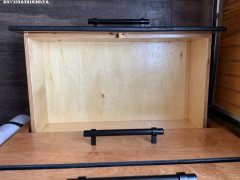
I also took the time to spray a polyurethane finish on the inside and outside of the drawers, it looks nicer and is less likely to have staining and scuffs. 
 
Drawer close up
Drawer finishing
 
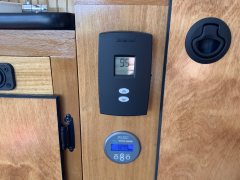
My wife got pretty excited about how it turned out, she wanted to show everyone. She’s now taking over on how to stock supplies and pack needed items, and get on the road to travel some more. One last request she had was to paint the Honeywell thermostat black so it didn’t stand out so much white as it was. I obeyed!
 
Painted thermostat


Well, that’s it for now. 
 
Poky


Edited by PokyBro, 20 September 2021 - 04:42 AM.

  • 1

1999 F250 crew cab SRW, 7.3 Powerstroke TD

1981 Grandby shortened to a Hawk

Build thread / https://www.wanderth...by-into-a-hawk/


#303 Mighty Dodge Ram

Mighty Dodge Ram

    Senior Member

  • Members
  • 1,003 posts
  • LocationClose to the edge...

Posted 20 September 2021 - 01:32 PM

Mad skills! The wood tone/black contrast looks great. 


  • 0
Richard
1996 Dodge Ram 1500 4x4, lightly lifted, ARB bumper/Warn winch, BFG AT/KO2, Snugtop shell. SOLD! But not forgotten!
2002 Chevy 2500HD XC LB 6.0L 4X4, Leer Hi-Rise shell, completely stock...for now!

#304 Vic Harder

Vic Harder

    Doctor Electric

  • Site Team
  • 4,947 posts
  • LocationCalgary, Alberta

Posted 20 September 2021 - 02:54 PM

Very nice!  


  • 0

#305 Casa Escarlata Robles Too

Casa Escarlata Robles Too

    C'est la vie

  • Site Team
  • 9,283 posts
  • Locationmonterey bay area

Posted 20 September 2021 - 05:28 PM

Great job your woodworking skills are very good.

Frank


  • 0

2002 Tundra AC TRD 4WD Limited 2009 ATC Bobcat loaded http://sharychic.blogspot.com/


#306 Abbiennormal

Abbiennormal

    Advanced Member

  • Members
  • PipPipPip
  • 38 posts

Posted 20 September 2021 - 05:41 PM

Very nice!!!


  • 0

1985 Grandby

1985 Ford F150 4x4

2017 Toyota Tundra 4x4

I'm just a Gen Xer with new knees so now I feel unstoppable.


#307 CAPTNDAVIE

CAPTNDAVIE

    Newbie

  • Members
  • Pip
  • 6 posts
  • LocationNorth Carolina

Posted 23 August 2023 - 02:09 PM

Great build write up! Thanks for sharing!!!
  • 0


0 user(s) are reading this topic

0 members, 0 guests, 0 anonymous users