Jump to content


Photo
* * * * * 1 votes

Full build - Reconstructing a 1981 Grandby into a custom Hawk!


  • Please log in to reply
306 replies to this topic

#111 PokyBro

PokyBro

    Senior Member

  • Members
  • 467 posts
  • LocationLas Vegas, Nevada

Posted 29 September 2016 - 05:09 AM

Marty shared one important tip with me for getting the panels evened out side to side, and that was to cut a couple of pieces of plywood to the same exact length, placing them each side and then let the roof drop down and rest on them before you attach the hinges to the wall. This was done first on the back, then repeated on the front.
The next several photos will show these jig boards, and this is after I corrected the panels so they would fold correctly. It cost me about 1 1/2" off of the height I was shooting for, but they still ended p at 25 1/4", and it worked out fine. My inside camper height is about 6' 5".

ImageUploadedByWander The West1475125392.833661.jpg ImageUploadedByWander The West1475125426.391465.jpg ImageUploadedByWander The West1475125464.759477.jpg ImageUploadedByWander The West1475125490.711617.jpg

I also added lift spring studs before attaching the panels.
ImageUploadedByWander The West1475125593.256388.jpg ImageUploadedByWander The West1475125612.209435.jpg


Sent from my iPad using Wander The West
  • 0

1999 F250 crew cab SRW, 7.3 Powerstroke TD

1981 Grandby shortened to a Hawk

Build thread / https://www.wanderth...by-into-a-hawk/


#112 PokyBro

PokyBro

    Senior Member

  • Members
  • 467 posts
  • LocationLas Vegas, Nevada

Posted 29 September 2016 - 05:15 AM

Last thing for tonight, here is before and after trimming the lift panels to fold properly. Notice the rounded edges are gone on top and bottom of both panels. I wouldn't round those parts of the panels if I were making them again. It made it a little more difficult to center the hinges on the panel lip.

ImageUploadedByWander The West1475126054.293796.jpg ImageUploadedByWander The West1475126072.429888.jpg ImageUploadedByWander The West1475126097.180191.jpg ImageUploadedByWander The West1475126127.558479.jpg


Sent from my iPad using Wander The West
  • 0

1999 F250 crew cab SRW, 7.3 Powerstroke TD

1981 Grandby shortened to a Hawk

Build thread / https://www.wanderth...by-into-a-hawk/


#113 hebegebe

hebegebe

    Senior Member

  • Members
  • 234 posts
  • LocationLA and San Diego

Posted 29 September 2016 - 02:47 PM

Looks like you have done a proper job. Congrats on becoming the lift panel guru! In your opinion would it be possible to have a window opening ? How much are the new hinges?


Sent from my iPhone using Wander The West
  • 0

#114 PokyBro

PokyBro

    Senior Member

  • Members
  • 467 posts
  • LocationLas Vegas, Nevada

Posted 03 October 2016 - 03:04 AM

Hebegebe, thanks for your your comments. In regards to a window through the lift panels, I don't really see a way to do so as long as they are made wood or composite, and having a hinge running across the width. I'm sure it's been considered many times though. For several people who have made roof lifts out of conduit tubing, perhaps that might be an option?

The hinges I purchased from ATC were $40.00 each, plus shipping.


Sent from my iPad using Wander The West
  • 0

1999 F250 crew cab SRW, 7.3 Powerstroke TD

1981 Grandby shortened to a Hawk

Build thread / https://www.wanderth...by-into-a-hawk/


#115 PokyBro

PokyBro

    Senior Member

  • Members
  • 467 posts
  • LocationLas Vegas, Nevada

Posted 03 October 2016 - 03:34 AM

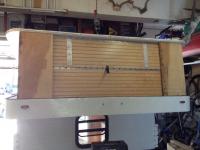
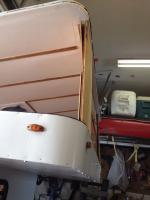
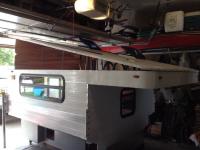
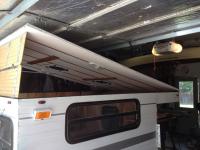
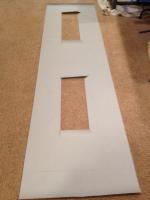
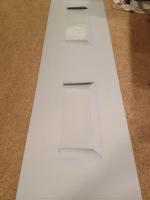
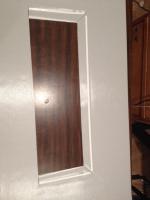
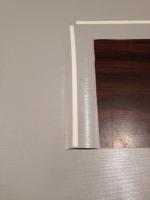
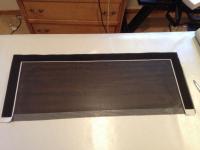
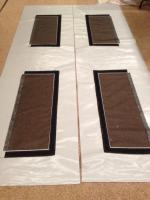
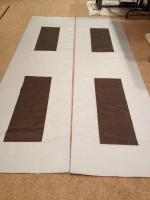
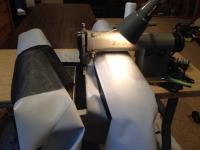
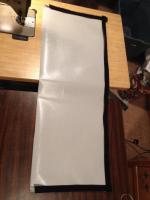
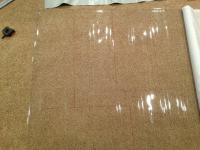
This weekend, I made a ton of progress, as you'll see. Today, I'll be posting a long thread of photos of the whole process I went through to assemble a side liner, and surprisingly (at least a little to me), I seemed to have gotten it mostly right the first time, which is awesome!

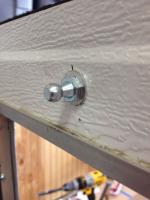
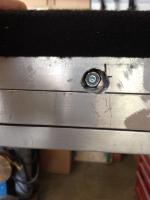
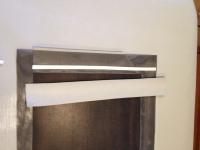
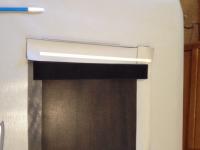
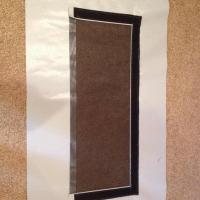
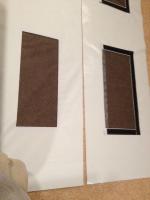
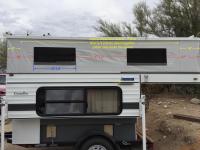
W6USA, provided me with some excellent photos from his FWC Grandby, along with some measurements, that provided some very detailed, up close shots, enabling me to study them carefully, and come up with plans to make my own. (thanks again, Scott!)
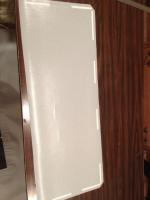
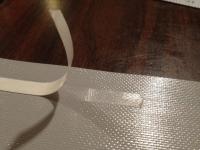
Here's one example:

ImageUploadedByWander The West1475464227.535890.jpg


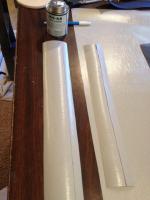
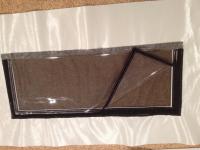
I ordered my materials from Sailrite, which included the following:

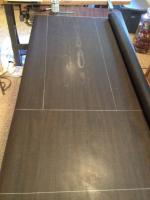
5 yards of Shelter-Rite, grey, 18oz vinyl covered polyester (comes in 61" width)
2 yards of clear 18oz clear window material (comes in 54" width I think)
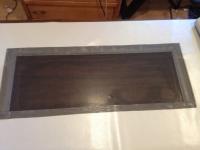
2 yards of Fiberglas reinforced screen material (comes in 61" width)
2 large spools of v92 upholstery thread with uv protection, 1-white and 1-black
2" Velcro loop
2" Velcro hook

You can go to their sight at Sailrite.com, and check it out, the materials are of very high quality, and if you have any questions, they are very patient and willing to answer questions, and help in any way they can. Also on their sight, they have many, many how to videos that were invaluable to me to learn sewing techniques, seams, and assembly process. Thumbs up for Sailrite!

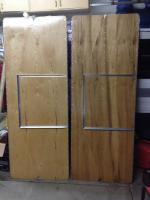
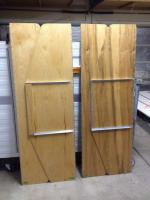
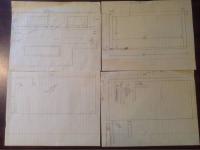
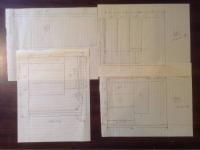
After studying the photos shots I received, and some additional ones I was later able to take, I came up with the following rough plans. The measurements are not exact, but illustrate how I try to get organize before building something, such as wood project.

Alright, here we go. I'll try to keep my commentary to a minimum, and hope that the pictures will be of help and interest to others.

ImageUploadedByWander The West1475465472.781357.jpg ImageUploadedByWander The West1475465492.353922.jpg ImageUploadedByWander The West1475465530.052110.jpg ImageUploadedByWander The West1475465556.348414.jpg ImageUploadedByWander The West1475465580.145072.jpg


Sent from my iPad using Wander The West
  • 0

1999 F250 crew cab SRW, 7.3 Powerstroke TD

1981 Grandby shortened to a Hawk

Build thread / https://www.wanderth...by-into-a-hawk/


#116 PokyBro

PokyBro

    Senior Member

  • Members
  • 467 posts
  • LocationLas Vegas, Nevada

Posted 03 October 2016 - 03:52 AM

After cutting the pieces to length and the width I would need, as seen above, I measured, and remeasured, and then marked, and laid out the cuts to make for the Windows. A good pair of heavy duty scissors cut through this vinyl material easily, and you can even just slide them along on the lines once you get started. As far as marking the vinyl, you can get a blue marker pen at Walmart or other stores, in the sewing department, that is water soluble. When marking screen and window vinyl, I think a soap stone works best.

ImageUploadedByWander The West1475465906.883623.jpg ImageUploadedByWander The West1475465946.779604.jpg ImageUploadedByWander The West1475466048.699617.jpg ImageUploadedByWander The West1475466127.883403.jpg ImageUploadedByWander The West1475466149.081017.jpg

I laid the first panel over top the second,face to face, and marked the corners so I could make sure they were in the same place, and then followed up with measuring and marking to be exact. I always measure from the edge of the original material that came off the roll, in order to make sure I was always square from that surface. Speaking of that, I used a tape measure, a metal yard stick, and a builders square, to lay out the pattern for the cuts.


Sent from my iPad using Wander The West

Edited by PokyBro, 03 October 2016 - 03:54 AM.

  • 0

1999 F250 crew cab SRW, 7.3 Powerstroke TD

1981 Grandby shortened to a Hawk

Build thread / https://www.wanderth...by-into-a-hawk/


#117 PokyBro

PokyBro

    Senior Member

  • Members
  • 467 posts
  • LocationLas Vegas, Nevada

Posted 03 October 2016 - 04:05 AM

Once the windows were cut, I used seam stick tape, (which is a two sided tape you apply and peal off the paper, essential for this project, obtained from Sailrite), to fold the flaps back into place. Then after cutting the screen material to size, I put another row of seam stick down to hold the screen material in place, then again placed seam stick on top of the screen, then a folded piece of Vinyl for inside the side liner, sandwiching the screen material. And finally, I used seam stick one more time, on top of the vinyl strips to hold the Velcro hook material in place, before taking it to the sewing machine. It is a process, but the final product came out looking much like factory made.

ImageUploadedByWander The West1475467357.240246.jpg ImageUploadedByWander The West1475467387.809223.jpg ImageUploadedByWander The West1475467424.293379.jpg ImageUploadedByWander The West1475467456.865943.jpg ImageUploadedByWander The West1475467475.477593.jpg ImageUploadedByWander The West1475467492.201283.jpg


Sent from my iPad using Wander The West
  • 0

1999 F250 crew cab SRW, 7.3 Powerstroke TD

1981 Grandby shortened to a Hawk

Build thread / https://www.wanderth...by-into-a-hawk/


#118 PokyBro

PokyBro

    Senior Member

  • Members
  • 467 posts
  • LocationLas Vegas, Nevada

Posted 03 October 2016 - 04:09 AM

ImageUploadedByWander The West1475467566.773119.jpg ImageUploadedByWander The West1475467586.872389.jpg ImageUploadedByWander The West1475467615.679187.jpg ImageUploadedByWander The West1475467639.274701.jpg ImageUploadedByWander The West1475467661.257265.jpg ImageUploadedByWander The West1475467705.977345.jpg


Sent from my iPad using Wander The West
  • 0

1999 F250 crew cab SRW, 7.3 Powerstroke TD

1981 Grandby shortened to a Hawk

Build thread / https://www.wanderth...by-into-a-hawk/


#119 PokyBro

PokyBro

    Senior Member

  • Members
  • 467 posts
  • LocationLas Vegas, Nevada

Posted 03 October 2016 - 04:14 AM

ImageUploadedByWander The West1475467835.571746.jpg ImageUploadedByWander The West1475467864.782989.jpg ImageUploadedByWander The West1475467884.571824.jpg ImageUploadedByWander The West1475467913.805262.jpg ImageUploadedByWander The West1475467937.502252.jpg

That was pretty much one day's work for me, as I was learning while I was making, and concentrating and being very careful. It was draining to be honest!


Sent from my iPad using Wander The West
  • 0

1999 F250 crew cab SRW, 7.3 Powerstroke TD

1981 Grandby shortened to a Hawk

Build thread / https://www.wanderth...by-into-a-hawk/


#120 PokyBro

PokyBro

    Senior Member

  • Members
  • 467 posts
  • LocationLas Vegas, Nevada

Posted 03 October 2016 - 04:30 AM

Next it was time to make the clear vinyl window, and the privacy window, and attach Velcro loop to them.

Once again seam stick is the way to go. My industrial sewing machine is not a walking foot machine, so this a big part of the reason for so much use of seam stick.

First I carefully measure and laid out the cut patterns on both the materials, assuring they were square and measured correctly, to lay over the previous made panels with screen windows, and velcro'd inside.

The privacy flapped required allowing an extra 1/2" - 1" flap, to fold over, so there isn't a raw edge. It just looks nicer as well.
Seam stick again to fold the flap over, then once more seam stick to hold the Velcro in place. The flat finish of the grey Shelter-Rite goes to the exterrior, so on the privacy flap, the edge folds inside, and then the Velcro attaches over the edge flaps at the sewing machine.

ImageUploadedByWander The West1475468794.270539.jpg
ImageUploadedByWander The West1475468533.454470.jpg ImageUploadedByWander The West1475468559.011733.jpg ImageUploadedByWander The West1475468612.285867.jpg ImageUploadedByWander The West1475468632.384618.jpg ImageUploadedByWander The West1475468654.340098.jpg


Sent from my iPad using Wander The West
  • 0

1999 F250 crew cab SRW, 7.3 Powerstroke TD

1981 Grandby shortened to a Hawk

Build thread / https://www.wanderth...by-into-a-hawk/


1 user(s) are reading this topic

0 members, 1 guests, 0 anonymous users