Jump to content


Photo
* * * * * 1 votes

Full build - Reconstructing a 1981 Grandby into a custom Hawk!


  • Please log in to reply
306 replies to this topic

#191 Living The Dream

Living The Dream

    Senior Member

  • Members
  • 464 posts
  • LocationFront Range, Colorado

Posted 11 April 2017 - 02:34 PM

Hey Poky. Glad to hear you are doing well.  I have one quick questions for you.


For the sideliner, you mention you wish you had used the camper body circumference rather than the roof circumference.  And you think the material will stretch to fit the roof.


Can you elaborate on why you think the lower circumference is the right one to use?  I made a pattern/mockup of window with your guidance, it is looking great. I will be getting to the sewing in two more weeks after some travel is done.


Best - Tim


  • 0

My youtube channel about my Four Wheel Camper - https://www.youtube.com/c/timmorrissey

All about my camper - https://www.tgmorrissey.com/camper

Item I used in my build- http://bit.ly/TGMorrisseyParts


#192 Boonie

Boonie

    Senior Member

  • Members
  • 193 posts
  • LocationBrighton, Colorado

Posted 11 April 2017 - 05:11 PM

Hey Tim,


I'm sure Poky will confirm, but on my build the roof is actually 1/2" wider than the body making the circumference on the roof greater. I assume this allows the aluminum trim attached to the top to fit over the body easier and provide a better weather seal.


Boonie


  • 0

#193 PokyBro

PokyBro

    Senior Member

  • Members
  • 467 posts
  • LocationLas Vegas, Nevada

Posted 11 April 2017 - 11:05 PM

Tim and Boonie,

My reasoning about fitting the side liner more to the circumference of the camper body, vs the roof, is mainly to get a tighter fit that prevents the side liner material from "puckering" for lack of a better term. If the side liner is loose on the roof, as mine was, when you put the trim ring around the camper body, you'll end up fighting the material from bunching up, sort of like a very tight belt, on too big a pair of jeans, on a skinny kid, if that gives you an exaggerated visual. Perhaps slightly loose around the camper body would be best, to allow for shrinkage of the material over time.
The main reason I would make it tighter the next time is to get a smoother, tight fitting look. Mine was probably 1- 1 1/2" too long, which isn't bad, it worked out fine, maybe I'm just picky.

When installing, I marked one inch at the top of the liner, and matched that one inch mark to the top of the tube on the roof edge, and then folded it over so the roof sheeting lays down over top like a shingle.

Hope that helps Tim, and congrats on getting to the sideliner stage on your camper, wishing you lots of luck. Just take your time and it'll turn out great!

Poky
  • 0

1999 F250 crew cab SRW, 7.3 Powerstroke TD

1981 Grandby shortened to a Hawk

Build thread / https://www.wanderth...by-into-a-hawk/


#194 PokyBro

PokyBro

    Senior Member

  • Members
  • 467 posts
  • LocationLas Vegas, Nevada

Posted 05 June 2017 - 04:32 AM

I found the opportunity this weekend to do a couple of additions to my build. It's been awhile because I don't have access to all my tools since moving to Utah, as I mainly just moved me, not my whole household.

I decided to tackle the installation of lift spring struts. I ordered them from eBay, "Strut-your-stuff", for $39.99 per pair. I ordered 36", 40 lb struts for both front and rear. I also purchased offset brackets from the same source.

I installed 10mm ball posts on the body, front and rear, awhile back, so this mainly involved just installing the brackets on the roof, and connecting the struts.

IMG_2641.JPG IMG_2640.JPG IMG_3067.JPG

I began by attaching the strut upside down to the ball post on the body, and then raising the roof, holding the offset bracket up to about where it would go, and marked the location. I dropped the roof back down to make sure there was plenty of room for the struts to compress. Then I went ahead and attached the brackets on the roof, and was able to use one existing hole. I chose to purchase brackets with three fastener holes for strength.

Image1496637048.285777.jpg Image1496637063.032103.jpg Image1496637092.010143.jpg

Edited by PokyBro, 07 June 2017 - 02:58 AM.

  • 0

1999 F250 crew cab SRW, 7.3 Powerstroke TD

1981 Grandby shortened to a Hawk

Build thread / https://www.wanderth...by-into-a-hawk/


#195 PokyBro

PokyBro

    Senior Member

  • Members
  • 467 posts
  • LocationLas Vegas, Nevada

Posted 05 June 2017 - 04:44 AM

Image1496637153.512461.jpg Image1496637172.612368.jpg Image1496637185.280438.jpg Image1496637207.195849.jpg

I repeated the same process on the front after making sure the rear of the roof would fold down properly still after adding the struts, which it did.

Image1496637311.203265.jpg Image1496637323.671079.jpg

Suffice it to say, I was mighty pleased with the way it turned out. During my build I actually weighed my complete roof, along with the extra things I added, so I know it weighs a little over 100 lbs. with two 40 lb struts on each end, it seems perfect to me. It requires a fraction of the force to start to raise the roof, and then stops right up into place. To drop the roof, I have to pull down just slightly.

Why did I wait so long to do this? Silly me!
  • 0

1999 F250 crew cab SRW, 7.3 Powerstroke TD

1981 Grandby shortened to a Hawk

Build thread / https://www.wanderth...by-into-a-hawk/


#196 PokyBro

PokyBro

    Senior Member

  • Members
  • 467 posts
  • LocationLas Vegas, Nevada

Posted 05 June 2017 - 04:52 AM

I also decided to use 1 1/2" attachment screws, here's why.

If you look at the roof frame, you can see there is a one inch tube, butted up to a two inch tube. I wanted to screw through both, vs just a 3/4" screw that would get only one thickness on the outside tube as shown in the additional example. This should provide considerable strength, times three for each bracket.

IMG_0958.JPG Image1496638204.524350.jpg Image1496638215.877007.jpg


The second project I completed was to stain and finish the slide out board for the bed, and the side boards it rests on.

Image1496638304.609541.jpg Image1496638317.011538.jpg
  • 0

1999 F250 crew cab SRW, 7.3 Powerstroke TD

1981 Grandby shortened to a Hawk

Build thread / https://www.wanderth...by-into-a-hawk/


#197 PokyBro

PokyBro

    Senior Member

  • Members
  • 467 posts
  • LocationLas Vegas, Nevada

Posted 05 June 2017 - 05:00 AM

Image1496638363.919152.jpg

The finished color matched up pretty nicely, if I do say so myself.

Image1496638438.835149.jpg Image1496638451.402748.jpg

That's about it for now. I'm planning out the galley side cabinetry now, and hope to get going on that soon, as well as installing the Isotherm CR 130 12 volt fridge.

I found a source for purchasing my bed and seat cushion foam in Las Vegas, called Galaxy Foams, that I'll be checking out when I'm down there seeing family, and then I can get my bed cushions made up. My brother does upholstery, so I might cave and let him help me on that.
  • 0

1999 F250 crew cab SRW, 7.3 Powerstroke TD

1981 Grandby shortened to a Hawk

Build thread / https://www.wanderth...by-into-a-hawk/


#198 Living The Dream

Living The Dream

    Senior Member

  • Members
  • 464 posts
  • LocationFront Range, Colorado

Posted 10 June 2017 - 09:26 PM

Looks great Poky.  Nice to see some more progress, motivating for me to get back in the garage too.  Now I really want to do struts too.


I'll be on the road soon enough!  - Tim


  • 0

My youtube channel about my Four Wheel Camper - https://www.youtube.com/c/timmorrissey

All about my camper - https://www.tgmorrissey.com/camper

Item I used in my build- http://bit.ly/TGMorrisseyParts


#199 PokyBro

PokyBro

    Senior Member

  • Members
  • 467 posts
  • LocationLas Vegas, Nevada

Posted 06 July 2017 - 04:15 AM

For the 4th of July weekend I did a little work on the rig, and made it out camping as well.

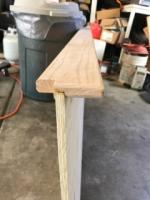
I ordered and installed Bilstein 5100s to replace a mismatched set of shocks on my pickup. The front had Monroe Reflex, and I couldn't identify the rears. So, a new matched set made sense to me. My pickup started out for me just to be something to play in when I can. Then came the camper, so now I'm fixing both up over time.

The Bilsteins made a very notable difference in handling characteristics. They are slightly stiffer on the ride and over bumps, but in a good way. Going around curves in the canyon is now a firm feel, and less swaying or leaning. On dirt roads with minor washboard the wheels stay on the ground and don't bounce, at least not at lower speeds. I'm really happy with the Bilsteins and recommend them highly.

I purchased a new mattress pad from Galaxy Foams and Upholstery in Las Vegas, NV, but unfortunately its a tad too firm. I will be changing that out before I do the cover, plus it's a little too thick as well. Should have been more careful with the purchase, but overall its not too expensive to replace. Still slept well nonetheless.

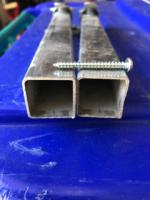
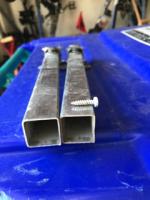
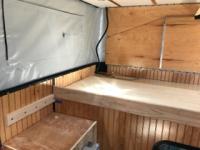
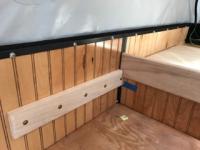
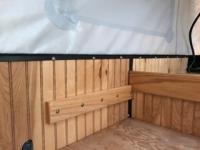
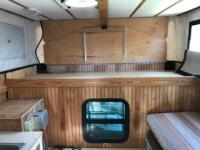
I've pulled all my temporary galley fixtures out, in preparation for building the real deal galley, so for now, I'm back to just a shell.

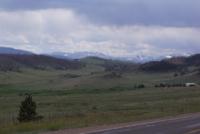
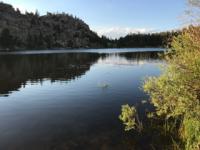
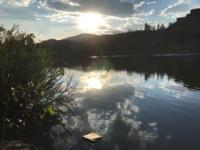
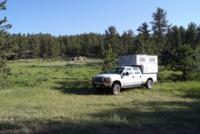
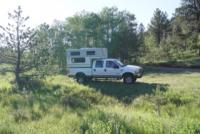
Just the same, as stated above, I got out for a short camping trip in Colorado for the holiday weekend. Man I can't get over how easy it is to go from fishing, drive up the NF road five minutes, find a spot for the night, park as level as you can, pop the top, roll out the bag, and ready for bed, all in another five minutes. It's awesome!

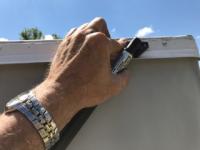
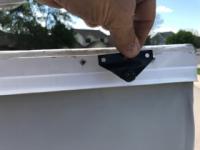
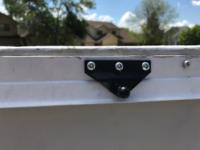
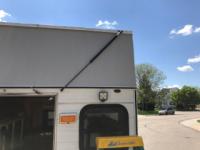
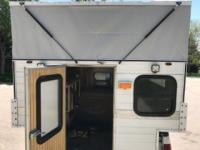
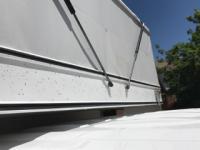
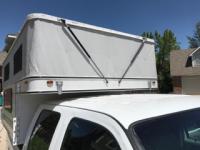
Here's some photos of the trip.

Edited by PokyBro, 06 July 2017 - 04:27 AM.

  • 0

1999 F250 crew cab SRW, 7.3 Powerstroke TD

1981 Grandby shortened to a Hawk

Build thread / https://www.wanderth...by-into-a-hawk/


#200 PokyBro

PokyBro

    Senior Member

  • Members
  • 467 posts
  • LocationLas Vegas, Nevada

Posted 06 July 2017 - 04:19 AM

DSC00092.JPG Image1499314647.753267.jpg Image1499314672.346213.jpg DSC00095.JPG DSC00096.JPG
  • 0

1999 F250 crew cab SRW, 7.3 Powerstroke TD

1981 Grandby shortened to a Hawk

Build thread / https://www.wanderth...by-into-a-hawk/


0 user(s) are reading this topic

0 members, 0 guests, 0 anonymous users