Jump to content


Photo

Restoring a 68 Siesta Pop-up and getting it to fit a newer style truck.


  • Please log in to reply
60 replies to this topic

#1 68 Siesta

68 Siesta

    Advanced Member

  • Members
  • PipPipPip
  • 86 posts
  • LocationSouth Jordan, Utah

Posted 30 May 2016 - 12:57 AM

I've been pestered by a couple wtw members to start a thread on the restoration of my 1968 Siesta hard side popup and the mods I have made to get it to better fit the newer truck. Its been a project I have been working on for several years now. I first got the camper in 2002 and camped in it for about 7 years without any other work than routine maintenance. If there is interest in seeing anything I don't include a picture of, I'll try to get something uploaded. I'm not very good at taking progress pictures because I hate to stop working and pick up the camera.


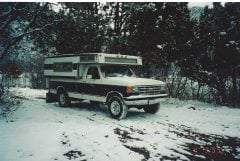
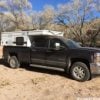
When I first acquired the camper it was sitting on a 1987 F250.


4 28 2015 018


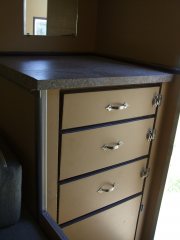
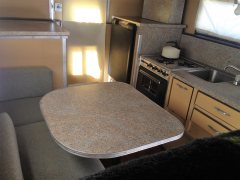
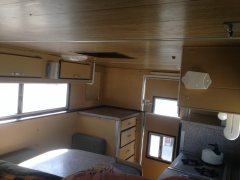
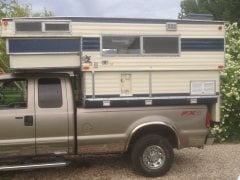
When the camper got to the stage of "junk it or fix it" I chose to fix it. I tediously tore off all the contact paper on the inside walls and repainted, put in a new floor and countertop, built drawers where a hanging closet used to be, added a freshwater and battery monitor and 12 volt power source, and painted the outside to match my old truck. Again, I'm horrible at progress pictures, but here are some shots of the final product. 


DSCF2188
IMG 3054
IMG 3049
IMG 3037


  • 1

#2 68 Siesta

68 Siesta

    Advanced Member

  • Members
  • PipPipPip
  • 86 posts
  • LocationSouth Jordan, Utah

Posted 30 May 2016 - 12:57 AM

I upgraded trucks a couple years ago which required a number of modifications to get the camper to fit the truck. Most importantly, the camper was too wide at the tailgate to fit the newer Fords so I had to narrow the backend about 3 inches. Luckily there was some closet space that I could take it from. Unfortunately, I didn't have the foresight then to take pictures of that project. 


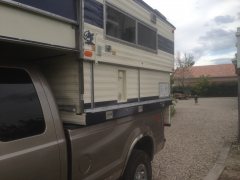
The next challenge was to get the cabover of the camper to clear the cab. If you look carefully at the first picture in this thread, you can see the overhang on the camper is actually indented and the cab of the truck fit up inside the overhang of the camper. Because I upgraded to an extended cab truck which a higher cab, I had to add about 5 1/2 inches of spacer between the bed of the truck and the camper to get the cab over to clear. 


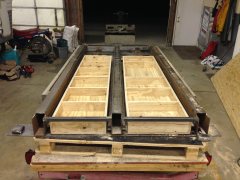
At first I built a wood platform, but after a while I got to thinking about all that wasted space under the camper and decided to do something about it. In short, I built a steel frame that I bolted to the bottom of the camper, complete with sliding drawers that run the length of the bed. Here is the rough framing:


10 28 2015 006
 

Because drawer slides that long were cost prohibitive, I designed the drawer to slide on roller blade ball bearings which run along on angle iron I welded to the frame of the spacer. 


10 28 2015 009
.
 
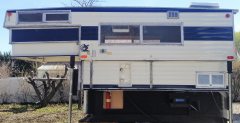
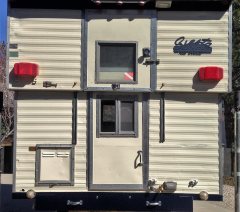
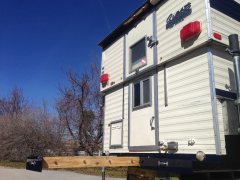
I made drawer faces from thin steel plate and painted them to match the truck. Here's a picture of the finished back end. 
 
IMG 3028
IMG 3053


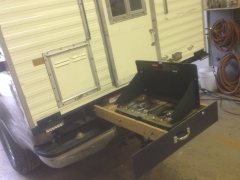
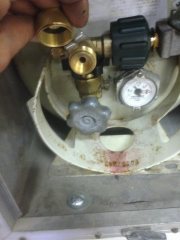
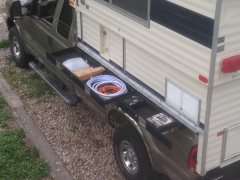
I have drawer locks that lock the drawers closed for travel. On the driver's side I keep  tools, a shovel, recovery straps, an ax, and lug wrenches for my trailers. On the passenger side I have made an outdoor kitchen complete with propane hookup. The drawer slides out about six feet, but you'll get the idea from these pictures. 


IMG 3134
IMG 3130


More to come later.....


  • 1

#3 DrJ

DrJ

    Senior Member

  • Members
  • 514 posts
  • LocationSouthern Idaho

Posted 30 May 2016 - 01:17 AM

This is an awesome restore project.

I've seen the camper first hand and it's top notch work!!!


  • 0

2015 Silverado Crew Cab Duramax and 2015 Front Dinette Grandby

One can change the world, it only requires kindness

http://www.truckcamp...g-family-earth/


#4 68 Siesta

68 Siesta

    Advanced Member

  • Members
  • PipPipPip
  • 86 posts
  • LocationSouth Jordan, Utah

Posted 31 May 2016 - 04:00 AM

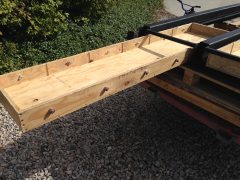
After building the drawers underneath the camper, I decided to do something about the wasted space in between the bed rails of the truck and the camper. So I built drawers that fit there also. Because they don't slide as far, I was able to use heavy duty drawer slides. I went with inlaid pulls for a more sleek look along the sides. 


IMG 3137
 
IMG 3136
 
IMG 3135

  • 1

#5 68 Siesta

68 Siesta

    Advanced Member

  • Members
  • PipPipPip
  • 86 posts
  • LocationSouth Jordan, Utah

Posted 31 May 2016 - 04:26 AM

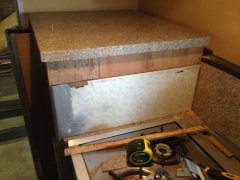
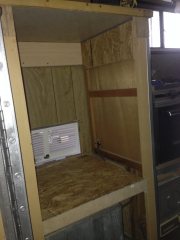
The camper originally had an ice box which I could never get to hold ice longer than a day. When I did the restore I put in a new ice box hoping that new insulation would help. It didn't. So when I got a good deal (free-ninety-free) on a Norcold 3 way fridge I jumped at installing it.  


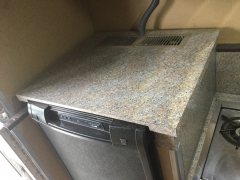
It didn't fit the cabinet well, so I had to remodel the cabinet and redo some countops. Luckily I was able to find another sheet of matching laminate counter top. 


12 17 2014 014
12 17 2014 011
 

The reason I got it for free was the previously owner (thanks DrJ) removed it to put in a compressor fridge because the 3 way Norcold didn't hardly cool and often spoiled the food. Because everything seemed to work well in my bench tests, I read the manual to see if I could figure out why it wasn't cooling when installed in the Hawk. 


What I discovered is that it was not properly vented in the Hawk. Really, it was just too big for the FWC. Because of the size of it, FWC didn't have enough room to properly place the upper vent. Because the upper vent was installed too low, hot air was always trapped around the rear fins of the fridge that have to be kept cool. 


So the tricky part of the fridge install was engineering a vent that worked per the specs of the manufacturer whether the camper was lowered or popped up. I couldn't do two side vents like many pop-ups because the upper vent would be blocked when the camper was in the lower position. 

 
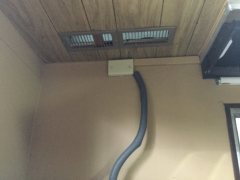
My solution was to vent straight up through the roof. I put vents on top of the cabinet and in the roof directly above the counter top vents. When the camper is in the down position there is about 2 inches of space between the vents and the hot air flows freely out the top. 
 
813
 
view of roof vents


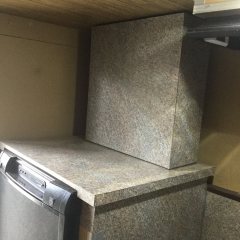
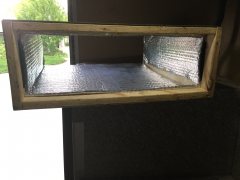
In order to vent the hot air out while the camper is in the up position, I built a "chimney" that fits perfectly between the cabinet and the roof when I pop it up. 
 
Chimney insert in place
 
view of chimney insert
 

The chimney just stores on the lower bed of the camper when I travel and I slide it into place when I set up. I also added two small computer fans to in the cabinet vents to help air move up and out. They are wired to a switch next to the fridge. Might be overkill, but the fridge works amazingly well installed in this way.


  • 1

#6 68 Siesta

68 Siesta

    Advanced Member

  • Members
  • PipPipPip
  • 86 posts
  • LocationSouth Jordan, Utah

Posted 31 May 2016 - 04:30 AM

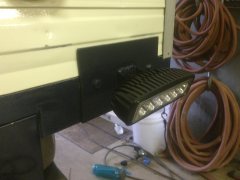
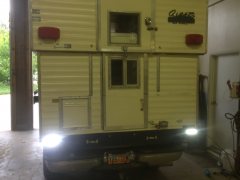
Recently, I decided to replace the old retro back-up lights that have never worked since I owned the camper with some higher powered LED lights. I welded up a bracket to make them fit and got them all wired up. Love them!


IMG 3133
 
IMG 3132

  • 0

#7 DrJ

DrJ

    Senior Member

  • Members
  • 514 posts
  • LocationSouthern Idaho

Posted 31 May 2016 - 03:14 PM

The amount of storage in this camper is amazing.


I'm not sure I've ever seen anyone else with side drawers - let alone side drawers and pull out drawers the entire length.


  • 0

2015 Silverado Crew Cab Duramax and 2015 Front Dinette Grandby

One can change the world, it only requires kindness

http://www.truckcamp...g-family-earth/


#8 97grandby

97grandby

    Senior Member

  • Members
  • 264 posts

Posted 31 May 2016 - 08:06 PM

Great work! Love the outdoor kitchen. That was about the only thing I saw at overland expo with all the off road cargo trailers with roof tents I envied was the out door kitchens. Sure makes it nice to be cooking outside where everyone else is at. 


  • 0

"Overkill is under rated" 


my Grandby upgrades--http://www.wanderthe...-to-me-grandby/

http://www.truckcamp...g-family-earth/


#9 DrJ

DrJ

    Senior Member

  • Members
  • 514 posts
  • LocationSouthern Idaho

Posted 02 June 2016 - 04:12 PM

How did you get huge slide out drawers to roll out?


Do they hang down after you pull them out all of the way?


  • 0

2015 Silverado Crew Cab Duramax and 2015 Front Dinette Grandby

One can change the world, it only requires kindness

http://www.truckcamp...g-family-earth/


#10 68 Siesta

68 Siesta

    Advanced Member

  • Members
  • PipPipPip
  • 86 posts
  • LocationSouth Jordan, Utah

Posted 11 June 2016 - 11:22 PM

I used roller blade ball bearings as slides. They are bolted to the drawers and run along 1 inch angle iron. The drawers do sag a bit when extended to full length. I'm thinking of adding a leg to the end on the one I use as an outdoor kitchen.


Sent from my iPad using Wander The West
  • 0


0 user(s) are reading this topic

0 members, 0 guests, 0 anonymous users