Jump to content


Photo

2018 Sprinter 4x4


  • Please log in to reply
32 replies to this topic

#1 VanGoOutdoors

VanGoOutdoors

    Senior Member

  • Members
  • 142 posts
  • LocationSt. Augustine, Fl

Posted 22 October 2018 - 05:59 PM

Well, this is round two, sold the first one.  Someone asked why I didn't post it here, and honestly, i had forgotten.  So thusly....here it is
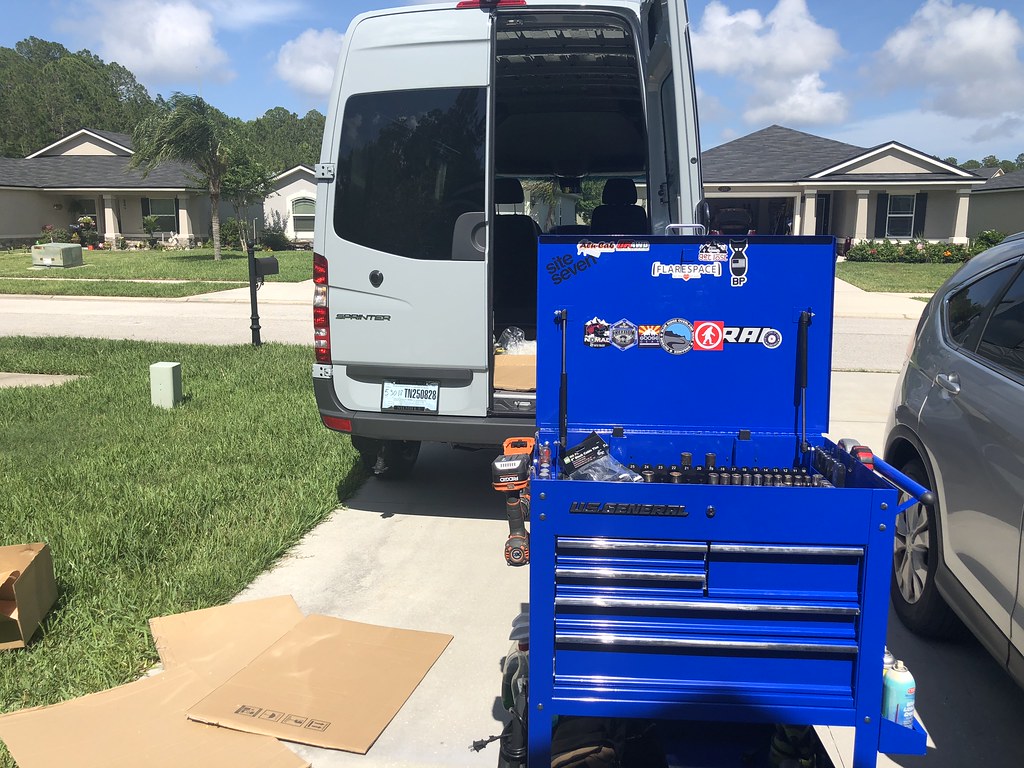
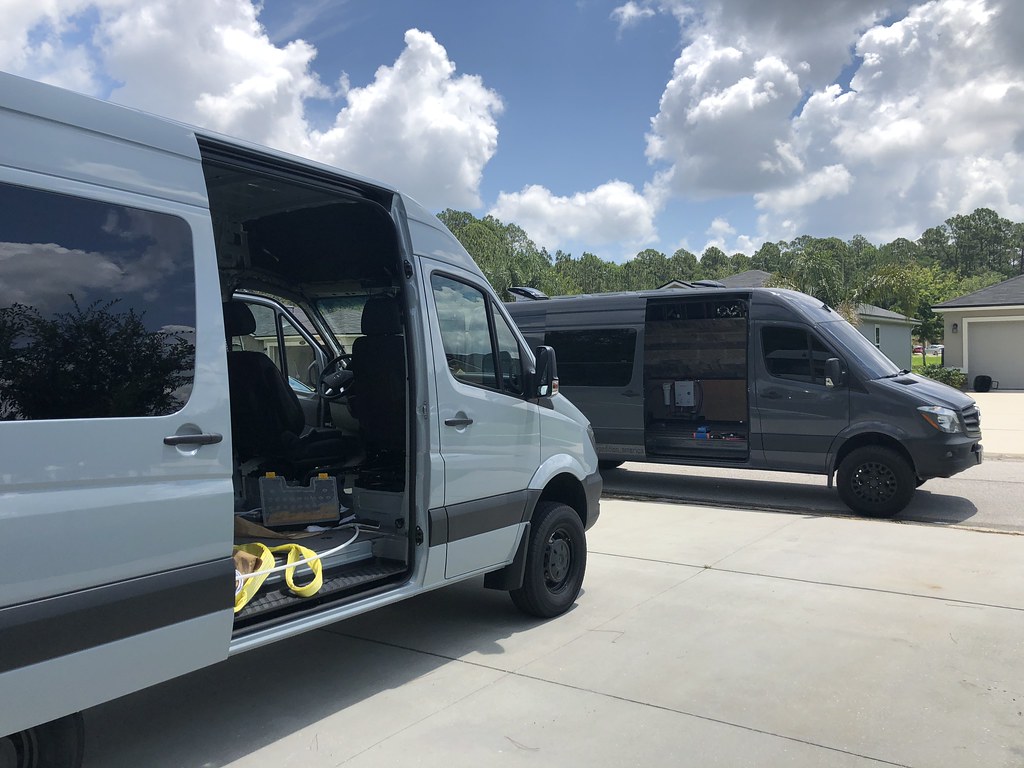
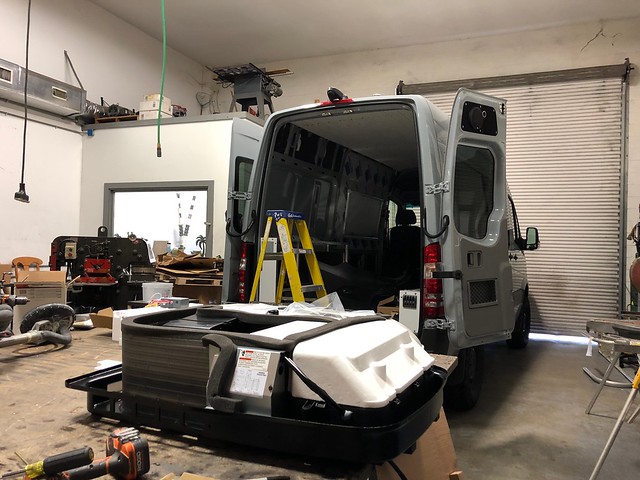
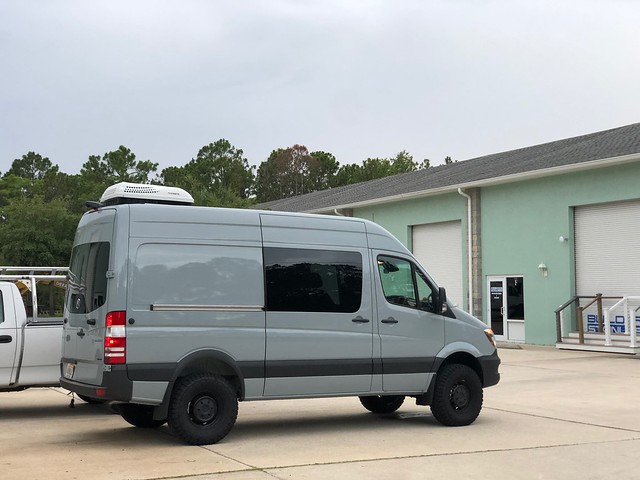
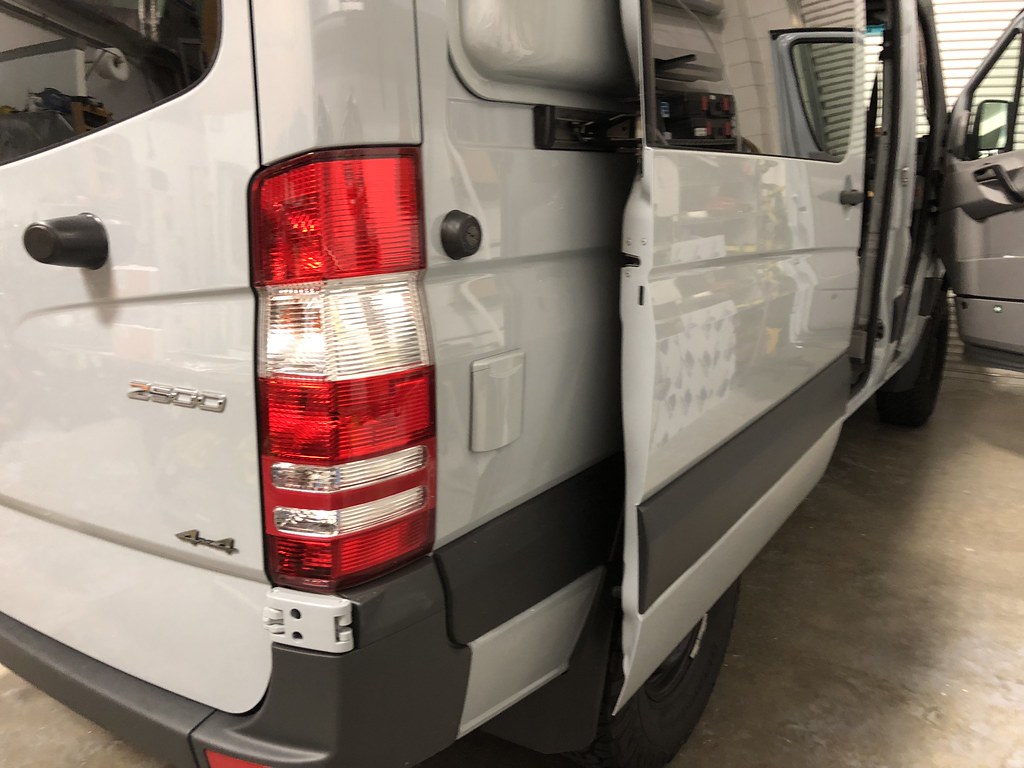
The current van

Of note:

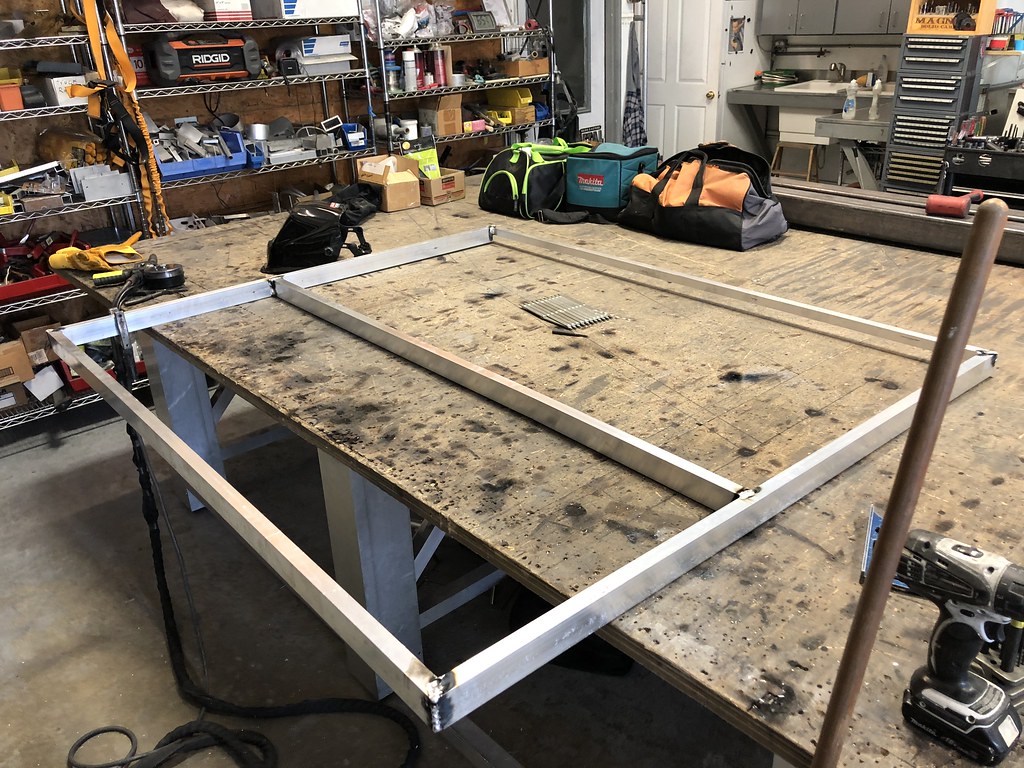
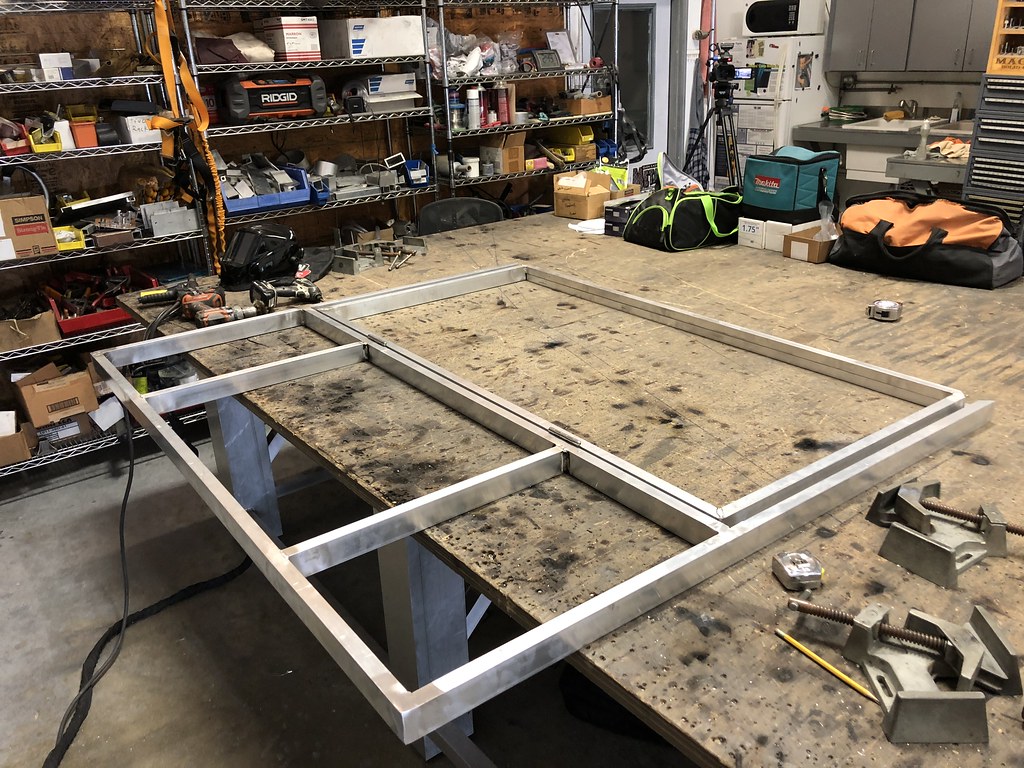
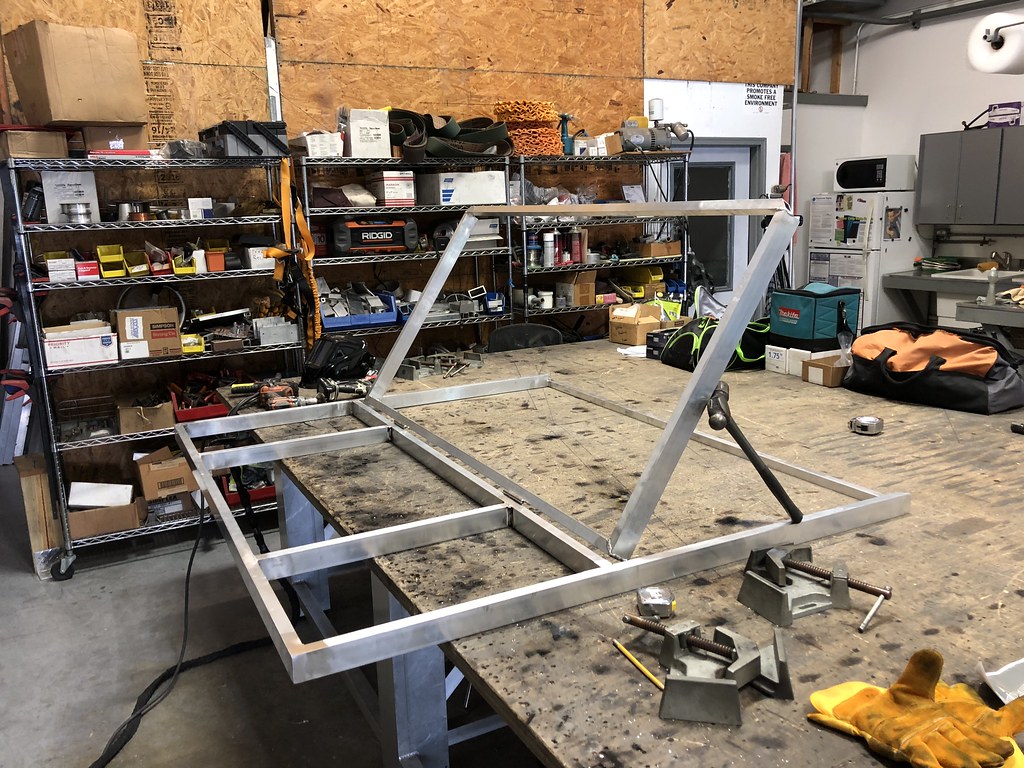
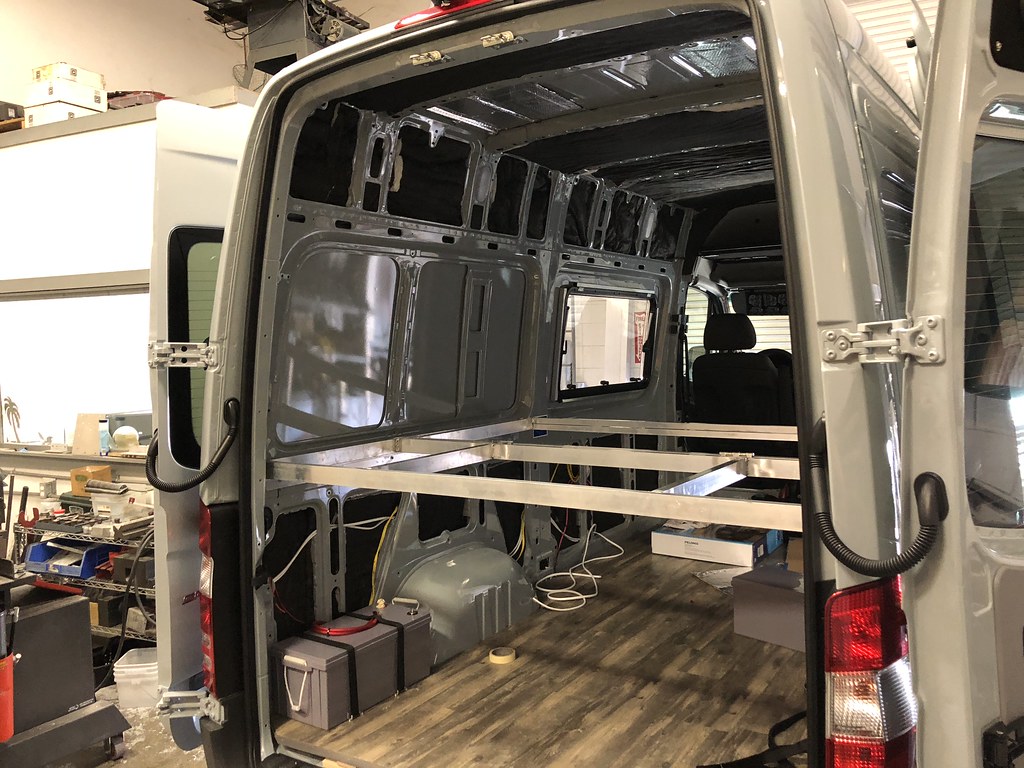
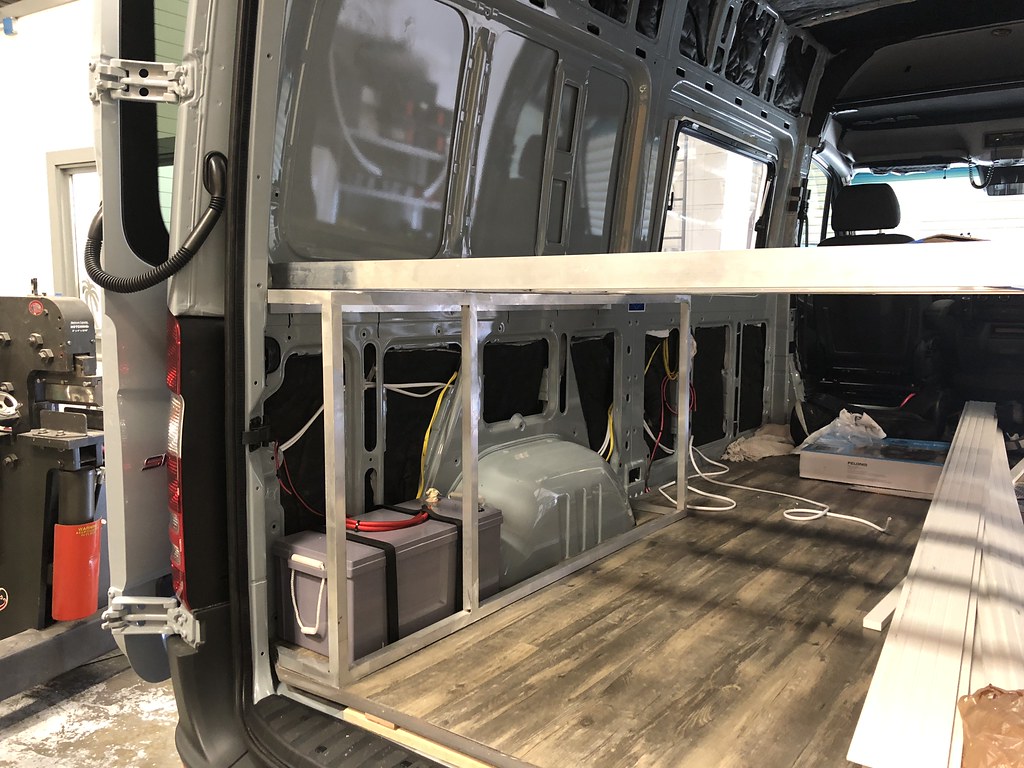
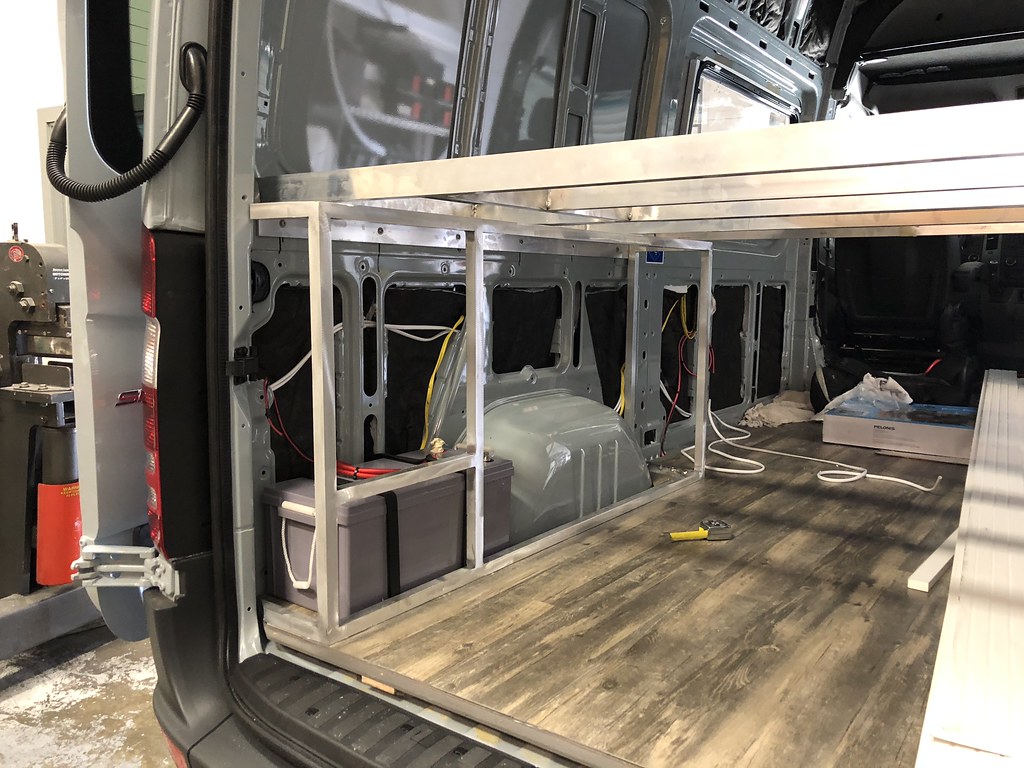
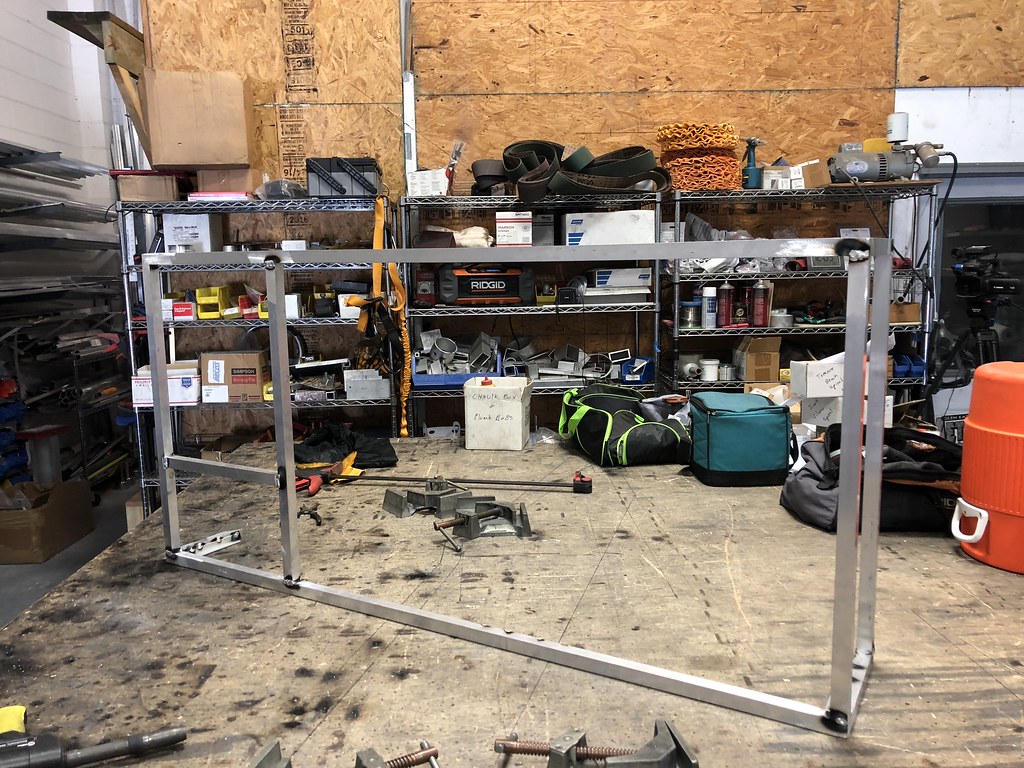
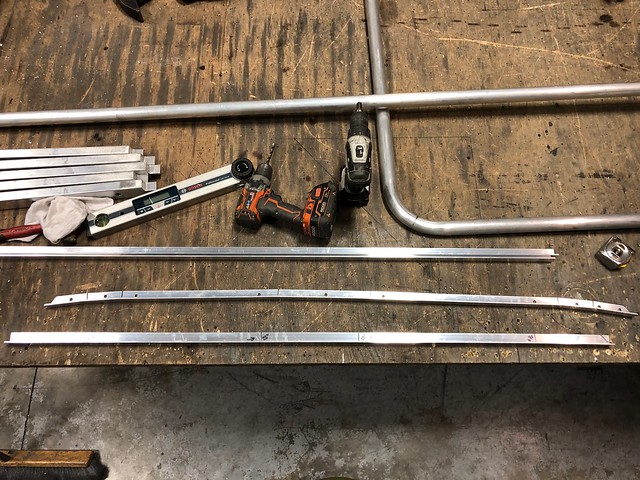
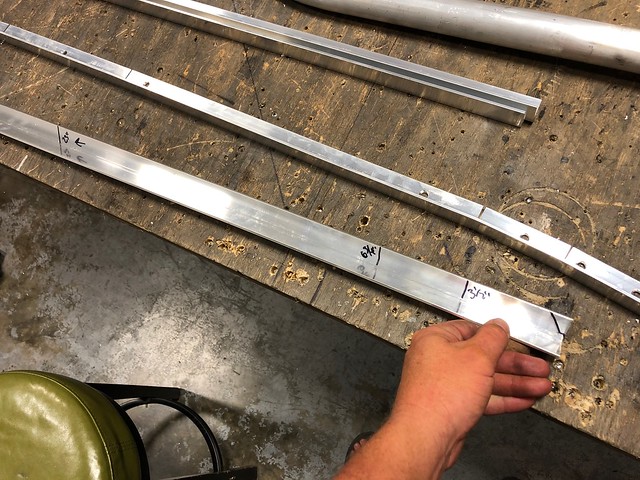
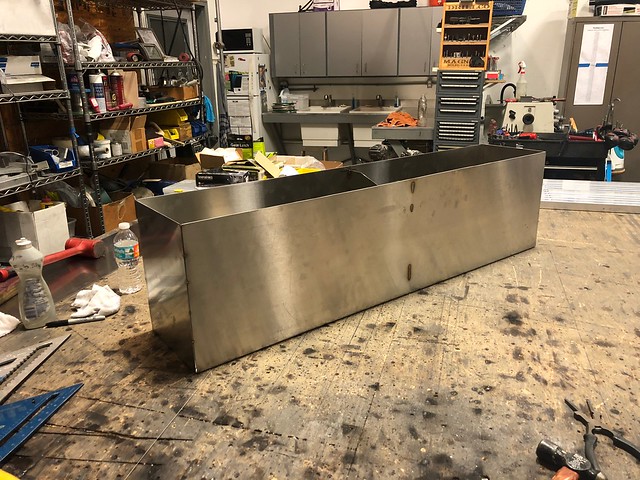
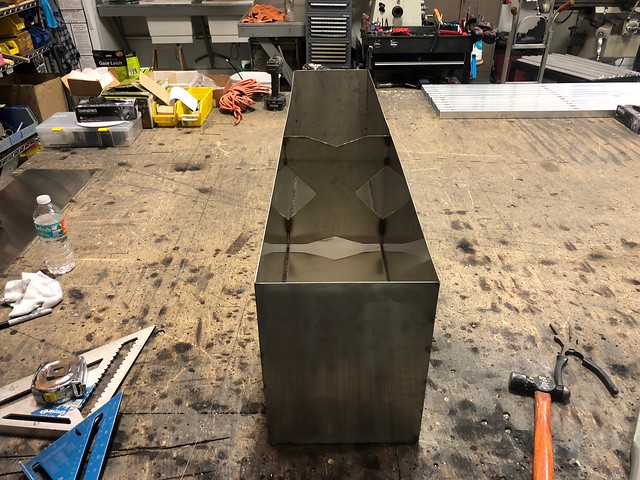
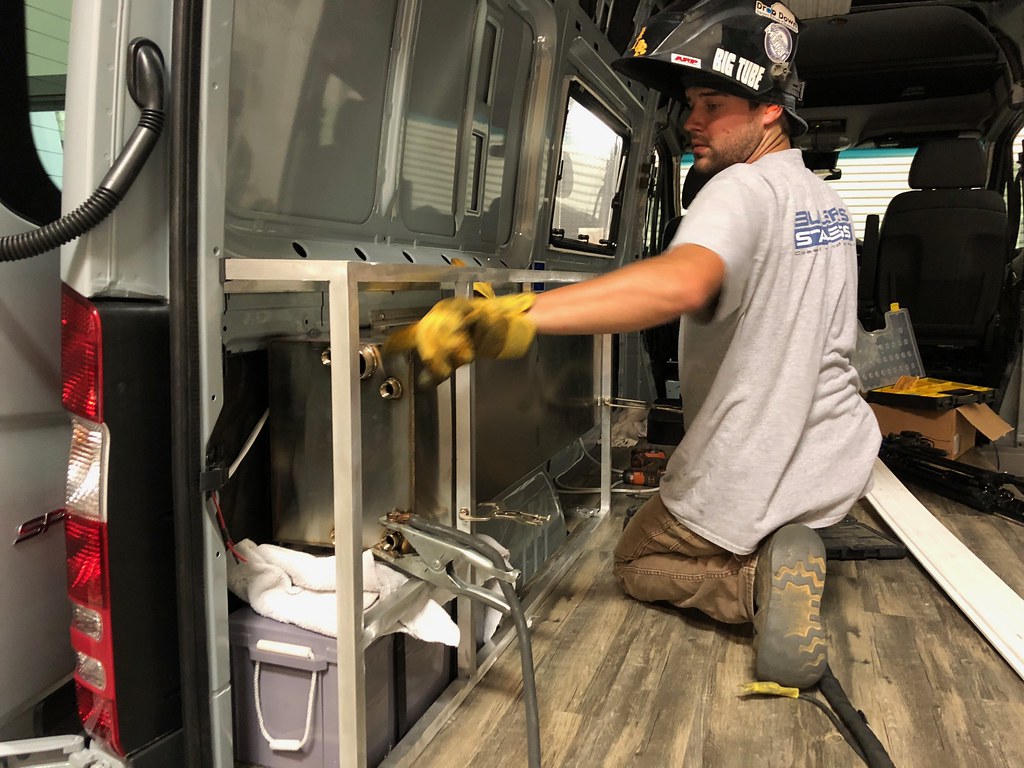
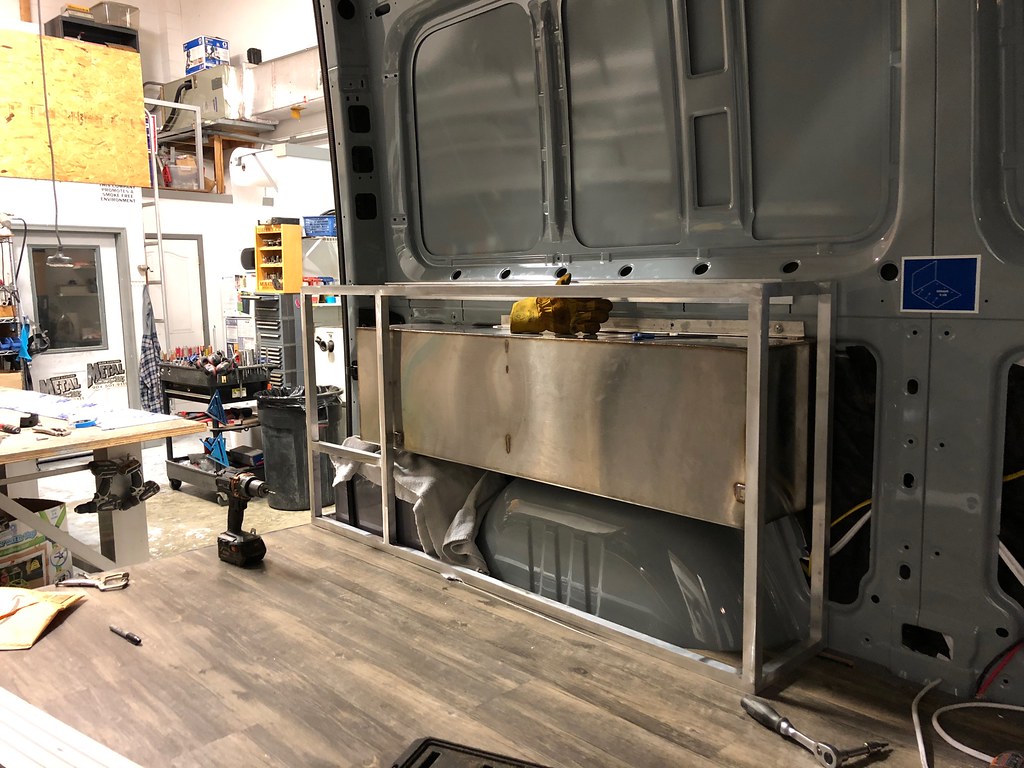
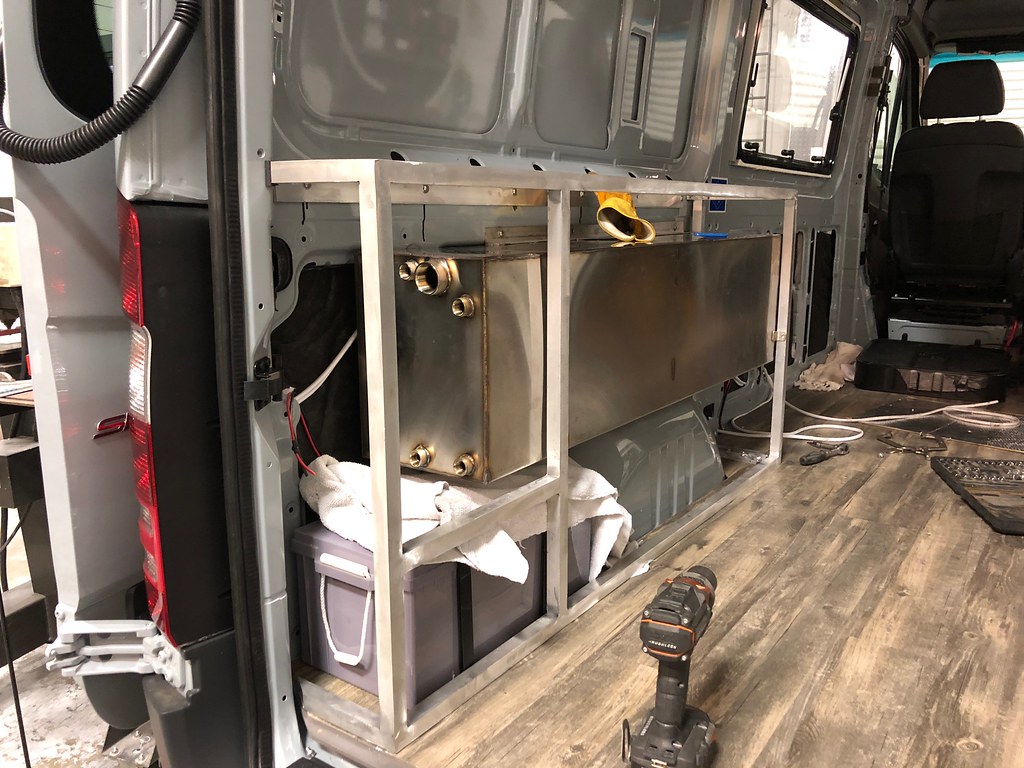
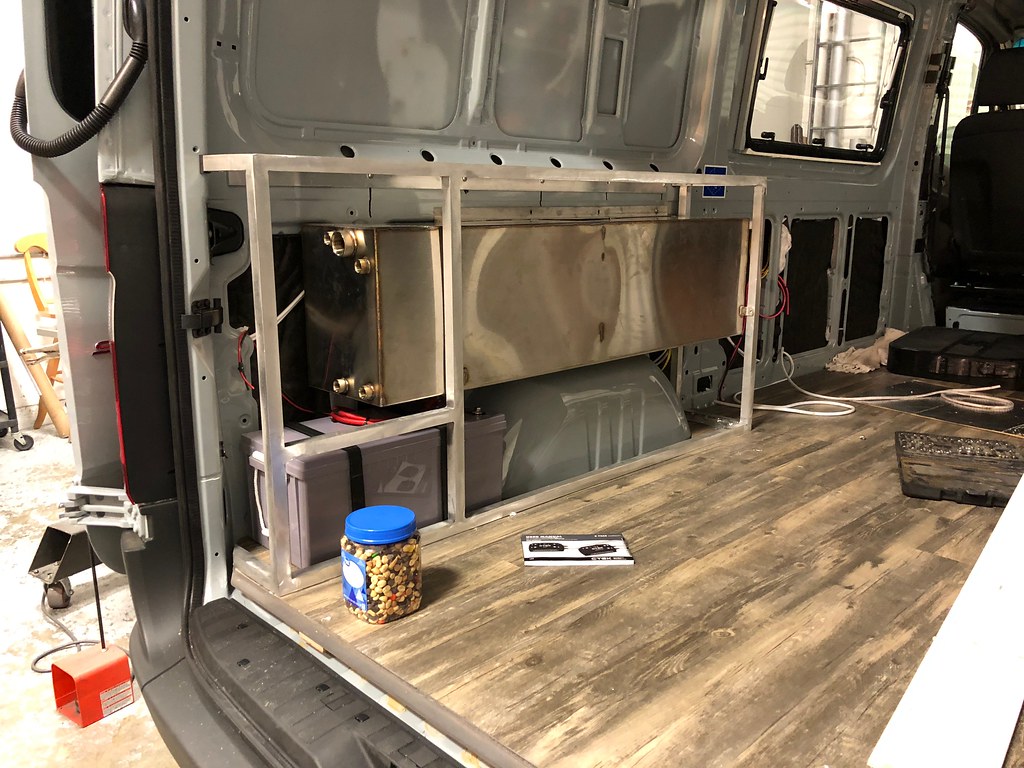
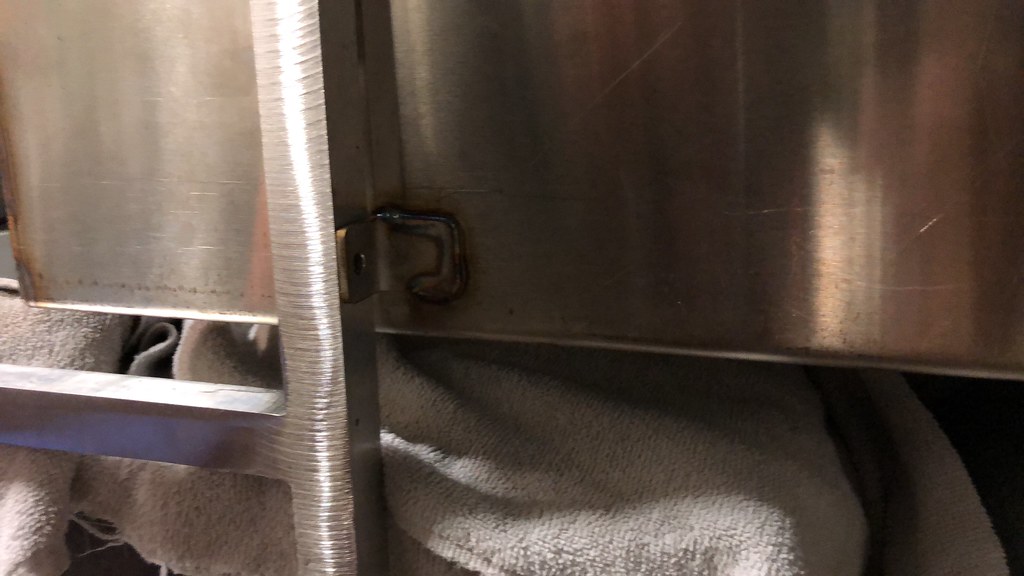
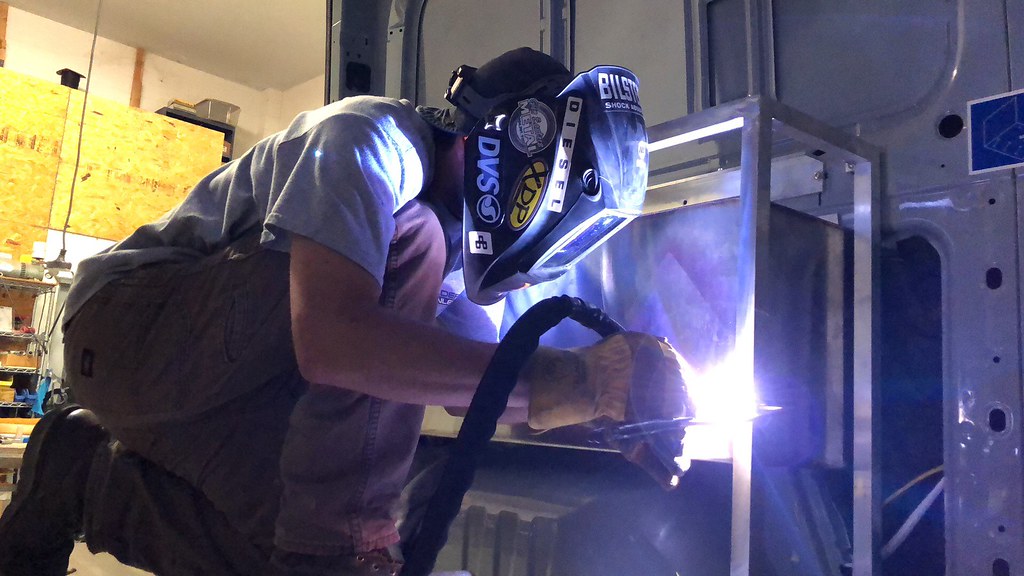
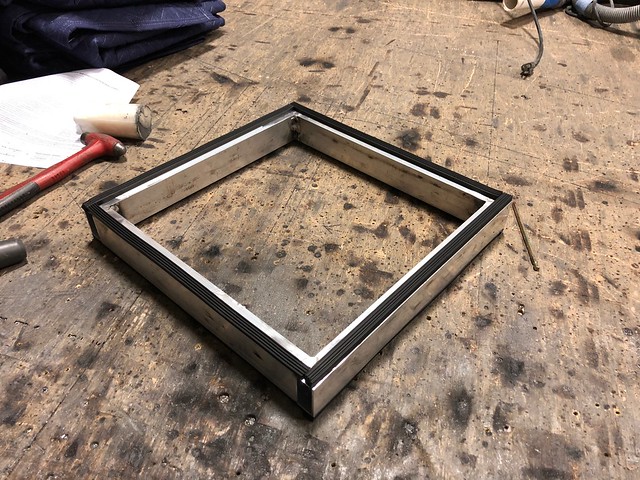
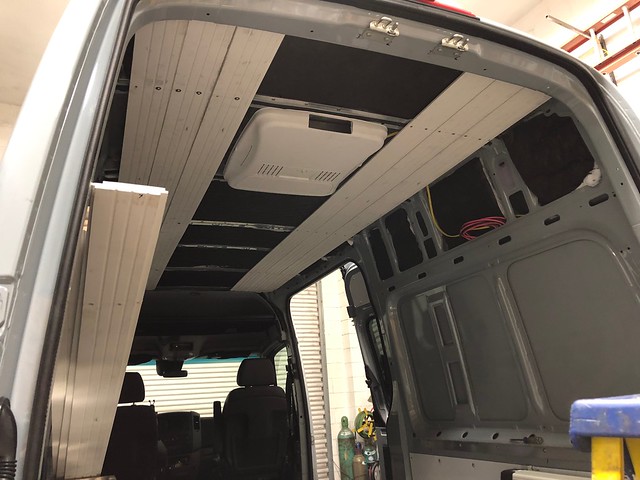
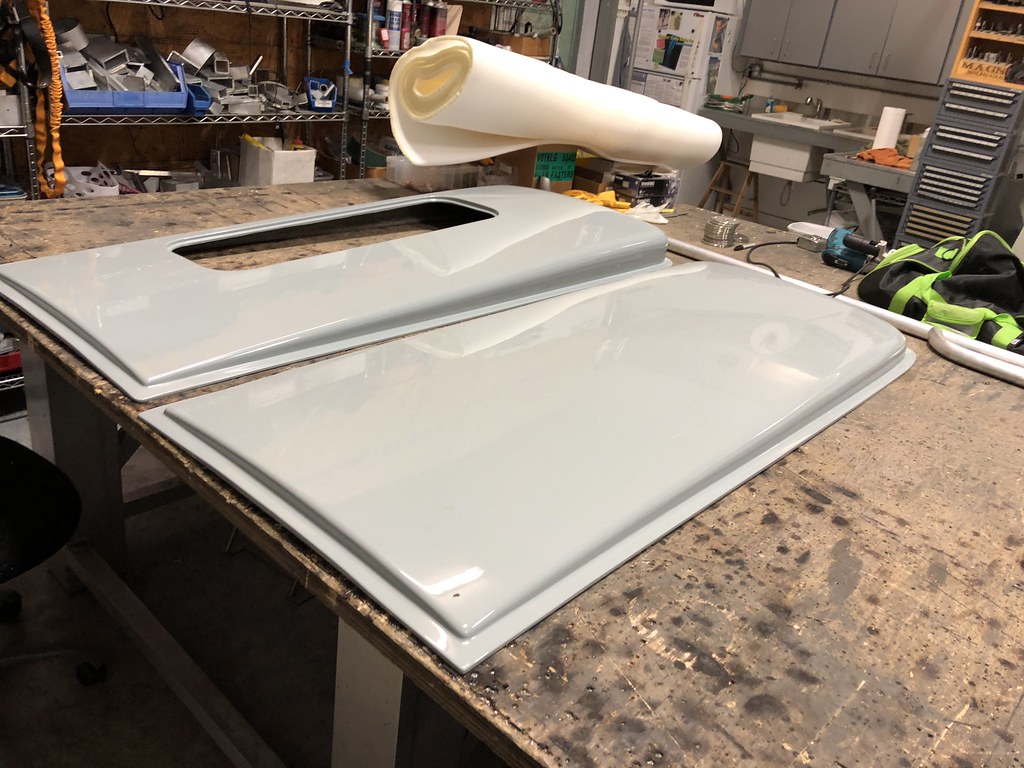
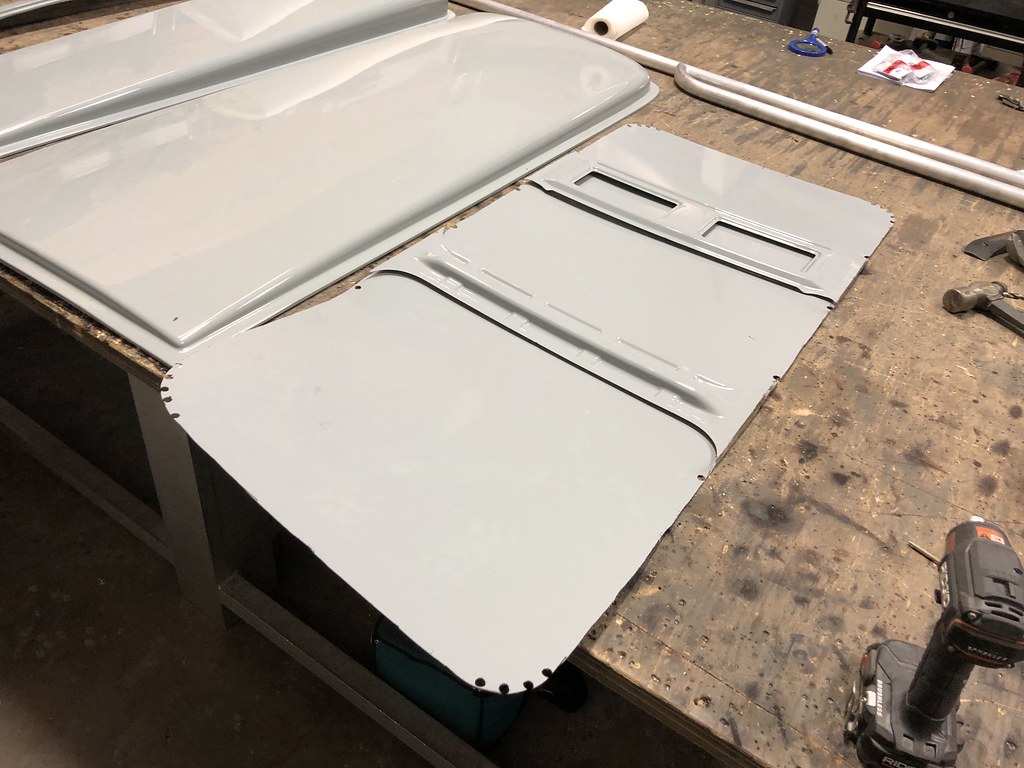
Everything except the Winch mount, and flares were 100% fabricated by me.  We produce the racks, interior frames etc etc etc.  
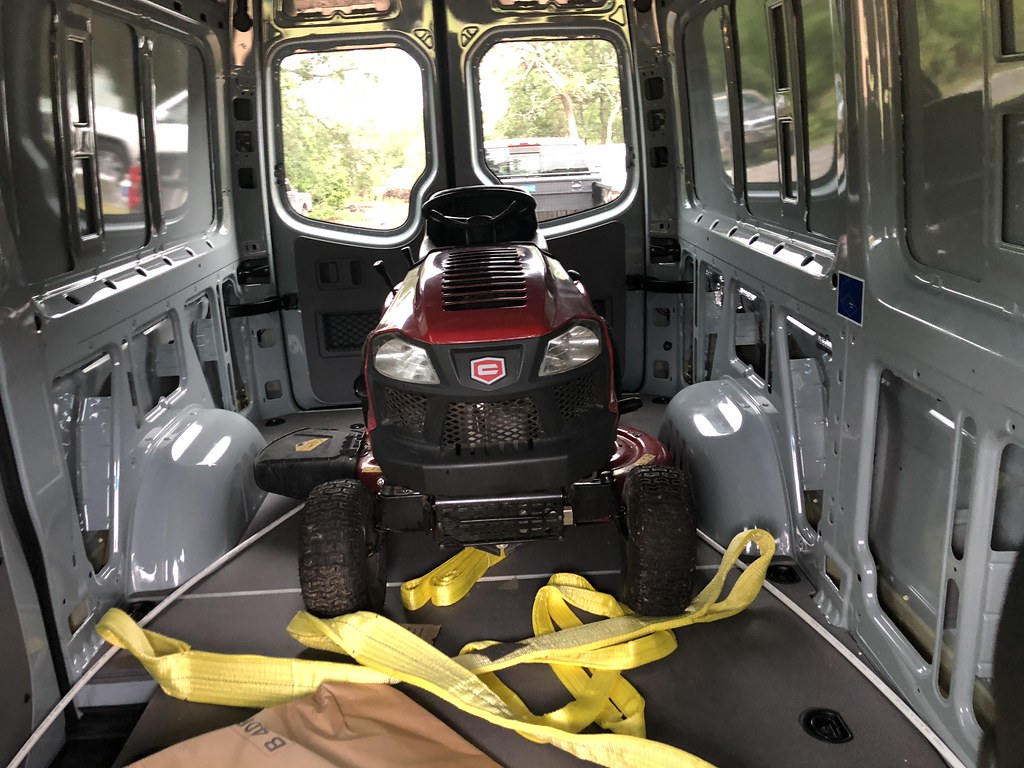
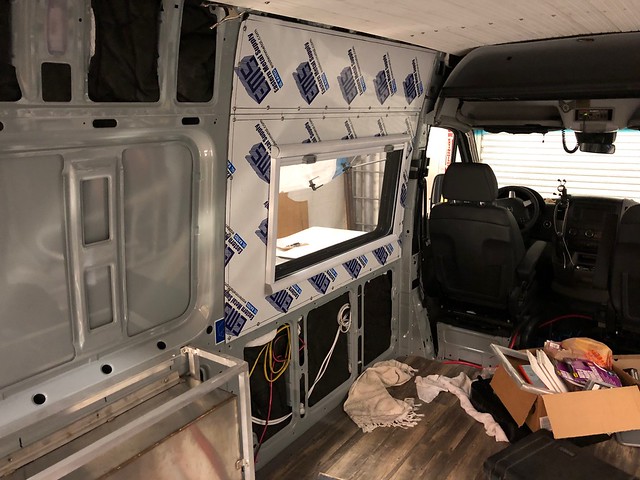
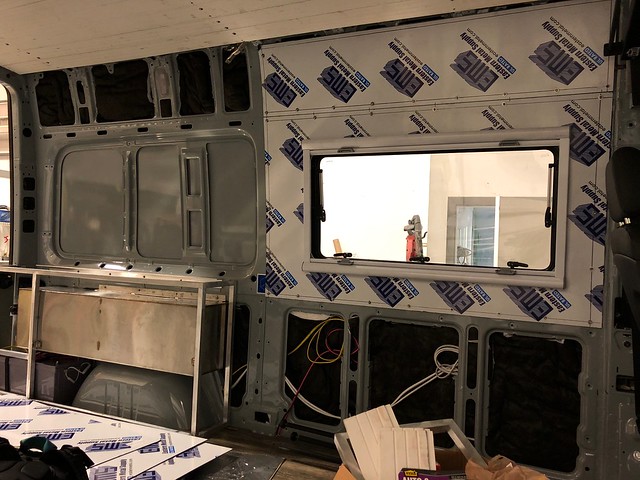
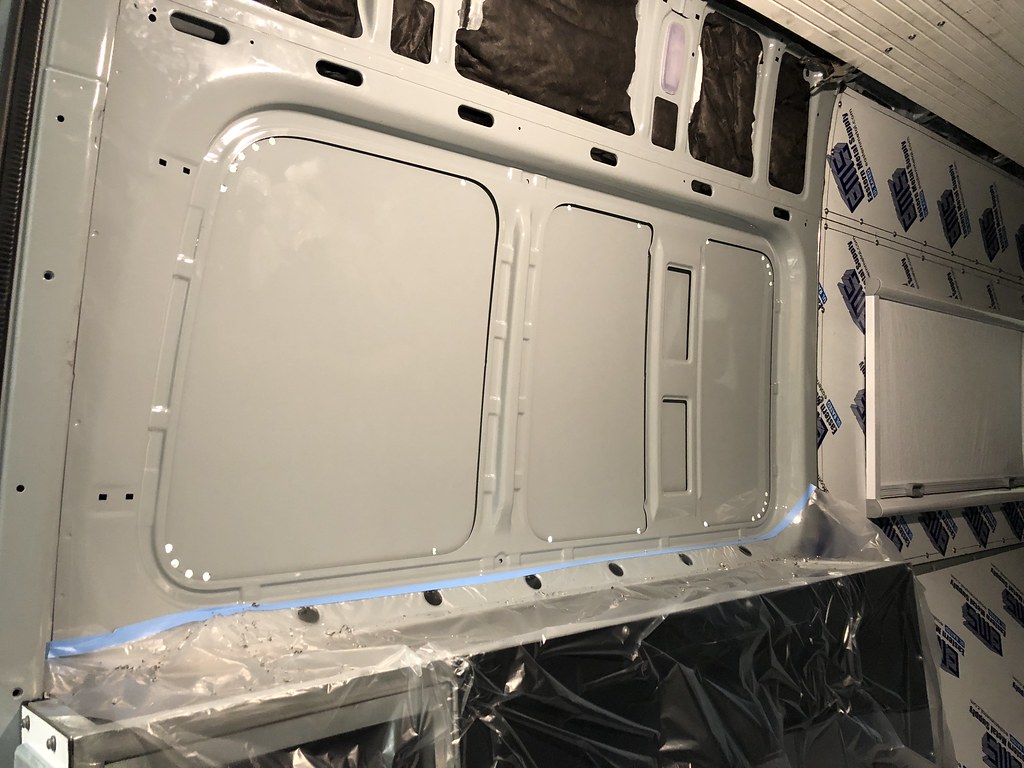
Full aluminum construction with aluminum composite wall coverings and panels. 
Only thing wood is the cabinet faces


40211259660_0f9cc8ccbf_b.jpg
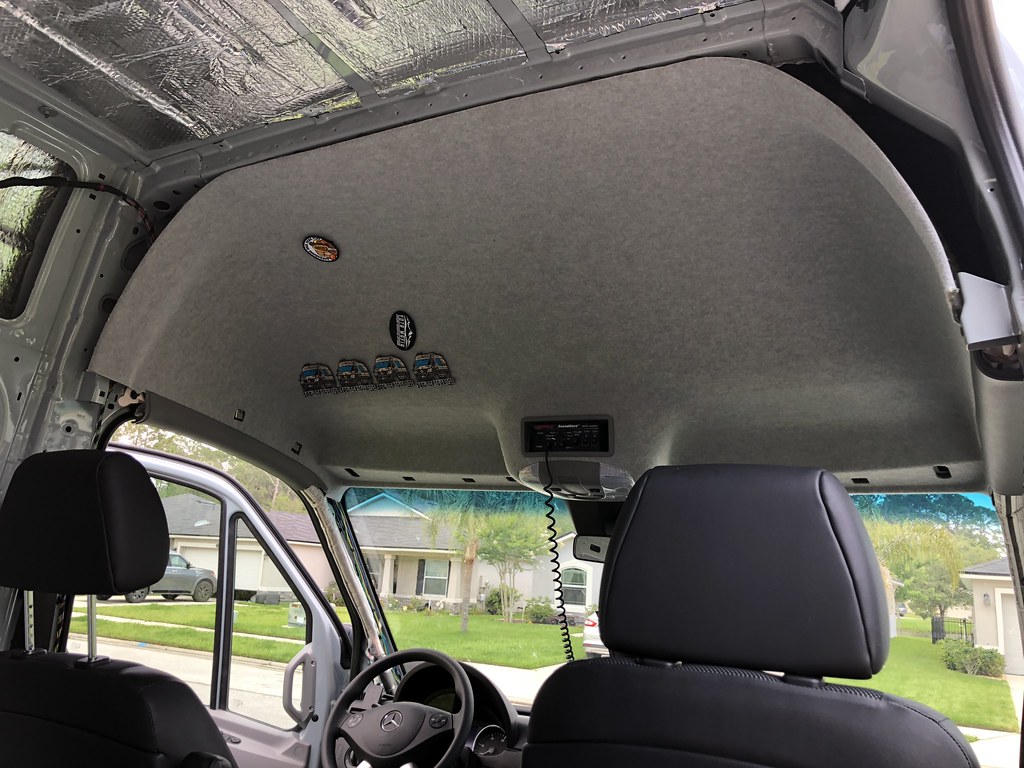
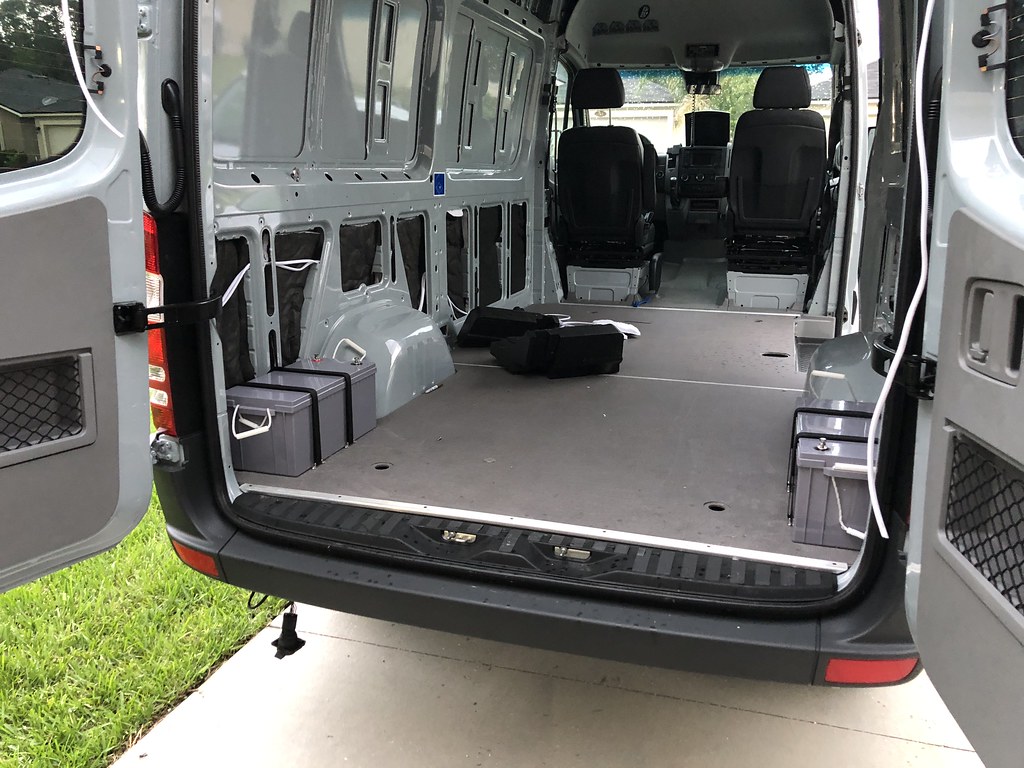
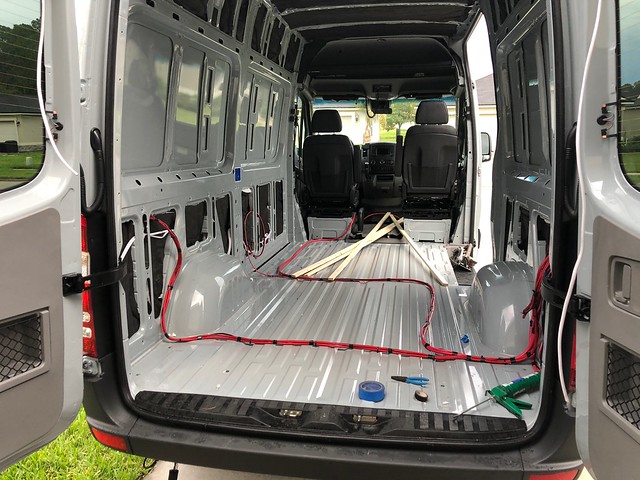
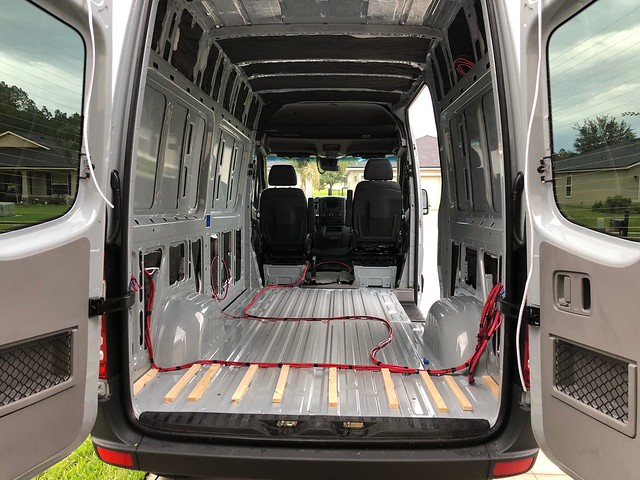
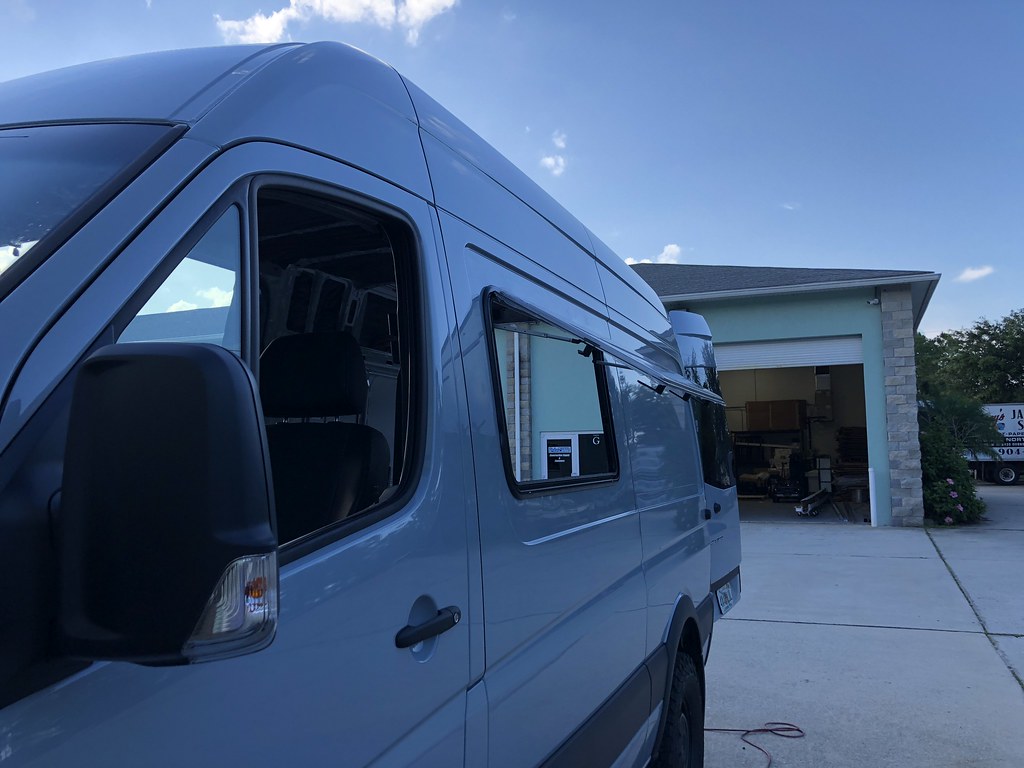
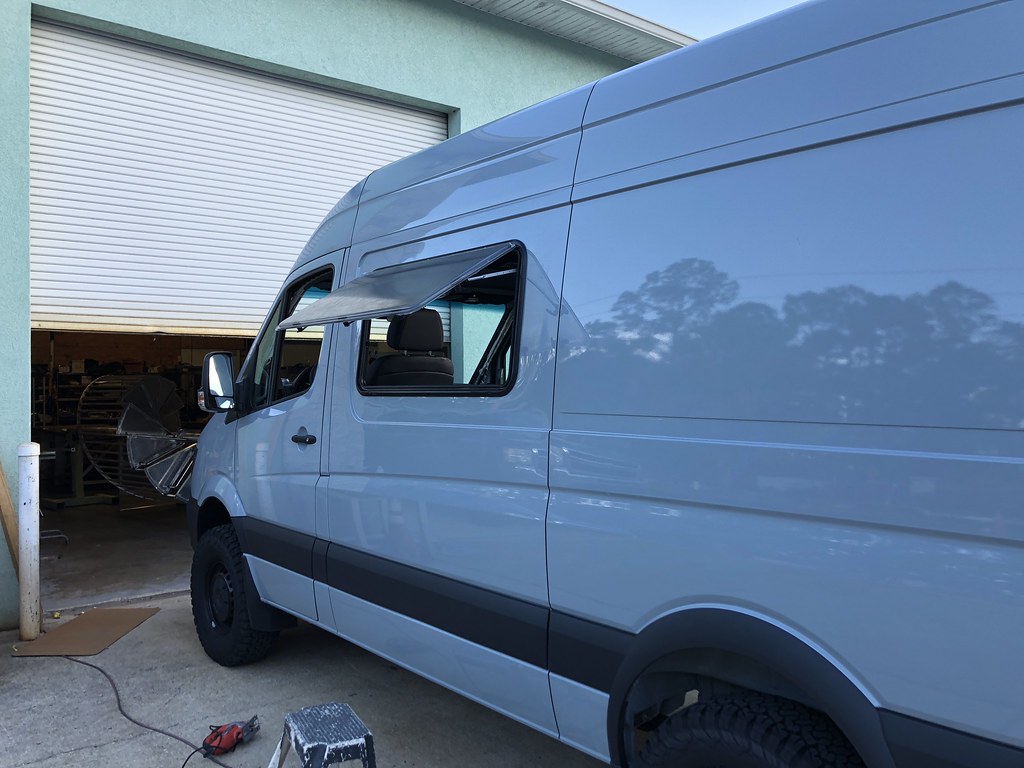
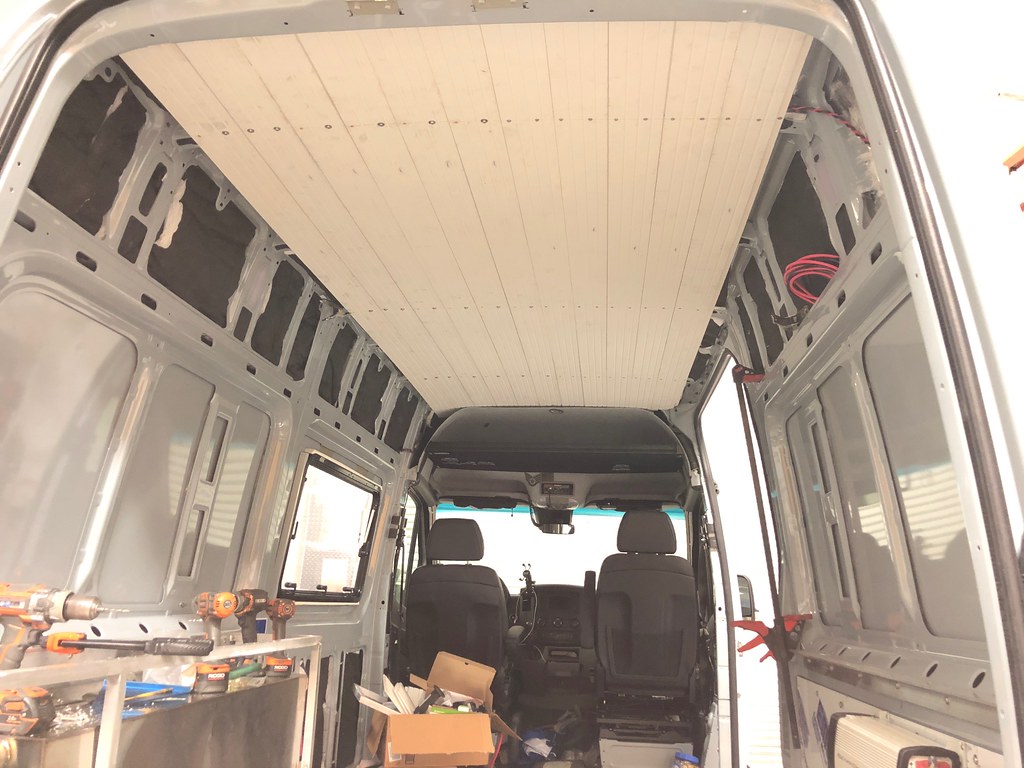
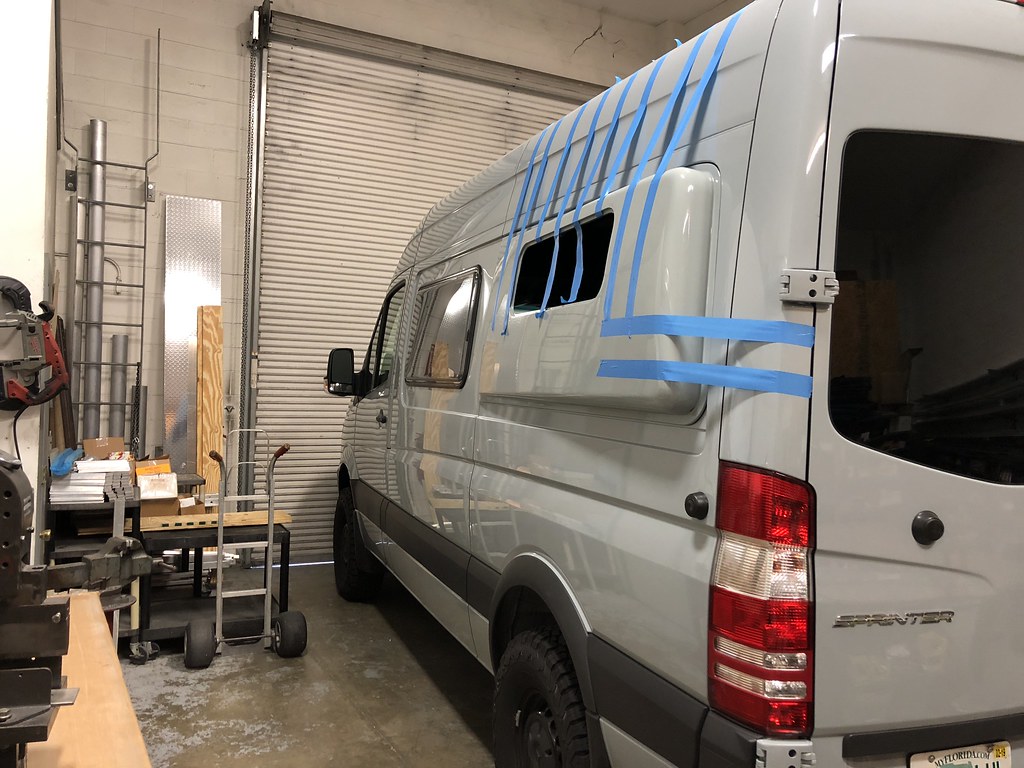
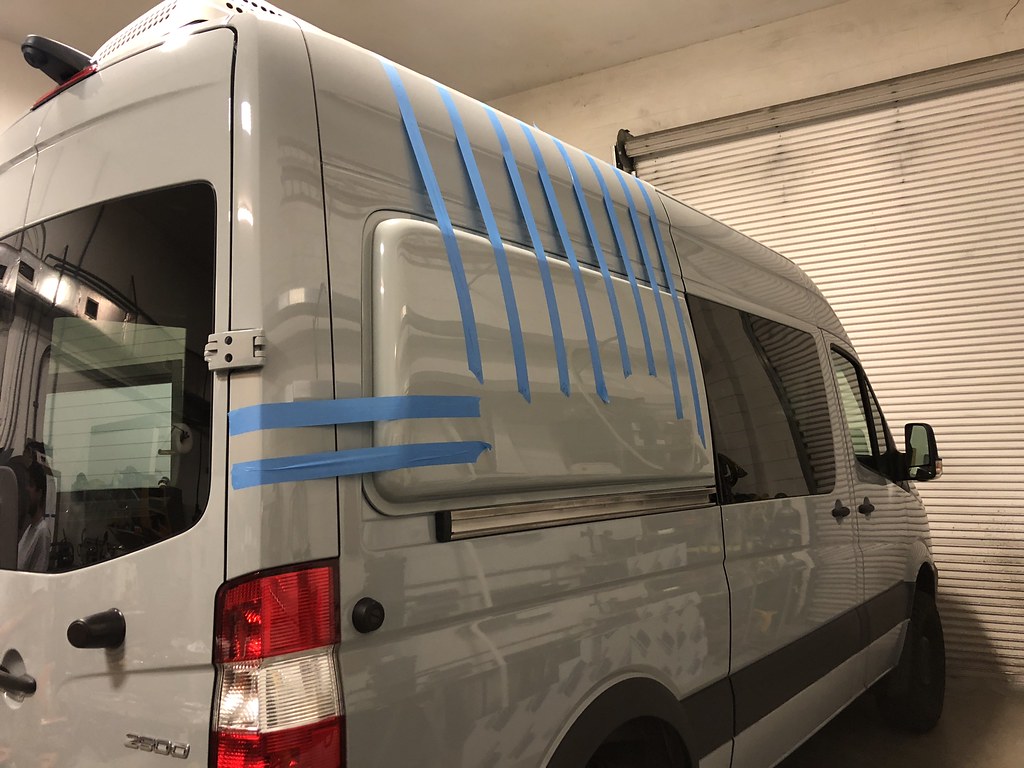
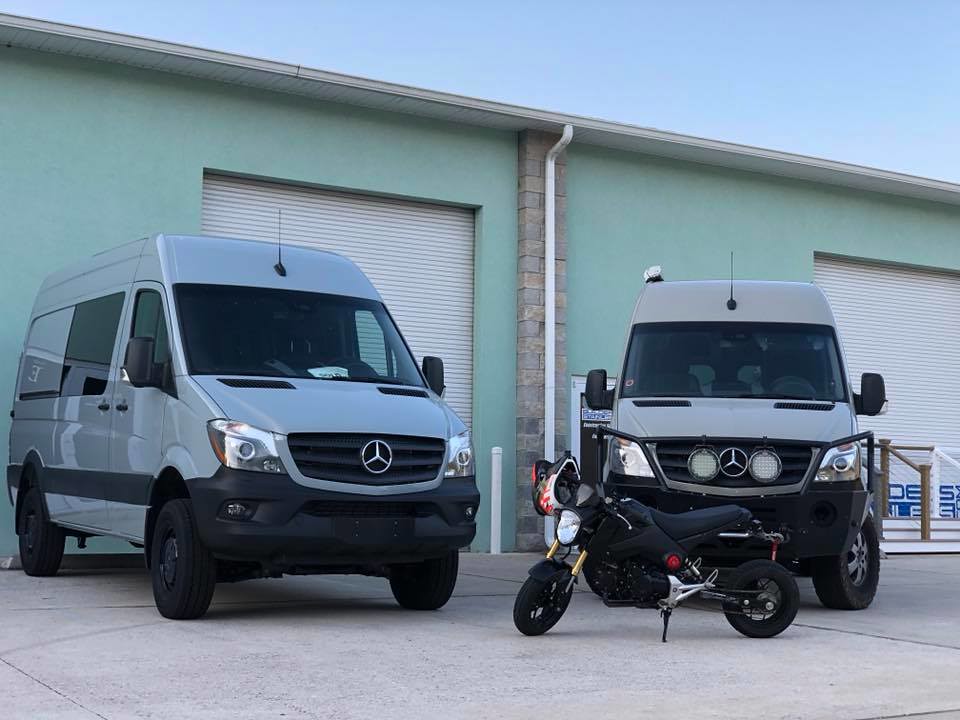
new van! by Grant Wilson, on Flickr
 
So, changes from last one:
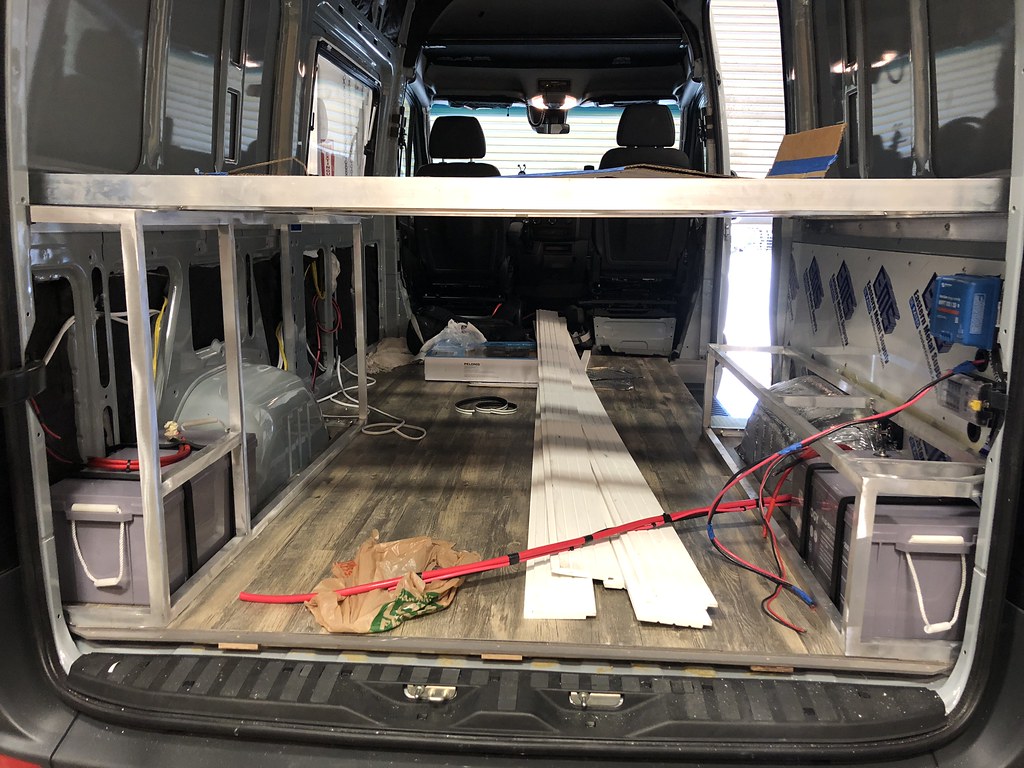
Queen bed instead of Full.  Still the same layout, but wider
Front will only have a winch and hitch mount
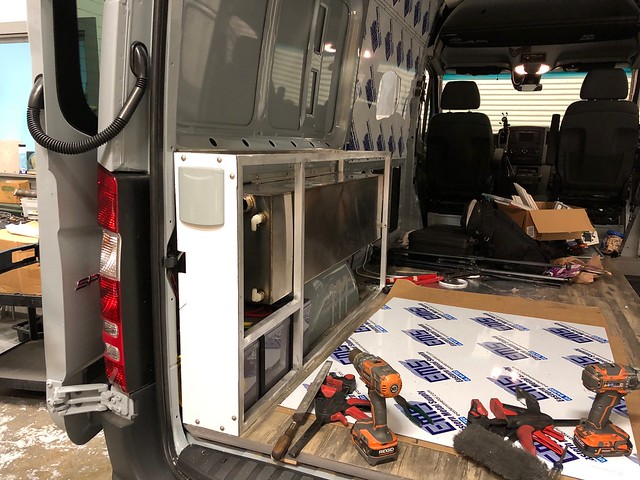
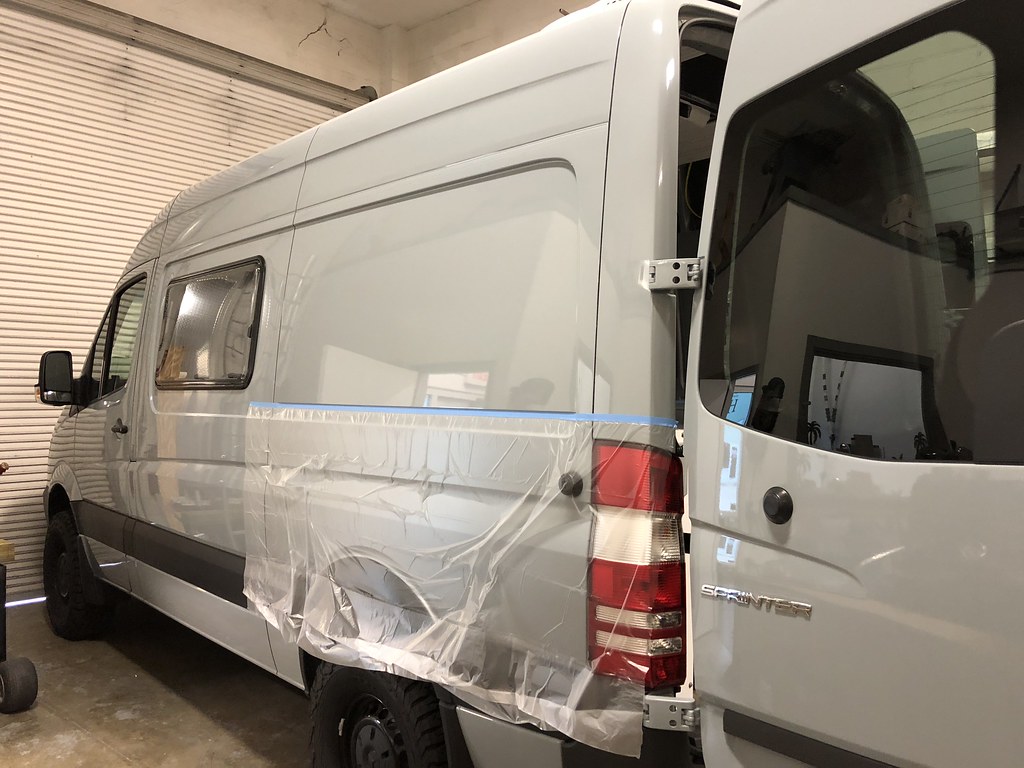
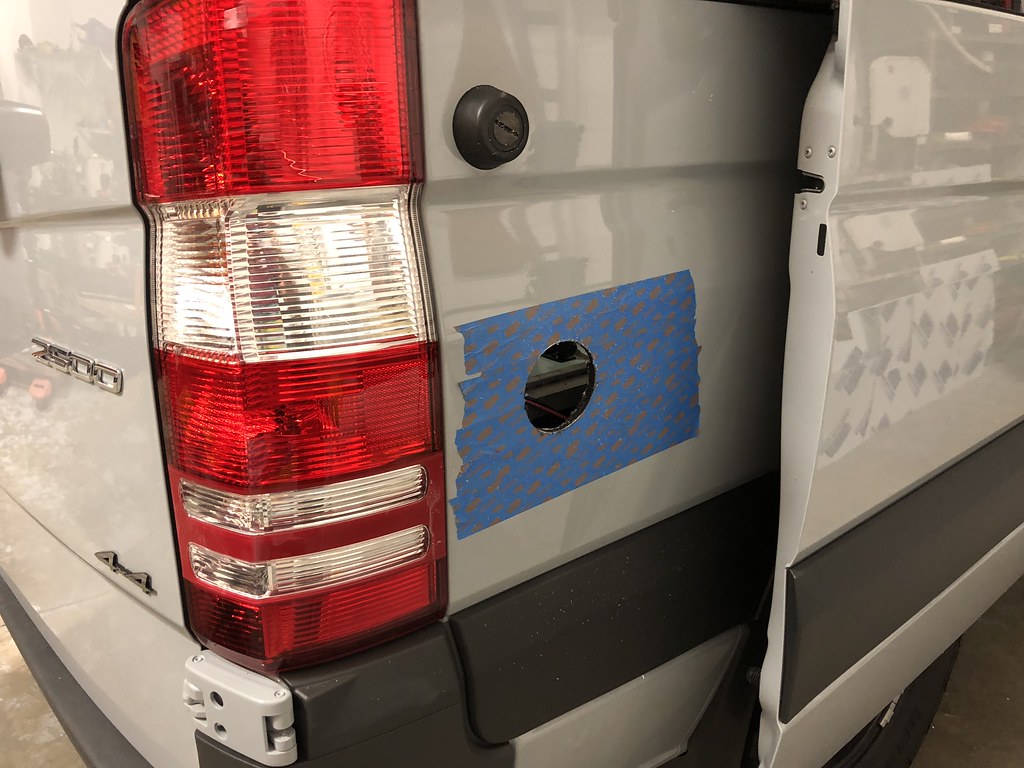
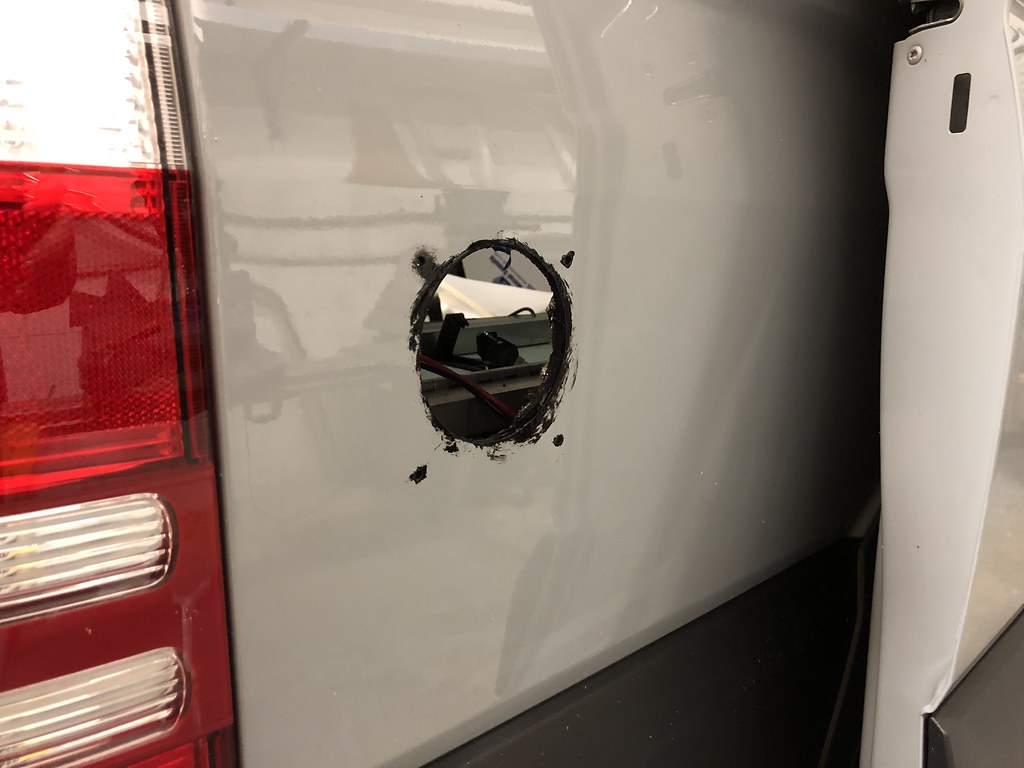
Spare tire mounted to the door (rear bumper is just too killer to the departure angle)
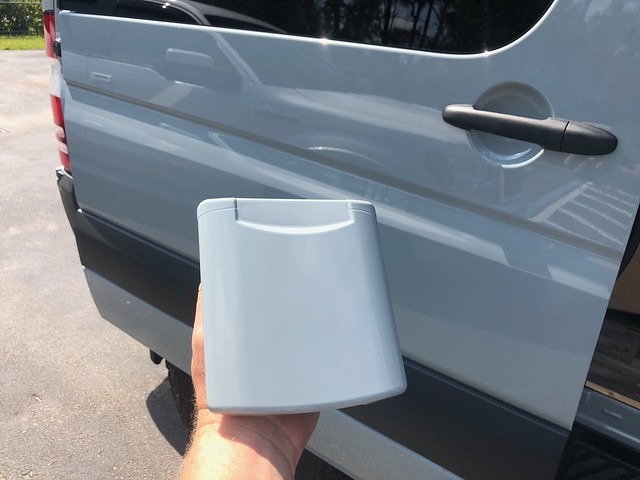
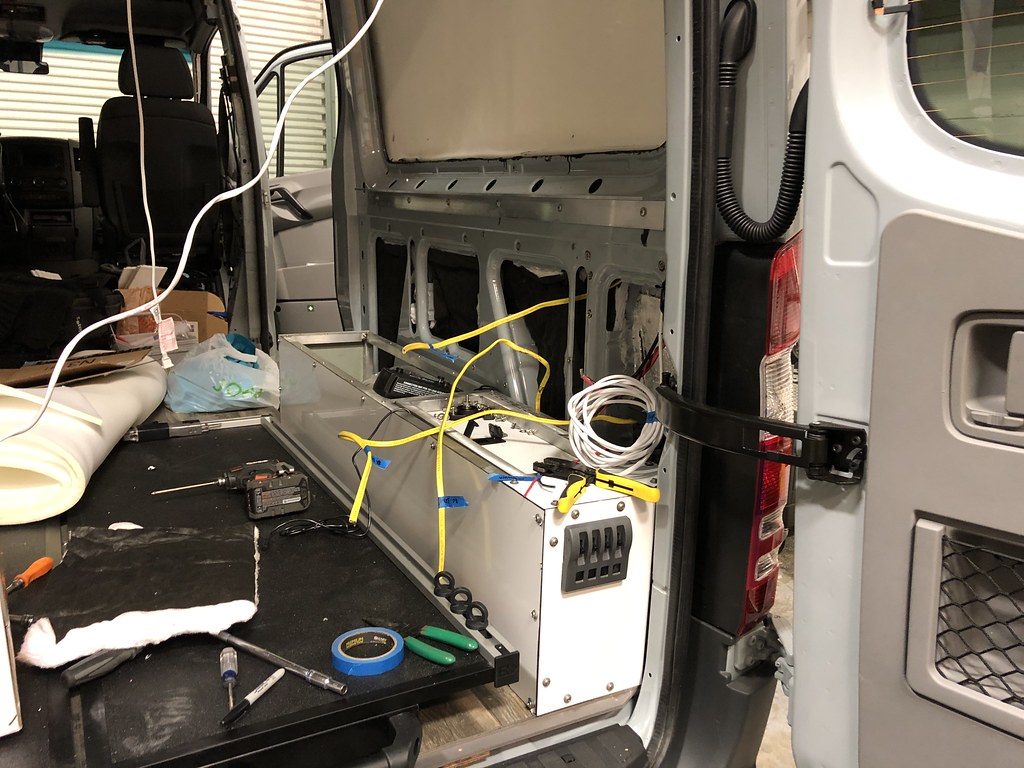
Fridge will be under the kitchen area and slide into the door opening for ease of access in or out of the van, driver side cabinet will stay about the same, with smaller drawers instead of one big one.
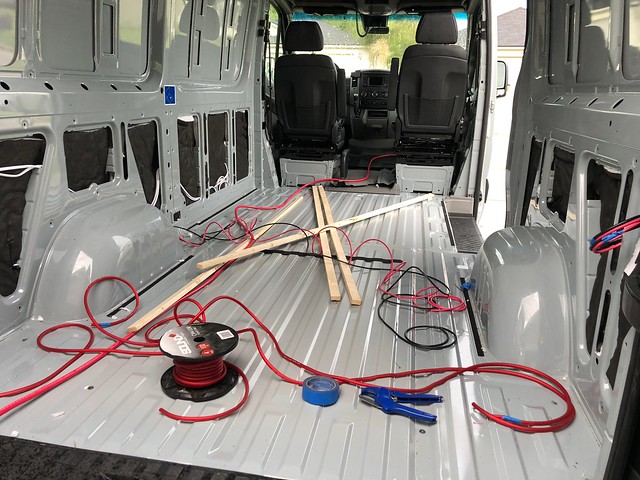
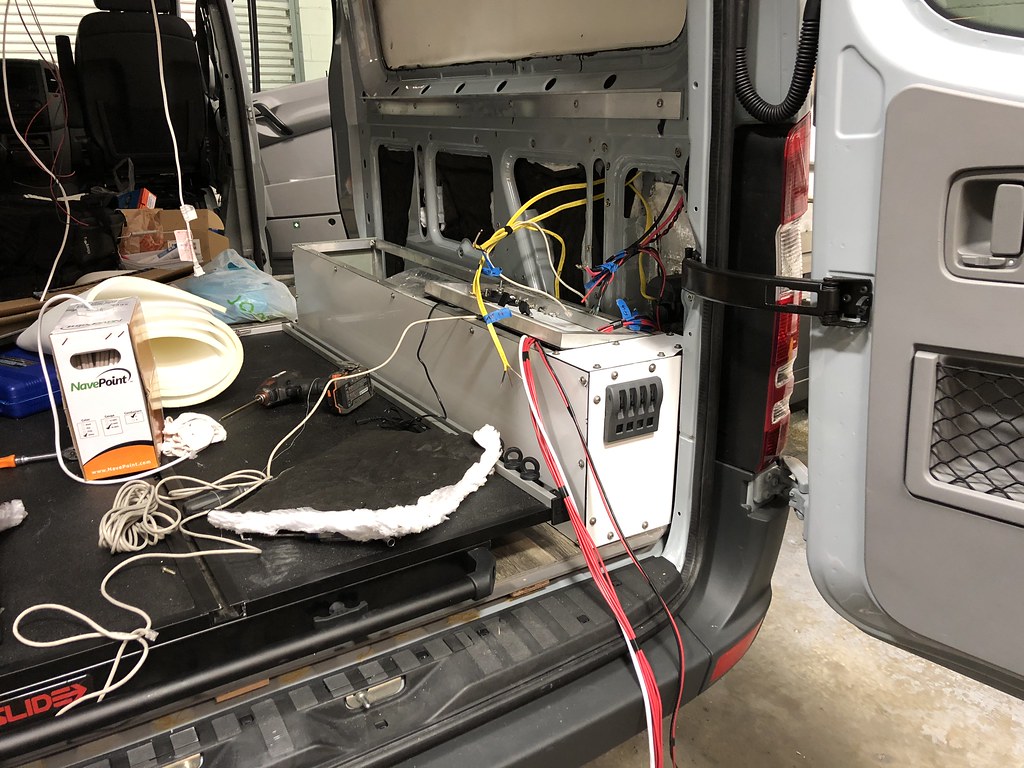
 
Let it start!


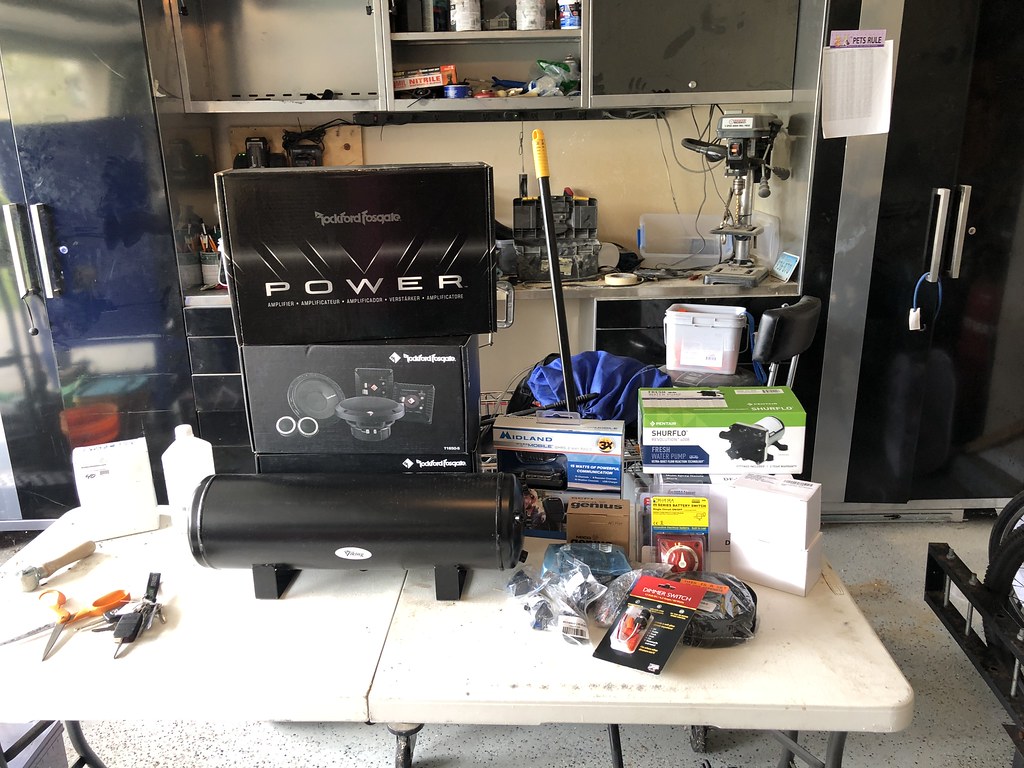
I will keep a running tally of what i buy, literally as i buy it.  I am not including any tools i buy, but i will factor in stuff left over from last build (some sound deadening and insulation for example), along with links to what i get on amazon, or another source.
 
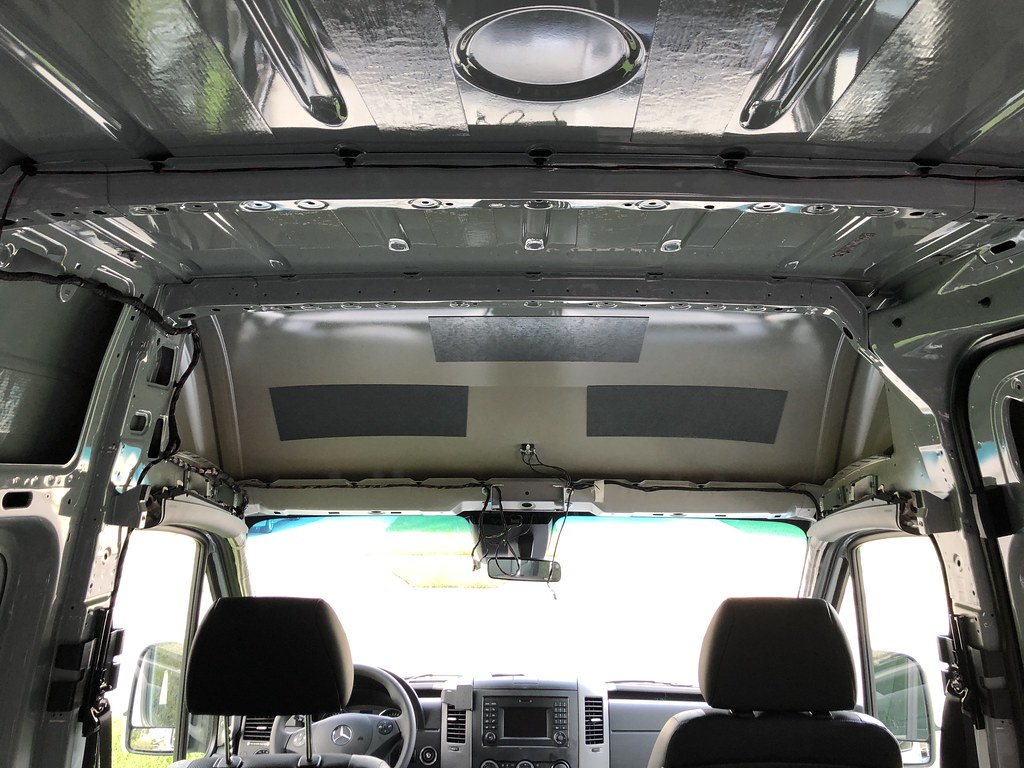
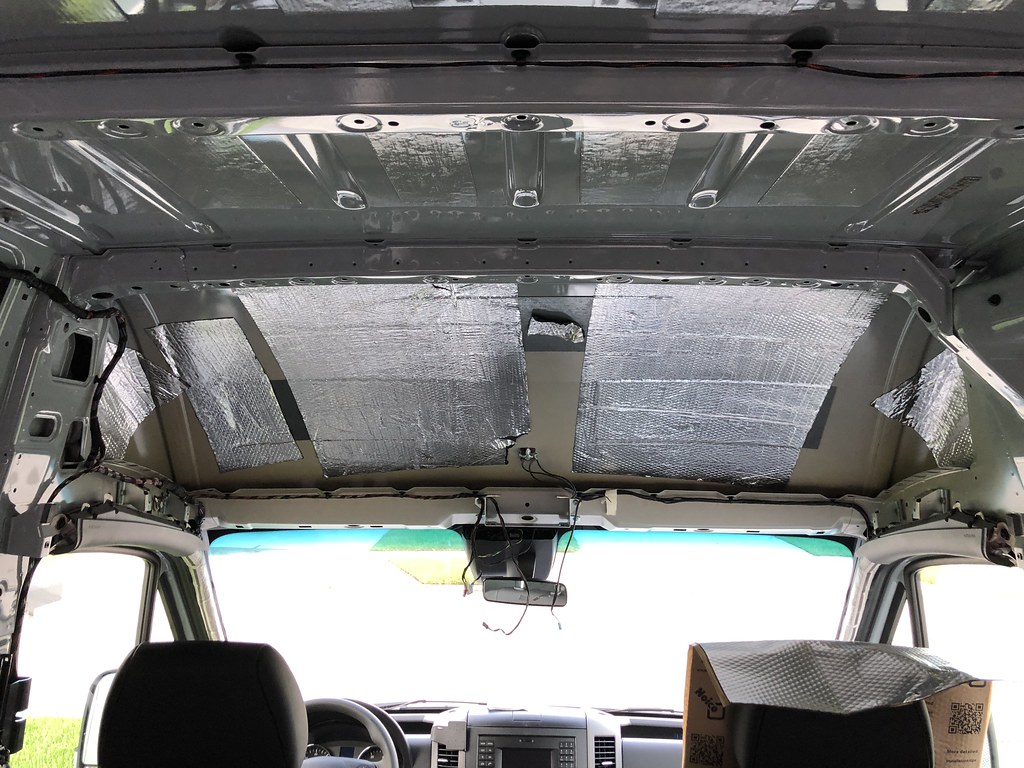
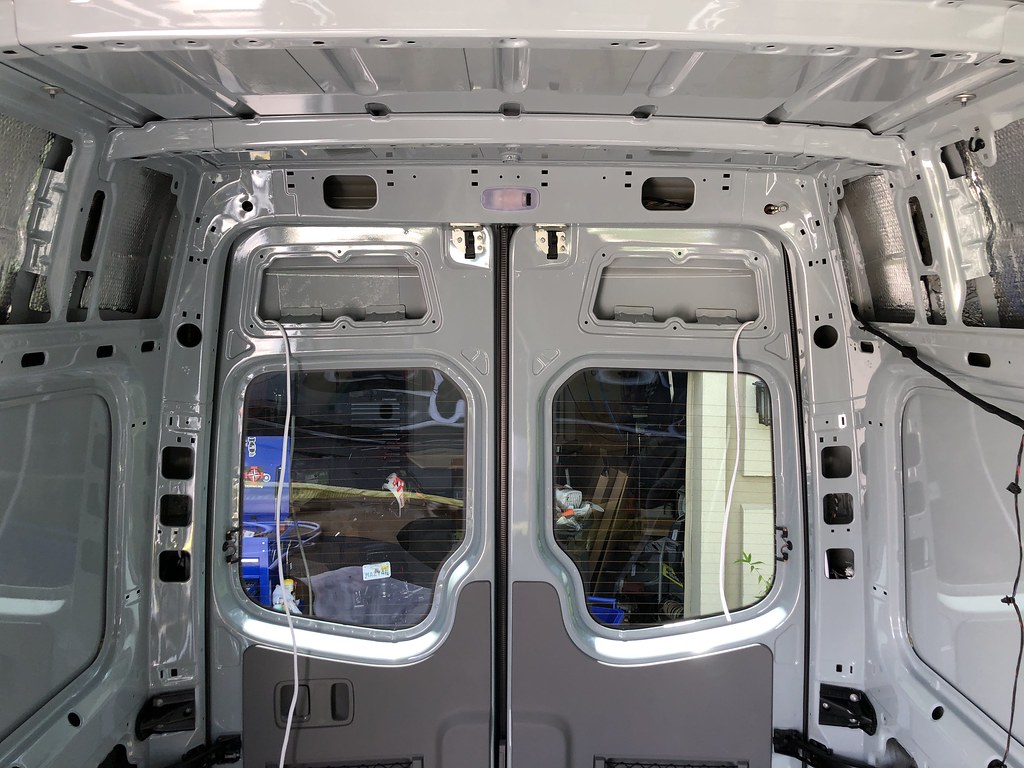
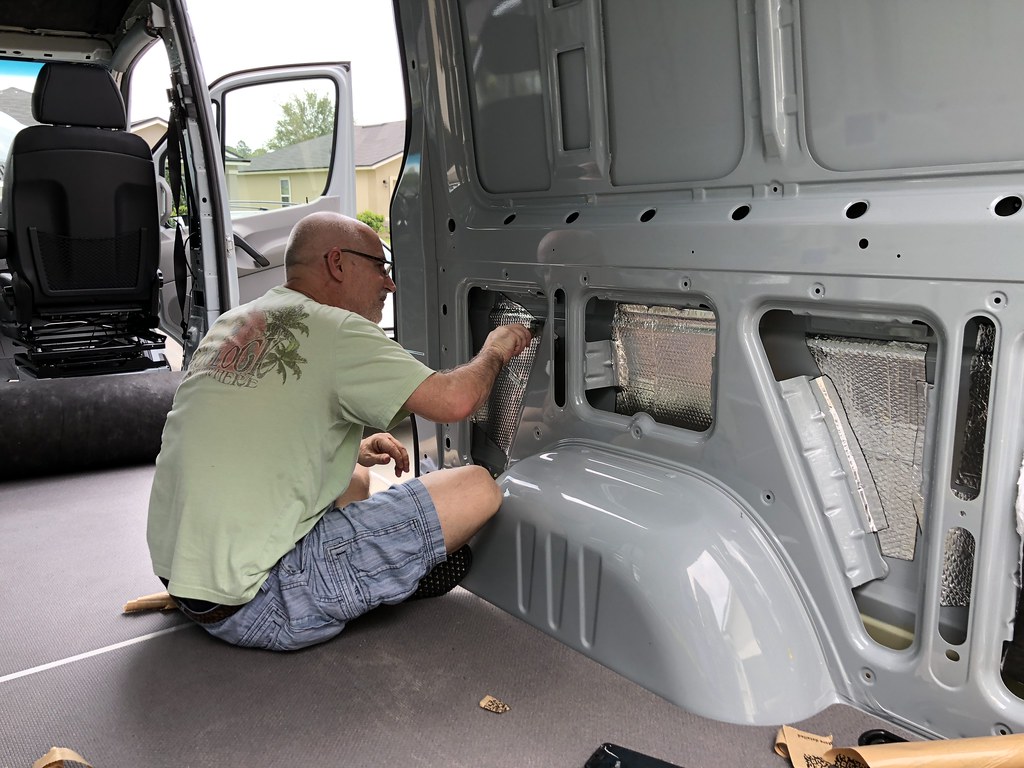
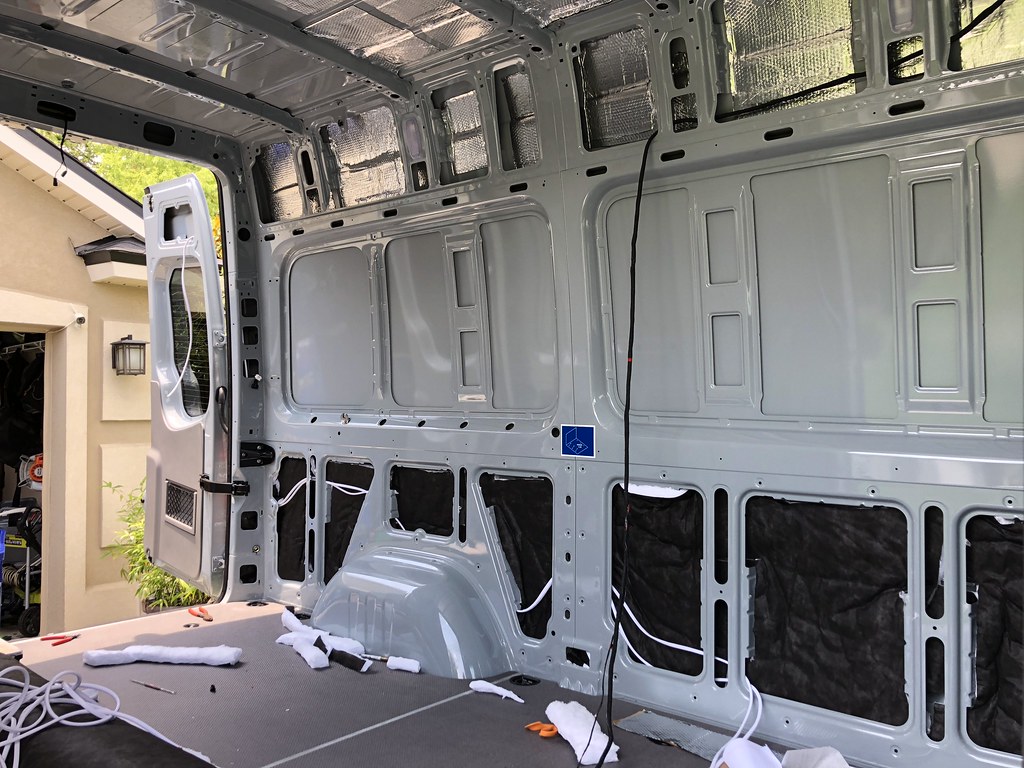
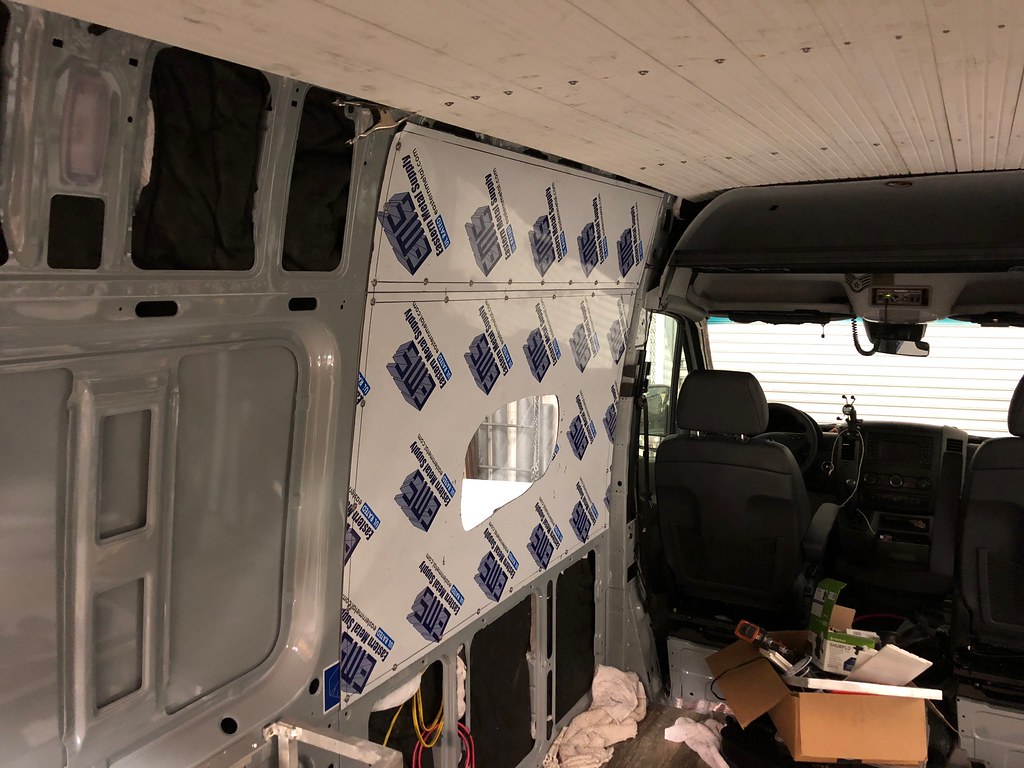
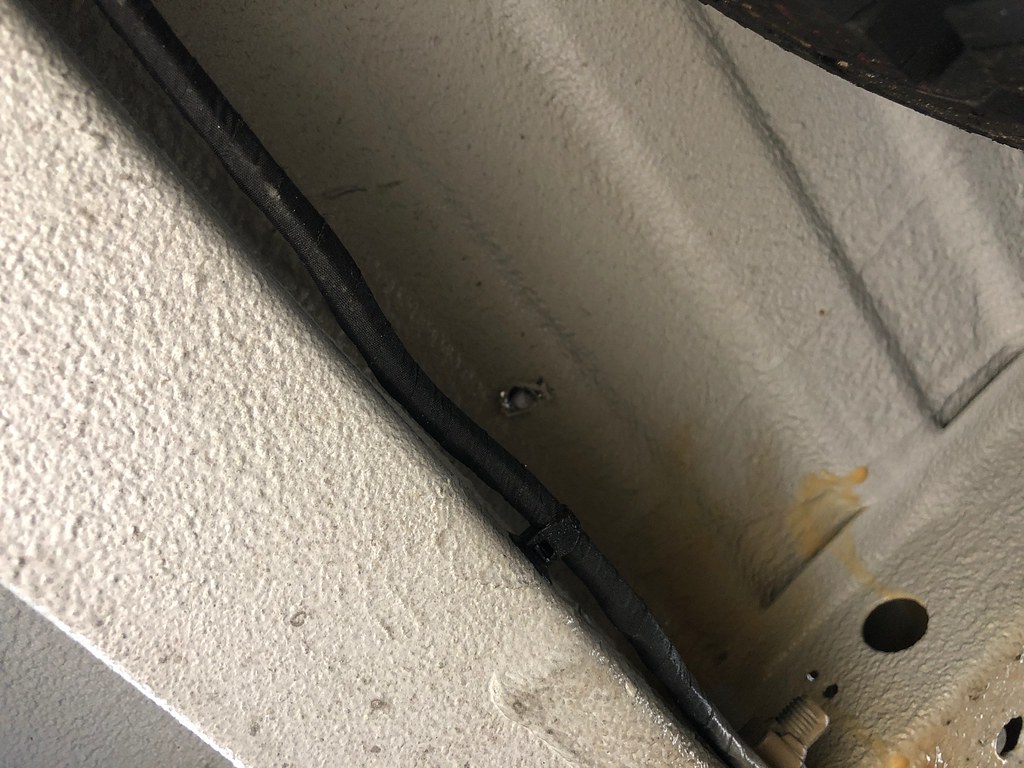
Sound Deadening 2 boxes - https://amzn.to/2xkq3Mu - 127.98 (two boxes does a whole sprinter very well)
Installation tools - https://amzn.to/2LutUJH - 14.99
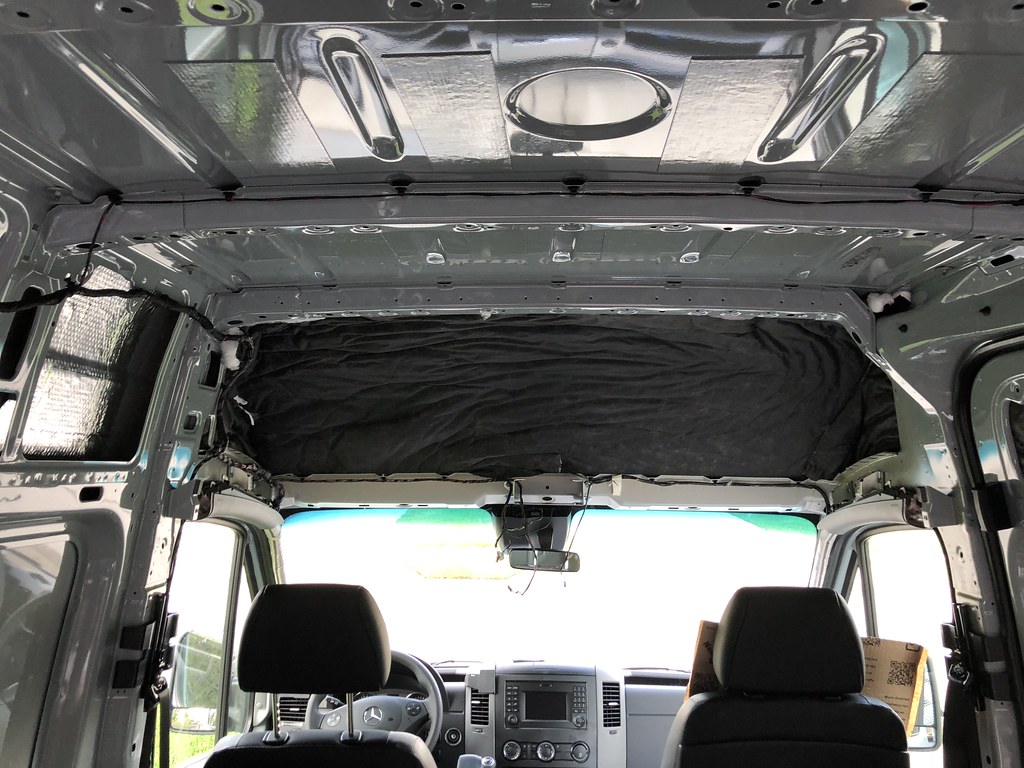
Insulation - 50 linear feet - https://www.ebay.com...kVO_5FNr6jaI3KQ - 600.00
Speaker adapters for door - https://www.ebay.com...gQ3IYaA&vxp=mtr - 26.00
Speaker panels for rear door - https://www.ebay.com...9AmEqeaafqX9ycA - 100.00
Vented seat base panel for heater intake - https://www.ebay.com...j4AAOSwa39UyG8D - 28.50
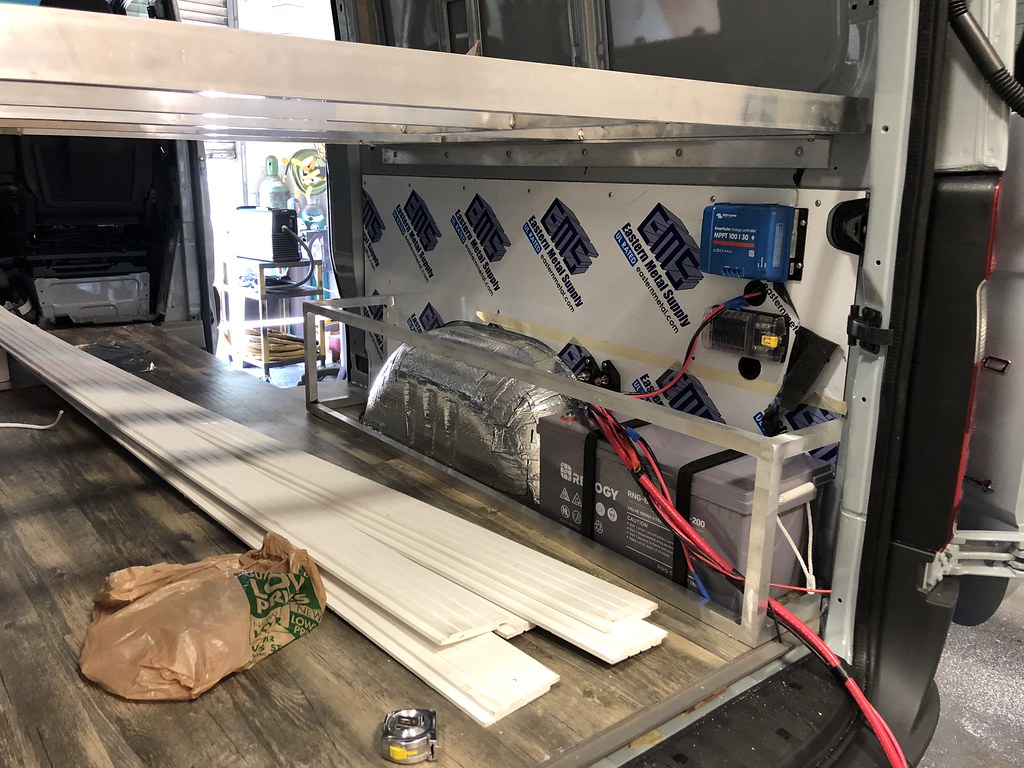
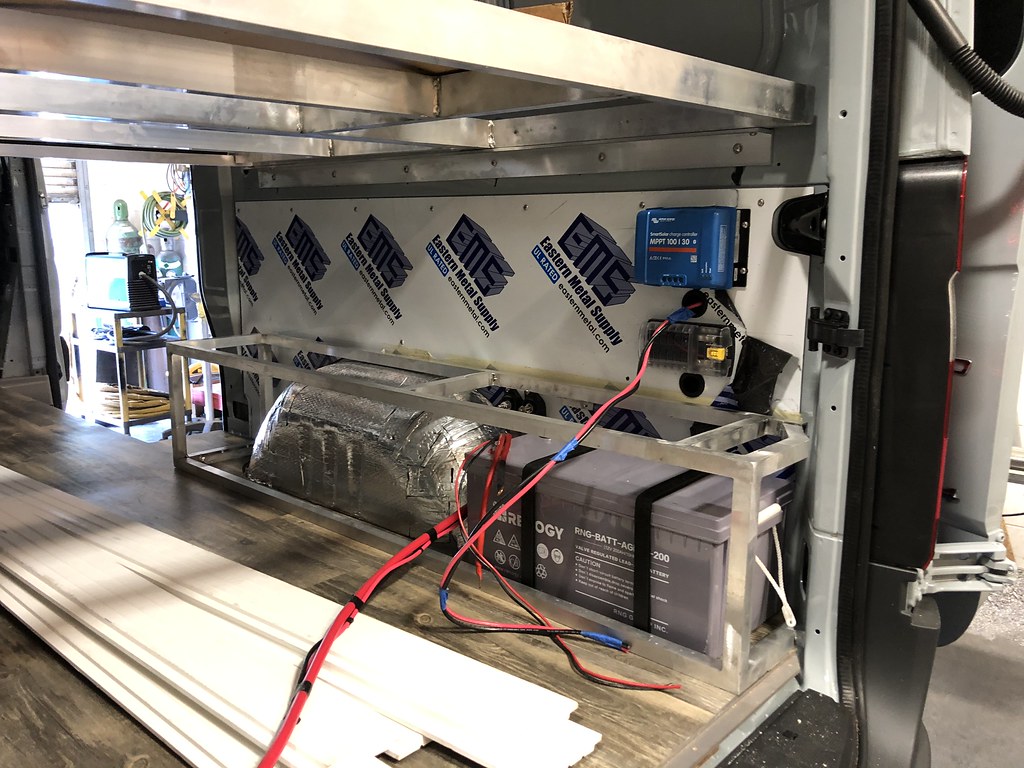
Espar D2 Heater with muffler, and easy start timer - http://www.heatso.co...2kw-heater-kit/ - 992.00
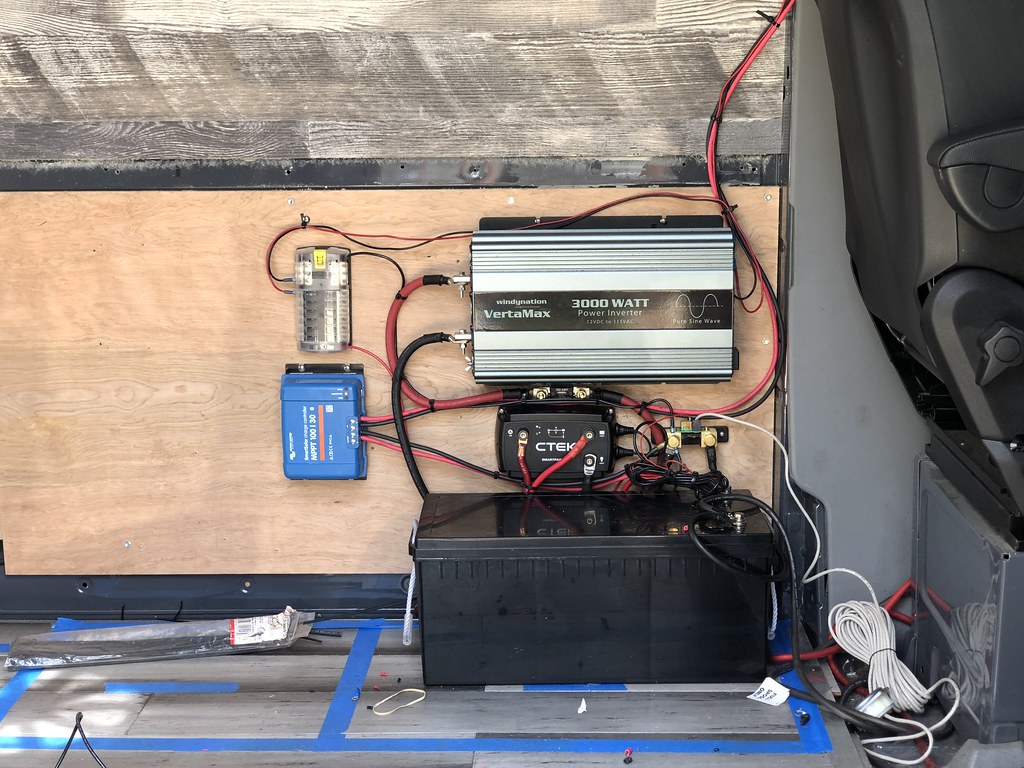
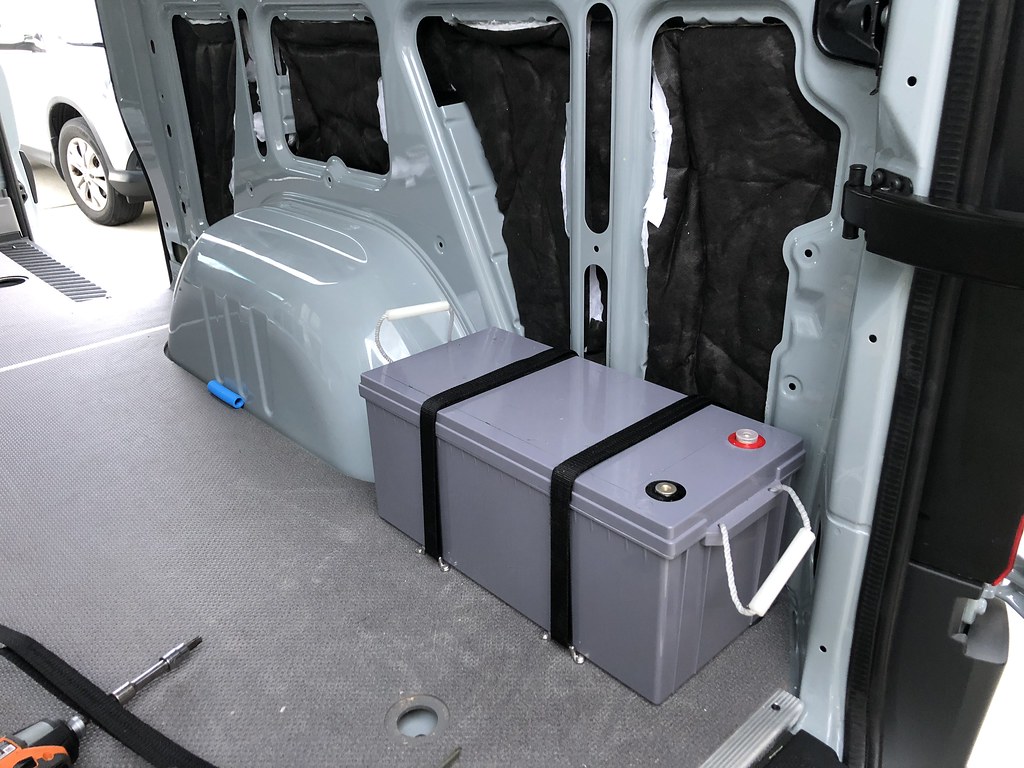
Renogy 200ah batteries (x2) - https://amzn.to/2krTAuo - 595.98 (on sale)
Renogy 100 watt panels (x3) - https://amzn.to/2s9bPZK - 318.87 (on sale)
Midland Radio - https://amzn.to/2s8XlsC - 149.99
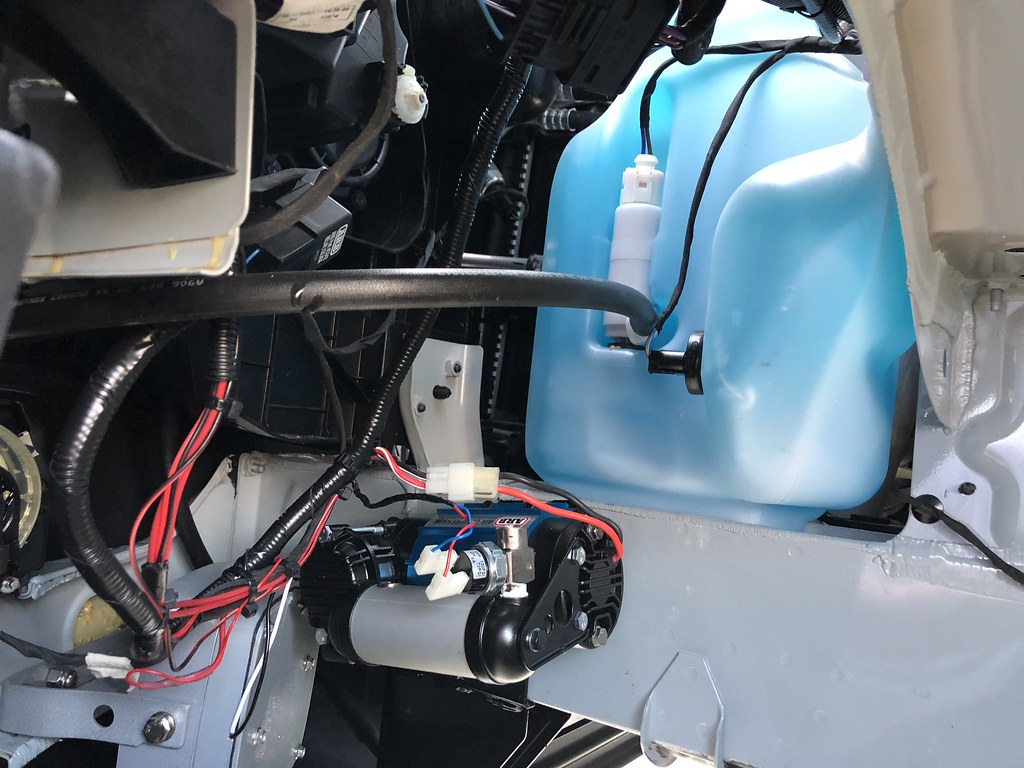
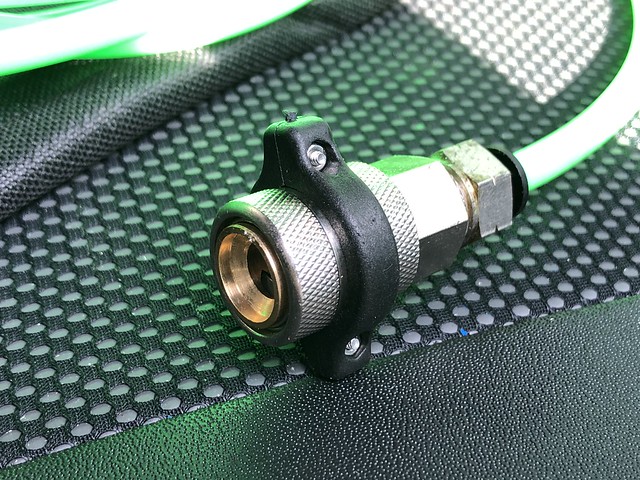
Air Tank - https://amzn.to/2IOF2iN - 57.95
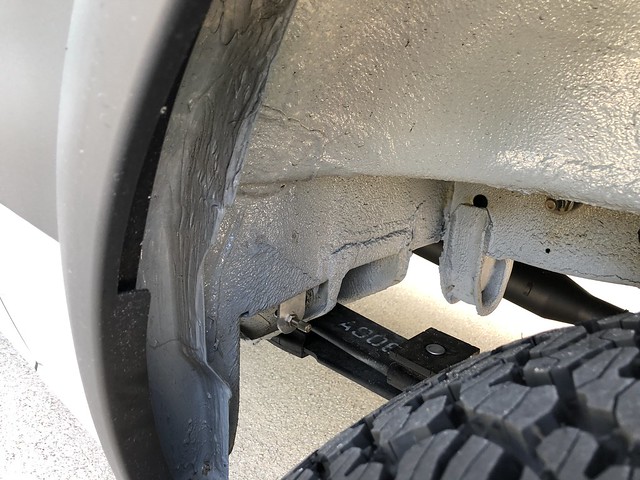
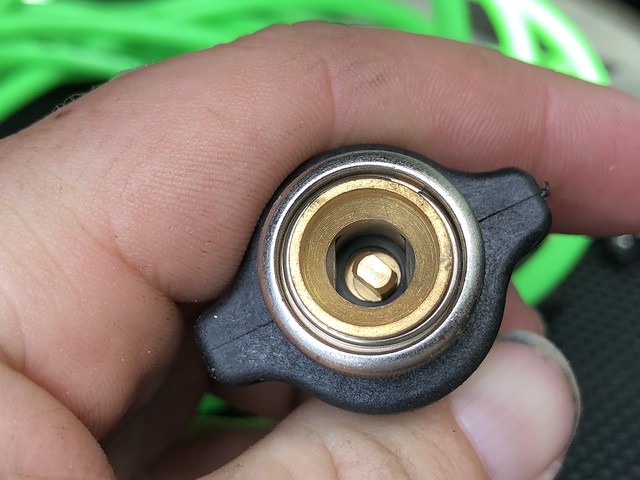
Air Bulkhead fitting - https://amzn.to/2s47GWX - 10.14
Rear shower - https://amzn.to/2sg90oZ - 50.00
Solar Y connectors (2 pairs) - https://amzn.to/2IQ0HLO - 17.00
ram mount - https://amzn.to/2GPKW1w - 32.99
Carpet for lining flares and trim (2ea) - https://amzn.to/2GQ0ceH - 65.32
Foam for lining flares  (qty 5) - https://amzn.to/2Lv9jF9 - 65.00
USB plugs (x4)- https://amzn.to/2ILM3VP - 44.00
12V plugs (x4) https://amzn.to/2LsnVF8 - 28.00
Quick fuel connector for heater - https://amzn.to/2Lub6KI - 9.88
Ceiling LIghts (8) - https://amzn.to/2IKm40R - 65.98
12v dimmer - https://amzn.to/2xb2Xb2 - 30.00
Roof Solar Entry - https://amzn.to/2GRSgJT - 20.00
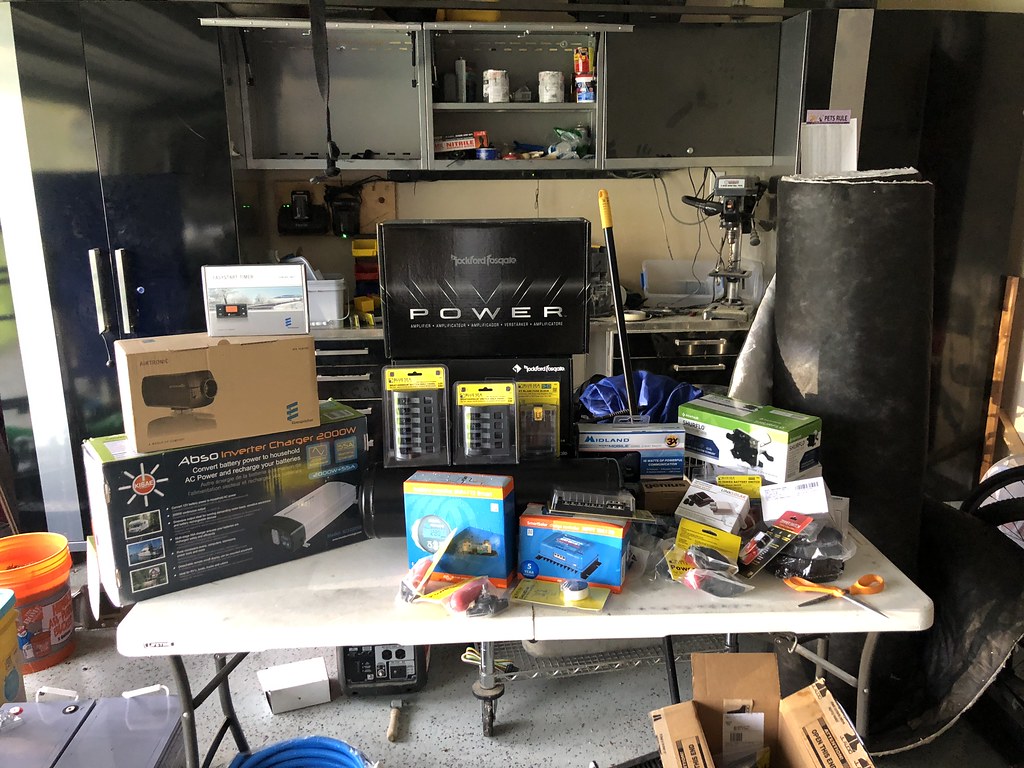
Main fuse panel - https://amzn.to/2LxCmIe - 35.96
driver wall fuse panel - https://amzn.to/2IOOpiD - 31.97
Solar wiring - https://amzn.to/2KVEQPy - 41.99
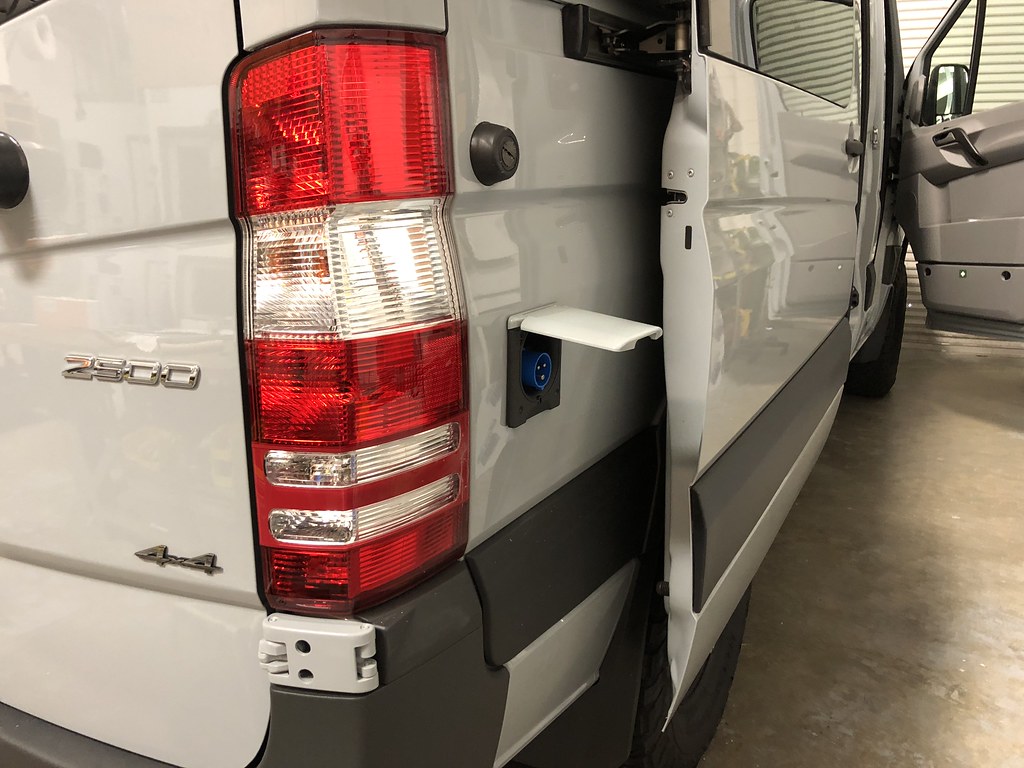
110 plug shore power - https://amzn.to/2s8z1am- 16.95
water Strainer - https://amzn.to/2xfL7nf- 8.11
water pump - https://amzn.to/2xckXBR - 71.13
Cable Ports (x4) https://amzn.to/2LsclKd - 90.88
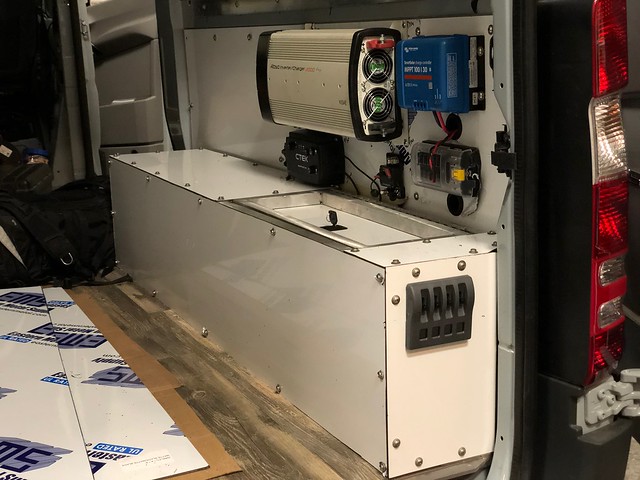
rear switch panel - https://amzn.to/2JdeWcC - 57.72
front switch panel - https://amzn.to/2J7BFHe - 68.33
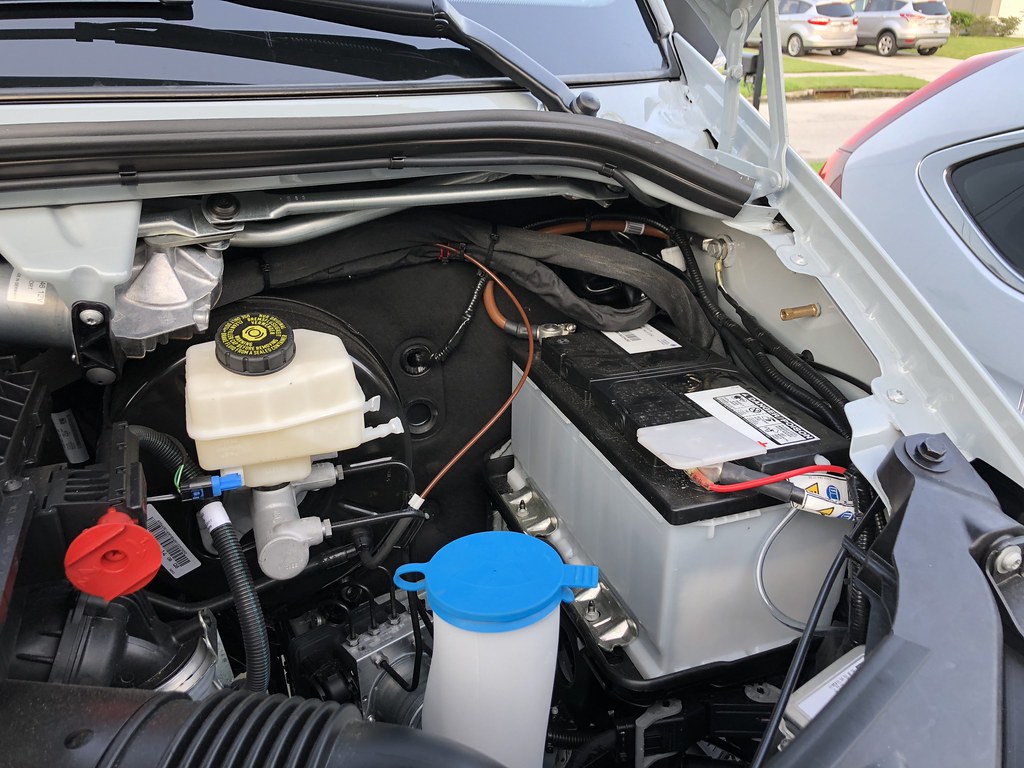
terminal studs (to add stuff to front battery, and manage rear battery connections) - 51.88
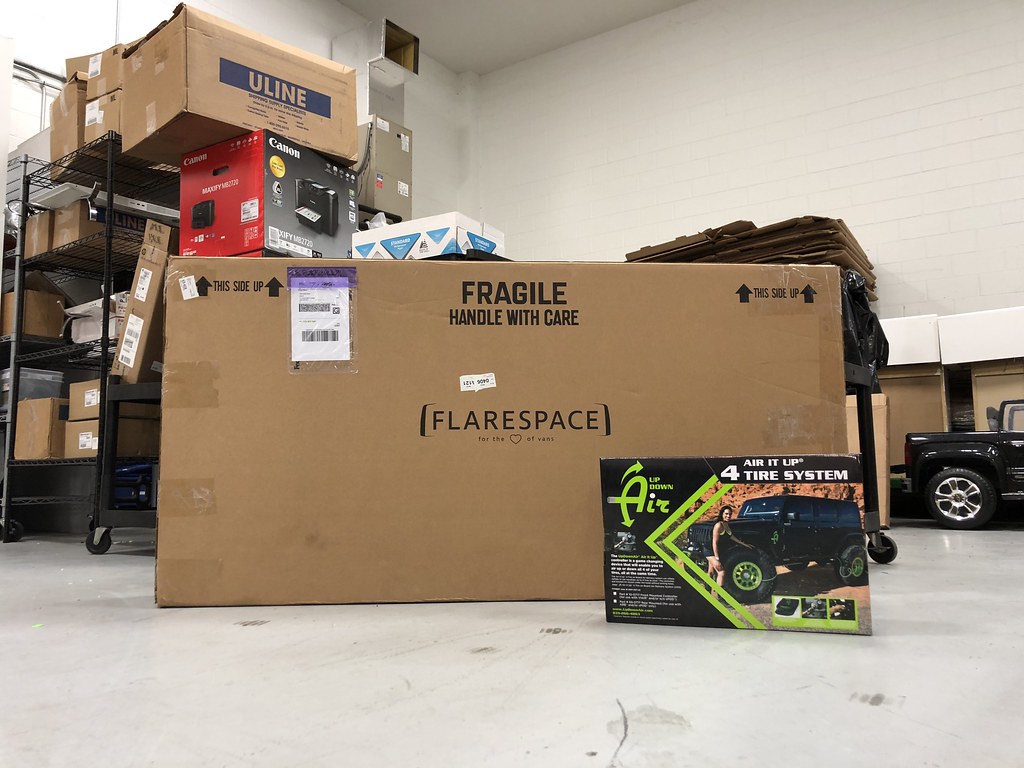
Flarespace Flares - http://www.flarespac...es-sprinter-van - 1750
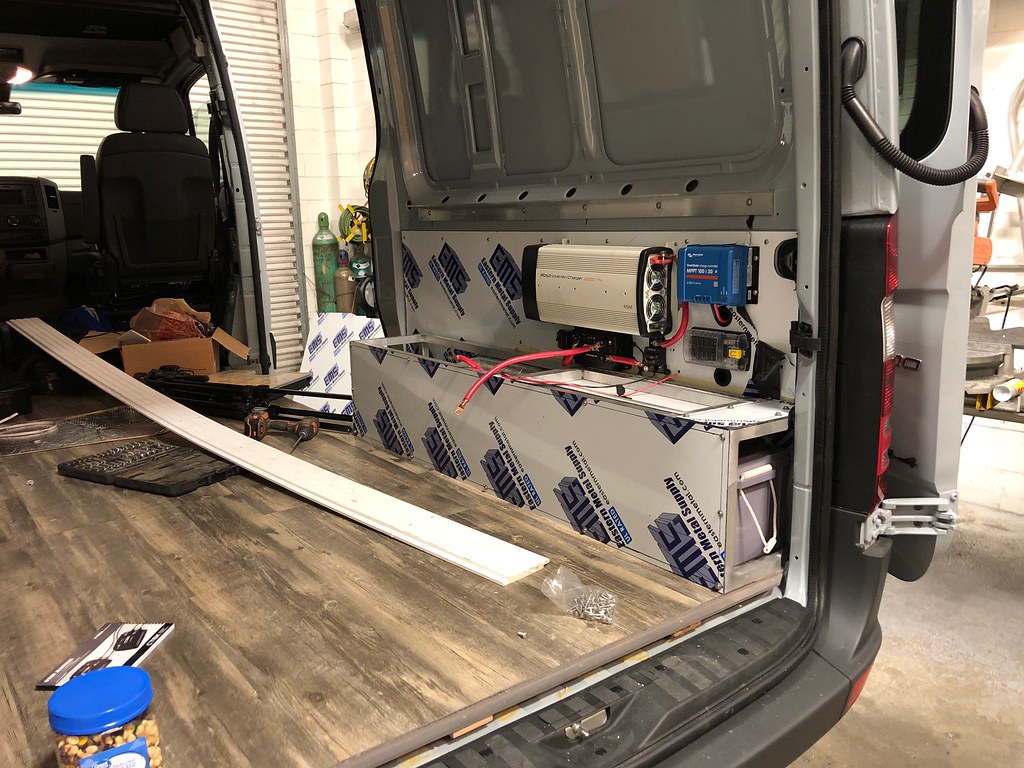
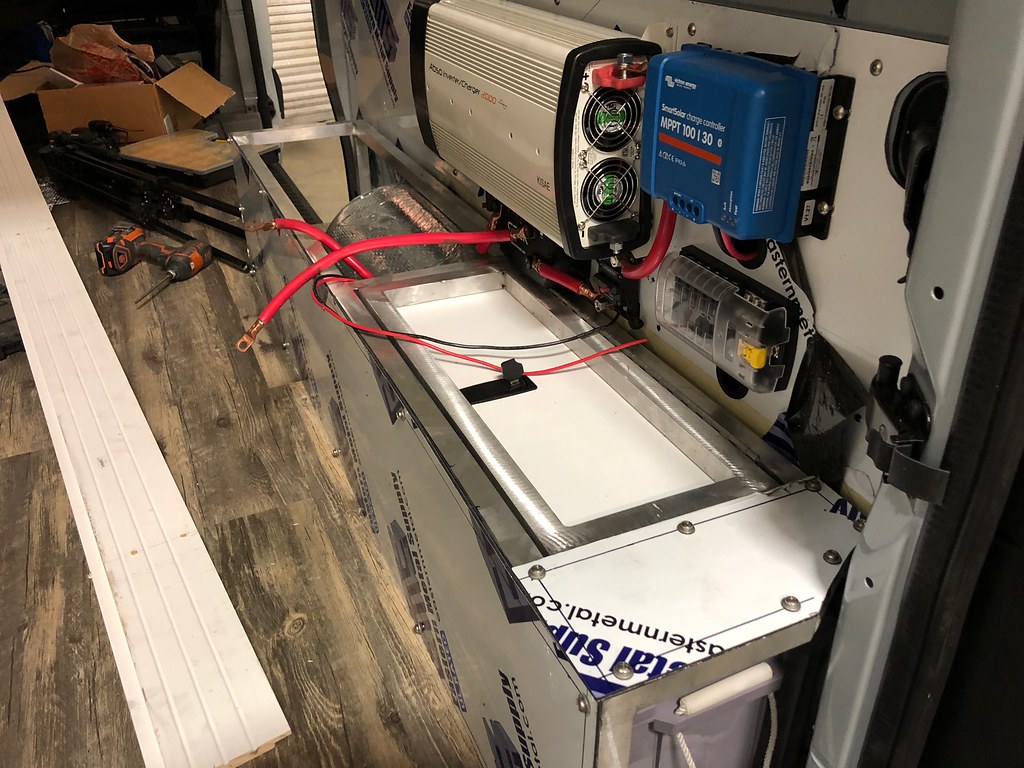
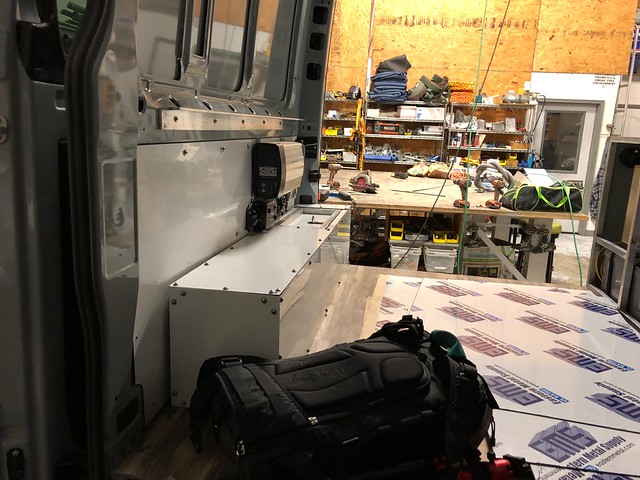
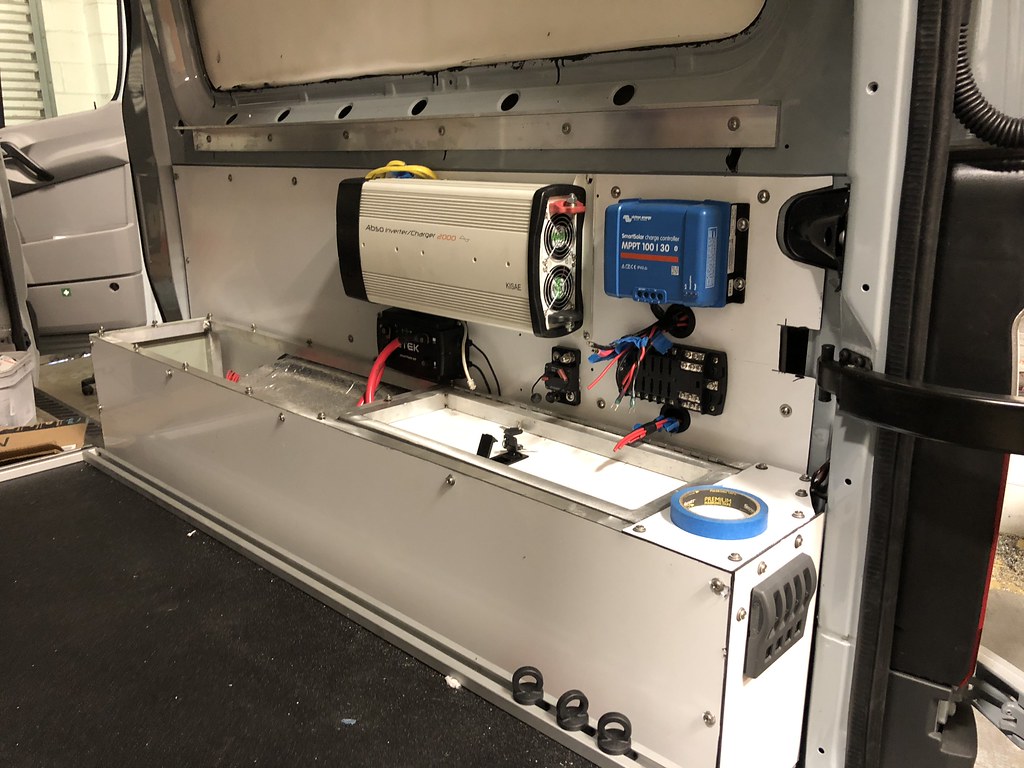
Inverter/charger - https://amzn.to/2ILmEHA - 515.98
Ctek Smartpass 120 -https://amzn.to/2IMsj4j - 206.55
Victrom 100/30 mppt - https://amzn.to/2J3DmFH - 226.10
Battery switch - https://amzn.to/2INVJio - 24.19
Total as of may 25 -6,948.26
 
Rockford Fosgate Power 400.4 - https://www.amazon.c...te Power T400-4 - 300.00
Rockford Fosgate  T1650-S components (2 pairs) https://amzn.to/2JgygGh - 430
Amp Install kit - https://amzn.to/2ITtSNW - 25.34
Line Converter - https://amzn.to/2LE5cqz - 8.16
Black and read heat shrink for terminal stuff - https://amzn.to/2GXQ4k2 - 8.99
4ga terminals (battery connections, inverter, etc) - https://amzn.to/2JezMIP - 9.99
0/1 terminals (for main wire to Ctek,)  - https://amzn.to/2LBB5jq - 11.54 (it was almost same price to buy 4 a it is 10, so i got 10)
PA System - https://amzn.to/2sqZgZd - 149.99
Total as of May 28 - 7802.27
 
 
And more parts
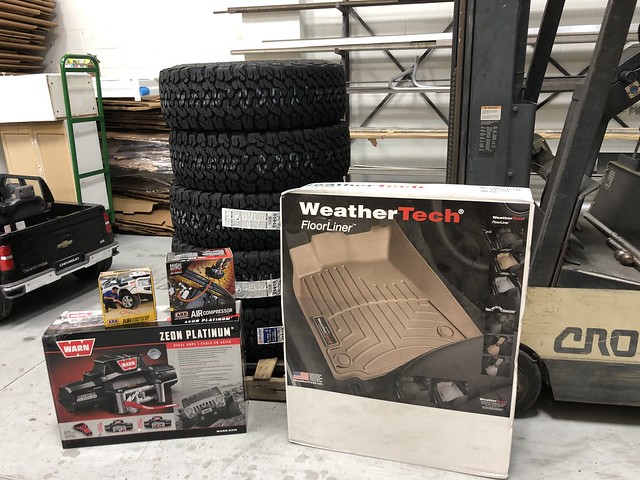
BFG KO2 - 285/75-16 x 5 - https://amzn.to/2H6BHtY - 1000
ARB Single Compresor - https://amzn.to/2xu7Yvc - 266
ARB Air up kit - 34.62
Weather Tech floor mats - https://amzn.to/2xveVME - 195
Warn Zeon 10S platinum - https://amzn.to/2Jmu7Av - 1595.85
3091
 
Total as of 5/31 - 11151.12
 
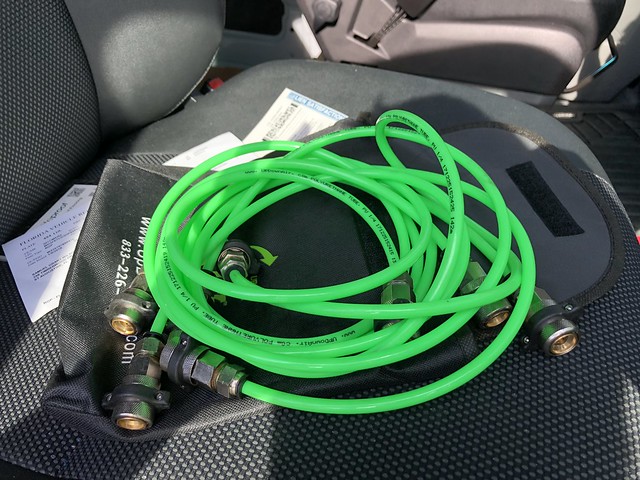
1/4 air line - 19.00
3M super 90 (6 cans)  - 54.00
Air fittings - 24.00
Rubber Grommets for wire pass thru - https://amzn.to/2sKOL2W - 16.10
AirUpDown Kit - https://updownair.com/ - 260.00
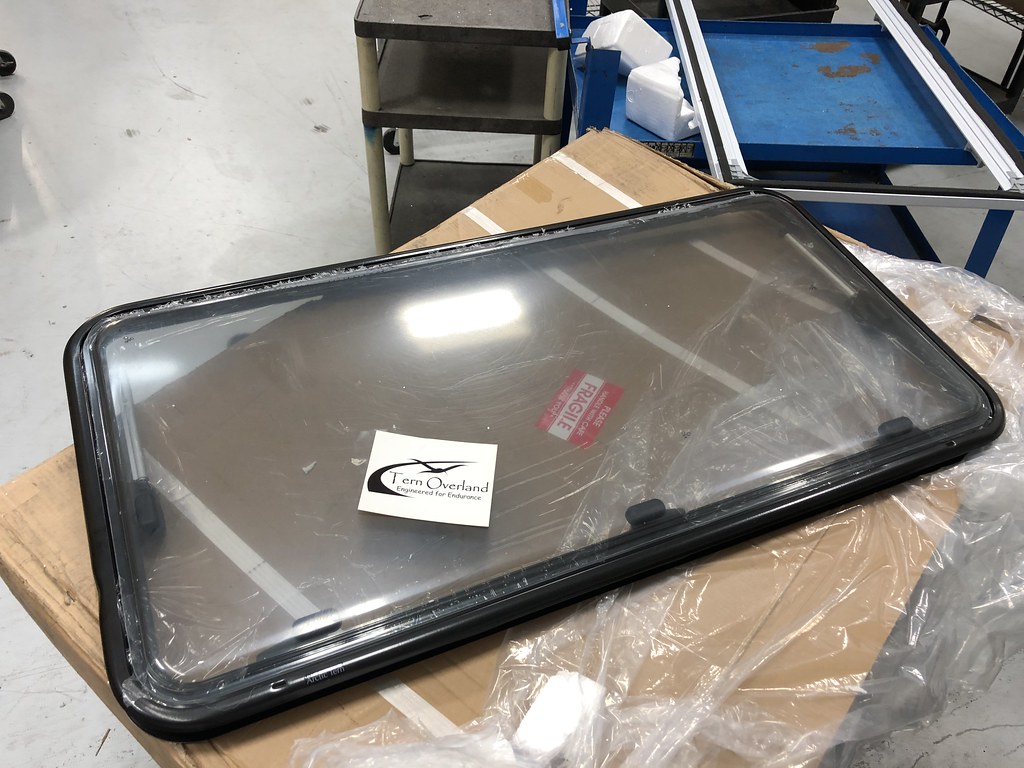
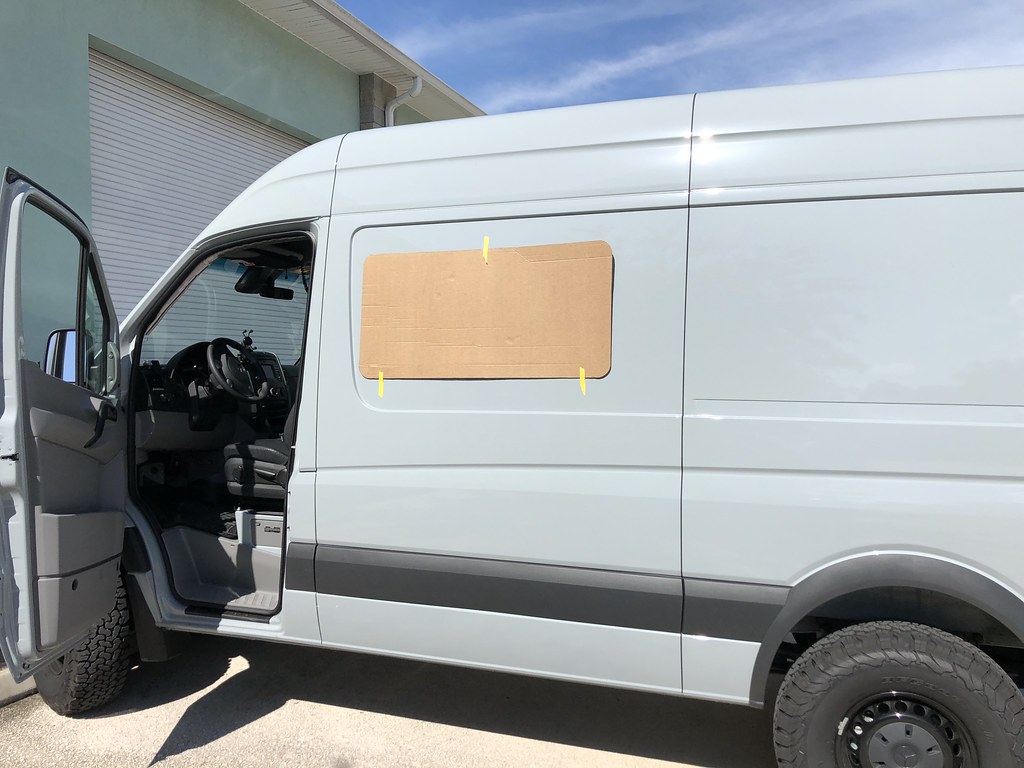
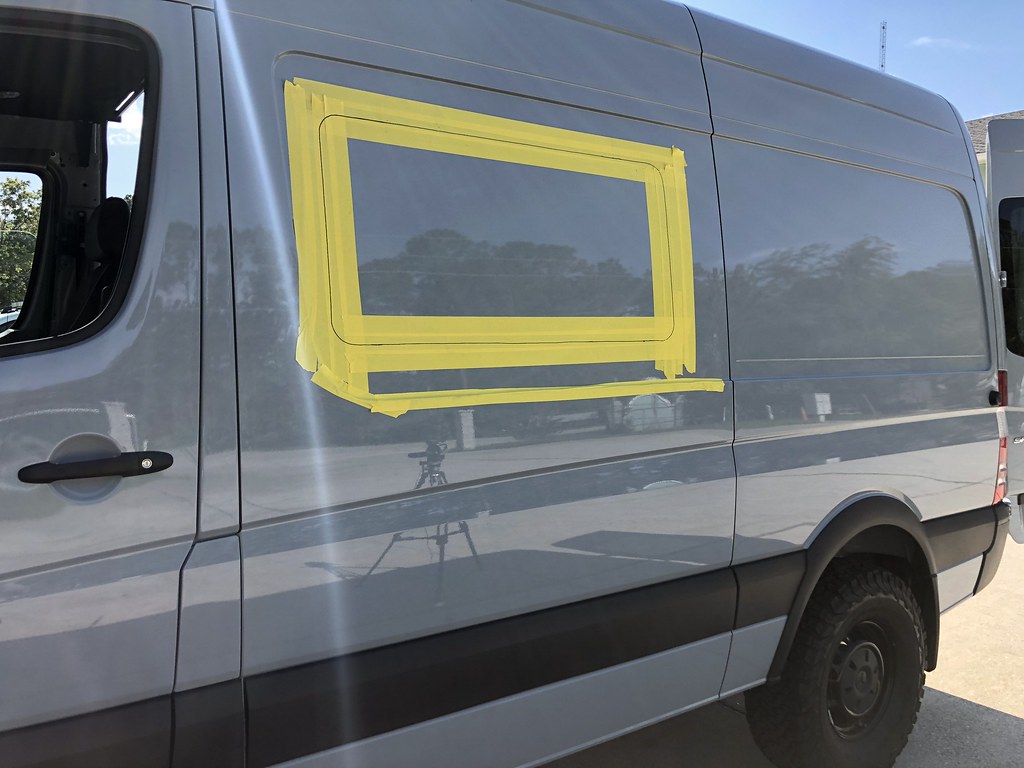
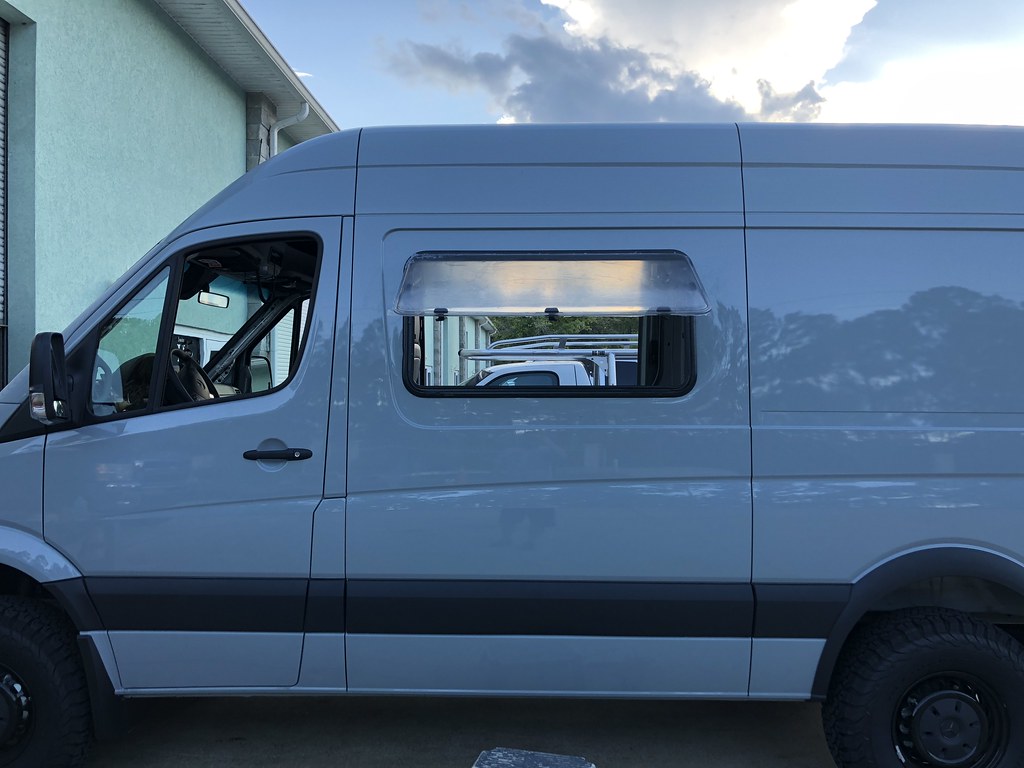
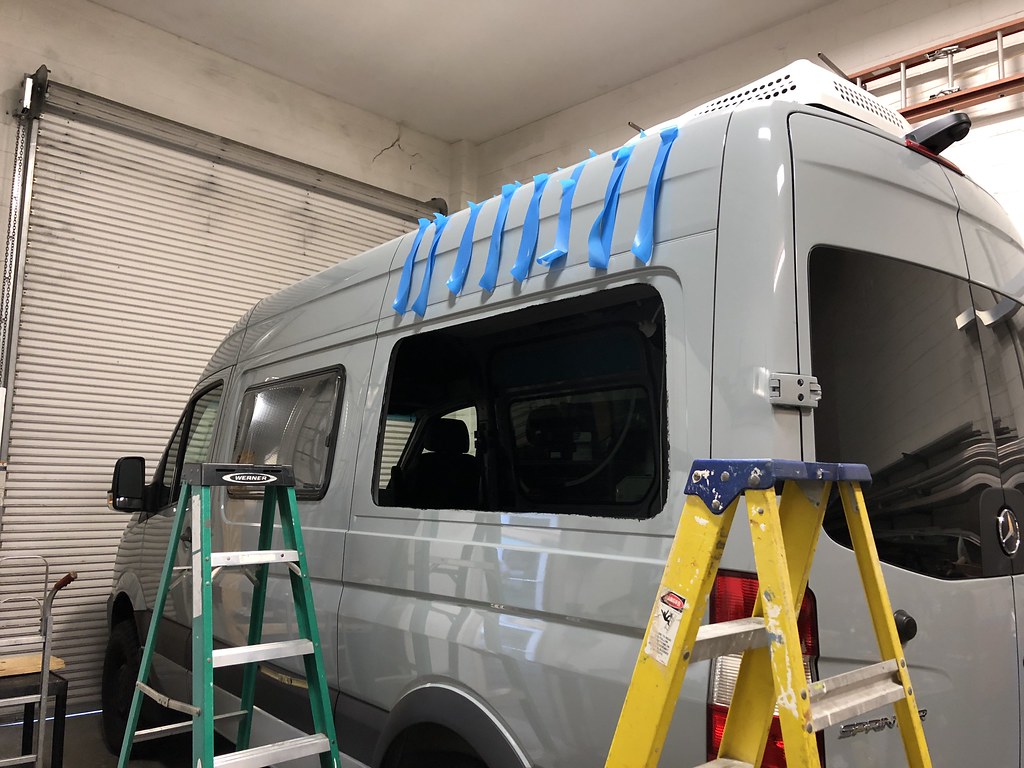
Tern Overland Window (biggest one)- 410
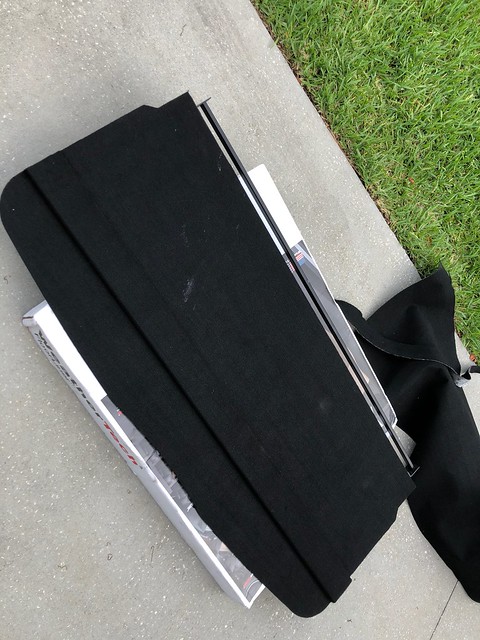
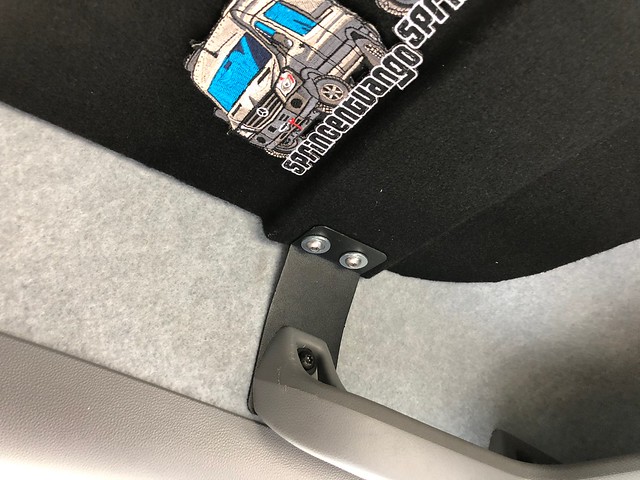
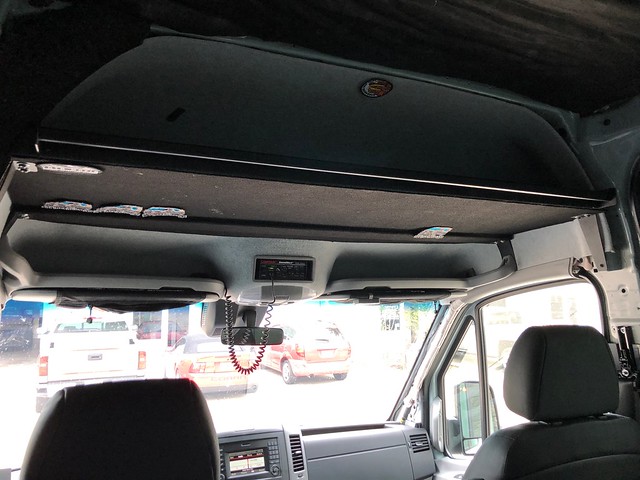
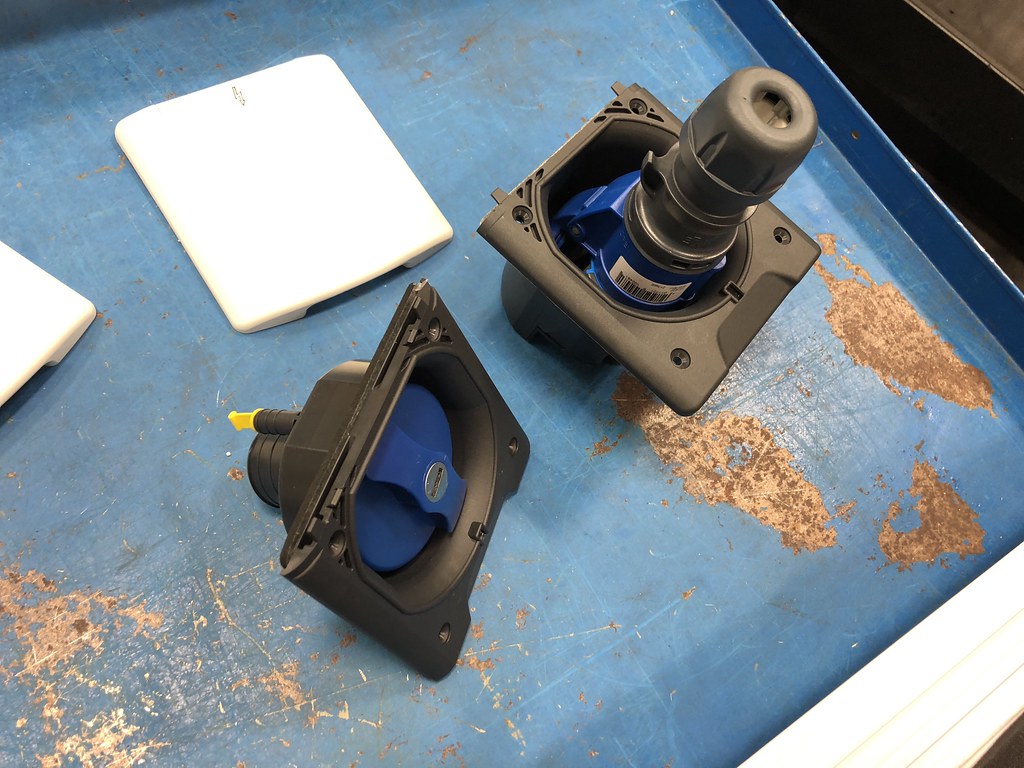
Electrical plug (x2) - https://www.ternover...ther-components - 102
Water fill (same link)- 49.00
 
 
Total as of 6/6/18- 12485.22
 
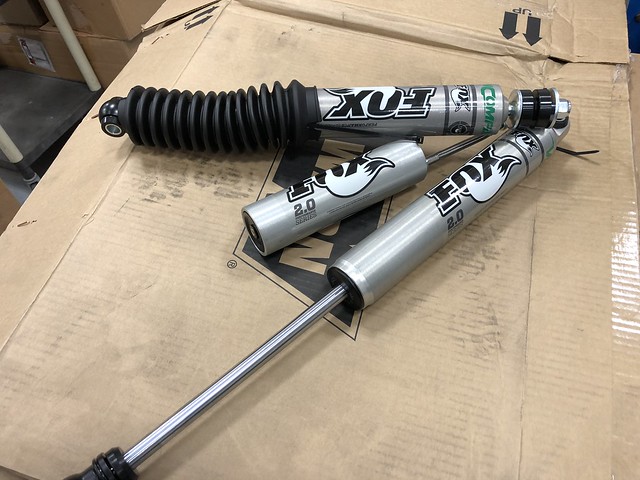
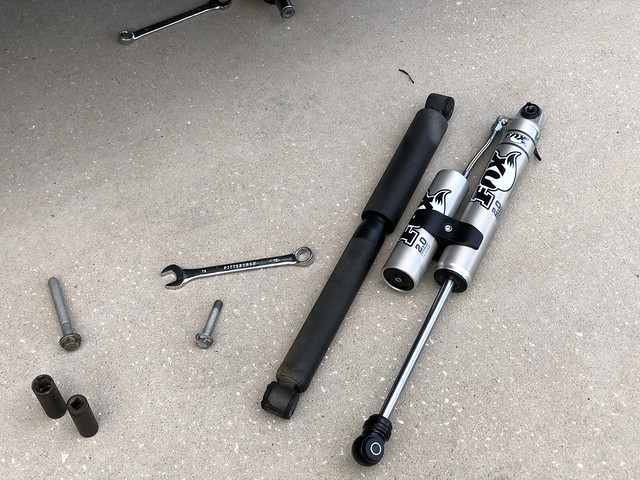
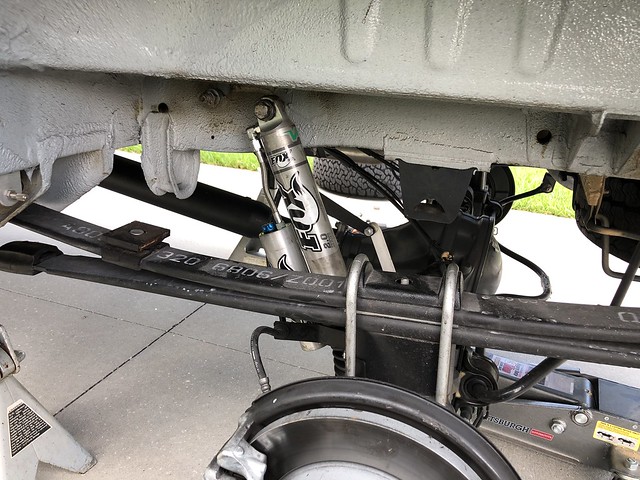
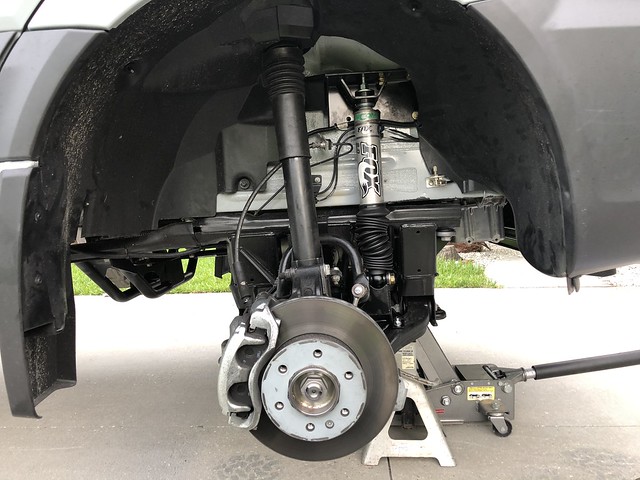
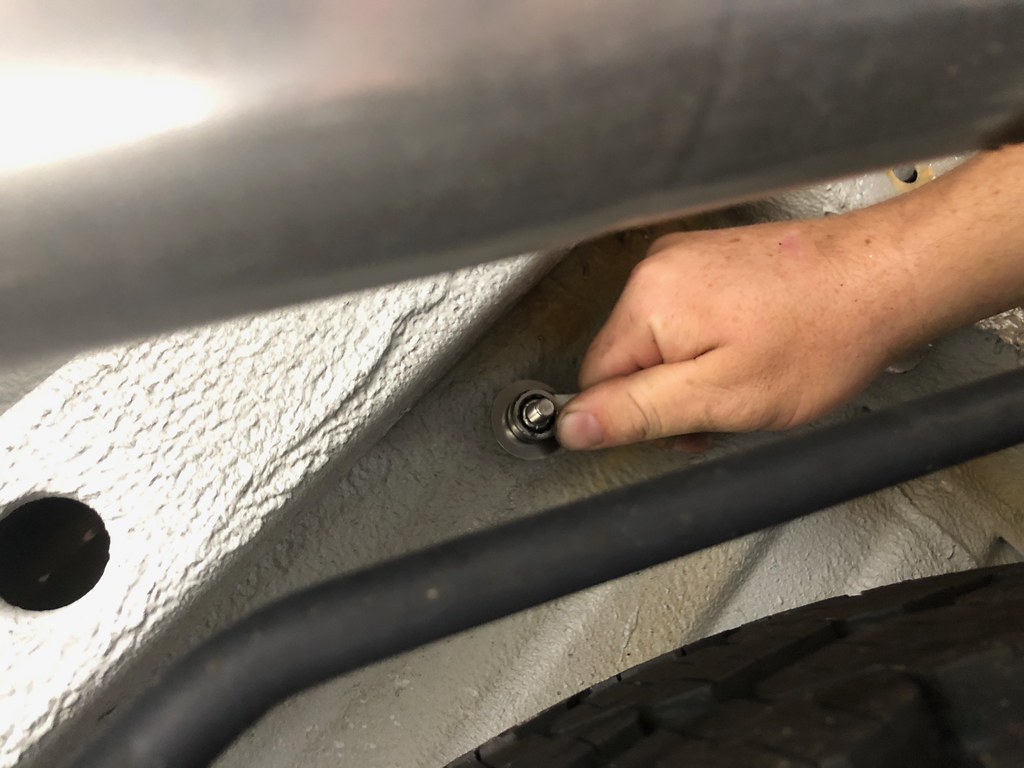
Van Compass suspension - 2492.49
 
TOtal as of 6/7/18 - 15024.64
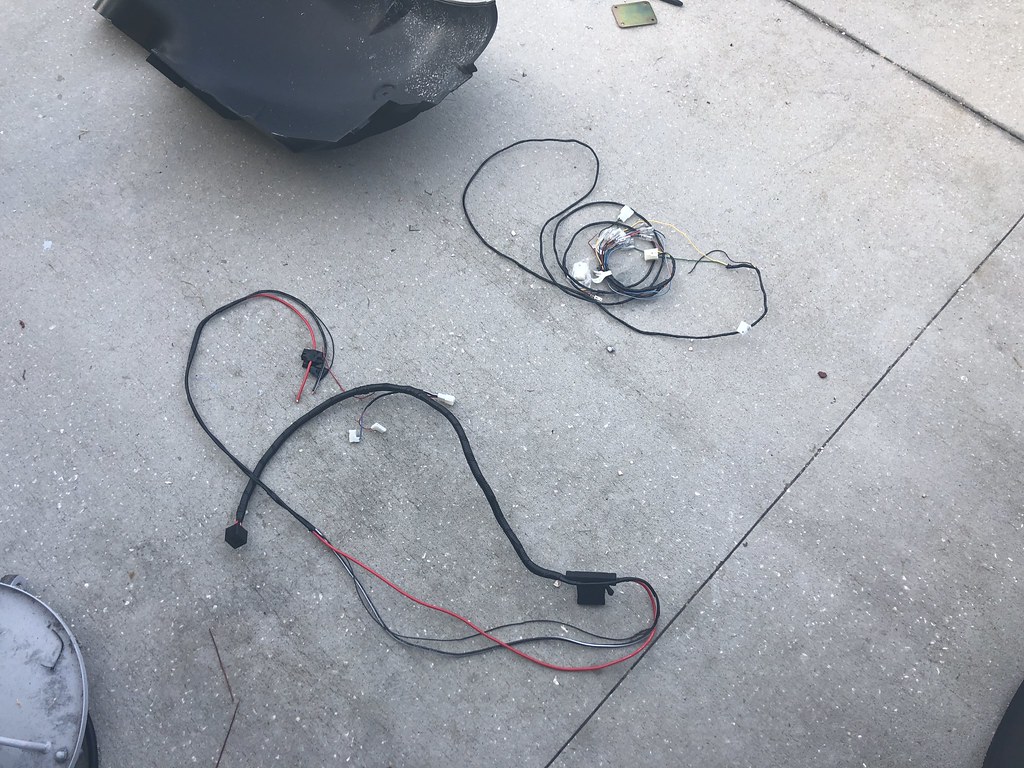
 
Wire totals - 450
Flooring - 180.00
Aluminum for fabrication- 680
 
Total as of 6/10/18 - 16334.64
 
Ceiling material - 80.00
pvc trim board for window spacers - 14.00
Rubber gasket for metal to metal areas - 8.00
latch for bed - https://amzn.to/2LVRNt9- 6.49
Outlets for driver side wall-https://amzn.to/2JNaVg6 - 22.99
200a CB for inverter - https://amzn.to/2JJWiua - 27.99
150A CB for smart pass- https://amzn.to/2JKD5IJ- 23.99
 
total as of 6/17/18- 16517.46
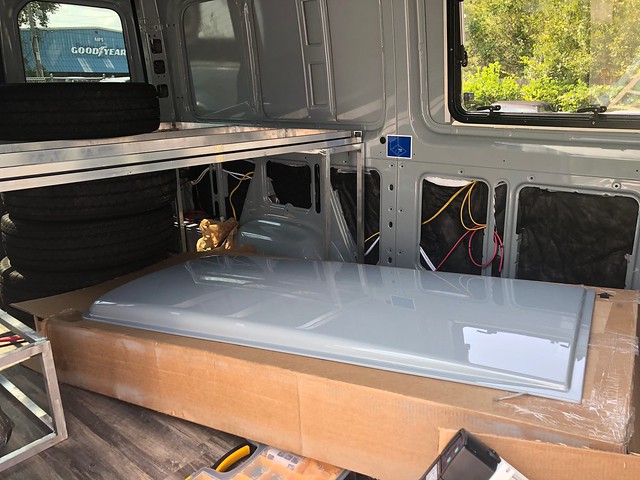
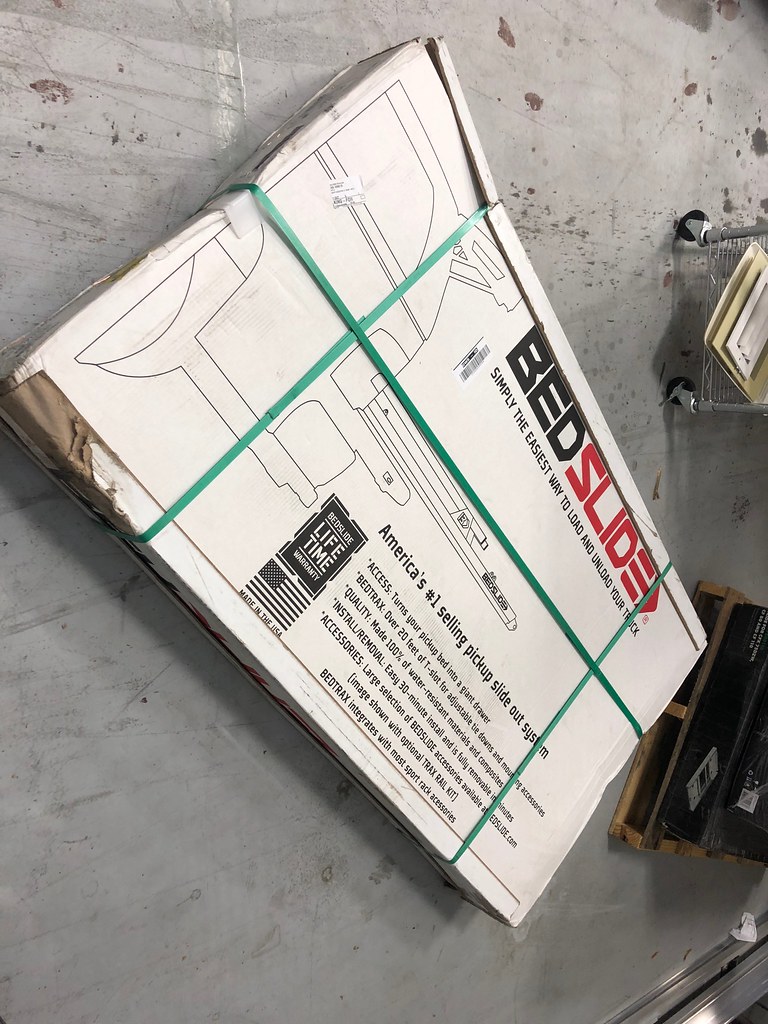
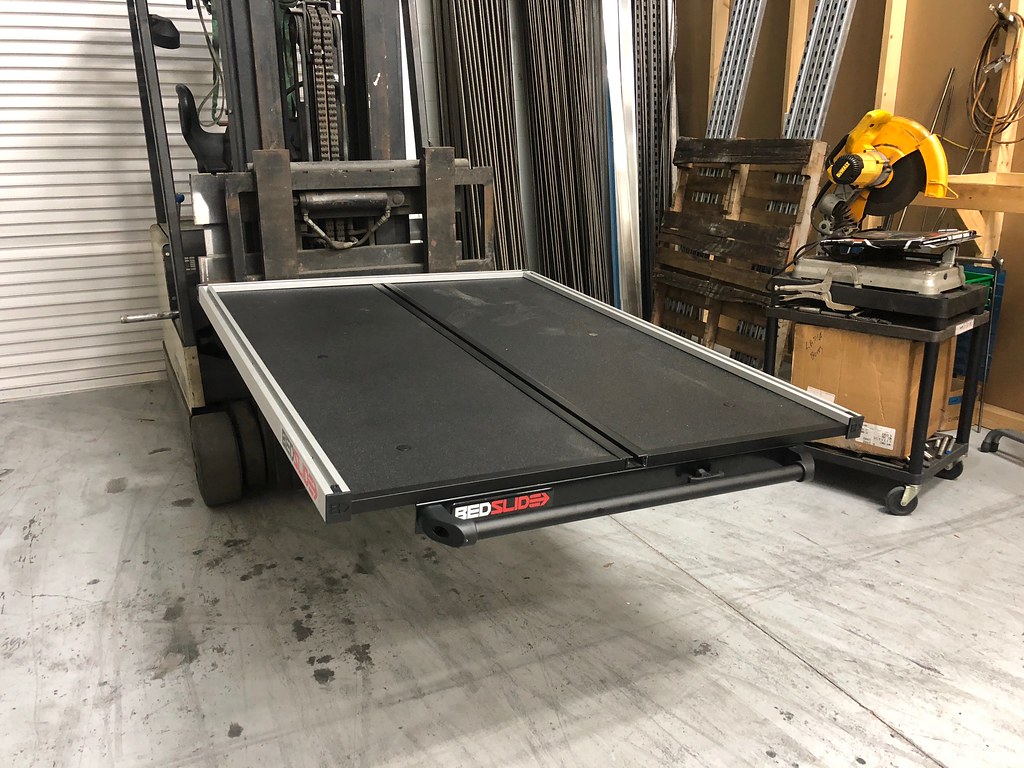
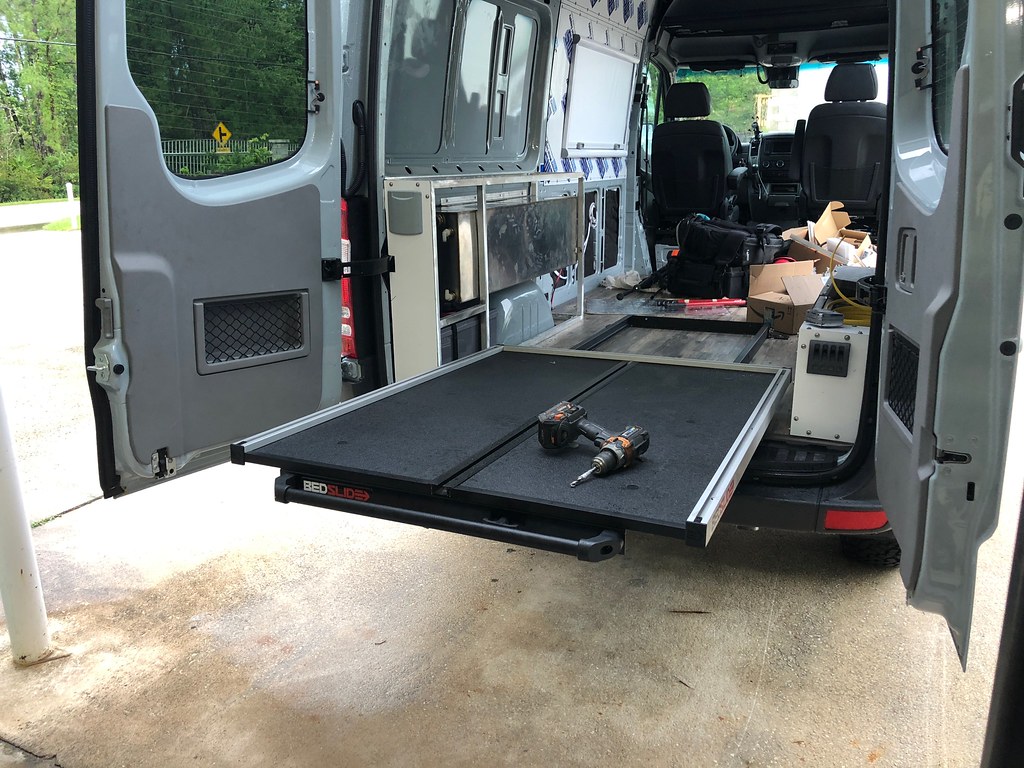
 
bedslide ordered
BEDSLIDE S 62" X 43"
(1-6243-S) - 899
 
total to date:
17,416.46
 
Ordered the fabric for ripplewear to make my shades
 
Total as of 6/19
17570.90
 
Misc Home Depot run - 174.34
Rack lights - https://amzn.to/2yxxnVr - (x3) 110.99
Side and rear rack lights - https://amzn.to/2JY7ByZ - (x3) - 30.00
 
Total as of 6/22 - 18168.18
 
Dometic Stove (mo8322)-https://amzn.to/2zkuSX8 - 499
Dometic Faucet - https://amzn.to/2MRYLQo - 100
Dometic CFX75DZ - https://amzn.to/2KRhGKs - 1k
Fridge SLide - https://amzn.to/2MRygKZ - 300
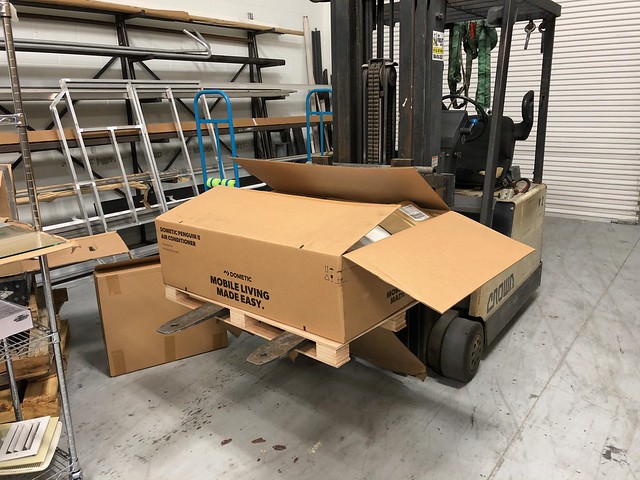
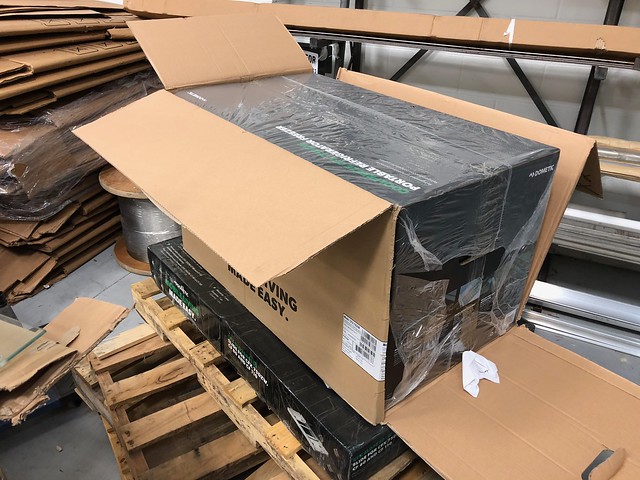
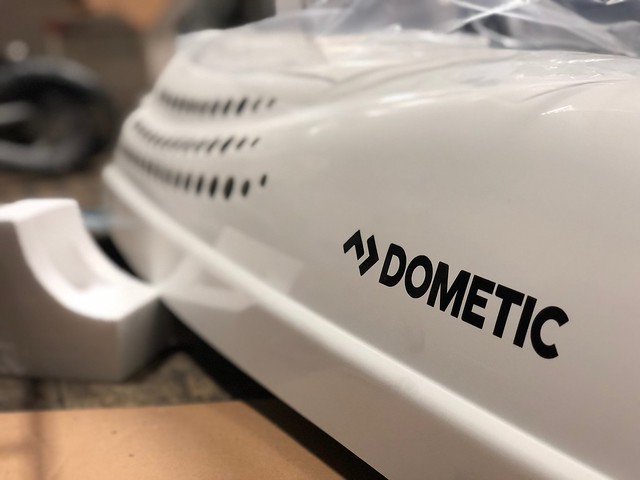
Penguin 2 AC unit - https://amzn.to/2u8wc9l - 800
Thermostat and air distribution panel - 250
MAxxair Fan - https://amzn.to/2tWJMxh - 250
spray adhesive (6 cans of super 90) - 66.00
 
total as of 7/5/16 - 20633


(stopped counting past this point.  Depressing. )


  • 0
2018 Sprinter 144" Wheelbase
Dometic - Tern Overland - Flarespace - Blue Ridge Overland Gear - WARN - Bedslide


#2 VanGoOutdoors

VanGoOutdoors

    Senior Member

  • Members
  • 142 posts
  • LocationSt. Augustine, Fl

Posted 22 October 2018 - 05:59 PM

Parts are starting to arrive!
28542221978_0aae4282b6_b.jpgUntitled by Grant Wilson, on Flickr
Picked up the audio today, components front and rear and a killer amp.  Got a great deal on it all, so worth it
 
Also picked up a new box to make it easier to get tools to the van, and keep from just dropping it all on a table like last time.
40607414460_9aefa0d84f_b.jpgUntitled by Grant Wilson, on Flickr
 
Also used the van as a truck to take home the craigslist find of the day.  500.00 year old mower!
40607414130_64ae82e585_b.jpgUntitled by Grant Wilson, on Flickr
 
27545108547_eb31ea837a_b.jpgUntitled by Grant Wilson, on Flickr
and finally, took some time to attach velcro to the back of the patches i got from expo and the trip out west.  Waiting to pull the headliner down and when i put it back up, ill throw em all on again!

The weekend has been pretty busy and awesome.  A ton of work got done and pretty happy with the progress.
 
The stack of parts is getting a bit large, so let's start putting some in there to get it down!
28668456828_4f8bc29f43_b.jpgUntitled by Grant Wilson, on Flickr
 
Friday after work, decided that i was going to strip all the pieces out of the front (a pillar and b pillar trim headliner etc) so i can start running wires for the PA and speakers.
42542046961_8f4433cd08_b.jpgUntitled by Grant Wilson, on Flickr
Then I applied the sound deadening, put a ton of Thinsulate up there, and moved on to some other areas
40733629440_73dca5f357_b.jpgUntitled by Grant Wilson, on Flickr
41639824865_628515763c_b.jpgUntitled by Grant Wilson, on Flickr
40733628850_895c90b253_b.jpgUntitled by Grant Wilson, on Flickr
 
After that was finished, I went to the rear doors.  Pulled the lower panels off, applied sound deadening there and thinsulate, as well as pulling the wires for the rear door speakers
40733628850_895c90b253_b.jpgUntitled by Grant Wilson, on Flickr
 
Saturday not much got done.  My friend Justin came over
42490040472_d6b3173a55_b.jpgUntitled by Grant Wilson, on Flickr
28668456658_542c53a0d0_b.jpgUntitled by Grant Wilson, on Flickr
He need his electrical system installed, so i knocked it out for him in like an hour or so
41639823485_c8bc5b2d2f_b.jpgUntitled by Grant Wilson, on Flickr
he still has to hide some cables and do some other crap, but he was headed on a trip this week and needed something functional, so i hooked it all up for him.
 
The one thing i did work on Saturday, was hiding the god awful wiring harness back there.  I pulled the entire body harness from the headliner to the rear out of its home and removed all the clips.
41639805285_368eafacaf_b.jpgUntitled by Grant Wilson, on Flickr
I actually pulled it all back out, and then rerouted it behind the side area as well then put it all back on sunday correctly.
 
Sunday was alot of wiring finishing up front and my friend Rob (the guy who bought my Subaru) helping out with sound deadening and insulation.
40733626220_a63488f0f8_b.jpgUntitled by Grant Wilson, on Flickr
I finished some wiring on the PA, mounted the siren/speaker in the front, a single row lightbar and then ran the trigger wire for the relay for the ARB compressor that I will install on Monday hopefully.  The balance of the evening was spent redoing the rear harness like i mentioned above to run behind all the body panels and not to be seen again.
We got 3/4 of the sound deadning in the upper portion of hte van done.  I ordered another box of sound deadedning to finish up what was needed, and am waiting on more thinsulate from Hein as well as some other parts so i can do the audio stuff.   Also mounted up the rear batteries using some holddown loops and 1" webbing straps I sewed up with velcro closure stuff to keep it tied down.   No batteries sliding around here!
42548094541_5fc005bdce_b.jpgUntitled by Grant Wilson, on Flickr
28674306018_7d3570185e_b.jpgUntitled by Grant Wilson, on Flickr
41639825125_c14d7163ef_b.jpgUntitled by Grant Wilson, on Flickr
 
 
Next up is getting the flarespace flares dropped off for paint when they come in this week, Sorting a Tern Overland window, pulling the floor for insulation and running main power wire for hte Ctek Smartpass to the rear, making the rear passenger wall to mount all the electrics to, and sorting electrics out.  Tons of fun!


  • 0
2018 Sprinter 144" Wheelbase
Dometic - Tern Overland - Flarespace - Blue Ridge Overland Gear - WARN - Bedslide


#3 VanGoOutdoors

VanGoOutdoors

    Senior Member

  • Members
  • 142 posts
  • LocationSt. Augustine, Fl

Posted 22 October 2018 - 06:00 PM

Pallet arrived today!
Correct winch is on the way, they sent steel instead of synthetic.  All good, dont need it for a few weeks anyways
42561012941_04dd0c2257_z.jpgUntitled by Grant Wilson, on Flickr
42561011871_b0c9ec9ec9_z.jpgUntitled by Grant Wilson, on Flickr
 
Headed to get tires put on now!


Since the pallet came in, and i now have my compressor, took the afternoon to put it in.
Started with stripping down the harness to only what I need.  Using the PA system aux switch to trigger the relay, so only needed that wire hooked up to something (other than the power and negative)  So took out the extra solenoid subharness and switch harness, re loomed the whole thing then installed it.
41847818704_f910bbe917_b.jpgUntitled by Grant Wilson, on Flickr
Lower is final harness (with full length of positive and negative i trimmed to length when installed)
Mounted the compressor on the lower frame rail up front to keep it closer to the UpDownAir module that will be installed later this week to air up and down all 4 tires at once.
41847817654_905bc7b964_b.jpgUntitled by Grant Wilson, on Flickr
and final wiring up to the Aux Battery
41668571455_0706059c4b_b.jpgUntitled by Grant Wilson, on Flickr


Edited by VanGoOutdoors, 22 October 2018 - 06:01 PM.

  • 0
2018 Sprinter 144" Wheelbase
Dometic - Tern Overland - Flarespace - Blue Ridge Overland Gear - WARN - Bedslide


#4 VanGoOutdoors

VanGoOutdoors

    Senior Member

  • Members
  • 142 posts
  • LocationSt. Augustine, Fl

Posted 22 October 2018 - 06:02 PM

Got my Van Wife Components headliner in.
Covered the bottom with carpet (yes i prefer carpet to tweed and other materials)
28757193538_2affcd3c26_z.jpgUntitled by Grant Wilson, on Flickr
Swapped out the hardware for some stainless (Of course, since that's what I sell lol).
41730380445_b78aca6359_z.jpgUntitled by Grant Wilson, on Flickr
Took some time to get it in and fit with some bracket tweaking, but I got er done
41730380795_b17be278a8_z.jpgUntitled by Grant Wilson, on Flickr
 
Also mocked up the water tank profile that we will build from stainless
40822496930_3d040a8cd7_z.jpgUntitled by Grant Wilson, on Flickr
 
And since the wiring came in, pulled the floor and started laying out wire!
0/1 from battery to rear for smartpass
4ga for battery connection (2 batteries)
8ga for fuse box crossover (one on each side for ease of adding in circuits later)
12ga for water pump
I will be adding romex today for 110 outlets as well
41912616184_86567088a9_z.jpgUntitled by Grant Wilson, on Flickr
42579920952_fd675326d0_z.jpgUntitled by Grant Wilson, on Flickr
41730379905_4f0ff46edb_z.jpgUntitled by Grant Wilson, on Flickr
Laid in some battons for the floor space for wires and insulation.
I think today will end up being air system day, since my air up and down system will be here, and mount the tank and hose and all that stuff for everything after work.  Also test fit my flares that will get here today and them drop them off tomorrow for paint.
 
PROGRESS!


42598621522_b76f430a54_b.jpgUntitled by Grant Wilson, on Flickr
BOOM
 
so excited


A big issue for me while in arizona was having to air up and down like 3 or 4 times a day depending on where i was going.  With the weight of the van and handling, I don't like to run low pressures on the street.  I don't mind the TIME it takes to air up and down, but more the process. It sucks going from tire to tire and squatting forever and im lazy.
 
So, when I saw these guys at Expo West, I jumped on it.  I'm a super hardware nerd, and the materials and choices they made on this product is outstanding.  All stainless construction, it appears as brass on areas on the quick release chucks (which are a work of art in their own) and just general awesomeness.
 
The things of note on this system.
If you have an air tank, you have to plumb it PRIOR to the air management unit.  Same for horns or air chucks.  I will be using a 3/8 to 1/4" tee and running the hose back to the tank from the front and teeing the air horn off of that line.
They dont really have a universal setup.  I bought the JK version, and just bend the mount flange to the angle i needed to clear the hood using a vice and a really damn big adjustable with tape on all surfaces then screwed it into the super thick core support plastic.  Good enough for the girls I hang out with.
It includes the fitting for the compressor you need and a good amount of hose.  I required some more 1/4" and 3/8" line due to the size difference between the JK/JL and sprinter, but that is cheap and i had the 1/4 on hand anyways.
You will need to make brackets for the air valves at the tires.  I used 1 x 2 x 1/8 angle and trimmed to size and appearance.  some 5/16 holes and off to the races.
Whole process took about an hour and a half, so not all that bad, for just the unit and hoses and brackets and stuff.
Unit costs about 260 bucks without compressor and jazz.
That being said. Here is the required pics!
28798412678_f650054a1d_z.jpgUntitled by Grant Wilson, on Flickr
28798412628_db485054ef_z.jpgUntitled by Grant Wilson, on Flickr
28798412708_78a532866f_z.jpgUntitled by Grant Wilson, on Flickr
28798812098_8c4128ec5e_z.jpgUntitled by Grant Wilson, on Flickr
42671886241_3e4f2b744e_z.jpgUntitled by Grant Wilson, on Flickr
27803467427_468607a9d7_z.jpgUntitled by Grant Wilson, on Flickr

  • 0
2018 Sprinter 144" Wheelbase
Dometic - Tern Overland - Flarespace - Blue Ridge Overland Gear - WARN - Bedslide


#5 VanGoOutdoors

VanGoOutdoors

    Senior Member

  • Members
  • 142 posts
  • LocationSt. Augustine, Fl

Posted 22 October 2018 - 06:03 PM


  • 0
2018 Sprinter 144" Wheelbase
Dometic - Tern Overland - Flarespace - Blue Ridge Overland Gear - WARN - Bedslide


#6 VanGoOutdoors

VanGoOutdoors

    Senior Member

  • Members
  • 142 posts
  • LocationSt. Augustine, Fl

Posted 22 October 2018 - 06:03 PM

Installed me some window!
 
The Tern Overland windows are pretty much the bees knees IMO.  Super solid construction and huge opening radius.
42816146951_8b61a9f423_b.jpgUntitled by Grant Wilson, on Flickr
42816146911_030133346f_b.jpgUntitled by Grant Wilson, on Flickr
27947250877_530c134009_b.jpgUntitled by Grant Wilson, on Flickr
41900111735_27357bf36f_b.jpgUntitled by Grant Wilson, on Flickr
41005819250_bf181fa86f_b.jpgUntitled by Grant Wilson, on Flickr
42816146861_97f7dfc946_b.jpgUntitled by Grant Wilson, on Flickr
27947250867_0cd95282c5_b.jpgUntitled by Grant Wilson, on Flickr
42098720834_21e1529da1_b.jpgUntitled by Grant Wilson, on Flickr
42816147271_e8d64f75ef_b.jpgUntitled by Grant Wilson, on Flickr
Also got some awesome power and water ports for the van from Tern Overland as well.  The covers are being painted to match currently with the flares
 
And the install video!


Did alot of fabrication these past few days. Working on editing video, but here is some . photo and talk about it.
Built the bed.
Materials used include 1 x 2 x 1/4" rec tube for the frames, and 1 x 1 x 1/4 for the overlapping section for the recliner
 
Basic frame is welded up
28987959528_60c34fa0ca_b.jpgUntitled by Grant Wilson, on Flickr
Made the second portion that will be the recliner back when we want to sit and look out the back and read, or make out or whatever
27992101707_75bc0aae56_b.jpgUntitled by Grant Wilson, on Flickr
41960042605_0035b751da_b.jpgUntitled by Grant Wilson, on Flickr
Threw it into the van for a test fit
28987985598_3b45f16160_b.jpgUntitled by Grant Wilson, on Flickr
 
Then it was time to build out the sides
28987959058_fb906c7b89_b.jpgUntitled by Grant Wilson, on Flickr
41960042165_dd24c0569c_b.jpgUntitled by Grant Wilson, on Flickr
27992135227_990af77a5f_b.jpgUntitled by Grant Wilson, on Flickr
42860515441_dfd1d60d8b_b.jpgUntitled by Grant Wilson, on Flickr
42143005264_bc078fdffb_b.jpgUntitled by Grant Wilson, on Flickr
42860486331_b4cc2dae38_b.jpgUntitled by Grant Wilson, on Flickr
28987985568_a32be14671_b.jpgUntitled by Grant Wilson, on Flickr
 
next up is the water tank, ceiling ribs, and skinning the rear panels, and making doors for them.


  • 0
2018 Sprinter 144" Wheelbase
Dometic - Tern Overland - Flarespace - Blue Ridge Overland Gear - WARN - Bedslide


#7 VanGoOutdoors

VanGoOutdoors

    Senior Member

  • Members
  • 142 posts
  • LocationSt. Augustine, Fl

Posted 22 October 2018 - 06:04 PM

Not a ton of pictures, just doing a bunch of small work that takes time.
 
"Fabricated" some roof rails so I didn't have to negotiate the large number of holes in the roof beams.
used some 2" x 2" aluminum angle with some slits and bends and then rivnuts to the side of the roof cross beams.
42886538072_5fd25c9239_z.jpgUntitled by Grant Wilson, on Flickr
28066693577_71605fe8de_z.jpgUntitled by Grant Wilson, on Flickr
28066693467_b34dbeeb86_z.jpgUntitled by Grant Wilson, on Flickr
Then i mounted some of the boards for the ceiling at the end of the evening.
These take about 20-30 minutes a piece to do at a leisure pace.
Have to put them up, clamp them together so the lines are all lined up, then measure the hole position, predrill with 1/8", take it back off, open the wood to 5/32 and the angle for the rivnut, install the rivnuts, put the board back up and throw in the 1 1/2" Stainless Hex Button Screws
42936052181_111c76d95e_z.jpgUntitled by Grant Wilson, on Flickr
Did 10ft pieces this time so there are no splices.  One continuous piece.  Should finish the ceiling this afternoon, then label it, pull it all out, and paint it on saturday hopefully to put back in.
 
Also got some stuff back from paint
Flarespace Flares are all painted and pretty, may install on sunday hopefully.
42886537512_fd097b28b1_z.jpgUntitled by Grant Wilson, on Flickr
The Tern Overland water and electrical covers are all painted as well to match.  Super impressed with the job the shop did on all the stuff.
42886537222_9e81670efd_z.jpgUntitled by Grant Wilson, on Flickr
 
And Lastly, the driver side wheel well water tank
26 gallons
Will mount to the wall, and the structure I made
Leaves enough room to have the bedslide in this one, where the last setup was about 4" difference into the cargo area.  Inches literally matter here.  Crazy.
42034045465_028dd448f6_z.jpgUntitled by Grant Wilson, on Flickr
42886538082_0f25cb47e7_z.jpgUntitled by Grant Wilson, on Flickr


A big thing is done, and marked off the list.
Water tank is finished and installed.  Bolts to the wall and the structure for the side to support it.
42254911614_ecb49acfba_b.jpgUntitled by Grant Wilson, on Flickr
42924119852_dfea47ac0d_b.jpgUntitled by Grant Wilson, on Flickr
42924119882_024289b679_b.jpgUntitled by Grant Wilson, on Flickr
41163394270_fb6ffe1694_b.jpgUntitled by Grant Wilson, on Flickr
28104820187_bf78b89e00_b.jpgUntitled by Grant Wilson, on Flickr
42924119442_476dd15290_b.jpgUntitled by Grant Wilson, on Flickr
42254907174_cf93594385_b.jpgUntitled by Grant Wilson, on Flickr
 
Also started to skin the passenger side battery/wheel well cover
Will also be covering everything panneled with foam and fabric for a nice touch surface on everything.  got some nice outdoor fabric that should hold up quite well.
41163394850_4651409560_b.jpgUntitled by Grant Wilson, on Flickr
42254911924_bdd768c3dd_b.jpgUntitled by Grant Wilson, on Flickr
I do have to move the Ctek forward a bit, but this is why we mock stuff up right?

  • 0
2018 Sprinter 144" Wheelbase
Dometic - Tern Overland - Flarespace - Blue Ridge Overland Gear - WARN - Bedslide


#8 VanGoOutdoors

VanGoOutdoors

    Senior Member

  • Members
  • 142 posts
  • LocationSt. Augustine, Fl

Posted 22 October 2018 - 06:05 PM

I got alot done today, but it doesn't look like it lol.
The ceiling is about 90% up.  gotta make some side pieces to fill that gap on the edges, then pull it down, finish doing some nuterts and paint it all.
41180481710_c9cbe8381f_b.jpgUntitled by Grant Wilson, on Flickr
Took far too long to do.  Put every single piece up, measured where to drill the holes so every single bolt is in the same spot on each board. a bit over the top lol
 
41180481850_2fac103887_b.jpgUntitled by Grant Wilson, on Flickr
Finally also got most of that driver wall installed. Tomorrow i will cut out the window and work on the trim piece as well as the lower panel, fuse panel installation for that wall and the electrical outlet installation as well. fingers crossed anyways.
 
Have to get the whole rear all done by thursday.  Bedslide should be here thursday, so need to get the side panels all buttoned up before then.  This weekend iw ill install the Van Compass suspension as well!


and again more progress
 
I hate it, because I only really get 2-3 hours after work to mess with it before i have to get home, and 45 minutes of that is spend getting everything set up and cleaning up at the end.  So I never get what I want done lol.
 
Finished skinning the passenger side and mounted all the electrical items in final locations.  The little open spot down there is annoying me, But i will figure out something to put there.  The panels won't stay white (some are black), everything will be covered with 1/2" foam and a really cool outdoor fabric that is a killer blue color the wife picked, but I wont be doing that until I am done touching whatever area I'm working on so it doesn't get dirty.  Most likely the very last thing to be done.
 
43011306211_9561329874_z.jpgUntitled by Grant Wilson, on Flickr
Blue sea switch panel is mounted on the back of the cover, easy to turn things on and off (water pump, under bed lights, outlets etc)
28142837927_0a15dd841b_z.jpgUntitled by Grant Wilson, on Flickr
Left a small gap between the two to prevent any rattling or squeaking, and allow for cable passthru for smaller gauges
43011306321_b90bf7fc0e_z.jpgUntitled by Grant Wilson, on Flickr
Water tank back panel, and Tern Overland water fill are mounted.  The color is off on the cover, so gotta take that part back and get them all resprayed
43011306171_951b46c723_z.jpgUntitled by Grant Wilson, on Flickr
42961796982_6d2cf157ab_z.jpgUntitled by Grant Wilson, on Flickr
42961795132_a716a83ba6_z.jpgUntitled by Grant Wilson, on Flickr
And got the Tern Overland window shade unit installed as well.  Trying to source some 3" thick foam to use to trim out the space between the window and the wall, not sure what i will use for that just yet.
 
Overall somewhat satisfied.  I would like to get the water tank unit covered today, and the lower driver wall skinned as well.  If i can manage that, I will be happy.  The Van Compass suspension gets here tomorrow, and the Bedslide on thursday.  By having the rear all done, i can put the bedslide in and be done with that and the suspension this weekend hopefully.  The dometic stuff should be on the way (penguin 2 ac, 75dz fridge, stove/sink) and im kind of waiting on them so i can build some important parts before i go too far and have to remake things because of size issues.


A number of things, such as finishing the roof, ordering the roof rack from Voyager Offroad and 110 wiring and stuff have been waiting on the arrival of the Dometic Penguin 2 AC unit.  I got the version with the thermostat, well to be fancy or something.  No heat strip since i have a Diesel heater. Plan is to run off the CTEK Smartpass and Inverter when driving/stationary whatever.  I can also get a couple hours off the battery, or run from a honda 2000 generator when beach camping.
43041207591_aedd67da8e_z.jpgUntitled by Grant Wilson, on Flickr
43041207801_86cfdf4065_z.jpgUntitled by Grant Wilson, on Flickr
The CFX75 and slide also came in as well, but that wont be messed with until next week most likely.
43041206241_b8a6028877_z.jpgUntitled by Grant Wilson, on Flickr
43041207521_e609eaa3dd_z.jpgUntitled by Grant Wilson, on Flickr
Took the cover off to well, take the cover off and take a look at all the stuff inside.  Everything looks pretty well built and fastened.  Was mainly checking to see if anything is going to break or vibrate loose from taking the van off sweet jumps.  Doesn't look too shabby.
42322600984_7e0a127ed2_z.jpgUntitled by Grant Wilson, on Flickr
Had to make a roughly 2" spacer to space the mounting plate down to the level it needs to be at.  sealed on both sides with weatherstripping
42322600504_f68dacd016_z.jpgUntitled by Grant Wilson, on Flickr
all mounted up and pretty.  Next up is wiring, then trimming the wood to fit
42322600294_57d63fd1f5_z.jpgUntitled by Grant Wilson, on Flickr
Id say it looks pretty sly up there.
 
I will be color matching it as well.

  • 0
2018 Sprinter 144" Wheelbase
Dometic - Tern Overland - Flarespace - Blue Ridge Overland Gear - WARN - Bedslide


#9 VanGoOutdoors

VanGoOutdoors

    Senior Member

  • Members
  • 142 posts
  • LocationSt. Augustine, Fl

Posted 22 October 2018 - 06:06 PM

Im drained.  Getting to the point where i have to take some time off lol.  on top of 40 hours a week, i am averaging another 25 hours on the van, and its catching up hah.  I think i may take a few days off after this weekend (or maybe this weekend)
 
The Van Compass suspension came in and opted to go ahead and put in the killer Fox stuff.  TBH never was or am a huge fan of fox.  But its the only option out there, so it is what it is.  Did the rear, and after putting them in backwards the first time because i didnt read directions, and flopping it back around, i still got the rears done in an hour.  at 630, I start the front, see the instructions said 4-6 in a driveway, or 3-4 for a pro on a lift.
 
Hold my beer.
 
Knocked out the front in just under 3 in a driveway sitting on a tire.  Did a little hooning on the way to work on some powerline trails and the difference is so night and day, that it is hard to explain.
It just works so much better.  No more bouncing around, the rear especially is a huge difference.  The back end even with a full load hopped and bounced its way down the trail.  Not anymore.  Cant wait to get the sumo springs and the rear spring pack in when it is all said and done.
 
41253422420_19e9c4dba9_z.jpgUntitled by Grant Wilson, on Flickr
41253422980_b117360091_z.jpgUntitled by Grant Wilson, on Flickr
41253422910_c585ce96ed_z.jpgUntitled by Grant Wilson, on Flickr
28196308017_c21950d989_z.jpgUntitled by Grant Wilson, on Flickr


In the last van I built, not having a way to get cargo out from under the cavernous under bed storage area was super annoying.  On this one, I decided I wanted to rectify that very early on in the build.
I designed the whole rear end so the side panels for wheel well covers and stuff were as tight as possible (roughly extend 2" from the wheel well total, due to battery width)
 
The slide I personally chose was the 00-12 Dodge Dakota Short bed  Part Number 1-6243-S
 
This fit my use case perfectly.  They do have other sizes, and another may fit yours better!
 
The whole process was super quick (IMO) and took about an hour total with some putzing around.
The whole thing was well packaged, heavy, but well packaged.  Made it through UPS with no problems (and that is a feat)
43088164591_e9c9606b35_b.jpgUntitled by Grant Wilson, on Flickr
 
The assembly is easy with 10 total bolts and about 10 minutes doing it
43088165141_17cb514aea_b.jpgUntitled by Grant Wilson, on Flickr
 
From there had a friend help me set it in the van.  I chose to set it as far back as possible just barely not touching the rear door and center it from there
41276611510_abaf91bfe0_b.jpgUntitled by Grant Wilson, on Flickr
 
To bolt it in, I chose not to use the plus nut stuff that they included.  Instead I thru bolted the slide down into the van.  I anticipated the slide, so i put a large number of battons on the floor to support the clamping load this creates with the space in the floor, and made sure my wires were ran nowhere near the slide fastening area.
I used a 3/8 stainless bolt, fender washers on both side and a nylon lock nut with anti seize on it to prevent galling.
The location of the holes ended up being perfect, right next to the support structure, so lots of meat
28218533667_5624cfeaa0_b.jpgUntitled by Grant Wilson, on Flickr
41276611270_11206a6fdb_b.jpgUntitled by Grant Wilson, on Flickr

  • 0
2018 Sprinter 144" Wheelbase
Dometic - Tern Overland - Flarespace - Blue Ridge Overland Gear - WARN - Bedslide


#10 VanGoOutdoors

VanGoOutdoors

    Senior Member

  • Members
  • 142 posts
  • LocationSt. Augustine, Fl

Posted 22 October 2018 - 06:06 PM

And final installation
43037104772_c799ba563a_b.jpgUntitled by Grant Wilson, on Flickr
43037104962_acca830582_b.jpgUntitled by Grant Wilson, on Flickr
 
Overall, well worth it.  I do have some slight concerns about vibration based noises, but until I do more offroading, i wont be able to tell, or sort it out.  Around town with speedbumps and road irregularities it isn't an annoyance (and I'm the guy that finds the sunglass holder vibrating annoying)
 
Will update as time goes on.
 
I purchased through YotaMafia (info@yotamafia.com) Cause I know the guy from toyota days and he gives a few bucks off for peoples.


A few big things this weekend.
 
Flarespace flares are installed.
Not alot of words for it, pretty simple install.  if you have questions please ask!
41304663460_8cb0dea881_b.jpgUntitled by Grant Wilson, on Flickr
42397609424_dbce3a6482_b.jpgUntitled by Grant Wilson, on Flickr
41304662920_7030fd6a2b_b.jpgUntitled by Grant Wilson, on Flickr
42397608904_a08ee88784_b.jpgUntitled by Grant Wilson, on Flickr
41304663160_50a9282fdd_b.jpgUntitled by Grant Wilson, on Flickr
41304663240_8ced557a01_b.jpgUntitled by Grant Wilson, on Flickr
41304663410_193c1c5194_b.jpgUntitled by Grant Wilson, on Flickr
I will say this.  I changed from a window on the passenger to the driver side. The reason for this was i found when i was traveling and staying in a city on the streets, the window on the sidewalk side sucked.  People were easily able to see in the window and it was kind of awkward at times.  By moving it to the traffic side, it alleviates that.  So cool story right?
 
On to installing the Tern Overland Electrical Socket.  It's a cool unit that i found on the site and wanted to use rather than the janky noco thing i was going to do.
41328579960_1dc18b1fb4_b.jpgUntitled by Grant Wilson, on Flickr
42420690954_53fc14ec44_b.jpgUntitled by Grant Wilson, on Flickr
Its a 3 5/8 hole that has to be used for a pretty tight fit
28270040547_7a80145342_b.jpgUntitled by Grant Wilson, on Flickr
Make sure you add some paint to keep corrosion at bay

43089541452_a98481905f_b.jpgUntitled by Grant Wilson, on Flickr
it looks super nice and clean color matched
43089541742_379ddbe349_b.jpgUntitled by Grant Wilson, on Flickr
 
I also did a ton of wiring.  Ran all the ceiling lights, switch wires for the door opening like the last van, ac 12 fan wires, 110 wires in and out.
41328580090_bb10a94776_b.jpgUntitled by Grant Wilson, on Flickr
29267933748_e51aac7919_b.jpgUntitled by Grant Wilson, on Flickr
Also remembered this time to run the victron Battery monitor cable ahead of time lol.
 
42420690834_a9acd3acae_b.jpgUntitled by Grant Wilson, on Flickr
 
However.  I did forget to run the 8ga wire for the blue sea fuse box  -_-
go figure.
 
Lastly, did the first panel in the final decided color/style
42211454705_51f119c964_b.jpgUntitled by Grant Wilson, on Flickr
 
All the panels you see in the van will be covered like this.


  • 0
2018 Sprinter 144" Wheelbase
Dometic - Tern Overland - Flarespace - Blue Ridge Overland Gear - WARN - Bedslide


0 user(s) are reading this topic

0 members, 0 guests, 0 anonymous users