Jump to content


Photo
* * * * * 1 votes

1980 Granby Rebuild for 2nd Gen Tacoma


  • Please log in to reply
80 replies to this topic

#41 a8ksh4

a8ksh4

    Senior Member

  • Members
  • 109 posts
  • LocationSacramento, CA

Posted 02 August 2019 - 02:59 PM

More progress this week; The big pieces of trim metal all got scrubbed and any painted pieces got re-painted. The trim around the roof jut got a scrub and I'll have to bang on it a bit this next week to try to straighten it.

IMG_20190801_175637.jpg

IMG_20190801_175641.jpg


My theory now is that there used to be a rack on this camper and someone put a heavy load on it and tried to lift the top. It tweaked the two outside beams in the roof and bent the trim metal. Everything seems structurally still good, though, so I"m just going to straighten the trim a bit and put it back together w/ new metal on top.


Edited by a8ksh4, 02 August 2019 - 04:15 PM.

  • 0

#42 a8ksh4

a8ksh4

    Senior Member

  • Members
  • 109 posts
  • LocationSacramento, CA

Posted 02 August 2019 - 03:01 PM

And the last bit of stitching was done for the velcro for cold-weather insulation and for the headliner.  Getting close to building the roof.
IMG_20190731_214347.jpg
IMG_20190731_214359.jpg
 
I went by ATC to pick up new metal for the roof and a set of tie-down anchors that bolt through the plywood and got to lo see some of their fancy new gear.  


It looked like they had a bit of silicon on every screw that went through the roof, and there was silicon along the trim around the edge of the roof.  I'm not sure if I should put butyl tape behind the trim for the roof and silicon on the top edge or what.


  • 0

#43 a8ksh4

a8ksh4

    Senior Member

  • Members
  • 109 posts
  • LocationSacramento, CA

Posted 12 August 2019 - 02:49 PM

More progress putting the roof together this weekend. 

IMG_20190811_140149.jpg


Lines were marked on tape, then screwed partially, and then I'd remove the screws, pull the tape, and fully set the screws with a coating of silicon, as that's what it looked like they were doing when I stopped by ATC and got to look at their campers. .  I used zinc coated sheet metal screws and neoprene washers every 14".  

IMG_20190811_145034.jpg


  • 0

#44 a8ksh4

a8ksh4

    Senior Member

  • Members
  • 109 posts
  • LocationSacramento, CA

Posted 12 August 2019 - 02:56 PM

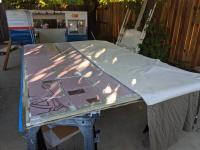
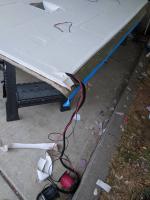
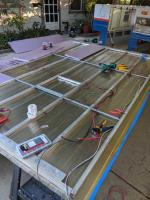
Ran wires for four lights, a fan, and solar (when I get to it).  The solar wires will be coiled in one of the front corner for some-day when I have time to pull them out and hook up a panel.   I ran a separate pair of wires to each light and the fan and ran them all back to a single solder joint for hot and for ground back by where the wires run up into the roof.  Also, new insulation!  

IMG_20190811_191611.jpg


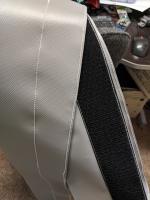
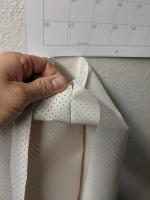
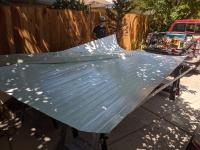
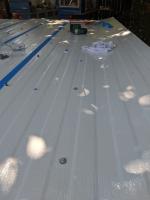
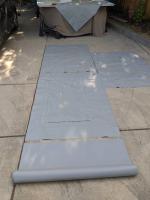
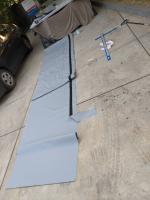
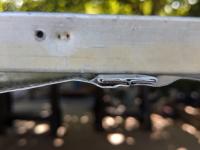
Detail of the seam on the sheeet metal from ATC, for anyone interested in how it's done on their large sheets of roof metal.  

00100dPORTRAIT_00100_BURST20190811161701667_COVER.jpg


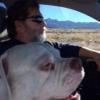
I really only have about two weeks to wrap this up and get it functional for a trip next month.  My wife and I have the month off and will be touring through Utah with the dogs, seeing some state parks and stuff.  Then we're going to drop the dogs off at home with a house-sitter and drive down to Vegas to see some friends, and finish our trip in Nevada and some of the california mountains on the way back.


The primary goals for the camper in the next couple of weeks are to:

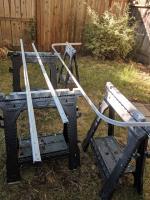
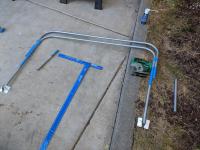
  • get the roof and vinyl sides on w/ the new conduit lifters
  • Finish the pull out bed platform
  • And it'd be amazing if I had time to build a little kitchen cabinet in the corner by the propane tank.  TBD!

Edited by a8ksh4, 12 August 2019 - 02:59 PM.

  • 0

#45 a8ksh4

a8ksh4

    Senior Member

  • Members
  • 109 posts
  • LocationSacramento, CA

Posted 14 August 2019 - 04:21 PM

First lifter setup is done; second in progress.  Thanks, Russ, for the EMT search hints.  I ended up just estimating that I'd gain about 2" making a 90 degree bend, figured about what would give me the widest bars and the most overlap between the two pieces of metal, and made my marks 1" wider on the top bar so that when I bent them, they would just overlap.  This worked out pretty good.


MVIMG_20190812_190405.jpg


  • 0

#46 CougarCouple

CougarCouple

    Senior Member

  • Members
  • 1,376 posts
  • LocationLas Vegas

Posted 15 August 2019 - 01:07 AM

Looking good there sir.

Russ
  • 0
F250 extended cab, Cougar from ATC. You guys rock thank you!

#47 a8ksh4

a8ksh4

    Senior Member

  • Members
  • 109 posts
  • LocationSacramento, CA

Posted 20 August 2019 - 04:17 AM

More progress!
The headliner is okay, but would look better over soft insulation. It's hard to stretch tight. The 3m spray adhesive holds powerfully!

All the lights and stuff are 14 gauge. I had run 12 for the solar, but team the calculators online and figured I should have 10 so pulled the smart stuff and redid it before putting the roof together all the way.

The foam was glued in with adhesive, filled the gaps with spray foam, and shot spray foam into the metal tubes as I read that was what they did at factory now to prevent condensation running down the tubes

1454976531.jpeg IMG_20190819_194752-01.jpeg IMG_20190819_195032.jpeg

Edited by a8ksh4, 20 August 2019 - 04:26 AM.

  • 0

#48 Living The Dream

Living The Dream

    Senior Member

  • Members
  • 464 posts
  • LocationFront Range, Colorado

Posted 20 August 2019 - 04:37 AM

Looking great. 


Those dang roof trim pieces are a serious PIA! They certainly get slightly bent when off the camper and I had the hardest time lining everything up on the reinstall. My front of the roof now has a 'gap tooth' because of it. 


Go buddy go, you'll be back to a working shell in no time and then can really start to see it come together. 


  • 0

My youtube channel about my Four Wheel Camper - https://www.youtube.com/c/timmorrissey

All about my camper - https://www.tgmorrissey.com/camper

Item I used in my build- http://bit.ly/TGMorrisseyParts


#49 a8ksh4

a8ksh4

    Senior Member

  • Members
  • 109 posts
  • LocationSacramento, CA

Posted 20 August 2019 - 03:54 PM

And my roof trim is more bent than most! I need to try and hammer parts of it flat. Tooth gap is alright; perfect is the enemy of good.

Home stretch! I'm really enjoying working on it!

Edited by a8ksh4, 31 August 2019 - 04:31 AM.

  • 0

#50 a8ksh4

a8ksh4

    Senior Member

  • Members
  • 109 posts
  • LocationSacramento, CA

Posted 22 August 2019 - 09:54 PM

I glued the window panels together yesterday. And glued in the strip with Velcro for insulation in case we ever want it in the future.
IMG_20190821_172036.jpeg IMG_20190821_191309.jpeg


A couple friends are coming by today to drink beer and help out if I get to the point where were ready to put the top onto the camper... 


Edited by a8ksh4, 22 August 2019 - 09:57 PM.

  • 0


0 user(s) are reading this topic

0 members, 0 guests, 0 anonymous users