Great Progress Cory!

92 Jayco Sportster 8' rebuild in the States with support from Deutschland
Started by
corybrown50
, Apr 19 2019 07:59 PM
92 Jayco Sportster rebuild slide in camper truck camper
135 replies to this topic
#81

Manfred65
-

- Members
- 230 posts
Senior Member
- Locationnear Augsburg, Bavaria, Germany
Posted 21 July 2019 - 08:36 AM
2000 Ford F-250 SuperDuty SC LB 7.3 Lariat
1992 Jayco Sportster 8ft Popup
http://www.wanderthe...8ft-renovation/
BundutecUSA, TravelLite and Palomino TruckCamper Sales in Germany and Europe
#82
corybrown50
-
- Registered (Tapatalk)
- 182 posts
Senior Member
- LocationCincinnati, OH
Posted 23 July 2019 - 03:28 AM
Well.....it's my time off for 5 days for a business trip. I didn't get as much done as I wanted to and I wasn't able to take as many pictures as I should have since the rains came through Sunday afternoon earlier than expected.
I'm not one to complain.....but....here's a pretty rough complaint I had to deal with......
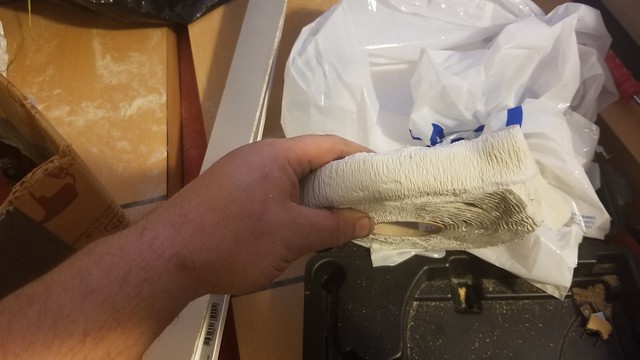
I sent my wife to Gander Outdoors for butyl tape. This is not a product that either of us has ever had any experience with before this project. Well.....the 1" tape they sold us was sooooo oooold that the paper had crepe'd up. We couldn't even get the paper off to be able to use the 3 rolls of 1" we have. We played and played with it trying to get it to work. No dice......unfortunately.....the store is an hour away. I don't know if I'll even be able to take it back.....
I was able to get all the outside stuff back on with the 3/4" tape...


Even the handle and original build badge......

We also had some problems with Amazon's 2 day shipping actually becoming 5 day. I had 1" insert that was supposed to arrive Friday so we could get everything sealed up before I left. We wanted to have the insert in before lap sealing the middle ridge line as trying to put it in after was too much for us thinking we would mess it up trying to get it in. I called customer service all night Friday and multiple times all day Saturday, even offering to meet someone to pick it up Saturday so we could get everything water tight before I left. Well.....as you can expect.....it doesn't work that way. It did, of course, arrive this afternoon, while I'm 10 hours away from the camper.
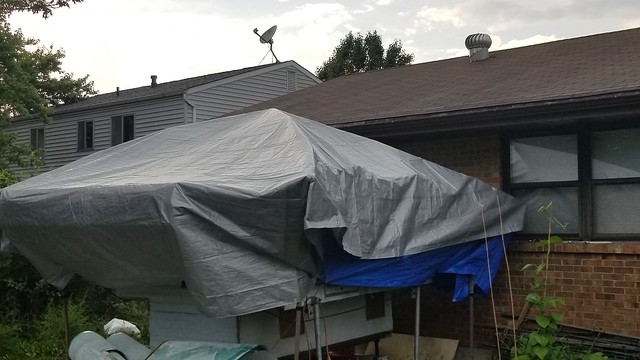
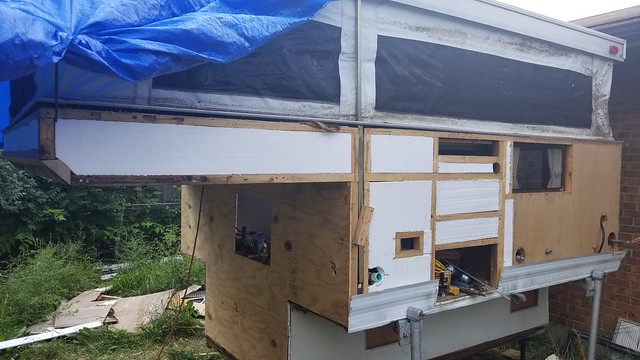
Since there was already lap sealant on. I had to build up a tent structure to put her away for the next 5 days. I had my wife, mother in law, and daughter all "helping" to get it in place. She finally got covered after a little bit of rain for a bit of rest for the week, and allowing my hands to hopefully be fully healed from all the tears, cuts, bruises, and swelling before the final rush that will start this weekend.....
If anyone wants to join me back in Cincinnati this weekend and next week to race to the end....you are more than welcome!!!
Edited by corybrown50, 23 July 2019 - 03:33 AM.
#83
hebegebe
-

- Members
- 234 posts
Senior Member
- LocationLA and San Diego
Posted 23 July 2019 - 02:07 PM
Sounds like you’re have no the time of your life! It will be a funny story sometime in the future!?Well.....it's my time off for 5 days for a business trip. I didn't get as much done as I wanted to and I wasn't able to take as many pictures as I should have since the rains came through Sunday afternoon earlier than expected.
I'm not one to complain.....but....here's a pretty rough complaint I had to deal with......
I sent my wife to Gander Outdoors for butyl tape. This is not a product that either of us has ever had any experience with before this project. Well.....the 1" tape they sold us was sooooo oooold that the paper had crepe'd up. We couldn't even get the paper off to be able to use the 3 rolls of 1" we have. We played and played with it trying to get it to work. No dice......unfortunately.....the store is an hour away. I don't know if I'll even be able to take it back.....
I was able to get all the outside stuff back on with the 3/4" tape...
Even the handle and original build badge......
We also had some problems with Amazon's 2 day shipping actually becoming 5 day. I had 1" insert that was supposed to arrive Friday so we could get everything sealed up before I left. We wanted to have the insert in before lap sealing the middle ridge line as trying to put it in after was too much for us thinking we would mess it up trying to get it in. I called customer service all night Friday and multiple times all day Saturday, even offering to meet someone to pick it up Saturday so we could get everything water tight before I left. Well.....as you can expect.....it doesn't work that way. It did, of course, arrive this afternoon, while I'm 10 hours away from the camper.
Since there was already lap sealant on. I had to build up a tent structure to put her away for the next 5 days. I had my wife, mother in law, and daughter all "helping" to get it in place. She finally got covered after a little bit of rain for a bit of rest for the week, and allowing my hands to hopefully be fully healed from all the tears, cuts, bruises, and swelling before the final rush that will start this weekend.....
If anyone wants to join me back in Cincinnati this weekend and next week to race to the end....you are more than welcome!!!
#84
corybrown50
-
- Registered (Tapatalk)
- 182 posts
Senior Member
- LocationCincinnati, OH
Posted 29 July 2019 - 07:27 PM
ALLLLRIIIGGHHHTY THEN..........
Here we go for the crazy push to be "CAMPABLE".....T Minus 6 days.......
Saturday was a bust as I helped a friend I've known since high school pull off a 20 year anniversary vow renewal for his lovely wife. It was a great time, and she was super surprised. Major brownie points to him, and I have 7 years to plan for mine......
Sunday....SUNDAY.....SUNDAY!!!!!
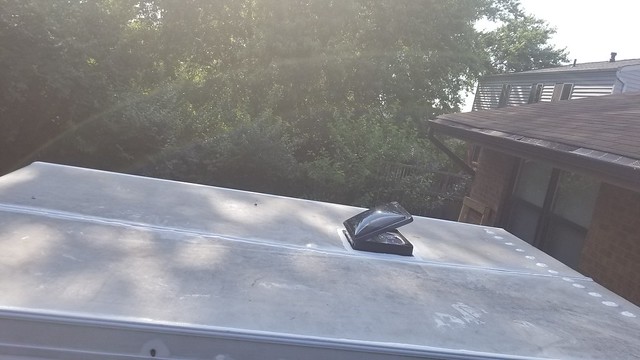
My buddy came over Sunday morning and we were able to fully finish the roof and most of the sides. The center track cover went in first, then he used a combination of Dicor on all the flat areas and Sikaflex on the curves to make everything water tight. This will be the first time I haven't "had" to have a cover on her in a while.
So pretty and clean!!!
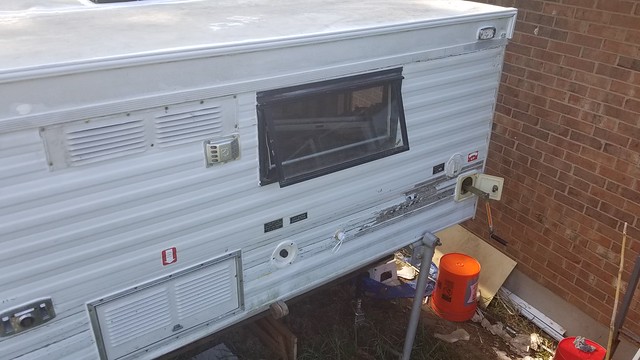
We also got all the side bits siliconed in....covers, caps, windows, and doors.....very exciting times......
I was also able to add the trim inserts for the whole camper.....looks very clean compared to before.

We took off the lens as we ruined 1 with the cleaner for the silicone....but the trim looks fantastic...

Once he and I were finished with sealing for the day, he had to leave and I turned my attention to the inside while everything on the roof and outside cured. I created a "time capsule" on the driver side upper bed area. I separated this area as it would be really had to utilize as storage.....I didn't really put anything in there, just signed my work while adding support to secure the cover wood.

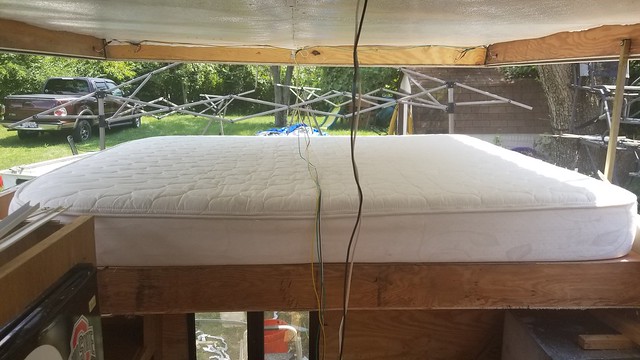
Cover wood installed on the left, you can see the under bed storage that will be available.

And with the final cover installed....mattress over top. I don't think I'll put hinges in yet, I think the bed will be enough. I can change that later.

Now, on to the seating area, where my daughter will sleep. I wanted to create some more storage there. I added vertical supports. The cushions are being redone by the Mrs. and will have wood under them. I have a pretty cool trick planned for this area to be added this week......teaser..... Storage already in use.

And with the cover on...

I had a cool thing happen on actually measuring correctly. The past owner had added these "spacers" to the hinges for the rear door to get it to close correctly.....they are no longer needed!!! Proper fitment is great!!!(unless they are really necessary and I messed up)

Here is the only thing I was actually able to do last week while away for work. I did some 3d drawing for my printer. More items to come, but here is a switch plate that I was able to make. The printer is whirring away right now knocking out more bits. I LOVE MY 3D PRINTER!!!

And of course.....Brutus is in the back yard just waiting for the "Brown Popper" to be added to his back ala Craigslist ad with the thumb covering the license plate....What do you think of the name? Brown Popper?

Keep praying for me....it's going to be a whirl wind......
#85
corybrown50
-
- Registered (Tapatalk)
- 182 posts
Senior Member
- LocationCincinnati, OH
Posted 30 July 2019 - 07:27 PM
Now for last night's exploits....
My wife called me a couple weeks ago from a yard sale and asked if she could spend $40 on a vacuum...ok....whatever....well, it was an older model Dyson. I've never been much for crazy expensive stuff, but for $40 we can take a flyer.....
I asked her if I could use it last night. She said she hadn't "cleaned" it yet....I said it's ok, I'm just going to use it in the camper. She agreed and I drug it out thinking it would be just another vacuum and it was easier to take outside than my shopvac.

Well, I don't know about new ones, but WOW!!! This thing really.....here it comes......SUCKS!!!! And in the best way possible!!!
I had to clean out some plugged up debris in the hose, and every place that it can come apart it does, and without having to get a screwdriver out to do so. Talk about user friendly.....I love this $40 vacuum, who cares who's name is on it.
Cleaning was at hand. So I started with the stove top area.....
Before:

After:

All the cubby type storage areas:


I wanted to get the "new to the camper" refrigerator in, so I had to cut the hole a bit bigger to accommodate the larger dorm fridge I am putting in....
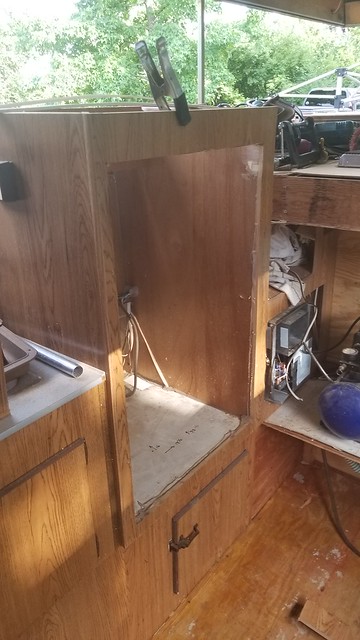
And installed:
OH.........IO

My wife insisted on cleaning the canvas from before. I was semi supportive of the effort. With my experience from trying to clean tents, I didn't expect much. Boy, was I wrong. With advise from my buddy that works for the rv dealership, she went to town on it with straight bleach. My goodness does it look better.
Before:

After:


IT LOOKS BRAND NEW!!!!
We'll condition it after it is all done, but I am definitely eating my words here....
That was all for last night, as a small storm started rolling through.....good news....after checking quickly this morning, it looks like I'm water tight so far!!!
Keep praying for me....it is working!
Edited by corybrown50, 30 July 2019 - 07:28 PM.
#86
Manfred65
-
- Members
- 230 posts
Senior Member
- Locationnear Augsburg, Bavaria, Germany
Posted 31 July 2019 - 10:58 AM
Hi Cory, i love your progress. You did a great job on this camper....much better than we did and this in the really shot time outdoors !
It´s AMAZING , to use only one word!
Create your wife  a gift and install a vanity over the fridge ....may be after the first trip!


More to find on the website of Northstar-Campers
2000 Ford F-250 SuperDuty SC LB 7.3 Lariat
1992 Jayco Sportster 8ft Popup
http://www.wanderthe...8ft-renovation/
BundutecUSA, TravelLite and Palomino TruckCamper Sales in Germany and Europe
#87
corybrown50
-
- Registered (Tapatalk)
- 182 posts
Senior Member
- LocationCincinnati, OH
Posted 31 July 2019 - 03:07 PM
That looks pretty sharp!!
With kids, I was thinking of putting a screen there that flipped up for them to watch dvds at night possibly....I do have a nice mirror from the past owner I wanted to reuse somewhere though, and this may be the spot. If not there, possibly in the extended closet by the new bed area.
Last night started with rain in the afternoon until about 6:30, so I was able to eat dinner before heading out and getting a bit done. I started reinstalling the roof insulation. No pictures there, but it was just cutting the insulation to fit, glue, support, repeat......I will say this, with pink insulation, measure, measure again, then measure 1 more time before cutting......it is a pain to have to trim any less than 3 inches from that stuff. You end up just breaking small bits off with a razor blade.
I have to add another picture of the canvas here. I am so proud of the Mrs. getting this done. This is a picture of the corner from the rear driver's side that was COVERED in whatever you want to call it, mildew, mold, whatever....MAN DOES IT LOOK GOOD!!!!

Also got a few of the 3d printed items ready to go on and placed.....
A cap for the fresh water fill.

A cap for the drain water

A lock for the fridge

Door holder for when open. I'm thinking of reprinting this as it was on the edge of the print table and came out a bit wonky.

A test end cap
And of course, since I was printing.....A robot for my best helper

I'm getting together 2 lists now, must do and would like to do. Here they are:
MUST DO:
- Bed (Queen) put in
- Canvas installed
- Bed (sidewall) support expansion
- LP Closet door
- Inner roof skin
- Lights (EXTERIOR) wired
- Lights (INTERIOR) wired
- AC?
- Exterior trim
WOULD LIKE TO DO:
- LP lines finished
- Water lines finished
- Closet
- Bunk bed
- Floor
- Interior trim
GOOD NEWS!!!!! NO RAIN IN THE FORECAST FOR THE NEAR FUTURE!!!!
I humbly ask any readers for this prayer:
"God, give Cory the strength to complete his tasks, the wisdom to make good and quick decisions, and the skills to accomplish everything in the time he has remaining."
Or in whatever words you would use. Your prayers are heard, and things are moving along well. I have tonight, and all day tomorrow and Friday to hopefully finish. I want to have Saturday to get rigged up and have a couple miles practice before leaving Sunday. It's 1 hr and 44 min to where we are going.....A week of fun at Long's Family Retreat. I love their tagline;
Get ready to disconnect-your cell phone will most likely not work here! WiFi is spotty too.
A super deal, and no, I'm not a paid salesperson for them:
Vacation Package Terms:
Arrive on Sunday afternoon and depart on Friday afternoon. Includes 5 nights of camping plus the following daily activities (Monday-Friday). All day waterslide and swim passes, unlimited miniature golf, canoes, and paddle boats. * Subject to change due to added activities. Additional charges for GoKarts, Oasis, Kiddie Train, Bounceables, Carousel, Water Wars & GyroXtreme.
Camping in your own unit/Vacation Package Family (2 adults & up to 3 children) . . . . . . . $275.00
Keep praying for me!!!!
#88
Wandering Sagebrush
-

- Site Team
- 10,584 posts
Free Range Human
- LocationNortheast Oregon
Posted 31 July 2019 - 04:42 PM
Cory, that door holder is a great idea.
I am haunted by waters
#89
corybrown50
-
- Registered (Tapatalk)
- 182 posts
Senior Member
- LocationCincinnati, OH
Posted 01 August 2019 - 06:03 PM
Hello all!!
I needed a mid-day break so I figured I'd update from last night's work....
Things continue to progress slowly but continuously.....
I finally got all the insulation in.....YEAH!!!

Since I had to wait for the insulation adhesive to dry before trying to put in the roof, I had to mess with some things around the bottom....
I installed my fridge lock, with a screw for a temporary pin......It works perfectly

The heater was pushed in too far into the cab, so I had to take the exhaust out from the outside and get it sitting flush again. I'll have to re silicone the exhaust sometime later, but that is back in after some "coercion" with a hammer....

I had a big hole in the sink area where the old faucet used to be. A 2x2 and the spacers that are not being used in the door came in handy here.

And a "PERFECTLY TRIMMED" filler piece is added in. The Mrs. is going to put contact paper over the whole area, so this will not be seen.

And the faucet installed in what I feel is a much better use of space. I understand why the factory put it where it was, the original would not fit in this location. I have a pump that will provide "boondocking" water if I ever do so.

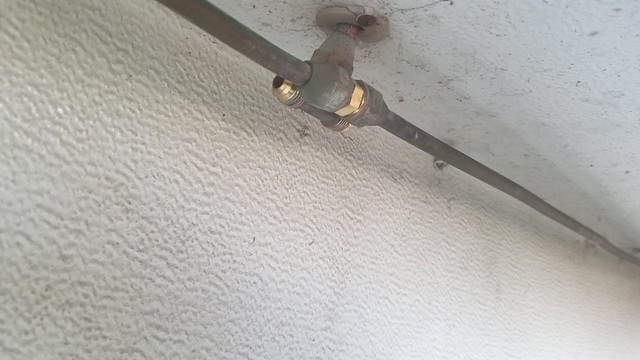
With the new fridge installed, there is no need for LP to be coming in that area. I though about just capping the line inside, but thought replacing the T junction with a union junction was a better choice for safety. If there is a leak, it will be outside.

I did leave the old T and line installed though, in case I or someone else ever wants to invest in an LP fridge.
THANK YOU FOR THE KUDOS ON THE DOOR LATCHES!!!
I didn't like how they came out before in person. The picture looked cleaner than reality. I ran them again with a bit of a twist, I'm going to use a catch in the middle of them with some paracord to see how that works. Harder for the kids to play with....
Fresh off the printer....

I know I probably keep sounding like a broken record, but PLEASE!!!! KEEP PRAYING FOR ME!!! This is a HUGE JOB that I do have some help here and there, but man.....God must like how broad my shoulders are.......I love the challenge......
So far today I've got the roof interior in and have started wiring the lighting. Also, my vent fan and fridge are running through the converter/house wiring in the camper....That was a relief. I'll add that all when I get the chance.
Until tomorrow....
“All hard work brings a profit, but mere talk leads only to poverty.” - Proverbs 14:23 (NIV)
God bless!!
Edited by corybrown50, 01 August 2019 - 06:06 PM.
#90
corybrown50
-
- Registered (Tapatalk)
- 182 posts
Senior Member
- LocationCincinnati, OH
Posted 02 August 2019 - 06:04 PM
Ok all....Midday break again......
I'll start this post with.....I'm glad nobody died, or was injured.....
Clickbait I suppose.
The big step for yesterday was to get the vinyl back in. For this camper, the vinyl has to go over the lift system for the roof. This means the roof has to be supported from some outside force....outside the camper body.
PLEASE!!! IF YOU ARE DOING THIS YOURSELF>>>>>DO NOT TRY TO SAVE MONEY OR TIME "RIGGING" SOMETHING.
The system I put together, which I will not describe in detail or show pictures of, was suspect to begin with. I had a buddy from my men's group over to help. I needed someone inside to "guide" things as they came in. Enter....my amazing wife.....
As I called her outside to help, I pulled her aside and said, "I'm putting you in harms way, and it makes me sick. If I yell or (friend's name) yells, or you see the roof move, drop.....it doesn't matter what is under you....drop. A hurt rear is very much better than a broken neck."
Well, we start the process, and the wind picks up. Of course, what happens next, the roof drops. Luckily, I put a very structural support in the rear, so only the front dropped. She was in the rear, and all ended well here, but PLEASE!!!! If you do this yourself, take the roof off, have a gantry system, or support it from above somehow. No one's life is worth any time or money saved rigging something.....GOD BLESS MY WIFE.
Okay.....we finally get the vinyl in, and as my friend and I are screwing it all down, I told him what I had said to my wife as she was walking out with me. He said, "My wife would never have done that. She would have said, "That's your problem, I'll be inside.""
I told him I had a brave and fearless wife. Willing to take on most anything. I wonder today, after the whole event, if this is why some men don't get to take on crazy projects like this, they don't have the support from their significant other. We all know how much Manfred had help from his wife from reading his rebuild. What an amazing woman. We are both very blessed. I pray that any readers of this are as blessed as we are....
Once we got the vinyl all screwed in, it was time to reattach the roof. Well....when it fell, it came down a bit crooked. Okay I thought, I'll lower it down to the bottom and we can pick it up a bit and move it straight. Unfortunately, in my friend's enthusiasm, he went a bit ahead of me and began trying to move the front by himself.....CRASH..... The whole camper fell off the jack stands. Luckily for me, I had put an H-form under the body of the camper just in case, which caught it. Of course, I have the jack on the passenger side off as I replaced everything over there and am waiting for my RV buddy to come over to finish sealing everything.
Well, we tried to lift it, the two of us and my wife standing there to put the passenger jack in. No dice. I go and get my truck lift jack and put it under the body. It lifts....gingerly we work it up so the jack can go under. It slides.....my buddy was standing very close, waiting for it to be high enough so the jack can get under, and the edge of the jack catches on the metal skin....a hole.....GRRRRR......
We finally work it all out, getting it high enough for the jack, level everything out, put the jack stands back underneath, and lower it back down.....What an adventure......for those of you that actually read the posts instead of just look at the pictures, thank you.
The positives now for the day.......
I started the day putting in the roof skin....working from the back to front. Not as bad as I thought it would be. Driver's side:
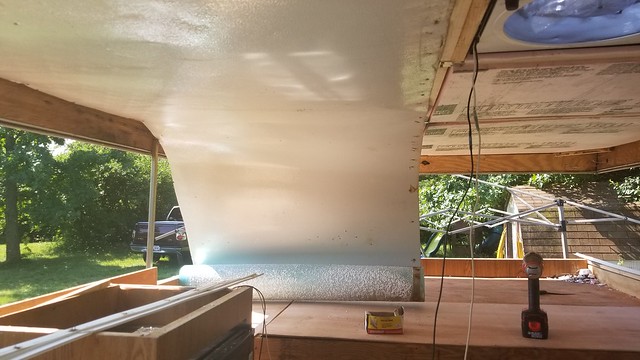

And passenger side in. A little wavy, but okay:


Getting the queen mattress in...RV QUEEN, slightly shorter than normal:
And the end of the night....with the vinyl in and laying folded inside with another link to the past, my great grandmother's blanket.....

Thank you all....please, broken record time.....keep praying for me, but also, add my wife....her name is Michelle....without her from the beginning of this, this would not be possible....
“So whether you eat or drink or whatever you do, do it all for the glory of God.” 1 Corinthians 10:31 (NIV)


Also tagged with one or more of these keywords: 92 Jayco Sportster, rebuild, slide in camper, truck camper


0 user(s) are reading this topic
0 members, 0 guests, 0 anonymous users

