

83 Fleet Rebuild on a 2010 Tundra
Started by
Sleddog
, Nov 21 2019 05:47 AM
55 replies to this topic
#11

Sleddog
-
- Members
- 182 posts
Senior Member
- LocationIdaho
Posted 22 November 2019 - 06:31 PM
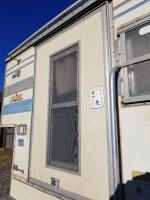
I went ahead and made a rain gutter for over the door out of a piece of metal roofing trim.

#12
Sleddog
-
- Members
- 182 posts
Senior Member
- LocationIdaho
Posted 22 November 2019 - 06:34 PM
And added a grab bar to make getting in and out safer and easier.
Attached Thumbnails
#13
Sleddog
-
- Members
- 182 posts
Senior Member
- LocationIdaho
Posted 22 November 2019 - 07:11 PM
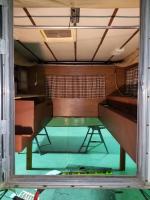
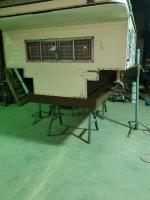
Priority #2. The New Floor - The new floor took the most time. I removed the original bed, couches, and storage dividers. Then I removed the bottom plywood only, everything else was solid enough to keep and I didn't see the point in making any extra work. The interior floor space with all of the original cabinets and storage dividers removed was sufficiently wide and we needed at least a little storage space, so I decided to fill out the 48 inch width by closing in the outside. I put a fresh coat of paint on the existing plywood before proceeding with the floor.
Attached Thumbnails
#14
Sleddog
-
- Members
- 182 posts
Senior Member
- LocationIdaho
Posted 22 November 2019 - 07:14 PM
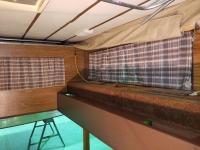
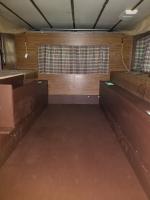
Didn't bother to remove the carpet, it was clean enough and with dogs it doesn't matter much.
Attached Thumbnails
#15
Sleddog
-
- Members
- 182 posts
Senior Member
- LocationIdaho
Posted 22 November 2019 - 07:15 PM
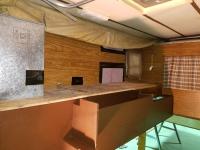
A clean slate for the kitchen area.
Attached Thumbnails
#16
Sleddog
-
- Members
- 182 posts
Senior Member
- LocationIdaho
Posted 22 November 2019 - 07:25 PM
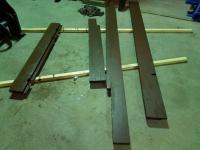
All wood and plywood for the base frame was painted first, then glued, screwed together, and finally covered with sheet metal, trimmed, and painted again. Since I was working alone on this remodel, I put the base frame on first, then the plywood, then framed the outside storage.
Attached Thumbnails
#17
Sleddog
-
- Members
- 182 posts
Senior Member
- LocationIdaho
Posted 22 November 2019 - 07:26 PM
I used 2x6 for the new base, cutting a notch the length of the 2x6 for the aluminum frame to sit on in the front and back of the camper, with an inch overlap on the inside to attach it with screws. I cut a similar notch in the 2x6 for the sides of the new base with an inch and a half overlap with the existing plywood to attach it with screws.
Attached Thumbnails
#18
Sleddog
-
- Members
- 182 posts
Senior Member
- LocationIdaho
Posted 22 November 2019 - 07:28 PM
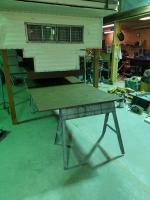
Putting on the plywood alone wasn't too bad. I just slid the plywood and sawhorses underneath and lowered the camper on top. Glued, predrilled, then screwed to the 2x6 frame.
Attached Thumbnails
#19
Sleddog
-
- Members
- 182 posts
Senior Member
- LocationIdaho
Posted 22 November 2019 - 07:31 PM
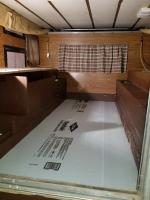
I finished the inside floor before moving to the outside to close in the storage area.
Attached Thumbnails
#20
Sleddog
-
- Members
- 182 posts
Senior Member
- LocationIdaho
Posted 22 November 2019 - 07:33 PM
I added a 1 inch piece of blue board insulation, a trick I learned for building dog houses in extreme cold climates, makes a big difference with cold seeping up through the floor.
Attached Thumbnails


0 user(s) are reading this topic
0 members, 0 guests, 0 anonymous users

