Amazing skills and creativity 


ATC Bobcat Shell - Owner Interior Build
Started by
Alley-Kat
, Oct 31 2013 05:39 AM
65 replies to this topic
#51

super doody
-

- Members
- 638 posts
Senior Member
- LocationSan Mateo Coast
Posted 16 March 2016 - 02:42 AM
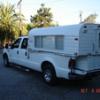
2003 Tacoma 4X4 - 2007 FWC Eagle shell
2006 Tundra Double Cab - 2015 Hawk - side dinette, silver spur interior
#52
Alley-Kat
-
- Members
- 989 posts
Elder Statesman
- LocationPacific Ocean
Posted 17 March 2016 - 12:02 AM
Thank you all for the kind comments.
I thought it would be appropriate to mention that a lot of fantastic, great and neat Camper Build threads have been compiled by Mark BC all in one place where it is easy to spend some time looking over what other guys have done. There is a lot of talent and really excellent ideas and expert craftsmanship in those camper builds. Check 'em out, it'll keep you off the streets and out of bars for some time.
#53
ski3pin
-

- Site Team
- 15,316 posts
Belay On
- LocationSierra Nevada Range
Posted 17 March 2016 - 02:47 AM
........................................................................ it'll keep you off the streets and out of bars for some time.
thanks for thinking of me Alley-Kat!
2003 Ford Ranger FX4 Level II 2013 ATC Bobcat SE "And in the end, it's not the years in your life that count. It's the life in your years."- Abraham Lincoln http://ski3pin.blogspot.com/
#54
RC Pilot Jim
-

- Members
- 1,544 posts
Senior Member
- LocationSan Diego Calif
Posted 19 March 2016 - 03:57 PM
Double Wow.
Lots of fantastic ideas
Unbelievable amount of storage space in a small camper
The shell is definitely the way to go !!
#55
Rusty
-
- Members
- 931 posts
Senior Member
- LocationPort Angeles, Washington
Posted 19 March 2016 - 10:51 PM
This thread has UC Santa Barbara written all over it.....what an amazing journey...WELL DONE!
Someone mentioned you should be teaching a class about this...my bet is you are a teacher...this was so well outlined and detailed....I'm in awe.
And I thought I was a stickler for details...lots and lots of great ideas..I hope you don't mind me "borrowing" a few... 
after all....flattery is the highest form of compliment.
BTW....I owned a cabinet shop for 12 years in another lifetime....you're a very accomplished woodworker...the details are impressive.
oops..had to come back to insert the periods 
Edited by Rusty, 19 March 2016 - 10:53 PM.
2003 Ford 250 Superduty Crew.... 7.3L PowerStroke diesel 1970 10" NCO Alaskan Firestone airbags pulling a 18' Silver Streak runabout
#56
ppink
-

- Members
-

- 2 posts
Newbie
Posted 20 March 2016 - 12:08 AM
Excellent setup! Do You mind sharing what brand of utility pan you used for your shower? I have been searching and can't seem to find any that has a low profile like yours.
#57
Alley-Kat
-
- Members
- 989 posts
Elder Statesman
- LocationPacific Ocean
Posted 20 March 2016 - 03:02 AM
Rusty,
Thanks for the "extra" kind words.
No UCSB, they are much better today than what they were known for back in my college days (#1 party university). Cal Poly, SLO, Aero Eng, then naval aviator, both of those have made me who I am today.
Wish I had a better wood working shop, plus a little help from someone like you with real world experience.
Steal whatever you want and have some fun.
Edited by Alley-Kat, 20 March 2016 - 05:32 PM.
#58
Alley-Kat
-
- Members
- 989 posts
Elder Statesman
- LocationPacific Ocean
Posted 20 March 2016 - 03:17 AM
Ppink,
Thanks for the kind words, much appreciated.
I had to cut the utility sink down to size.
To about 6 inches tall (inside, I think, not counting the base section where the legs mount), however, if you need a measurement, I can do that on Sunday.
Without the legs attached, I just set the fence on a table saw and did each side, one at a time. There was a little cleaning up in the corners to make a straight edge, and then a little sanding with 120 grip sand paper and a block of wood to make a nice rounded top edge surface. It sands really easy. it's pretty soft plastic.
Then I cut the legs to get the bottom of the drain elbow (purchased at an RV store) to be just off the ground. Same technique with the table saw fence. Legs are thicker and a harder plastic material than the sink, so go slow. I then drilled the legs and the mounting brackets on the sink for some bolts, just to keep it all together when in use. Otherwise, the legs and bolts are stored in a cabinet.
Oh, I used a fine tooth plywood saw blade on the table saw to cut both the sink and the legs. Wear fully eye enclosed safety glasses, those little plastic pieces fly all over the place, I'm still finding them each time I clean up the shop, several years later.
I've had two different utility sinks from my local ACE Hardware store. The first one I sold to a fellow camper. Both were a little different from each other, however, both were under $30, including sink and legs, from the same ACE Hardware store.
Here's an example, lowest cost, ACE Utility Sink.
Edited by Alley-Kat, 20 March 2016 - 03:33 AM.
#59
Rusty
-
- Members
- 931 posts
Senior Member
- LocationPort Angeles, Washington
Posted 20 March 2016 - 04:49 PM
Alley-Kat.....I understand now.....pilots are detail oriented by survival instinct, engineers by training....
The Marine Corps saw fit to give me a set of gold wings too....not pilots wings but gold non the less...
2003 Ford 250 Superduty Crew.... 7.3L PowerStroke diesel 1970 10" NCO Alaskan Firestone airbags pulling a 18' Silver Streak runabout
#60
ppink
-
- Members
-
- 2 posts
Newbie
Posted 21 March 2016 - 04:09 AM
Ppink,
Thanks for the kind words, much appreciated.
I had to cut the utility sink down to size.
To about 6 inches tall (inside, I think, not counting the base section where the legs mount), however, if you need a measurement, I can do that on Sunday.
Without the legs attached, I just set the fence on a table saw and did each side, one at a time. There was a little cleaning up in the corners to make a straight edge, and then a little sanding with 120 grip sand paper and a block of wood to make a nice rounded top edge surface. It sands really easy. it's pretty soft plastic.
Then I cut the legs to get the bottom of the drain elbow (purchased at an RV store) to be just off the ground. Same technique with the table saw fence. Legs are thicker and a harder plastic material than the sink, so go slow. I then drilled the legs and the mounting brackets on the sink for some bolts, just to keep it all together when in use. Otherwise, the legs and bolts are stored in a cabinet.
Oh, I used a fine tooth plywood saw blade on the table saw to cut both the sink and the legs. Wear fully eye enclosed safety glasses, those little plastic pieces fly all over the place, I'm still finding them each time I clean up the shop, several years later.
I've had two different utility sinks from my local ACE Hardware store. The first one I sold to a fellow camper. Both were a little different from each other, however, both were under $30, including sink and legs, from the same ACE Hardware store.
Here's an example, lowest cost, ACE Utility Sink.
OMG, You did such a great and meticulous job I actually thought the pan was straight from the factory ---Thank you so much for sharing, Really Appreciate it.


0 user(s) are reading this topic
0 members, 0 guests, 0 anonymous users

