Jump to content


Photo
- - - - -

My BOBCAT Build


  • Please log in to reply
41 replies to this topic

#1 GroovyDad

GroovyDad

    Senior Member

  • Members
  • 765 posts
  • LocationReno, NV

Posted 23 November 2014 - 02:09 AM

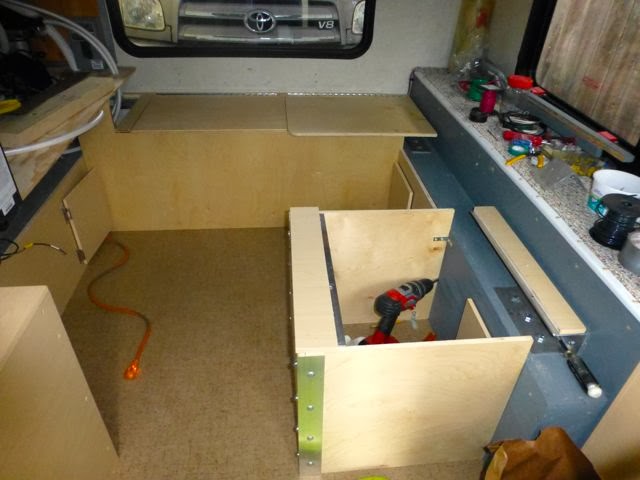
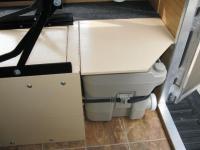
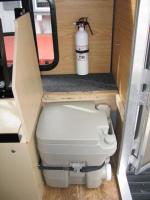
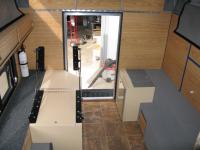
I plan to take most of the winter to build out my new Bobcat shell.  My plan is to go very simple and light so I can have as much agility as possible.  As of now, I plan to build a side dinette with a rollover chair that folds into a small, narrow bed for a second person or for stealth camping.  I plan to have gravity fed water from a 7 gallon jug, heat from a Mr. Heater, a simple, two burner camp cook top, one battery for LED lighting and a porta-potty.  I also plan to use a good quality ice chest for refrigeration.  


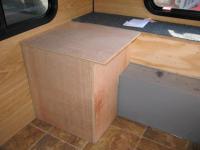
I'm toying with idea of incorporating milk crates for drawers.  Milk crates come in two sizes, are durable, reasonably priced and can be easily removed and stored when I'm not camping.


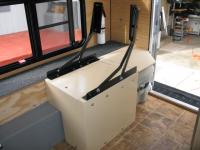
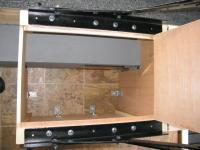
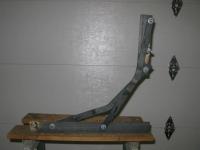
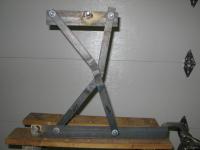
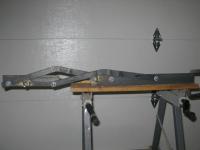
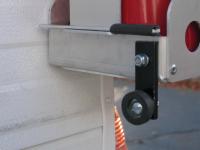
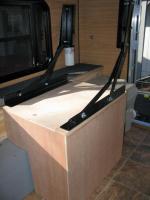
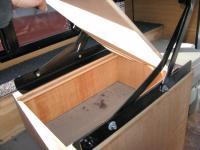
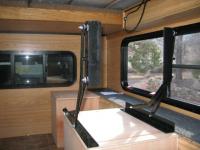
The other day, I started building a set of rollover hinges.  I'm fortunate enough to have a neighbor with a rollover couch in his FWC and he let me take some measurements of his.  I have some welding/metal working experience, so I got to work.  The hinges in the photographs are very raw and still need to be ground and finished, but they work!  and all for about $40.00 worth of metal.


IMG_0307.JPG IMG_0308.JPG IMG_0309.JPG  


  • 0

"I only went out for a walk, and finally concluded to stay out till sundown, for going out, I found, was really going in." —John Muir. http://aimlessroamer.blogspot.com/


#2 billharr

billharr

    Senior Member

  • Members
  • 2,824 posts
  • LocationStockton CA

Posted 23 November 2014 - 03:30 AM

Nice job on the brackets looking forward to your build
  • 0

#3 pvstoy

pvstoy

    Senior Member

  • Members
  • 2,768 posts
  • LocationCarson City, NV

Posted 23 November 2014 - 04:18 AM

I think that is pretty good skills to take metal and make your own roll over assembly!!  Looking forward to the rest of your build


  • 0

Patrick

2015 FWC Hawk Flatbed


#4 GroovyDad

GroovyDad

    Senior Member

  • Members
  • 765 posts
  • LocationReno, NV

Posted 05 December 2014 - 01:54 AM

Because my Gerry can holder doesn't allow my door to open all the way and fasten to the door holder, I came up with a little door stop to prevent the window from slamming against the can holder.  I'm always glad that I save little pieces of hardware, nuts and bolts--they always come in hand sooner or later.IMG_0327.JPG IMG_0329.JPG


  • 0

"I only went out for a walk, and finally concluded to stay out till sundown, for going out, I found, was really going in." —John Muir. http://aimlessroamer.blogspot.com/


#5 GroovyDad

GroovyDad

    Senior Member

  • Members
  • 765 posts
  • LocationReno, NV

Posted 05 December 2014 - 01:59 AM

IMG_0321.JPG


I know it's not a good idea to have an indoor propane cabinet, but I'm only planning to use an 11 lb. bottle and I'm going to seal it really well AND vent it to the outside.  


I still have to paint it, install the cabinet door & hardware, silicone seal it and mount it in place.  


  • 0

"I only went out for a walk, and finally concluded to stay out till sundown, for going out, I found, was really going in." —John Muir. http://aimlessroamer.blogspot.com/


#6 GroovyDad

GroovyDad

    Senior Member

  • Members
  • 765 posts
  • LocationReno, NV

Posted 05 December 2014 - 02:08 AM

IMG_0322.JPG


IMG_0324.JPG


IMG_0325.JPG


IMG_0326.JPG


I'm building a side dinette, so I've begun to make the seat boxes.  The forward seat box will hold my battery, battery isolator and inverter.  The rear seat box will support my homemade rollover hinges and have storage inside. 


IMG_0330.JPG


Since I used several different species of wood in my build, staining the cabinets would look a little jumbled, so I decided to go with a light, neutral paint.  


I'm having a BLAST!


  • 0

"I only went out for a walk, and finally concluded to stay out till sundown, for going out, I found, was really going in." —John Muir. http://aimlessroamer.blogspot.com/


#7 ski3pin

ski3pin

    Belay On

  • Site Team
  • 15,316 posts
  • LocationSierra Nevada Range

Posted 05 December 2014 - 02:59 AM

I'm having a BLAST!


:)  That's one of the key benefits!


  • 0

2003 Ford Ranger FX4 Level II 2013 ATC Bobcat SE "And in the end, it's not the years in your life that count. It's the life in your years."- Abraham Lincoln  http://ski3pin.blogspot.com/


#8 billharr

billharr

    Senior Member

  • Members
  • 2,824 posts
  • LocationStockton CA

Posted 05 December 2014 - 03:29 AM

Looking good, the seat brackets came out real nice. Will the hinged top on the rear seat clear the back cushion? I just did a lift out panel. I may have over killed the rear seat but if I have the top bed pulled out i step down oh the end of the roll over. Brackets bolt through to a 3" alum angle that is bolted to the sides and at the ends bolt to the angle on the outside edges. I added a bracket at the bottom that bolts through the floor. If you are not standing on the folded over seat it should not be a problem. If you are standing on it that is a lot of leverage. 


You can see the angle in the picture below. Angle to the outside is bolted through the outside wall. There is 1/2" of angle by the plywood that my seat panel sets on.

dinette+3+3+2014.jpg


  • 0

#9 GroovyDad

GroovyDad

    Senior Member

  • Members
  • 765 posts
  • LocationReno, NV

Posted 05 December 2014 - 11:56 PM

That's a good question Bill, I didn't check to see if the hinged lid would clear the back cushion.  I'll check it before I install the hinge and if it doesn't clear, then I'll make a lift out panel too.  Thanks for catching that!


  • 0

"I only went out for a walk, and finally concluded to stay out till sundown, for going out, I found, was really going in." —John Muir. http://aimlessroamer.blogspot.com/


#10 GroovyDad

GroovyDad

    Senior Member

  • Members
  • 765 posts
  • LocationReno, NV

Posted 08 December 2014 - 02:02 AM

IMG_0331.JPG

IMG_0332.JPG


So I made a little more progress on my Bobcat build this weekend.  The photos above are of the completed forward dining seat/electrical box.


IMG_0334.JPG

IMG_0335.JPG


These show the completed bench with storage that holds the rollover seat.


IMG_0336.JPG

IMG_0337.JPG


These show the porta-potty storage and the lid, which will be part of the lower bed when the dinette is converted to the bed.


IMG_0339.JPG

IMG_0338.JPG


The propane cabinet is large enough to hold an 11 lb. tank, and old school kerosene lantern and some extra kerosene cannisters.


IMG_0340.JPG


A view of the progress from above.  If the weather continues to stay nice, I'll tackle the kitchen counter and cabinets next weekend.


  • 0

"I only went out for a walk, and finally concluded to stay out till sundown, for going out, I found, was really going in." —John Muir. http://aimlessroamer.blogspot.com/


0 user(s) are reading this topic

0 members, 0 guests, 0 anonymous users