I noticed that my Grandby had come off center from its position on the truck bed. The front of the camper was OK, but the rear had moved to one side of the bed, so I took it to my ever lovin' tool guy.
The first thing he noticed was the position of the turnbuckles. All the turnbuckles are mounted in a vertical position. Vertical turnbuckles are great for keeping things from moving up & down, but they do little to keep things from moving side to side or front to back. Lateral motion is inevitable with such a set up. I know FWCs are designed to flex but I don't want my Grandby flexing all over the truck bed. I'd bet that most broken turnbuckles are a result of lateral stress.
First, we put on the jacks and raised the camper just a bit, and centered it as perfectly as we could with careful measurement and a rubber hammer.
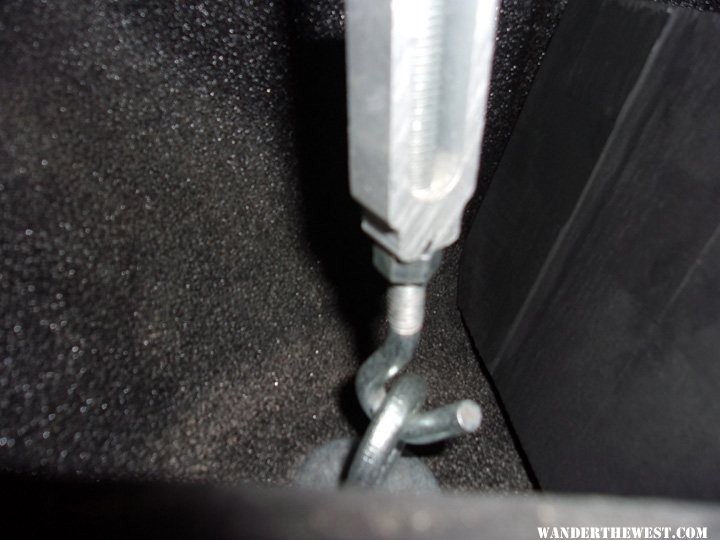
Before my ever lovin' tool guy reinstalled the turnbuckles, he installed on each of them a JAM NUT. A jam nut is a nut which is screwed onto one the the turnbuckle eye bolts, and after you tighten the turnbuckle to the tension you want, then you tighten the jam nut down so it "jams" against the turnbuckle (only finger tight), which prevents the whole turnbuckle from loosening. My ever lovin' tool guy tells me that with the jam nuts, I shouldn't have to check the turnbuckles so often. In fact, he expressed some puzzlement why jams nuts are not standard procedure for camper installs. In theory they should not fail, so If a turnbuckle ever comes loose, it will be some more serious failure than simple loose turnbuckle.
Picture of turnbuckle with jam nut below:
I asked my ever lovin' tool guy about the possibility of fabricating some spacers to install on the sides of the truck box, to address the lateral motion issue. He seemed to think that we could install spacers without removing the camper from the truck. I'm glad I have my ever lovin' tool guy. He is smart. After a few more measurements and a 24" piece of 2"X10" wood I got from the scrap pile in my local hardware store, this is what he came up with:
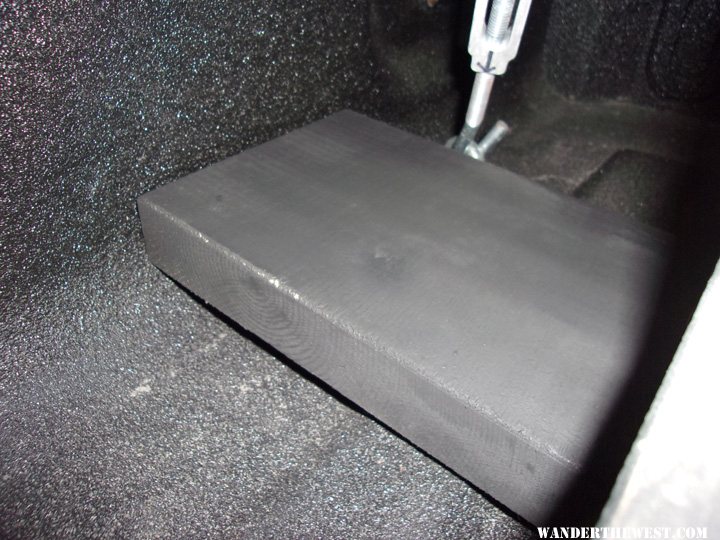
All spacers measure 2" X 8 9/16" X 8 9/16". Galvanized outdoor screws are used as feet on the bottoms of the spacers to allow about 3/4" of space underneath for water drainage. Spacers all sealed with about a half can of Rustoleum flat black. All spacers are installed through the turnbuckle access doors in the camper. The spacers are not screwed or attached in any way neither to the camper nor to the truck. They just pop into place and stay nicely where they are put. I love my ever lovin' tool guy.
The front spacers are laid down flat on the truck bed through the turnbuckle access door. The front spacers each have four screws on the bottom for feet. Below is a picture of the spacer inside the driver side front turnbuckle access door:
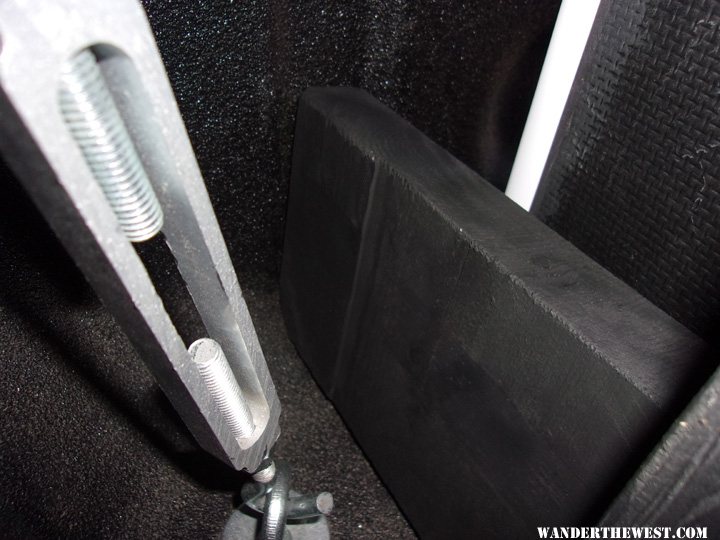
For the rear spacers there was not enough room to lay them flat, so my ever lovin' tool guy put the spacers up on edge. There just happened to be a groove at that point in the wall of the box, so my ever lovin' tool guy put a tongue on that side of the spacer so it fits right in. Only two screws for feet. I don't expect them to move - they are in quite solid despite no fasteners. Below is a picture of the spacer installed inside the passenger side rear turnbuckle access door. Note the one corner of the spacer has been rounded to match curvature of the inside of the truck bed:
Everybody's situation will be different, but this works for me. Jam nuts prevent the turnbuckles from loosening, spacers prevent lateral motion of the camper which prevents lateral stress to the turnbuckles. It's the circle of life! Now I can go back to doing doughnuts in the Flying J truck stop parking lot just before they ask me to leave...
Everybody should have a tool guy.
Edited by 2020, 16 April 2016 - 11:24 PM.