Tree removal was one thing, but this is definitely a six pack lemonade project[emoji41]Wandering Sagebrush asked that I post about this repair. Here goes -
A Wrenching Weekend
It was Mother's Day Weekend and, unfortunately, we are now both orphans. I can't BBQ a leg of lamb for my mother in law like I did so many years with wonderful memories. So it was a weekend of chores. On Saturday morning - as a retirement present - we bought and installed extendable towing mirrors onto our friend Cathy's 2016 Nissan Frontier. She bought a small travel trailer and these were needed. I was quite pleased with the quality and wish that mirrors like this were available for our Ford Ranger. They are not.
Cathy project was completed and she was on her way by noon so Saturday afternoon we did our 50 hour service on our Massey Ferguson tractor - fluid and filter change in the engine, front axle, and transmission, rear axle, and hydraulic system.
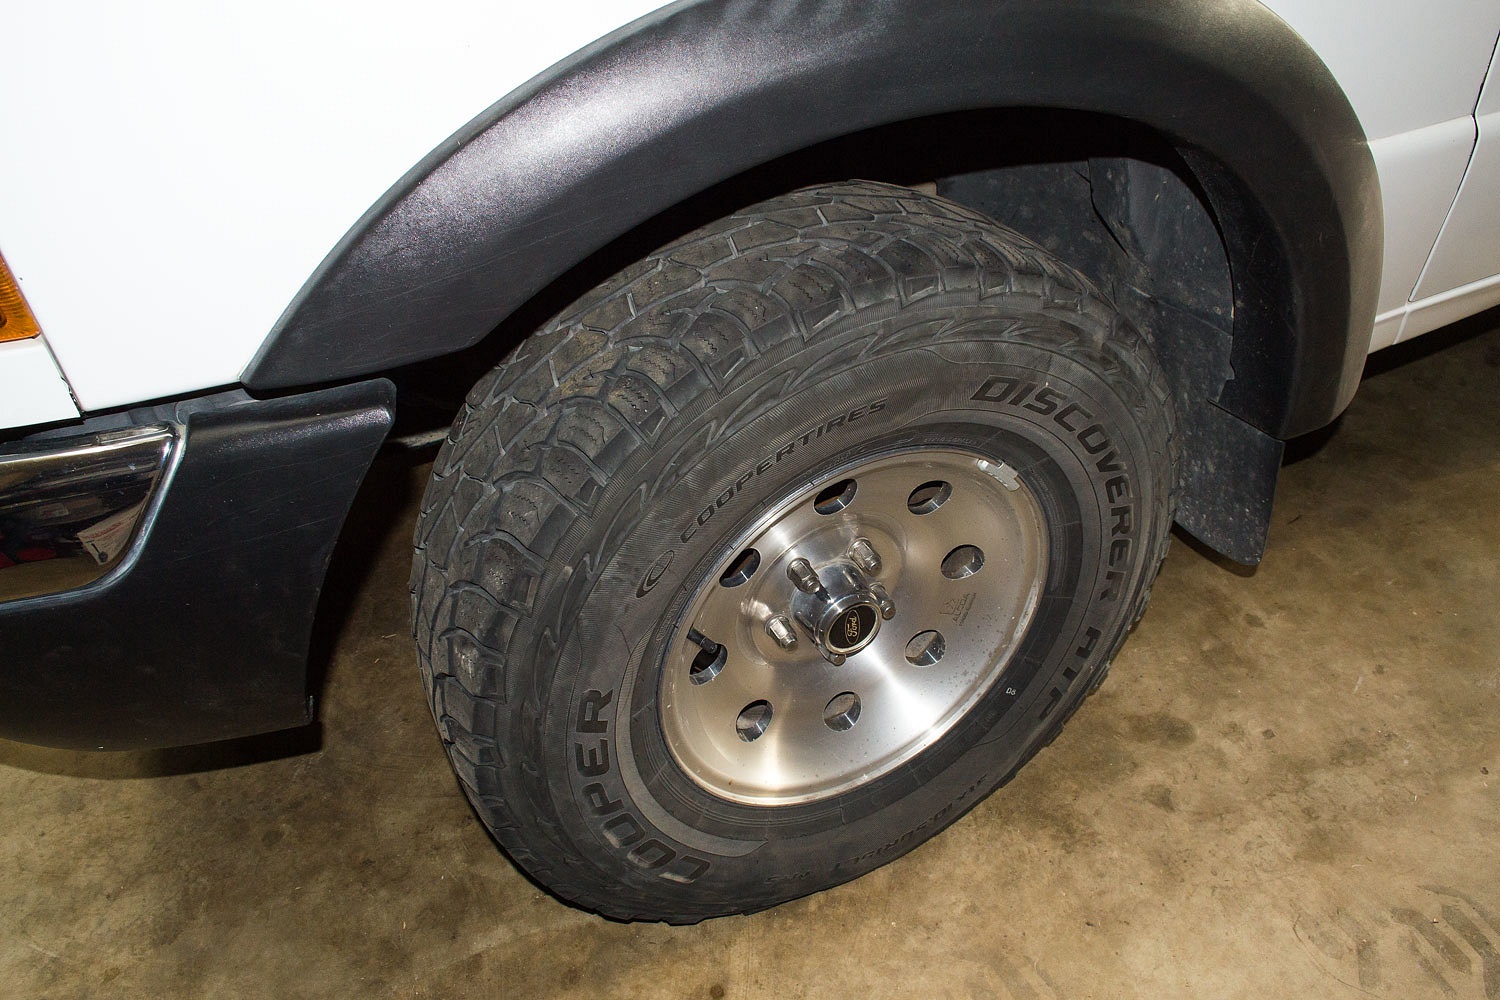
Sunday we rebuilt the front suspension on our 2003 Ford Ranger 4x4. Symptoms that pointed to the need were telltale wear patterns on the front tires, an occasional loud bang in the front end while crawling in 4x4, and a clicking sound on the left side when crawling in 4x4. Inspection showed wear in the left lower ball joint and both tie rod ends rubber boots were torn. The truck has 175,000 miles on it. The truck gets used. We will continue to use it, so it was worth it to us to do a rebuild. Around 3 months ago, in response to growing front bearing noise, we replaced the bearing hub assemblies on both sides. The clicking sound on the left side I attributed to the CV joint in that side's axle shaft, so we were replacing the axle shafts on both sides of the front. The ball joints on the upper control arms are not replaceable - as in pressing in new ones. The entire control arm with new bushings and ball joint is installed. New lower control arms with ball joint and bushings are available, so we went that route also.
We removed and replaced -
- Lower Control Arms - ball joints and bushings
- Upper Control Arms - ball joints and bushings
- Tie Rods - both inner and outer
- Tie Rod Boots
- Sway Bar Bushings
- Sway Bar End Links with bushings
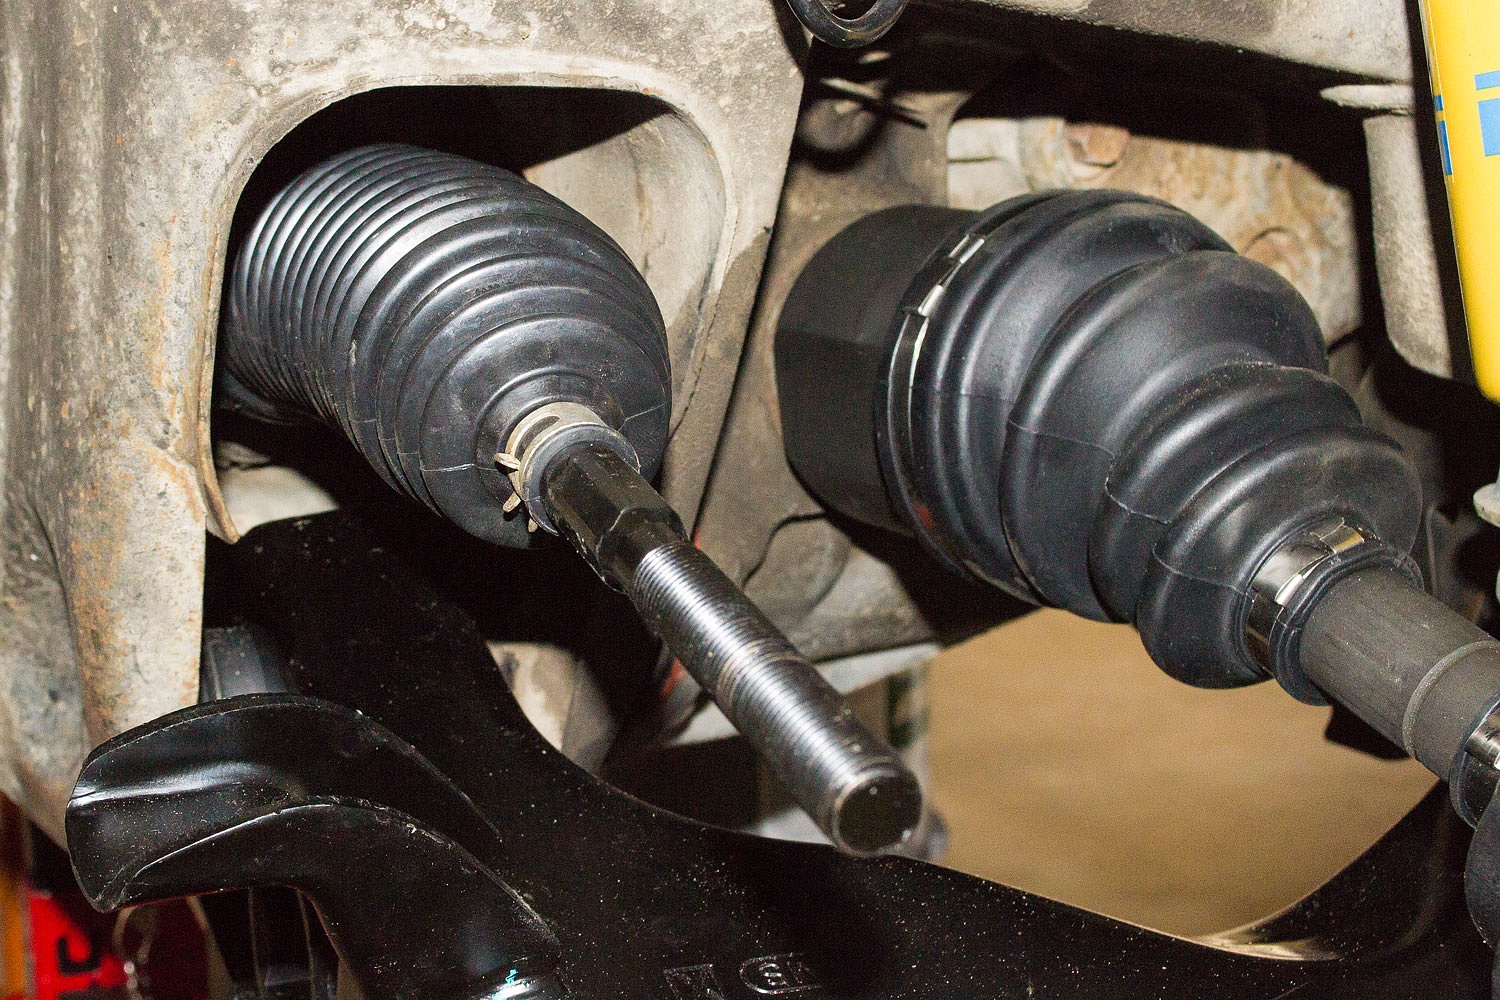
- Both axle half shafts
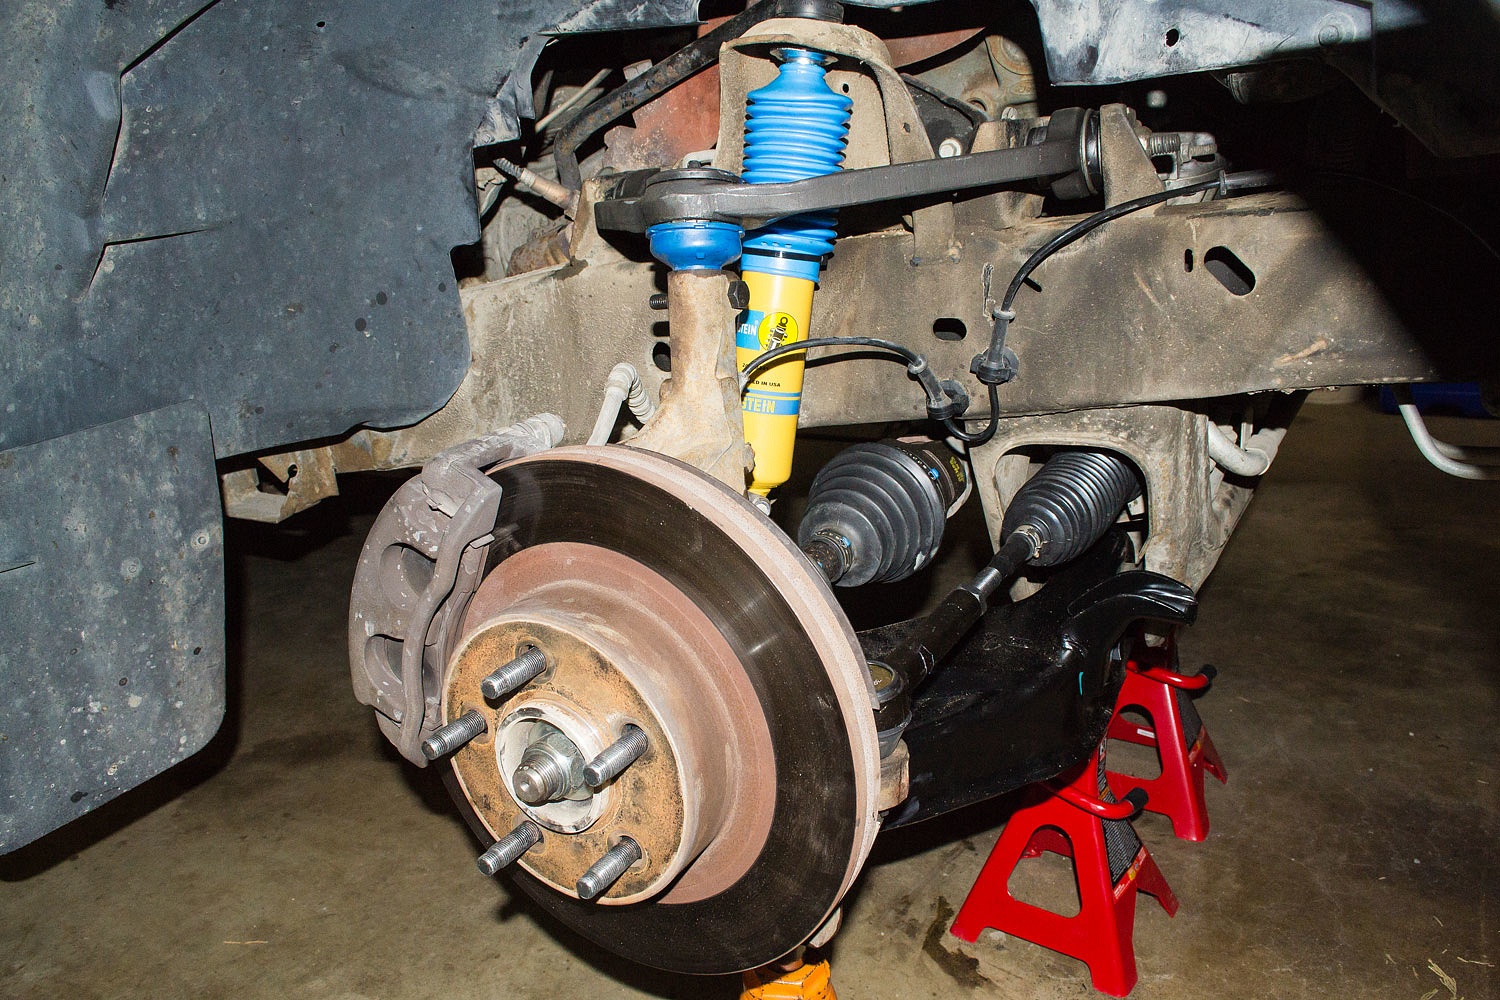
- Front and Rear Shocks - Julie wanted this since we were there.
I did not document each step as this was pretty basic wrenching. This job would have been very difficult without a pneumatic 1/2" drive impact wrench.
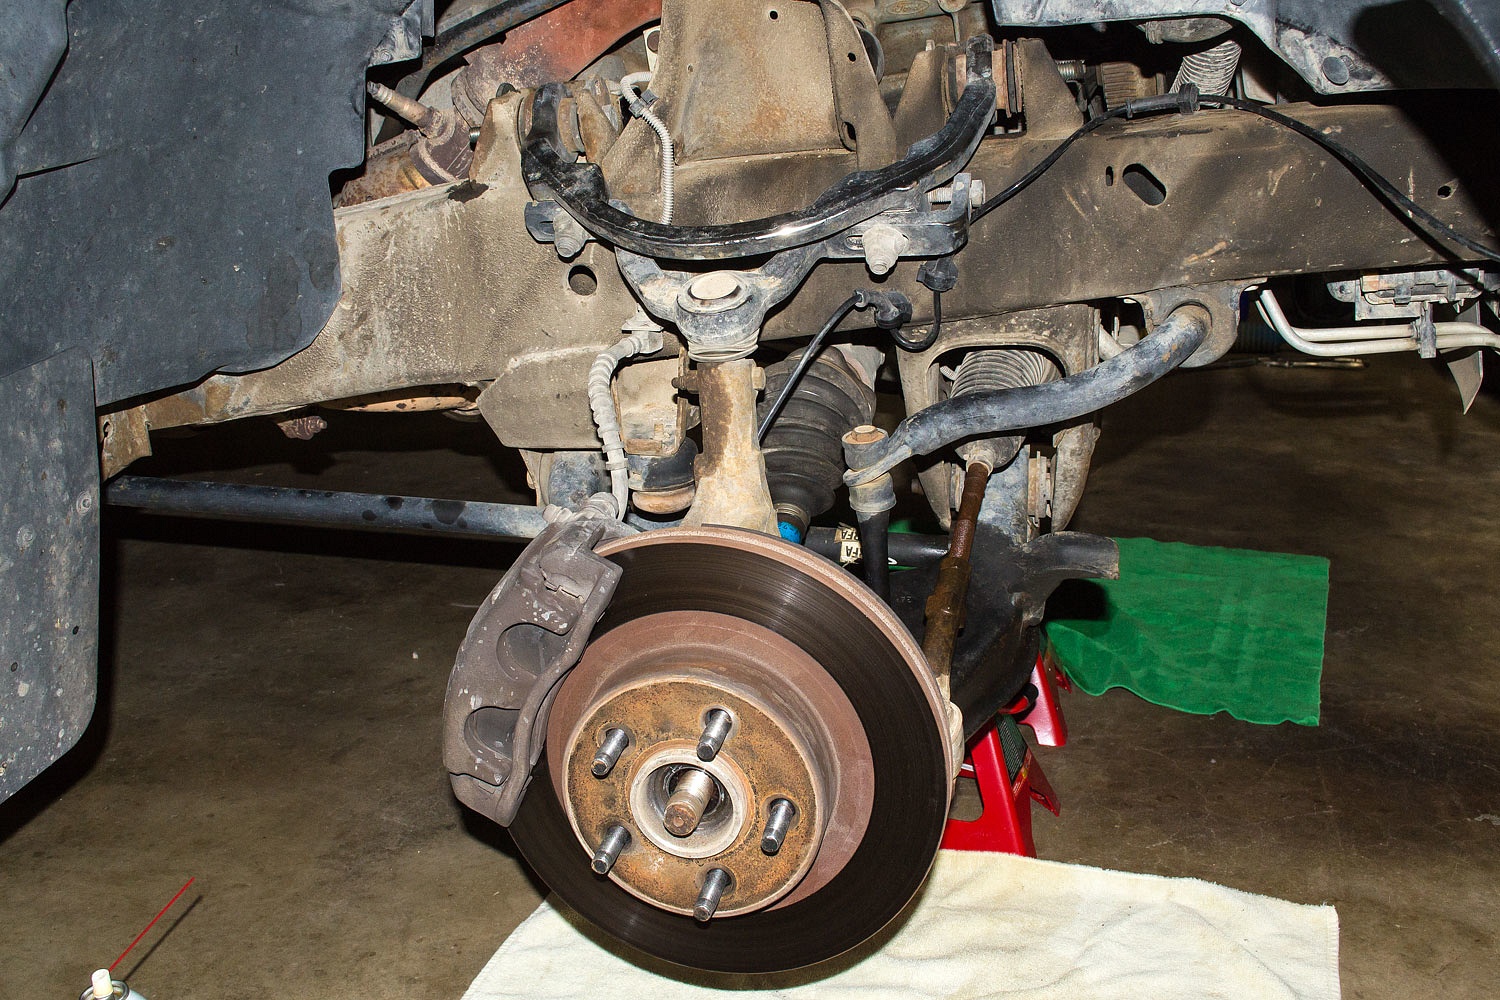
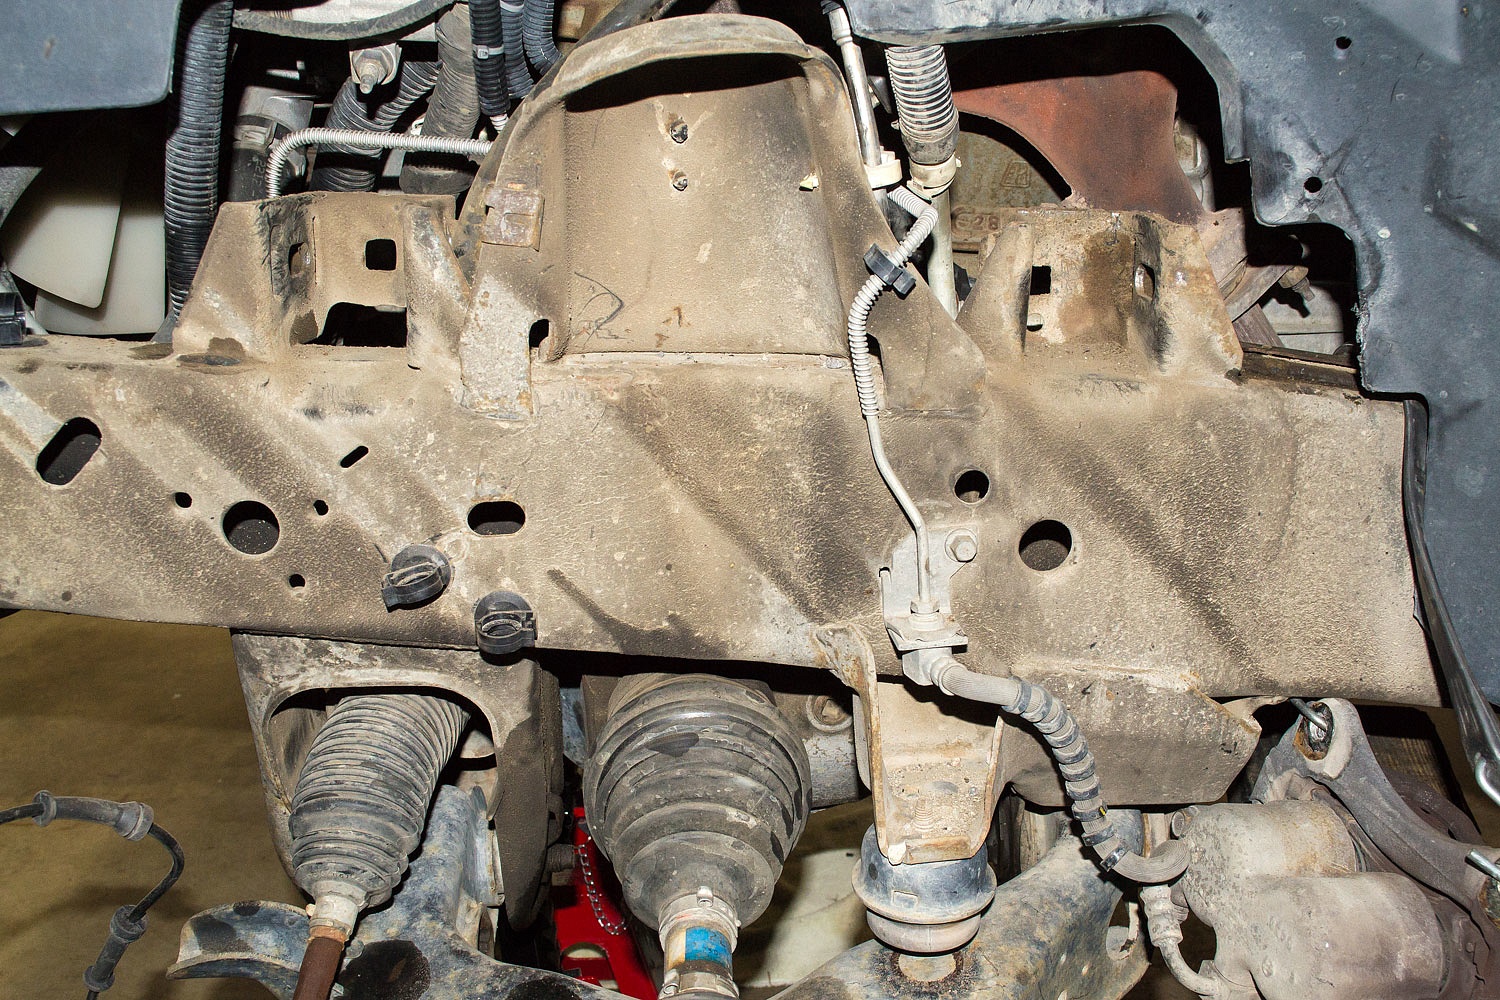
Here's the right front prior to disassembly - but we already removed the shocks.
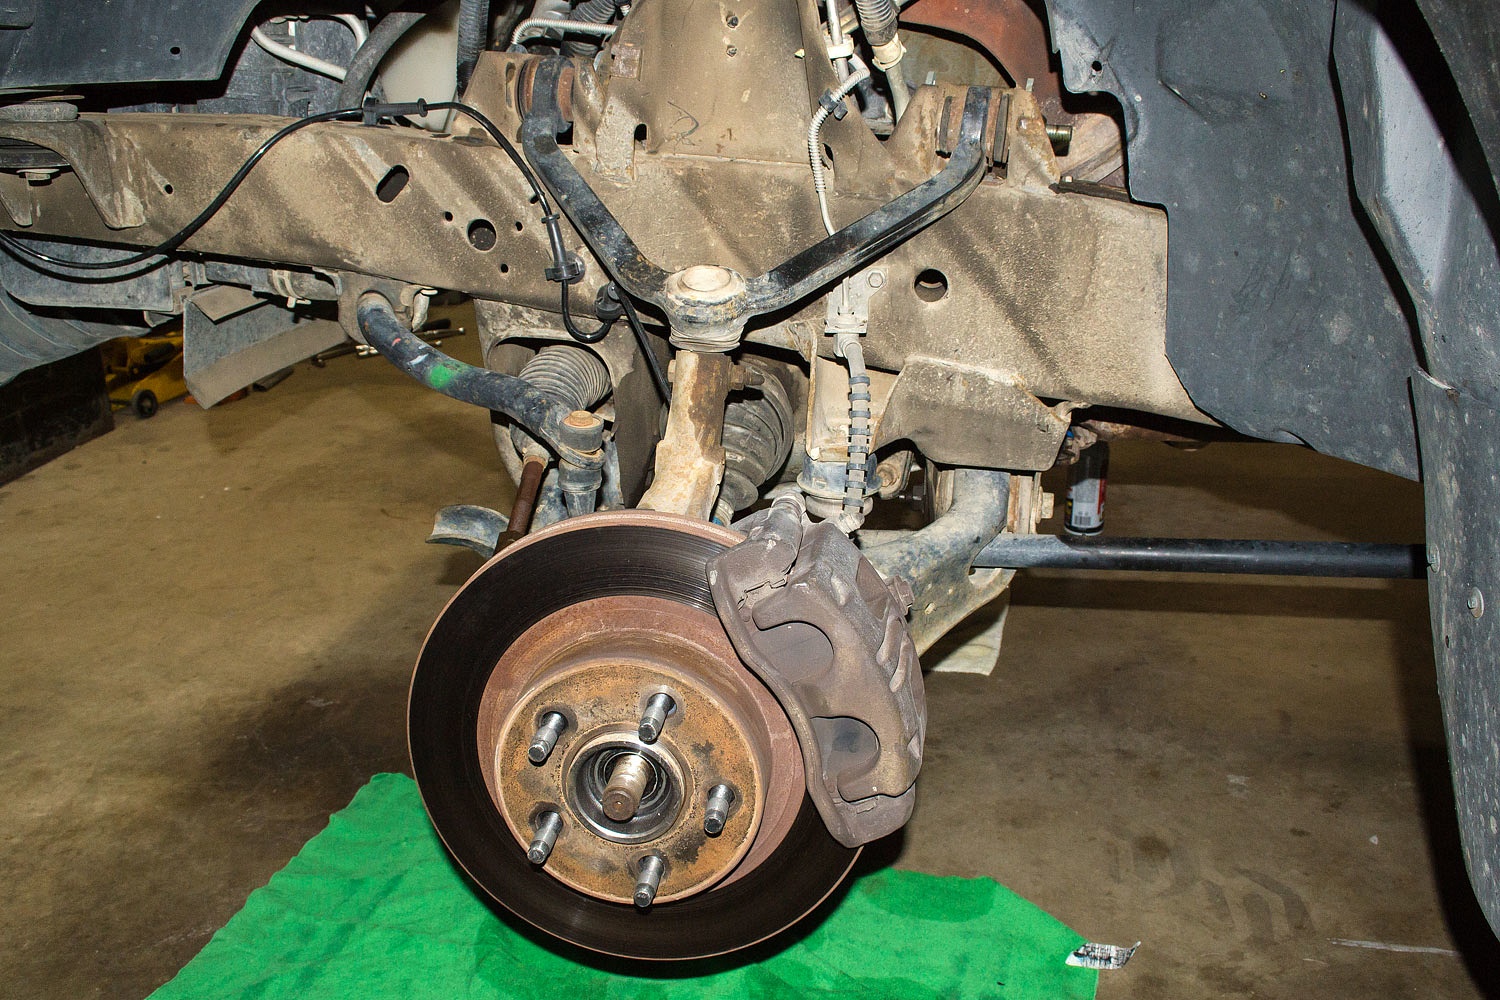
And, the left front.
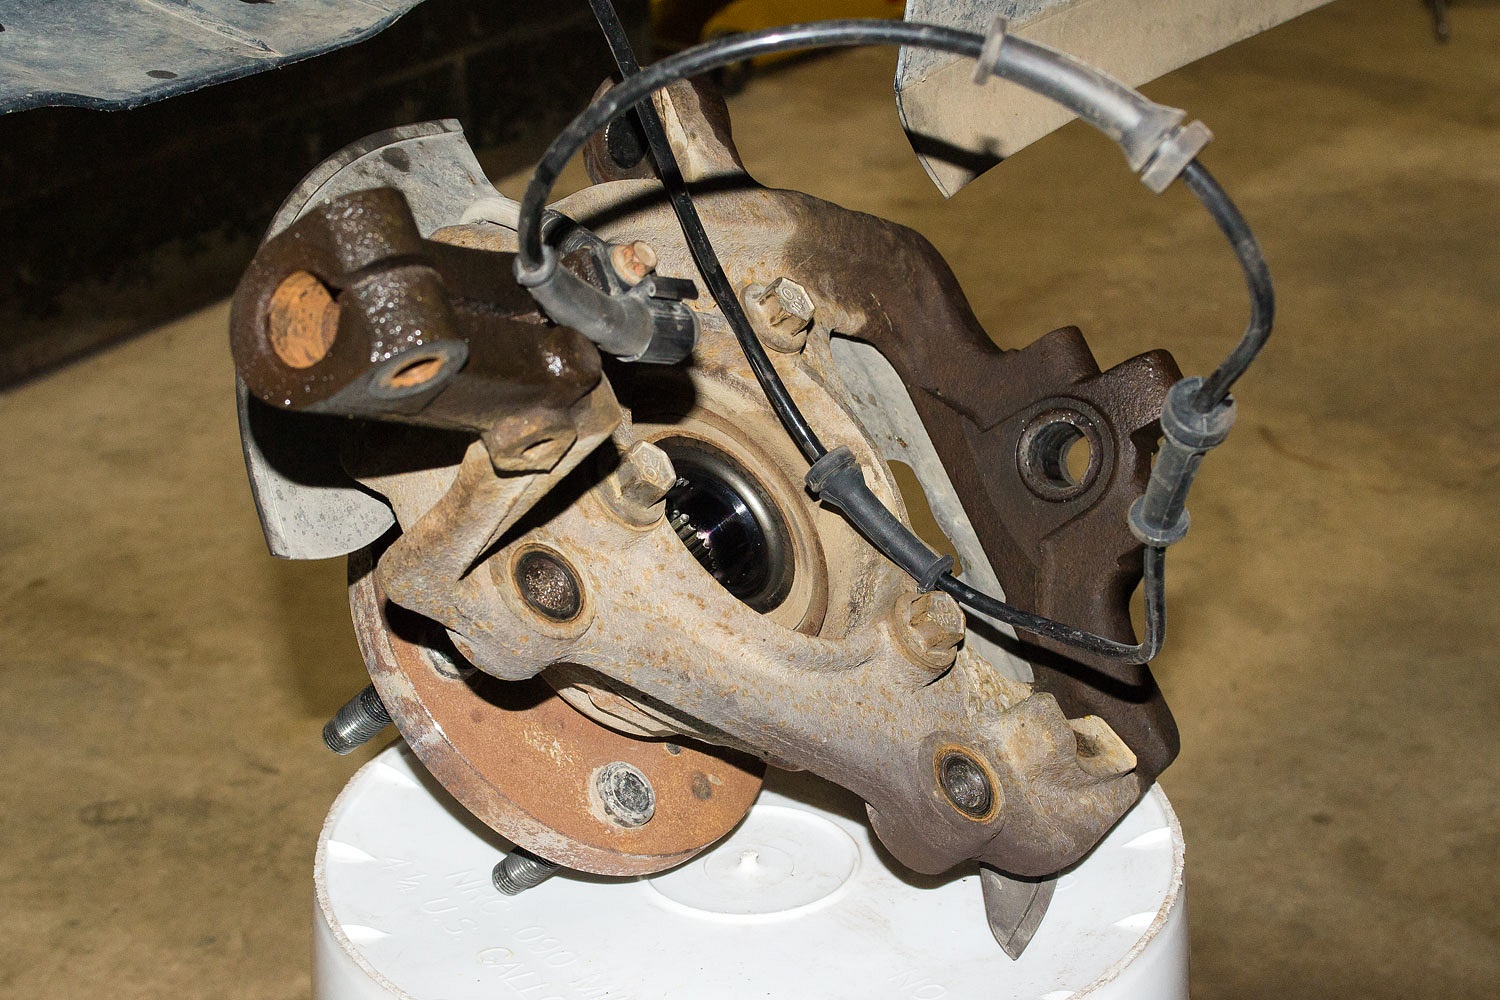
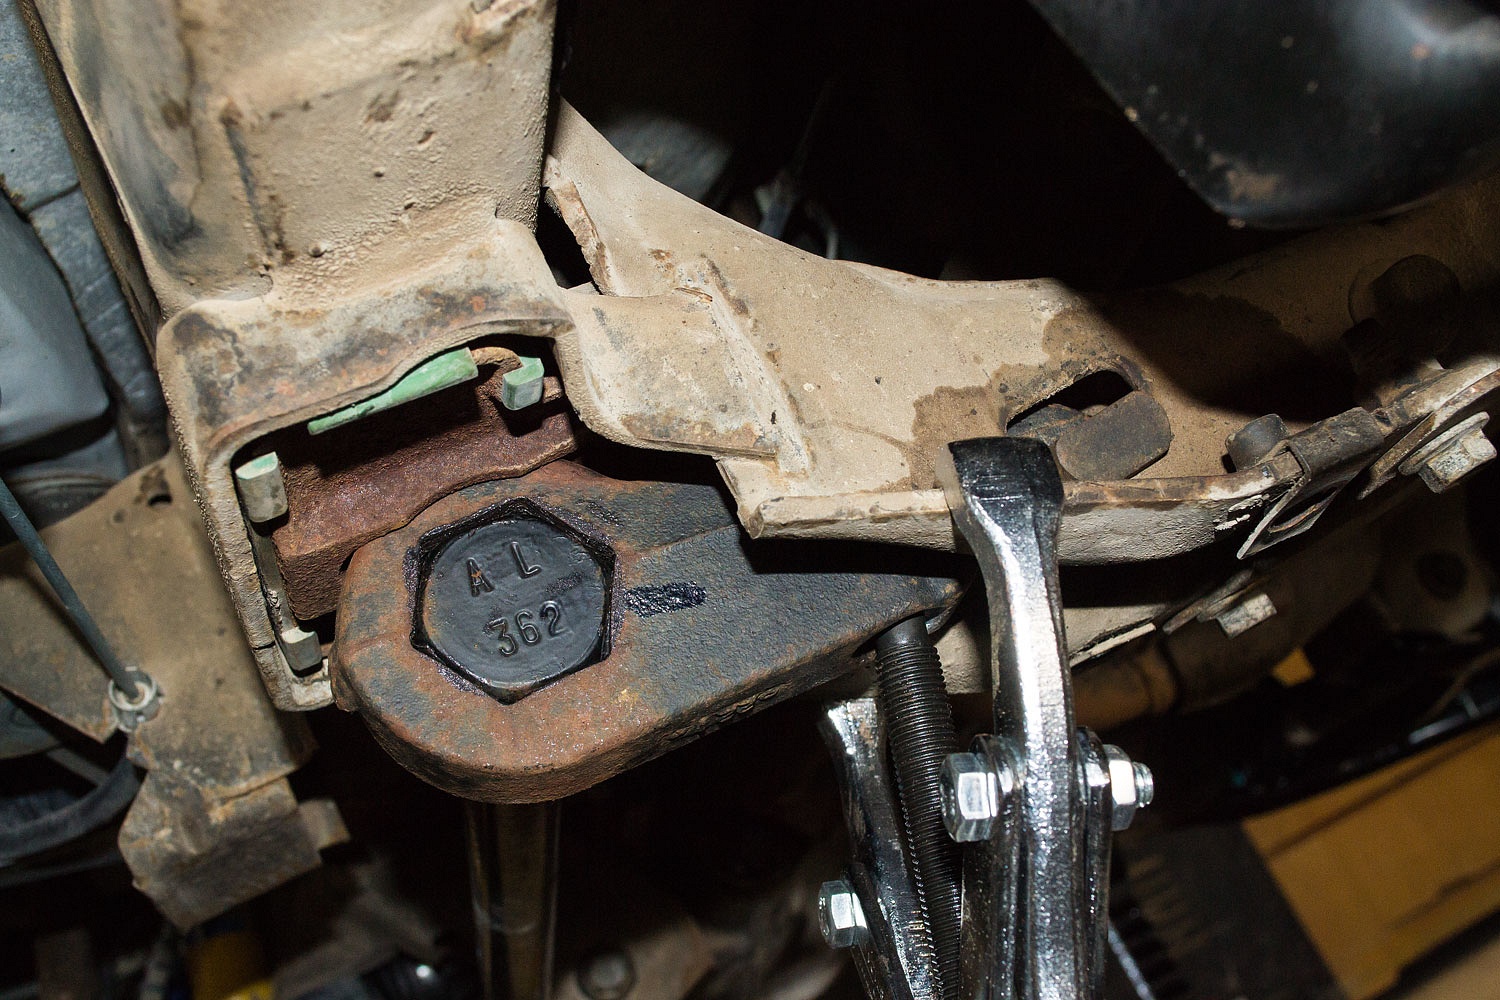
The brake caliber and rotor are removed and placed on a bucket to not tweak the brake line. The spindle assembly is placed on another bucket after releasing the clips for the ABS sensor cable.
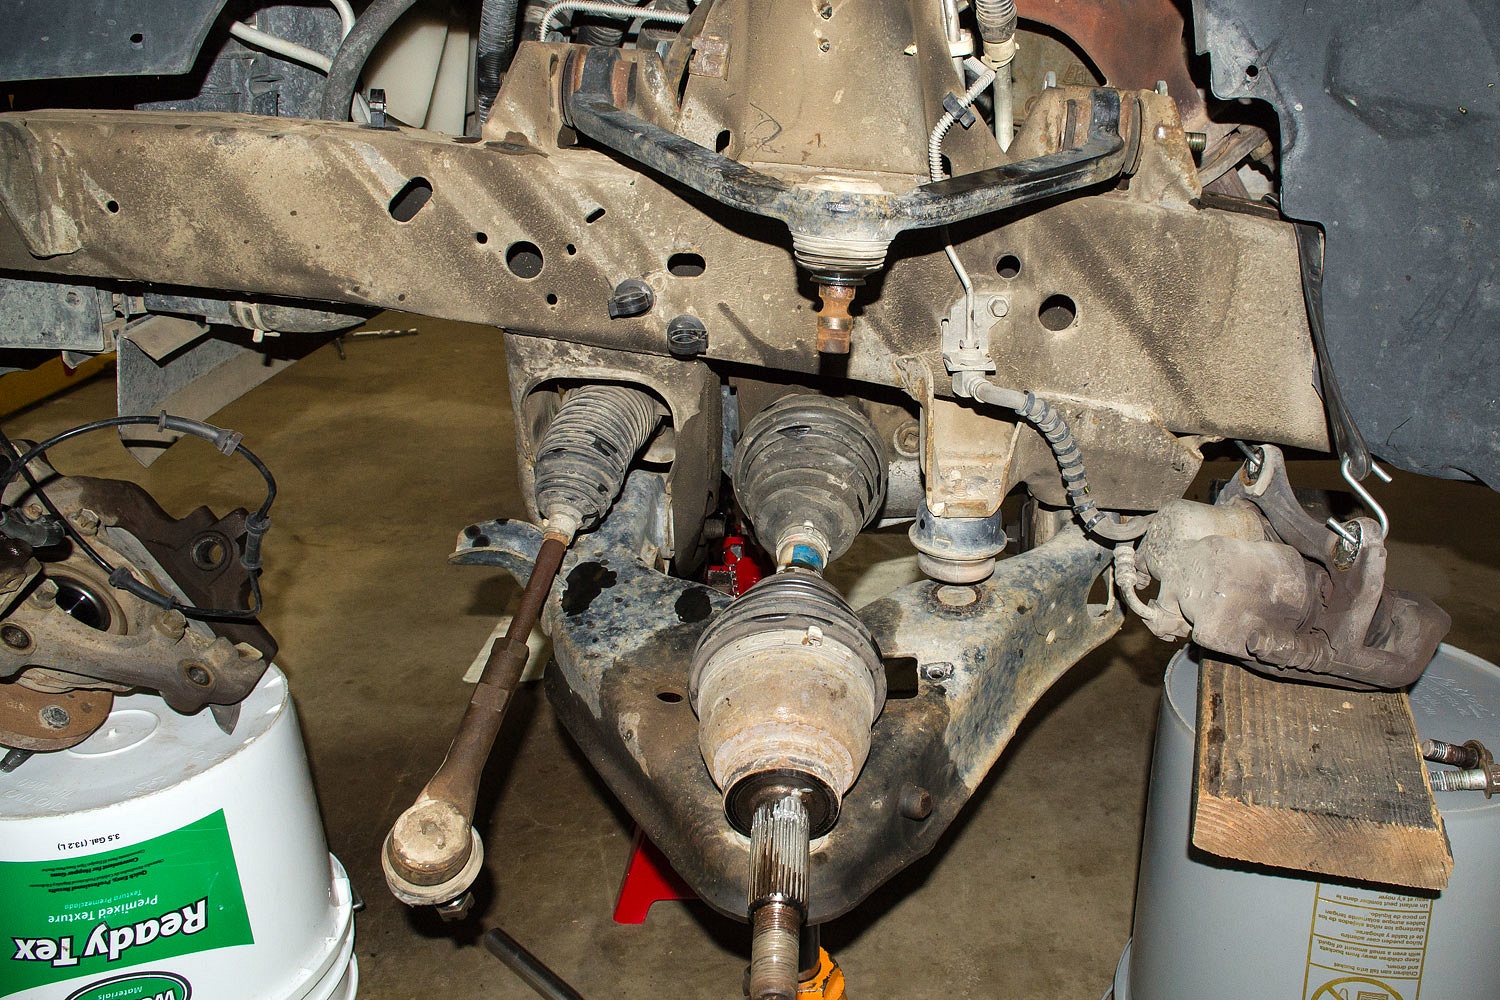
This truck has torsion bar suspension. Prior to disassembly I measured ride height in two places and also counted the number of turns to remove the adjustment bolt on each side. The torsion bar is still under tension after the adjustment bolts are removed. I used a two jaw puller to add tension to remove the adjustment key and then back off and release all tension to remove the torsion bars and end keys.
I also marked the position of all parts prior to disassembly.
I figured the torsion bars could be rusted and seized on both ends - the lower control arm and end key. I was lucky they came apart easily without brute force and the three pounder. I clean off - pressure wash - the underside of the truck very often - desert trips and especially after driving in chain controls and road deicing. I believe this practice really paid off with the relative ease of disassembly on this project.
Here's the torsion bar hex end removed from the lower control arm.
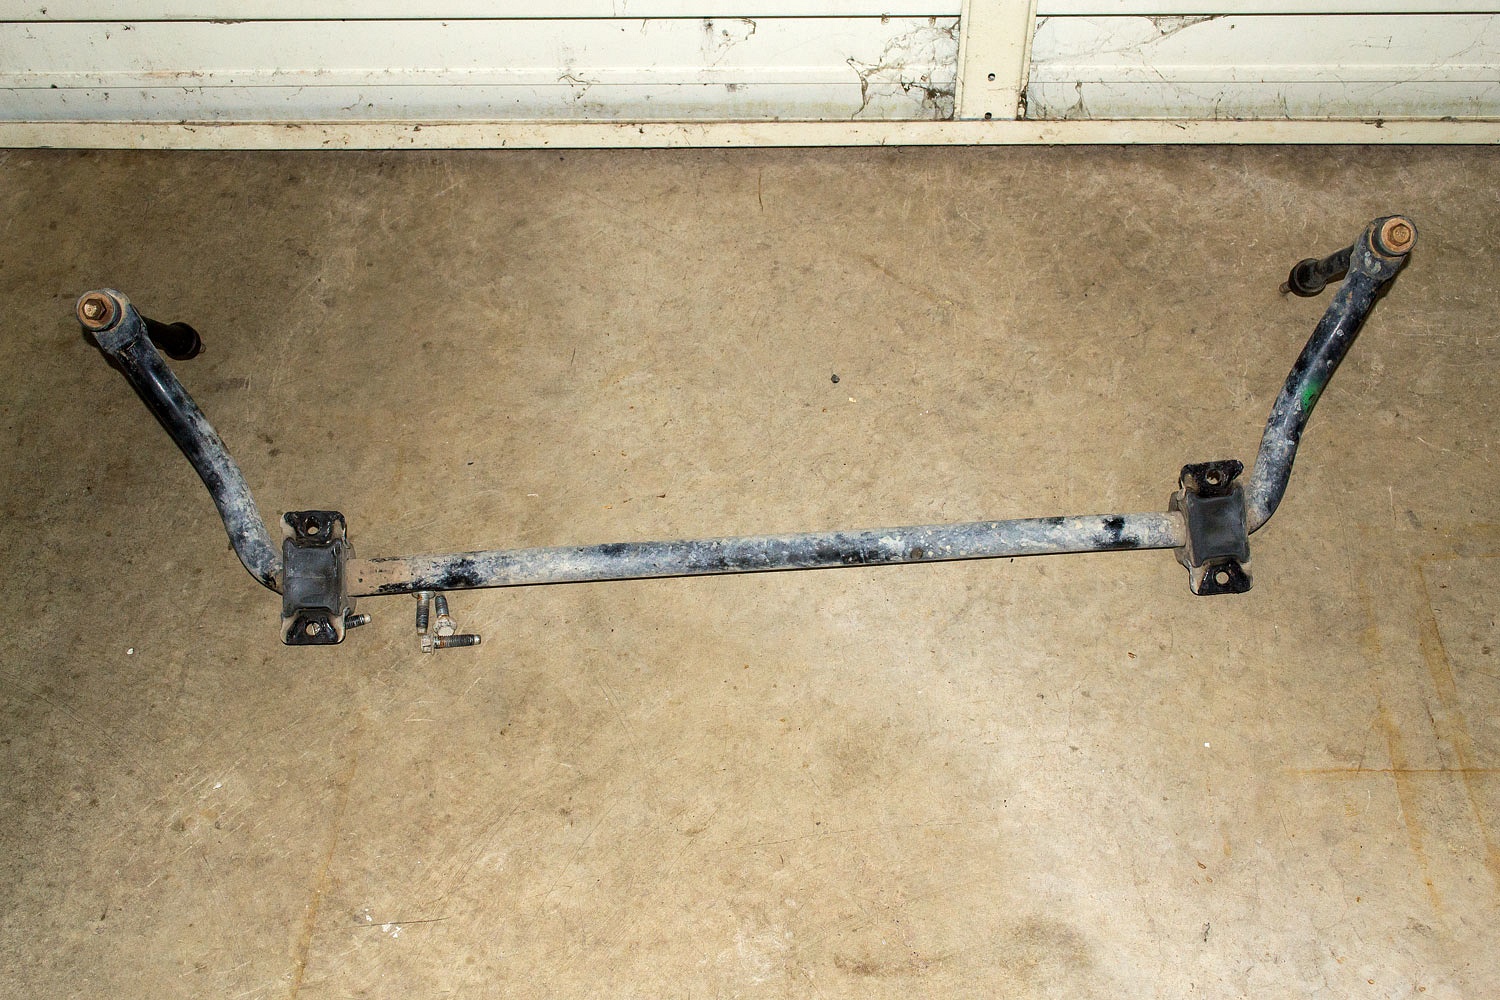
The complete sway bar removed.
Upper control arm removed. The brake and fuel lines were a bit of a hassle on the left side for removing the camber bolts.
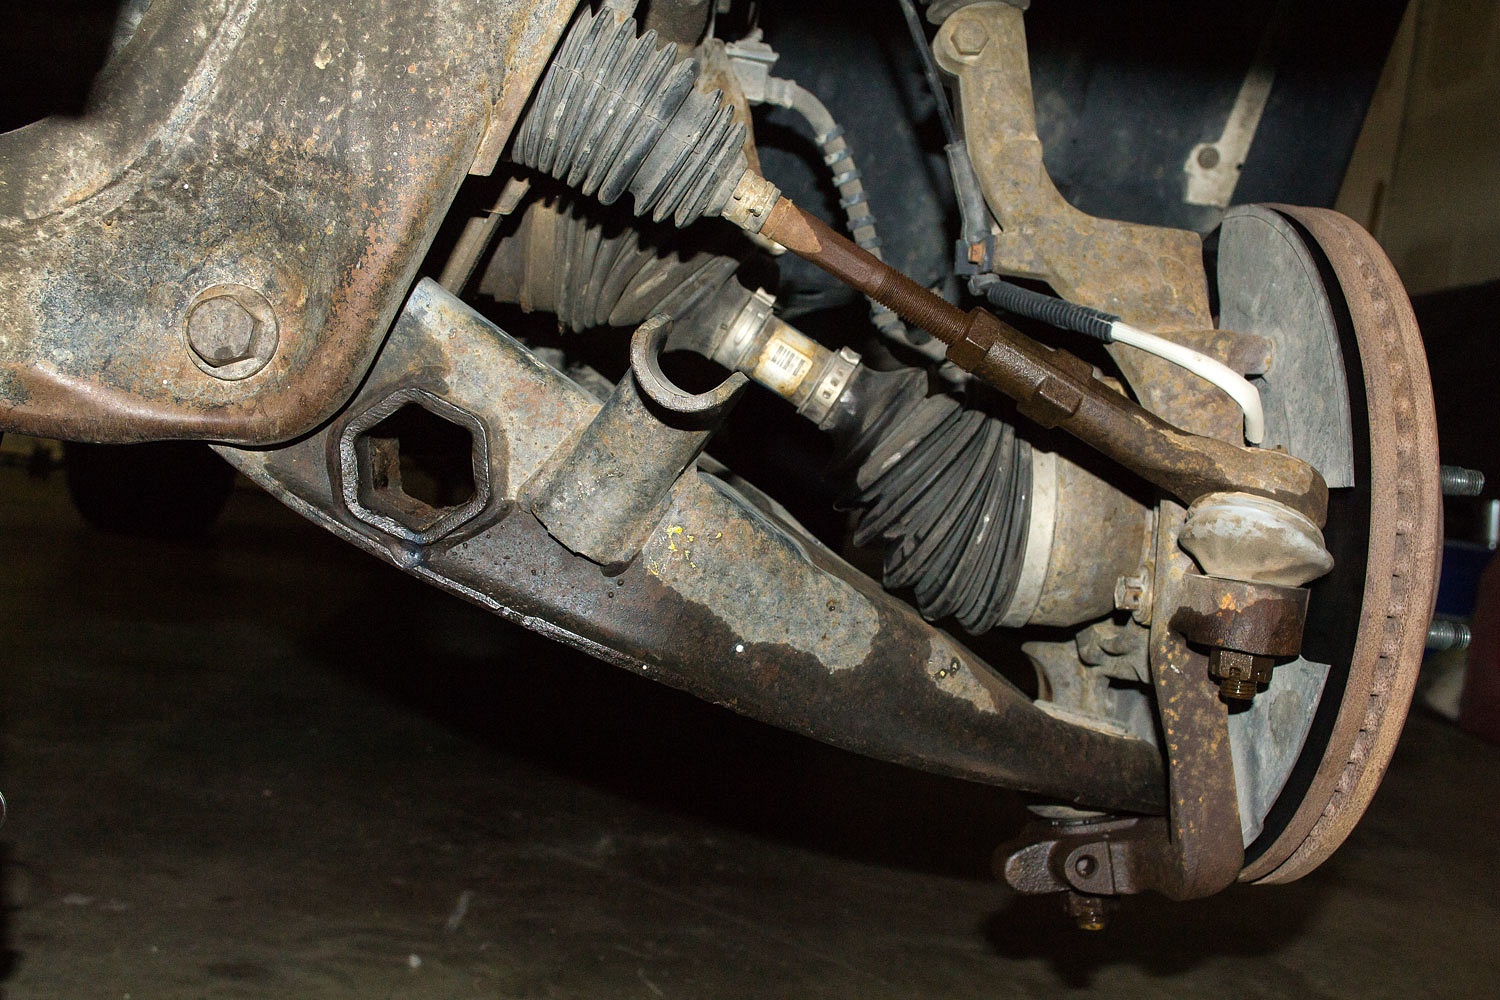
I did not photograph the lower control arms removed because we immediately installed the new ones. The axle shafts just pull out with care not to damage the oil seal on the axle housing. I measured the length of each tie rod prior to disassembly and adjusted the new ones to that length.
Here's new axle shaft, inner tie rod, tie rod boot, and lower control arm on the left side.
Inner tie rods do not come with new boots. From what I found, I believe it's essential to replace them. Replacing them was the hardest part of the job. It is close quarters back in there and a vent line is connected to each one so pressure is equalized on both sides of the steering assembly.
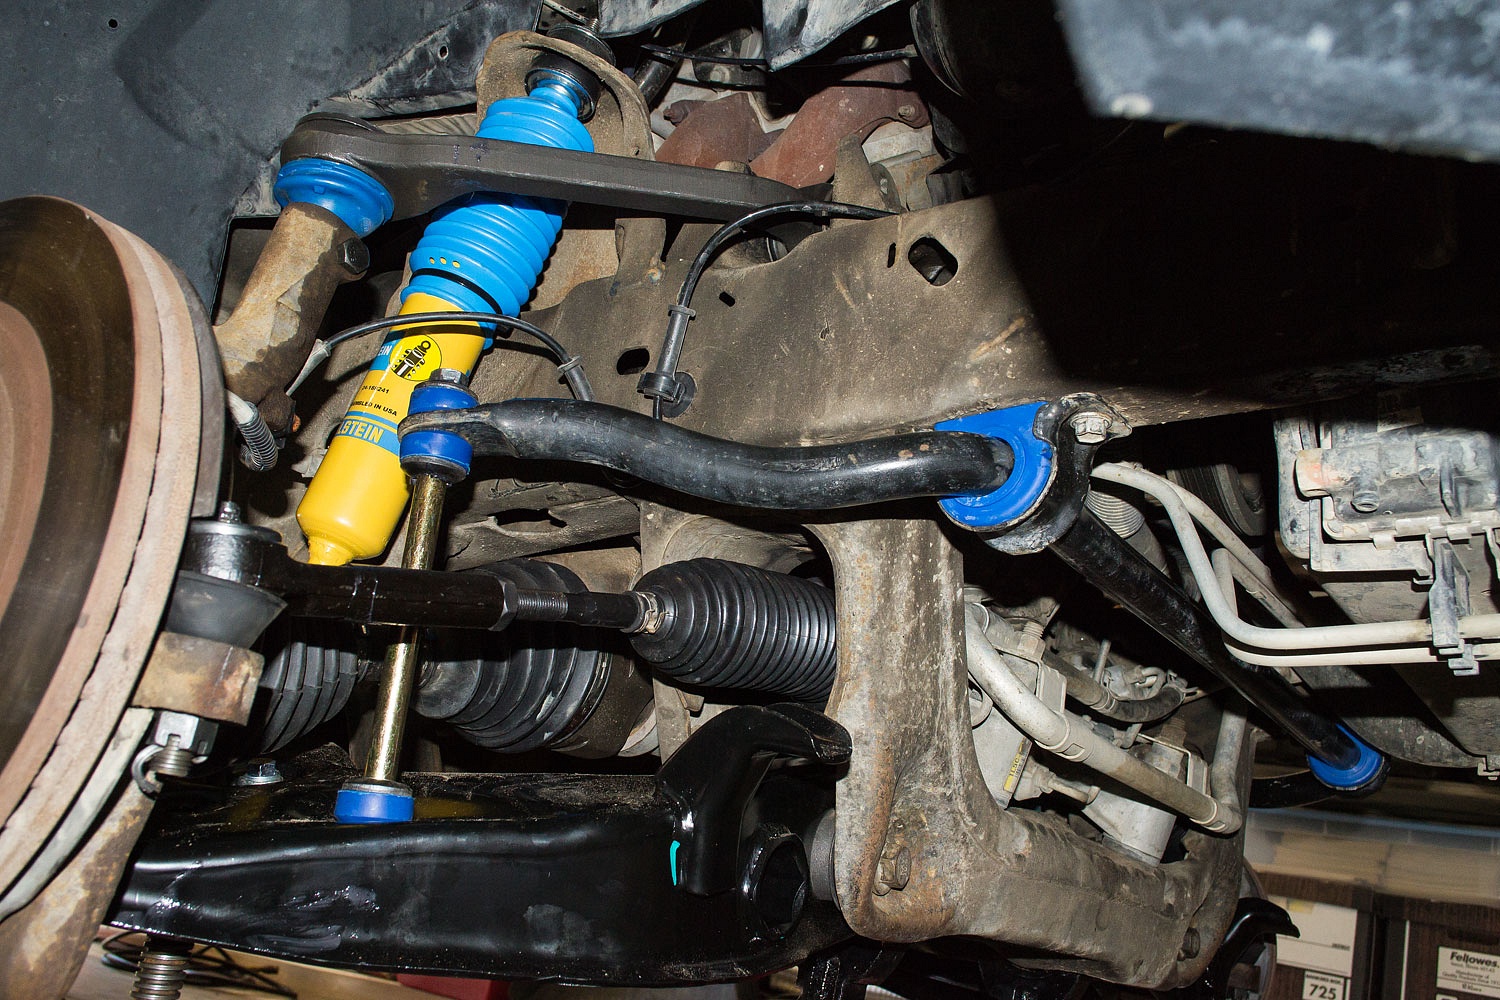
Here is the right side reassembled except for the sway bar and torsion bars.
And here is the sway bar with new bushings and end links installed.
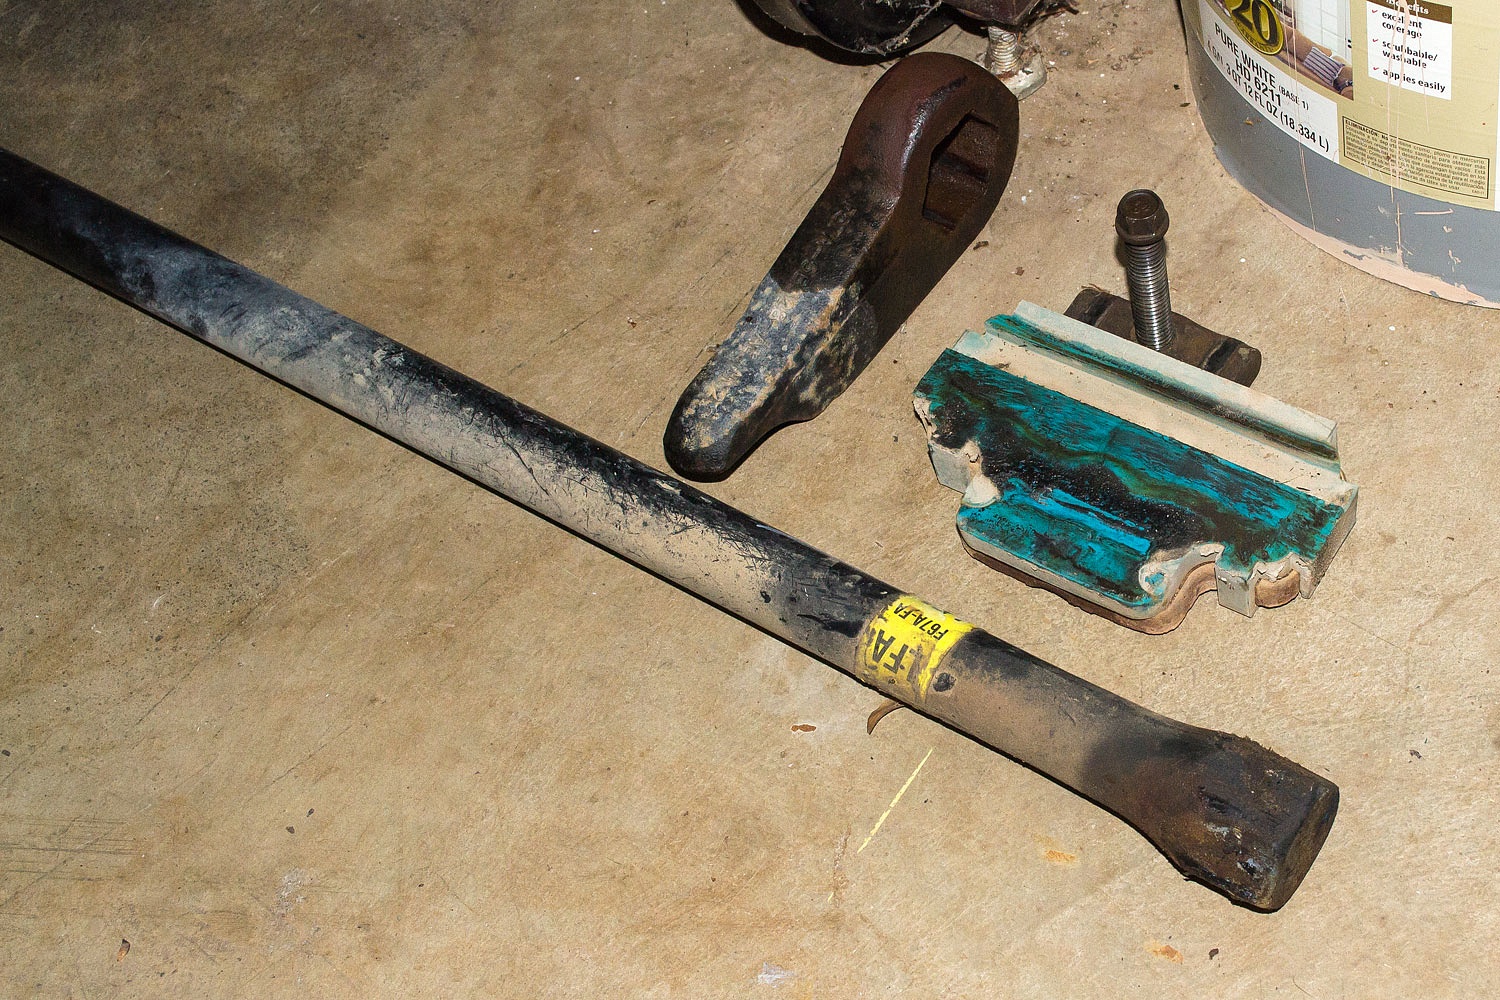
My 2003 shop manual stresses replacing the torsion bar adjustment bolts as they are treated with dry thread lock. I imagine you never want these to loosen up and drop out. I could only get these through Ford. The shocks are Bilstein, the same that came OE on the Level II Ranger 4x4 model. All other parts were Napa premium grade suspension parts. The Napa store is a mile away in our small town and I've always had good luck with their products.
I torqued all bolts to specs found in my shop manual. The control arm bushings bolts were torqued after the truck was back to normal ride height with the tires on and the truck off the jack stands.
I found two additional issues during disassembly. The inner tie rod on the right side was badly worn and the sway bar bushings on the end links were hard. I expect that the occasional bang was from the sway bar when under unequal tension.
Total cost of parts was around $1100. Well worth it. The alignment shop is also a mile away. They inspected our work, all was good, and aligned it. We are good to go with a brand new front suspension.
We'd both much rather travel then work on the truck but we also want this stuff done right, be well aware how everything works, and have no surprises.
Here's to Mother's Day from a couple of senior citizen orphans.


Front End Rebuild on our Ford Ranger
#11

-

- Members
- 2,826 posts
Ouch, that stings!
- LocationCarmel, Indiana
Posted 25 May 2018 - 08:45 PM
#12
-

- Members
- 1,529 posts
Lost again
- LocationNorth Carolina
Posted 25 May 2018 - 09:19 PM
It's very satisfying completing a project like this and knowing it's done right.
Eddie
KO4CPL
Travel light. Travel far. Travel safe.
#13
-
- Site Team
- 15,344 posts
Belay On
- LocationSierra Nevada Range
Posted 26 May 2018 - 01:55 AM
Nice work Ski.
It's very satisfying completing a project like this and knowing it's done right.
Thanks all for your kind comments. Update - we got to thinking last evening that we hadn't driven the truck more than a mile after the alignment. It occurred to us, to be on the safe side, we ought to go for a drive before loading the truck up and heading out on an adventure. Off we went on a drive. It feels soooooooooo good, so smooth, and straight down the road. We are very pleased with the success of the little project. Now when can we load up the truck & camper and take off?

2003 Ford Ranger FX4 Level II 2013 ATC Bobcat SE "And in the end, it's not the years in your life that count. It's the life in your years."- Abraham Lincoln http://ski3pin.blogspot.com/
#14
-

- Members
-

- 81 posts
Advanced Member
- LocationTucson
Posted 09 June 2018 - 03:06 PM
Hi ski3pin
I am curious that you replaced the inner tie rod ends and not the rack and pinion. Most new racks come with inner tie rod ends, and you did replace almost all the other parts. I have a 98 Ranger 195,000 miles and it still has most of the original parts except one upper ball joint and sway bar bushings. I am just impressed that those axles and bearings can last that long with no service and the punishment they take. There is a good front end man here in Tucson, Double D Alignment.
#15
-
- Site Team
- 15,344 posts
Belay On
- LocationSierra Nevada Range
Posted 23 July 2018 - 09:02 PM
"The axle shafts just pull out with care not to damage the oil seal on the axle housing."
An update on the repair. Within a week the outer axle seal on the left side leaked. I noticed it as we backed out to leave on a trip - isn't this always the case?
We went to work. Napa got a seal for us. We disassembled the left side and pulled the CV axle shaft. The seal is not fun to remove or replace. We test drove and no leak. The leak developed on the trip. The Lady was watching it like a hawk and was not pleased to see it leaking.
Back home, I enlisted the aid of the gear shop that does our auto trans maintenance. They put in another seal (Napa) and it leaked. We dug deeper and found the inner bearing worn along with the smooth bearing race on the inner axle. Also, the C clip that that holds the CV outer axle to the inner axle was worn enough to allow a bit of movement to the CV axle. I also sourced out an OEM Ford outer axle seal. It turned out to be easier to install and a better quality seal. We replaced the inner axle with a new Ford part. The inner bearing was difficult to find as there was no Ford part listed or even pictured in the diagram. We located the proper replacement by searching Dana 35 parts.
The axle seal leak has been fixed.
Note - use OEM Ford axle seals.
We rotated the tires Sunday morning and did a full on inspection of the front suspension. I was surprised to see one outer tie rod locking nut backed off - easily tightened - but everything else looks great. Thus far we have well over 1000 mikes on the rebuild.
2003 Ford Ranger FX4 Level II 2013 ATC Bobcat SE "And in the end, it's not the years in your life that count. It's the life in your years."- Abraham Lincoln http://ski3pin.blogspot.com/
#16
-
- Site Team
- 15,344 posts
Belay On
- LocationSierra Nevada Range
Posted 23 July 2018 - 09:07 PM
Doc, thanks for the comment. Since the steering feels tight and no issues, I didn't think about replacing the rack and pinion. Yes, I am very pleased with how well my original suspension parts have performed and lasted. We use our truck.
Hi ski3pin
I am curious that you replaced the inner tie rod ends and not the rack and pinion. Most new racks come with inner tie rod ends, and you did replace almost all the other parts. I have a 98 Ranger 195,000 miles and it still has most of the original parts except one upper ball joint and sway bar bushings. I am just impressed that those axles and bearings can last that long with no service and the punishment they take. There is a good front end man here in Tucson, Double D Alignment.
2003 Ford Ranger FX4 Level II 2013 ATC Bobcat SE "And in the end, it's not the years in your life that count. It's the life in your years."- Abraham Lincoln http://ski3pin.blogspot.com/
#17
-
- Site Team
- 15,344 posts
Belay On
- LocationSierra Nevada Range
Posted 23 July 2018 - 09:10 PM
FWIW, before our last Thanksgiving trip I replaced the sway bar end links on my old 2006 Tundra as the bushings were shot. I used Napa premium parts (I recognize the blue bushings), anyway the bushings ended up shredded after that one trip. I ended up installing OEM bushings over the new end links, easy enough, and problem solved. Hope you have better luck, I'm sure you will be closely monitoring everything on your next trip.
On our inspection Sunday. I did notice wear on the new blue sway bar bar end link bushings. I agree they look soft. I am searching out OEM replacements. Thanks for the tip.
2003 Ford Ranger FX4 Level II 2013 ATC Bobcat SE "And in the end, it's not the years in your life that count. It's the life in your years."- Abraham Lincoln http://ski3pin.blogspot.com/
#18
-
- Members
- 2,362 posts
King Taco
- LocationOxnard, CA.
Posted 24 July 2018 - 06:16 PM
Glad you caught it early. I sure miss quality American made auto parts.
Sunman2003 Four Wheel Camper -Hawk
2023 All Terrain Camper - Panther 2006 Toyota Tundra Double Cab Limited 4WD
2017 Toyota Tundra Double Cab Limited 4WD
#19
-
- Members
-
- 81 posts
Advanced Member
- LocationTucson
Posted 20 July 2023 - 09:28 PM
HI Ski3pin
I'll respond here to your post about the mileage mark you guys hit and the 4wheel trouble. I have a 98 Ranger, and it has now got 230,000 on it. Lately I've had a few struggles with the 4wheel drive mechanism. Over all it has worked very well and I have no complaints, but it became sluggish about coming out of 4wheel. I did install manual hubs because that way when it was slow releasing, I could insure that the hubs were free and only the drive shaft and front differential spun and the wheels were free. My set up is a little different than yours, mine uses vacuum to engage the hubs, and again it has worked mostly trouble free.
I have the pleasure of living in the same town as Lawnmowerman (Russell Hughes). We actually worked at the same time for the school district here and he's helped me numerous times with mechanical problems. Here is a link to a man he turned me on to:
Russell really likes him. My four wheel dash lights are now blinking on and off, usually six times per blink cycle. My truck has two fuses that control aspects of the GEM (Generic Electronic Module), both are 7.5 amp fuses. The GEM, sometimes called body control module, controls lots of stuff; just about everything not engine related. It is no longer available for mine, and probably not for yours though it is said they can be 'reprogrammed' should they fail. Pulling out one or both of the two 7.5 amp fuses usually will reset the GEM and 4wheel drive will function. I am seriously considering disconnecting the 4 wheel switch on the dash and installing a separate/new switch to control the electricity to the motor on the transfer case.
Do have a look at the link above, and best wishes. when I look at the post after 'posting' it the link doesn't show up, maybe you can PM me if it isn't there, I think it would be worth your while to see it.
Edited by dr.tucson, 20 July 2023 - 09:36 PM.


1 user(s) are reading this topic
0 members, 1 guests, 0 anonymous users

