Sweet lovin'. Thanks for the pointers.
-------------------------------------------
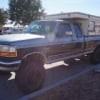
It should probably be pointed out that, due to certain circumstances, almost the entirety of this project takes place in a parking lot, with limited tools and space. Storage of materials consists of the truck cab and camper itself. It isn't ideal, but it makes things more interesting and everything is ready at hand on project days.
The overcab was replaced with 3/4' birch ply and the outside was painted before installation. This replacement, and the vents I replaced today, may not have been done to the most professional standards, but they needed to be completed sooner than later in order to keep out the elements. I'm not against going back later and making fixes to a higher standard, but I didn't want to neglect these deficiencies. This thing was pretty much a breezeway when I started.

Edges were caulked and the new overcab was synched in with new hardware.
-------------------------------------------
This is what the roof vents looked like when I began. One vent had broken in transport to TX and the other was more vent than cover.


It looks to me as if the original 14 1/2'X14 1/2" vent openings were later sized down with plates and smaller vents installed into those plates. Pulling off the old silicone, which was still good, and removing the plates and vents was so easy it spooked me. I kept waiting for some serious snag.

In come a brace of Heng's universal roof vents.

They popped right in without much difficulty. A lot of the previous screw holes were close enough to count. As for those that didn't, with enough pressure, any screw can become a self tapping screw! After screwing them down they got a liberal, if not precise application of silicone. The underside of the vents will be installed later when I've decided how to work out the interior roof. Much of that will probably be replaced. For now, no more venting unless I open one on purpose.
The vents stick up a bit further than the old pair, but that doesn't bother me. With time, there's probably going to be a bunch of other stuff up here as well. And, again, they just needed to get put in place. They can tag out at a later date if I want them to do so.


-------------------------------------------
Excuse the mess, but here's an idea of the original interior layout for anyone interested.


-------------------------------------------
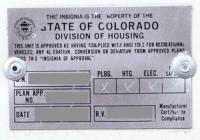
The ID/info plate.

-------------------------------------------
Unfortunately the lift panels are shot to crud and will need to be replaced. I think I've settled on the conduit lifters and some external gas struts. After the fiasco of having to finish my plywood cuts with a wood chisel due to the nature of reciprocating saw precision, I think it best to not try to fabricate the original style wood lifters with the tools available.
In the meantime, I picked up a couple of these bad boys for holding/lifting the roof up when I need to do interior work. I've seen them at Lowe's and Cabela's for about 25 bucks a pop. They ratchet up very easily and might be an economical solution for the strength or height impaired, both financially and with space.

-------------------------------------------
As you can probably tell, there's a lot of work that needs to be done on this old Keystone. In the end it should be worth the trouble and I've actually been enjoying the process so far. It's been too long since I've had a good project to use my hands on for any length of time. Already this has been both educational and rewarding.
So, the things I want to accomplish, in no particular order:
Fix the door. It came apart on me it's held together with an unusual use of spare hardware that was in my toolbox for no obvious reason. Shouldn't be terribly difficult to rebuild the frame and insulate.
Remove the interior paneling and replace the insulation with 1' foam board. Pretty strait forward, but the new paneling will have to wait until I settle on the redesign of the interior layout. There's a lot of space to utilize and I want to be efficient with that space. No rushing this department. This also ties into the rewiring and the aspects of the project that entails.
Complete replacement of cushions and upholstery. The interior was too long the home of various insects and critters to simply clean up. Something vinyl or the like will likely win out for both cost and ease of cleanup.
Patch the few small perforations in the outside panels. This will probably be fiberglassed from the inside and some form of bondo on the outside. This will take place before painting the exterior to roughly match the color scheme of the truck.
Way down the road, replace the pop up side material. This wont happen for a while, but I've got a local place that gives sewing lessons and I plan to be able to complete this myself by the time I'm ready to drop the cash on materials. For now, patch as necessary.
I will also be removing the original furnace and fridge. If anyone is in the El Paso area and would like to have them, I can hook you up once that portion of the project is reached. I don't know if they have any value, but they are yours if you want them.
The rest is what you might imagine. Layout, new utilities, various steps that will present themselves along the way, whether or not I see them coming ahead of time.
Thanks once again for letting me take part and glean from everyone that has gone before. This is a "budget project" and probably won't be featured on any showroom spreads any time soon, but it's fun, it's for hunting season next year, and I'm enjoying the ride.