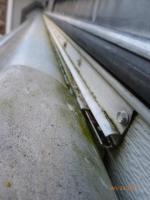


Recently I noticed what looks to be hardware for what I guess is some style of awning. It runs from about the passenger side above the beginning of the overcab all the way to the rear of the camper. There is no hardware like this on the driver's side. Does anyone know what style of awning this would work with or what it is if my guess is way off? I'd like to do some research to see if a new model is made that I can utilize.

Got a lot of material removed from the inside today. LP tanks are going to be an area of research so I can determine if the old tank is worth keeping, or if it's just wiser to replace and start over. Thank you, again, for the direction on that.
Other items to address in the future are:
Patching the small holes in the outside walls. Im thinking about using fiberglass on the inside and them something like bondo on the outside for cosmetics. This will happen before the exterior is repainted.
Removal of the rest of the paneling and fiberglass insulation. Haven't decided what material to use to replace the paneling, but foam board insulation will fit nicely where the fiberglass is now.
Reupholster the cushions and mattress with something that won't hold decades worth of dust and insect parts for whoever tries to breathe in this things once my time with it is over. Should be pretty easy and straightforward.
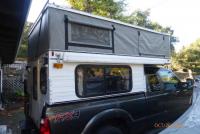
A big project will be replacing the popup wall material. I've got a line on a couple Singer 500As, so hopefully one of those will pan out and I can start practicing sewing and move on to replacement of that material.
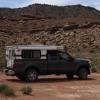
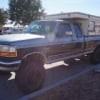
Today made for a lot of visual difference, so it's got me excited. It's this much closer to being in a condition to be camped in. Last weekend I camped out at Elephant Butte reservoir with some friends and kept daydreaming about parking the truck and Keystone right there at the water. Can't wait to have everything in the right place and ready to roll.
Thanks again to everyone who posts information, progress, inspiration, etc. It's a good time to be rebuilding an old FWC with all you guys put out there. Taking a trip to fish out of state for a while, but I'll be back next month and will continue to work and update the progress.
Edited by JDeanP, 20 May 2018 - 12:01 AM.