Jump to content


Photo
* * * * * 2 votes

Brian's 2015 Tacoma and Fleet Build


  • Please log in to reply
20 replies to this topic

#1 brianjwilson

brianjwilson

    Senior Member

  • Members
  • 218 posts
  • LocationPortland Oregon

Posted 19 July 2015 - 05:38 AM

I know there aren't a lot of "build threads" here, but I have had a few requests for information about my truck, battery, solar setup etc. So I'm going to try to summarize the truck and mods I've done so far. You guys here have given me a lot of great ideas and I enjoy looking through the posts here.

My last rig before the truck was a 2012 Jeep Wrangler, heavily modified, with an Ursa Minor J30 camper top. It was a great setup for solo trips, and pretty good for my wife and I. But once we were expecting a little girl, we couldn't figure out how we would camp as a family in the Jeep.
DE3B3F7F-2B71-445A-BC12-49604FBA627B-596

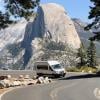
Eventually the Jeep sold, we bought a new house, and along with it a new '15 Tacoma double cab long bed 4x4 at the beginning of March.
889666A7-3D66-44F7-81DD-6E4C8E86F0F7.jpg

I have had full sized trucks on the past and didn't care for another right now. A Tacoma isn't going to fit on the same Jeep trails, but it will get me further than a full size truck, and fit in the garage with a camper. After picking up the truck I placed an order for a new fleet with Jeff at American RV in Tigard, and had the toyota dealership install my first mod. The TRD supercharger.
64BB68ED-0D07-414E-BBF5-F83EA5977092.jpg

Next was a set of Husky x-act fit floor mats and window tint. Then a large suspension order, though it didn't arrive all at once. The goal was to lift a couple inches, gain some extra travel, adjustable height and dampening, and better performance off road and extended washboard roads etc. Up front I went with Icon extended travel 2.5" coilovers with reseviors and adjustable compression clickers, tubular upper control arms with uni balls, and "super bumps" which are taller softer bump stops from wheelers offroad. I gained 1.5" of down travel, so I set the lift height to 2.5" over stock, leaving 3" of droop from static ride height.
0313F1CA-0689-42D8-A51D-24C8C95138A8.jpg

In the rear I started with old man emu leaf springs, all pro u bolt flip kit, and wheelers super bumps in place of the rear bump stops. Weeks later, my custom Icons arrived for the rear. They are 2.5" with reseviors and adjustable compression valving, longer than standard (10.5" travel), and valved 25% firmer than standard. Along with the longer shocks, I installed longer stainless steel brake lines. However I found that the large overload on the leaf spring was limiting compression, and I wasn't even able to hit the bump stops or use the last few inches of shock travel. I decided to disassemble the leaf springs and remove the upper overload, and install the extra lead I had ordered from OME. This would result in a higher spring rate but should allow more overall travel. Here is the final outcome. The empty ride is a little firm but not bad. It does allow more compression and feels much smoother over large bumps.
8D77BDF5-2934-4963-A553-1E16B9AA7A4A.jpg

Still, I expected that this wouldn't carry the full weight of a loaded fleet well. Along with those allpro u bolt flip plates, I ordered their timbren bump stop setup. Allpro uses a timbren mount bolted to the u bolt plate, but it is a shorter timbren with 1000lb capacity. I looked online and the normal Tacoma kit comes with a short timbren, but 3000lb capacity timbrens. The short timbrens also only compressed a max of 2.25" or so and are usually a harder rubber. I decided on the A535-55 timbren (listed 1800lb cap), it is taller and softer and compresses over 3". My thought was that these would provide a softer ride, and the springs with the extra leaf would provide great combination, without sacrificing travel. Best of all, with these u bolt plates, I can replace the timbrens with the other bump stops in about 5 minutes. No messing with air lines and bags and fittings. One other huge negative of air bags, for me, is that the bags for Tacomas don't have bump stops. So they can be harsh or bottom out in a bad way. Here is a test fit with the timbren and a 1/2" spacer. Though after installing the camper I installed another 3/8" spacer, soon to be replaced with one 1" spacer.
34006FDB-C816-4331-8928-F23C3E058D25_2.j


To be continued...

Edited by brianjwilson, 19 July 2015 - 08:03 AM.

  • 0

#2 brianjwilson

brianjwilson

    Senior Member

  • Members
  • 218 posts
  • LocationPortland Oregon

Posted 19 July 2015 - 05:48 AM

I'm skipping ahead a bit, but here is the timbren with the camper mounted, before the additional spacer. The timbren is only compressed about 3/8" and offers a great ride in combination with the springs and shocks. Minimal body roll, no harshness, overall pretty smooth and complaint.
08145FFE-52E6-4590-935F-0EAE0B1E0F67.jpg

I wondered again if they might be restrictive to overall travel though. Lots of large speed bumps felt good and smooth, but the shock shafts only showed that they were compressing another 1" or 1.5". Later on I made a run out to the mountains to be sure this wasn't an issue. Doesn't seem to be. ;)
7EFFAB81-CB06-4928-9869-77648DA630AD.jpg
82368191-FCA8-4D50-A7AC-F382E85A34F4_1.j

You can see the timbren smashed up pretty well, but it stopped the shock about 1" from bottoming out, and returned to normal shape with no problems. The other side is of course free to droop, unlike air bags. Yes the u bolts could be trimmed now that I've decided to leave the spring pack as is.
B30D0262-133B-42C3-96C2-7AF964D743EA_1.j

Stepping back a bit. In the above photos you can see rock sliders installed. These are allpro's bolt on heavy duty rock sliders. Not that I intend to drag this truck over rocks the way I did the jeep, but they are invaluable protection for the rocker panels and doors. Additionally they are a good solid lifting point for a hi lift jack. These particular sliders have a large L shaped portion that hugs the Tacoma frame. Several open holes in the frame are utilized for mounting, and four additional holes are drilled in the bottom of each slider/frame, with countersunk bolts, for additional strength. After install I could actually feel a difference in the truck driving down the road, the chassis actually felt stiffer.
55D66B66-406B-4FE0-A54D-A6B5CC5778C3.jpg

I had to come back and add in wheels and tires, somehow I skipped as well. I wanted to run tall and skinny tires on this truck, but with a little wider stance than the factory wheels. I didn't want anything too aggressive or flashy, or have issues with rubbing. Finally I decided on FJ cruiser trail team 16x7.5" wheels with a little less backspacing than the originals. For tires I went with 255/85r16 (33x10") Cooper St Maxx tires, basically an aggressive all terrain. No rubbing, no tires outside the wheel wells, and the full size spare fits underneath like a glove. The tires are very stiff, but have a very strong sidewall. They are also surprisingly quiet given the deep tread.
417585BF-4E18-48C3-9EAB-B3F459CE3251.jpg
B70AEB58-8796-4BE1-ACA3-299E8F3E13BE.jpg
B66E5D9E-D2E9-42DA-AF61-889B37979440.jpg

Edited by brianjwilson, 19 July 2015 - 06:48 AM.

  • 0

#3 brianjwilson

brianjwilson

    Senior Member

  • Members
  • 218 posts
  • LocationPortland Oregon

Posted 19 July 2015 - 06:14 AM

The next big upgrade was battery and electrical. While I had a plan for lots of solar power, I wanted to be sure I could provide a good bulk charge from the alternator while driving, and good supplement during cold dark winter months. I've read that the standard four wheel camper isolator and wiring wasn't capable of providing a good charge via the alternator. Additionally, in the fleet forward dinette, the batteries are mounted in the far rear corner. I didn't like the idea of adding 100lb+ of batteries 3-4' behind the axle.
I ordered 3 new group 34 interstate AGM batteries. 1 was placed under the hood as a starter battery, the other two went behind the passenger rear seat as camper batteries. Separating the two banks, is a blue sea 7622 automatic charging relay with manual override switch, and a bunch of 2 gauge wire for minimal voltage loss. Oh and blue sea circuit breakers and battery switches. The battery location did a few things for me. Brought weight several feet forward, balanced the left to right center of gravity better (without camper), provided a shorter run of wire from the alternator, freed up storage in the camper, and used a space in the truck that is nearly impossible to access with a child's convertible seat in place.
D6904DC3-A927-47B4-81B1-D96D59326650.jpg

On the rear wall, the wire from the charge relay comes into the switch on the right, then the circuit breaker. Ordinarily, the switch would be off. And the power passes through the circuit breaker. Since the ACR is capable of carrying 500 continuous amps, the switch is wired so that it can be used as a circuit breaker bypass. Turn the switch on, kick the circuit breaker off, and I can jump start the start battery if needed.
5466B078-4B1C-49CF-8211-9A4BCF4F4ABC_1.j

The manual override switch in the cab. In auto, the charge relay senses voltage from both banks. It will automatically connect or disconnect based on voltage. When the camper battery starts to drain overnight, eventually the voltage gets low enough and it will isolate the batteries. There is also a start isolation wire that will disconnect the banks as soon as the starter receives power (in auto mode), to prevent any voltage dips or spikes and to prevent draining the aux battery. Once anything is charging over a certain voltage (solar, alternator, converter) the relay will reconnect the batteries and charge all 3 simultaneously.
6B787A21-651D-46C1-AE9D-481A3D50D32A.jpg

2 gauge wire goes to an Anderson power pole connector in the bed. The camper also now has a powerpole connector, and 2 gauge running to a battery switch and remote mount studs in the battery compartment. This is where the camper power and solar are connected. So far this setup is working great with no intervention and minimal voltage loss during charging. All 3 batteries are being conditioned by the MPPT solar controller.
557B8DA0-5407-4023-9FCE-A8B8B0BDA585_1.j
  • 0

#4 brianjwilson

brianjwilson

    Senior Member

  • Members
  • 218 posts
  • LocationPortland Oregon

Posted 19 July 2015 - 06:41 AM

While the supercharger definitely helps, the tall tires and camper take their toll on the drivetrain. I was nervously watching trans temp on hot days. To help alleviate this, I ordered a 3rd member and clamshell (rear and front differentials) from east coast gear supply. Both setup with 4.56 gearing and ARB air lockers. I ordered in time to take advantage of an ARB promo offering a free CMKA12 compressor. Also ordered the air up kit, inflator, and deflator kits.
A16D3B30-7D14-4160-940B-E0056A890AEE.jpg

Installing the rear third member was cake. A couple hours by myself and I was test driving. The front was a little more involved. I spent the entire next day working by myself in the garage, though I did take a break to order a big 24" fan. Of course I could probably do it again in 4-6 hours, having done it once. Seems like I always have a couple small hang ups where I could use another hand or two. Finally I finished late at night and put a few more miles on the truck. Overall drivability and accelerating was hugely improved. The truck didn't feel nearly as labored, and did not need to downshift so frequently. At 60, the engine is turning just a hair over 2000rpm, slightly higher than stock. I think I'll lose a little mileage on the highway, and gain some in town or off road.

The following day I tackled the compressor install, electrical and air plumbing. With the supercharger, there really wasn't much space left under the hood. I spent a lot of time rotating the tank on the compressor and trying to jam it into different spaces. Finally I found that I could fit it (just barely) behind the passenger head light. Not as much airflow as I would like but it works. Barely. I likely would have saved a lot of time removing the grill and head light for the install. I drilled 3 holes in the fender and used 1 existing hole, with the backing plate under the fender. The compressor with everything mounted...
41555138-8BB0-4620-8580-3CAB41F0A482.jpg

And finally jammed into it's home and bolted down, then wired up.
8E4E5B61-8232-4FD6-93AB-780F795E07FD.jpg
F594B438-4126-4AEB-B910-6FA3BC9D35FF.jpg

If you've used an ARB product, you know the big silly carling switches they come with. I wanted a cleaner, factory looking install. I found toyota factory style switches from aironboard.com . My Tacoma has 6 switch holes on the left side, only 3 were used. 1 on the top row and 2 on the bottom. With a little modification I was able to locate them all on the bottom. This left 3 in a row for my new switches.
2463E8C5-6537-4273-A792-2C5EE53C437C.jpg

They are back lit with the factory dash lights. The lettering lights up with the dash lights, and the top lights up when switched on. Here they are, all on. Note the compressor switch is the wrong color and a replacement is on the way.
B174B687-2372-47F3-99F7-5899C04261FF.jpg
  • 0

#5 brianjwilson

brianjwilson

    Senior Member

  • Members
  • 218 posts
  • LocationPortland Oregon

Posted 19 July 2015 - 07:15 AM

Finally onto the solar. What I really wanted was a setup similar to Jonathan Hanson's roof. FWC centered his roof vents, and he ran to 100w unisolar (I believe) panels on each side. It looked like this would be possible with Yakima tracks too. However FWC is unwilling to do custom work, so I had to have the offset roof vents. This leaves limited space for lightweight low profile panels. I decided to follow suite here and use renology panels. After looking at measurements from DonC, I determined that I could fit 300 watts of solar, run Yakima racks with a box on the drivers side and still not shade the panels when the sun was at least 40-45% above the horizon, it would just take careful placement. I order 2x 100 watt panels and 2x 50 watt panels. I also ordered mc4 connectors, 50' of 10 gauge solar wire, and a combiner box from amsolar. Ideally I would cut the connectors off of the panels for a clean install, but it voids the warranty from renology. After realizing I was going to be using a few mc4 branch connectors to deal with the short leads, I decided not to use the combiner box. Rather just neck down the wires with branch connectors. I'm still not sure I love the wiring, but right now it works. I can modify it later.

The original plan was to use 3m 4000 series adhesive as most of you did. But after seeing issues with panels, I decided to try Velcro at the last minute. I bought 3 packages of industrial strength Velcro (velcro brand), each 2" wide X 15' long. After marking the roof with each panel location, I lined each panel with Velcro around the perimeter, with a strip down the middle of the 100 watt panels. I left 1/2" free on the front edge of the forward panel. Here, I used a bead of 3m 4000 series adhesive to prevent wind from slipping under the panel as it is very close to the front edge. The yakima cross bars, should I use them, would run between the two 50 watt panels, and one between the 50 watt and 100 watt panel. Spacing is about 30" as required by most roof top boxes. The spacing between the drivers edge and the roof vent is about 23", and the Yakima rocketbox 11 is 24" wide. However this also leaves a good spot for snowboard racks or anything else similar. Also notice that the cross bars will not block the vents.
2DE80852-96CD-4EB5-8655-7706BDF60CB9.jpg

7D224EB8-0E66-49E9-841F-53FF45D770CF.jpg

I used adhesive backed cables tie mounts to secure the wire, with some 3m sealant around the adhesive mounts, under the branch connectors, and on a few select pieces of wire. I may run eternabond or similar over spots to prevent branches from snagging anything. After a week and a half everything is very secure. It was in the 90s most days. I left the truck outside and drove it quite a bit each day. As is, I have no concern about the Velcro or glue. Time will tell how it handles the heat, cold, rain and dirt. Replacing a panel would be quick work though now with no damage to the camper.

I decided to use blue sky's 3000i mppt controller. I like mppt as it handles partial shading and low light very well. With the money I have into solar panels and batteries, I didn't see a reason to cheap out on a PWM controller. The 3000i is digital and programmable. You can select desired voltage and time for absorption, and voltage for float. You can enable equalize as well (I will not with agm). The display also reads voltage, amps in, amps out, amp/hr counter among other things. I wanted to mount the controller below the sink, in the unused space there. However four wheel did a great job of sealing up the panels in the wiring area and I didn't feel like taking the time to reroute everything. I mounted the controller in the battery compartment door. A bonus to this position, I can easily read the display through the window on the rear door.
22105EFC-18AE-4540-AB36-CFF2D4AE55F2.jpg

607C6E42-AF03-40FD-9DFA-AE4C2BD6C72A.jpg

So for I'm very happy with the solar setup. Even on an overcast morning, I start seeing a couple amps charging shortly after the sun is up. Several amps in partial shade, a couple amps when completely shaded but bright out, and up to 15 amps in clear sun, so far.
  • 0

#6 brianjwilson

brianjwilson

    Senior Member

  • Members
  • 218 posts
  • LocationPortland Oregon

Posted 19 July 2015 - 07:56 AM

So far I haven't modified much in the camper. I've slept about 6 nights in it, and used it daily while I was home with my 14 month old daughter. Even on day trips, it is great having a place to feed and change her, clean her up after playing outside, put her down for a nap etc. Much easier to contain her when it's just the two of us!

One item I purchased to make setup and tear down quicker, and my my wife more comfortable, was a king size Rv superbag. If you haven't seen it, it's essentially a large two person sleeping bag, with sheets that Velcro inside. One side of the bag is thicker than the other, so you can put it on the top for colder weather, or bottom for warmer weather. It has been great since it feels more like regular bedding and just takes a few seconds to fold the whole thing up, and put it on the dinette seat when closing the top. We don't like the feeling or constraint of most sleeping bags. We do have one oversized two person sleeping bag, but it is extremely warm and bulky, and very difficult to wash. Being able to pull the sheets out of the Rv superbag is a huge bonus. The only downside so far is the price which is a little ridiculous for something I could (but don't want to) put together myself.

We are using a dometic portable toilet, with the smaller tank (our old larger one wouldn't fit in the the storage space. It is secured by Velcro straps that are screwed into the walls of the cabinet. I plan to mount some firm foam above it to prevent it from bouncing around at all.

Once I send my differentials back and get my core charge returned, I think I'm going to mount an ARB awning on the passenger side. Probably just a 6' awning so I don't have to relocate the roof latch. I like the ARB awnings because they are light, simple and cheap. They also sell complete screen rooms or tent rooms for the awning that are reasonably placed.

Another important thing I need to figure out, is where to carry a couple of rotorpax gas containers. The range on the Tacoma is pathetic with the small fuel tank. I emailed Brenda for pictures or drawings of the rear wall and side wall frames, for mounting items, but never heard back.

After another 10 days at work, I'll have two weeks at home, two weeks back at work, then my six week vacation starts. So I have just a little time at home to iron out a lot of additional details before my vacation. It is tough to get much done with a 14 month old at your side all day!

Here are few more random pictures...
F5DD6B32-A9E8-4B48-9689-C5E1AE95CD2B.jpg
AE05B615-C97C-4FCE-BD31-F44DA7973CAB.jpg
91E40984-8981-4FF8-B0A5-C8AE4A87902D_1.j
A9E37091-CF87-4C15-9CFD-54ABDA672943_2.j
F3639C63-0B5B-43D5-8F4C-B49B7A894308_2.j
DA8D9F52-FB27-4899-A0FA-227B299E41EC_2.j
7743AFC2-5806-4DD3-AC63-79B8866D300B.jpg

Edited by brianjwilson, 19 July 2015 - 07:59 AM.

  • 0

#7 Sledawg

Sledawg

    Senior Member

  • Members
  • 127 posts

Posted 19 July 2015 - 01:19 PM

Wow! Nice build. Thanks for taking the time to post. See you out there Wandering!
  • 0
2021 Off Road TACOMA 2013 FWC Fleet
Going Insane Diego!

#8 billharr

billharr

    Senior Member

  • Members
  • 2,825 posts
  • LocationStockton CA

Posted 19 July 2015 - 01:50 PM

Very very nice work.  Thanks for posting.


  • 0

#9 takesiteasy

takesiteasy

    Senior Member

  • Members
  • 2,588 posts
  • LocationMinnesota

Posted 19 July 2015 - 02:46 PM

Nice setup! Thanks for the writeup. That should be a very capable rig for many years of fun family camping and exploring.


  • 0
2011 Tacoma AC TRD
ATC Custom Shell

travelswithrockythedog.blogspot.com

#10 Squatch

Squatch

    Senior Member

  • Members
  • 1,281 posts
  • LocationOn the wrong side of the mountains!

Posted 19 July 2015 - 05:31 PM

Yes thanks for posting. One of my next steps will be sorting out the springs on my Moon Truck build. I may have to mix and match a little as well. The OME springs I have are the same as adding the extra OME leaf to the normal OME HD springs. The pics you posted of the Timbrens was very helpful. I think I will replace the bumpstops in my truck with them as well.


Thanks on the Anderson connector as well. That's exactly what I was looking for.


Edited by Squatch, 19 July 2015 - 05:34 PM.

  • 0


1 user(s) are reading this topic

0 members, 1 guests, 0 anonymous users