Jump to content


Photo
* * * * * 1 votes

DIY Camper Build From Scratch


  • Please log in to reply
85 replies to this topic

#31 Wyo1

Wyo1

    Advanced Member

  • Members
  • PipPipPip
  • 70 posts

Posted 04 April 2018 - 02:52 AM

IMG_4202.JPG IMG_4207.JPG IMG_4208.JPG
  • 0

#32 Wyo1

Wyo1

    Advanced Member

  • Members
  • PipPipPip
  • 70 posts

Posted 04 April 2018 - 02:57 AM

IMG_4176.JPG IMG_4179.JPG IMG_4189.JPG IMG_4186.JPG IMG_4187.JPG IMG_4188.JPG

When it comes time to sew the windows up in the next few days, I’ve opted to do the privacy flap a little different than what I saw Poky and Tim do. I can’t see really why the privacy flap needs to be tucked to the outside with the screen and window vinyl, as the clear window is what keeps the moisture out. So I’m thinking I can sew the bottom of the privacy flap on the inside and all the way across the bottom and it should provide for a nice clean and simple look as well. Hopefully I’m not wrong in my thinking.
  • 0

#33 shellback

shellback

    Senior Member

  • Members
  • 336 posts
  • LocationWagontown,PA

Posted 04 April 2018 - 11:25 AM

Looking good!  


  • 0

#34 Wyo1

Wyo1

    Advanced Member

  • Members
  • PipPipPip
  • 70 posts

Posted 07 April 2018 - 11:48 PM
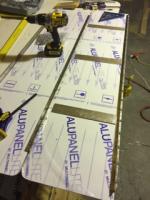
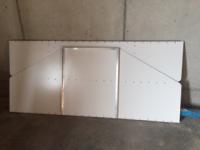
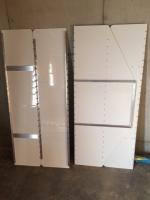
IMG_4212.JPG IMG_4211.JPG IMG_4213.JPG IMG_4214.JPG IMG_4215.JPG

Got the two main sideliner panels with windows sewn up today. Took more time than expected, about 4 hours, and wrestling the large pieces wasn’t pleasant. Overall turned out pretty good, had a little bit of wrinkling happen on the bottom of one of the windows when sewing in the window and privacy flaps. I opted to not tuck the bottom of the privacy flap to the outside and instead sewed it all the way across on the inside and did triple stitches in the corners. It seems to me it will still be just as water tight as the window flap and screen are still tucked to the outside, and provides a better looking finished product on the inside.
A big thanks to my friend Merlin for doing the sewing for me. Go check out their website if you’re into handmade leather goods and hides. After checking out some of his work, I may just have him make me cushion covers out of buffalo hide for the fold over couch, would be unique and considerably more durable than normal upholstery fabric!
www.merlinshideout.com
  • 0

#35 Wyo1

Wyo1

    Advanced Member

  • Members
  • PipPipPip
  • 70 posts

Posted 07 April 2018 - 11:51 PM

IMG_4216.JPG

Another look at the triple stitch on the bottom corner, from the outside.
  • 0

#36 shellback

shellback

    Senior Member

  • Members
  • 336 posts
  • LocationWagontown,PA

Posted 08 April 2018 - 08:33 PM

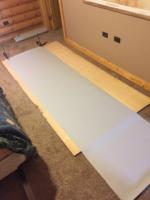
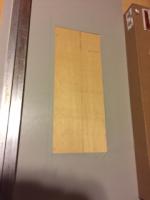
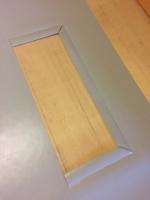
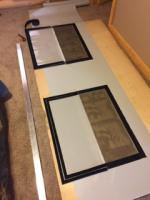
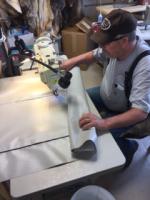
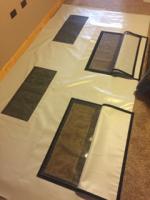
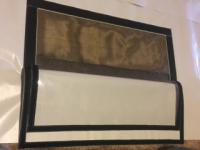
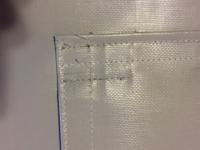
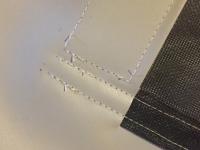
That wrinkling at the bottom was a problem for me also. I actually canned my first 2 panels due to that. I started sewing mine with the screen side up and under the foot of the sewing machine. A friends wife explained the problem was possibly due to the different type materials. She suggested I sew with the screen side down, and that helped a lot. I did get 1 small wrinkle at a corner, but was satisfied overall. I'm pretty sure my original panels were done the way you made yours. I made mine following Poky's plans, with one exception. Where he glued patches in the corners, I glued a strip across the whole bottom. I wasn't taking any chances on leaks. If it ain't damp, it ain't camp! LOL.


  • 0

#37 Wyo1

Wyo1

    Advanced Member

  • Members
  • PipPipPip
  • 70 posts

Posted 12 April 2018 - 02:58 AM

Shellback,
The wrinkling was fairly minimal and only below one window. I’m thinking I’ll be able to fix it somewhat when I install the the sideliner on the camper body. Don’t think it’s worth it to me to sew up another side panel to fix it haha.

On another note, I spent tons of time researching refrigerators of all kinds and pulled the trigger on an Isotherm cruise 65. Am nowhere near ready for a fridge, but West Marine had them on sale and free shipping until the 15th of April. Also found a $15 coupon online to bring it to a final price of $592.99. I think I got a good deal, but I sure hope I made the right decision going with this fridge vs. a 3-way or even a portable ac/dc chest type.
Image1523501906.485409.jpg
  • 0

#38 buckland

buckland

    Senior Member

  • Members
  • 3,080 posts
  • LocationNew England

Posted 12 April 2018 - 10:24 AM

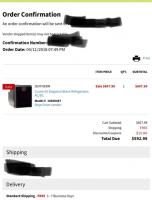
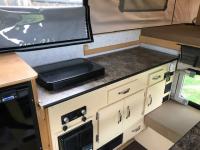
You will not regret it one bit. I installed last year 65L and it is a wonderful fridge. super quiet. I have DC only but it keeps everything cold and uses very little energy. Good choice.


  • 0

2016 Duramax 2.8 Diesel long bed Colorado 4WD with 2011 Eagle

Lordwoodcraft  instagram        Rob
The only people who ever get anyplace interesting are the people who get lost.
Henry David Thoreau
"Work to achieve not to acquire"


#39 buckland

buckland

    Senior Member

  • Members
  • 3,080 posts
  • LocationNew England

Posted 06 May 2018 - 02:00 PM

Last year i installed the DC 65L isotherm and this Spring converted the side couch to a side dinette. Also I removed old counter and replaced so I could move stove top out from under the pull out bed. Coffee in the AM! I won’t put in the sink as we never use it... I will put the pump back on the counter as we use the water. We usually wash plates in a Tupperware tub as I prefer having food smells outside. Just have to make the new cushion covers. IMG_5151.jpg IMG_5153.jpg
  • 0

2016 Duramax 2.8 Diesel long bed Colorado 4WD with 2011 Eagle

Lordwoodcraft  instagram        Rob
The only people who ever get anyplace interesting are the people who get lost.
Henry David Thoreau
"Work to achieve not to acquire"


#40 Wyo1

Wyo1

    Advanced Member

  • Members
  • PipPipPip
  • 70 posts

Posted 12 June 2018 - 02:33 AM

Finally back to making some progress on my camper build project!
Most of the work I had been doing in my unfinished walkout basement. The camper was far enough along that it had to be moved out of the basement to continue on. So with that, I had to build a shed where I could finish building the camper and also provide storage for it until I build a garage in the next year or so. Once the shed was done, I got the main body and sides all welded together to finally have a complete camper body frame! It was so nice to finally see a full camper take shape! With that done, I could start the next step which was siding. The siding is now on, and the necessary openings were cutout using a router and flush cut bit. It’s starting to look pretty good if I say so myself! I’m hoping in the next month or so I’ll have a complete shell!
The official camper shed
IMG_4676.JPG
  • 0


0 user(s) are reading this topic

0 members, 0 guests, 0 anonymous users