Jump to content


Photo
* * * * - 2 votes

Rear Lift Panel Fabrication and Replacement


  • Please log in to reply
15 replies to this topic

#1 rich

rich

    Senior Member

  • Members
  • 463 posts

Posted 27 May 2010 - 10:12 PM

Hi Guys,

I've been meaning to put this up for a while but I haven't had the time but a rainy day while I recover from a tooth extraction seems like a good time to do it ;)

I have now replaced both lift panels in my '89 Fleet. Barko has a thread going right now asking for suggestions on his panel replacement but I didn't want to hi-jack his thread so I figured I'd post the pics and suggestions here. So here we go:

Posted Image

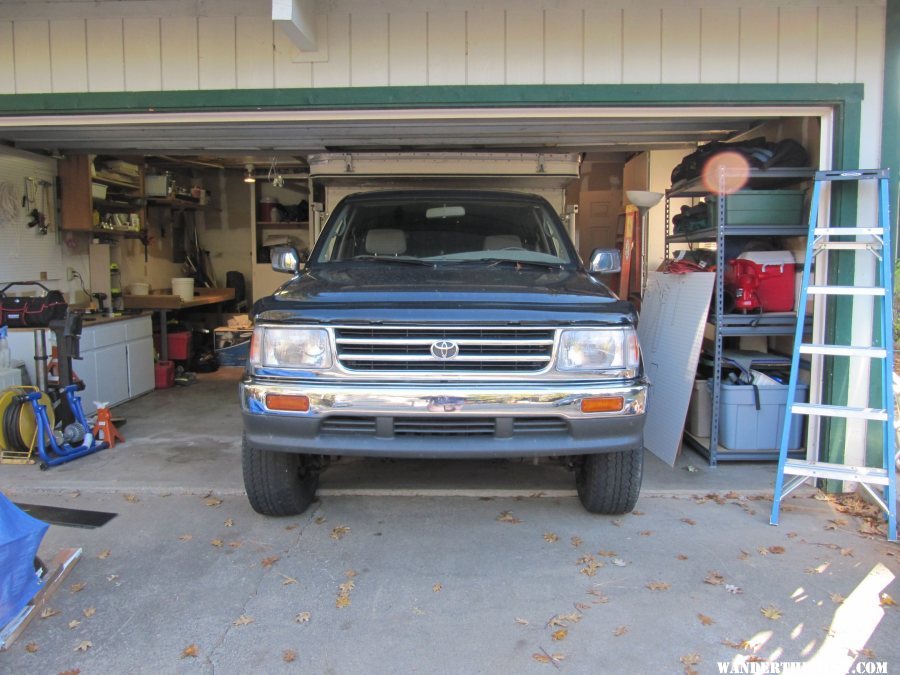
First I had to deflate my tires, load a bunch of cinder blocks in the camper, dismantle and jack up the garage door to get it into my 1950's garage because I hadn't built the trolly yet and didn't have enough time to :(
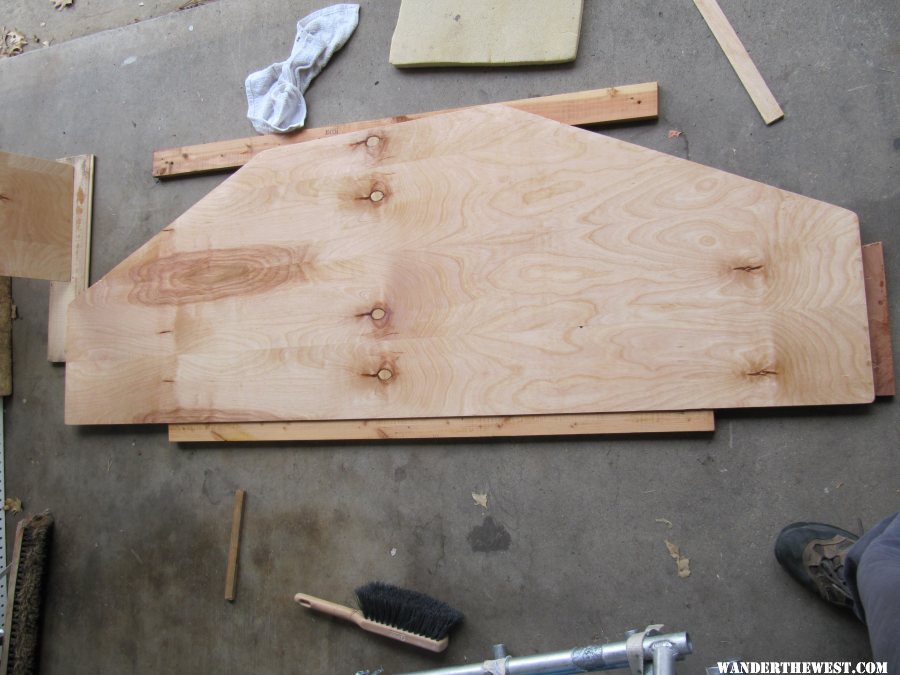
Posted Image

Fit like a glove.

Posted Image

There was only enough room to lift one end of the camper at a time.

Posted Image

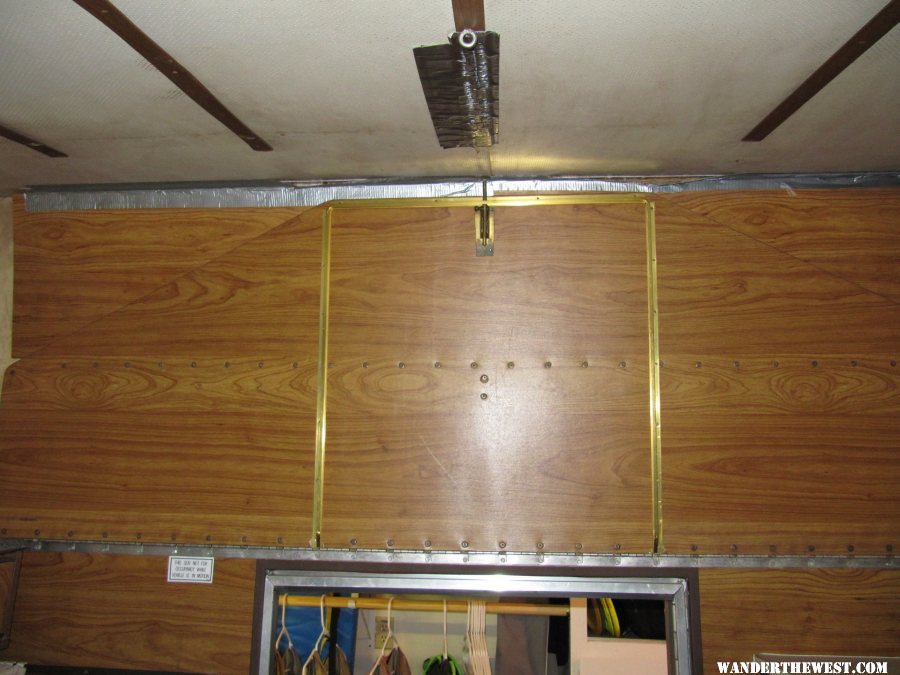
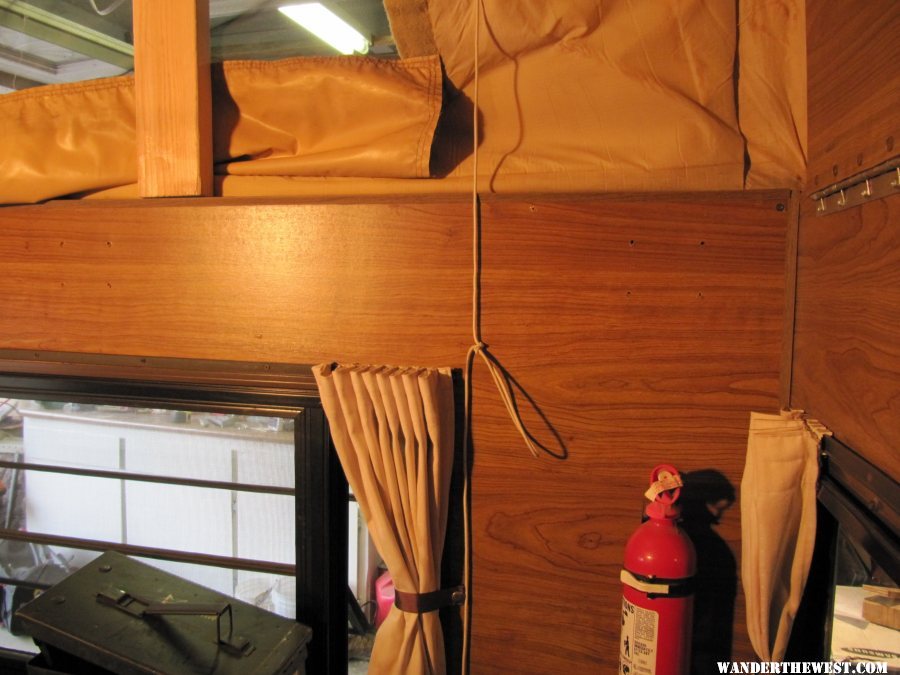
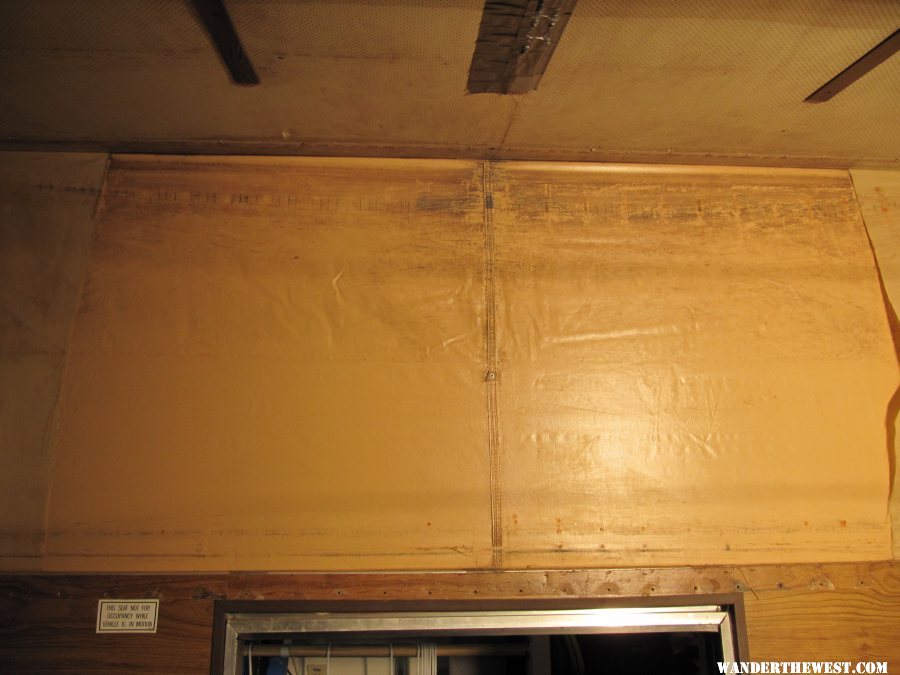
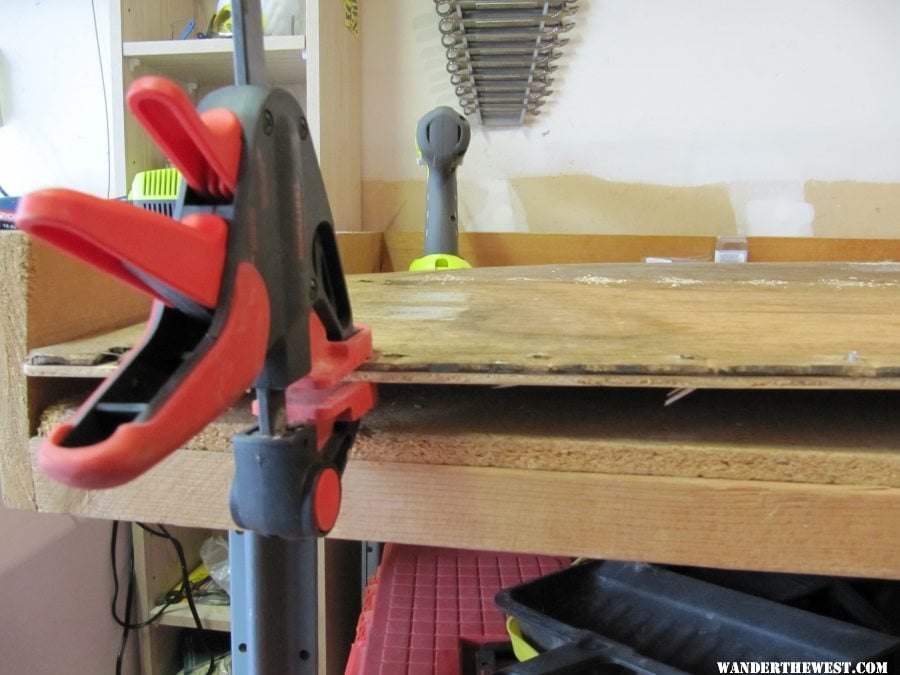
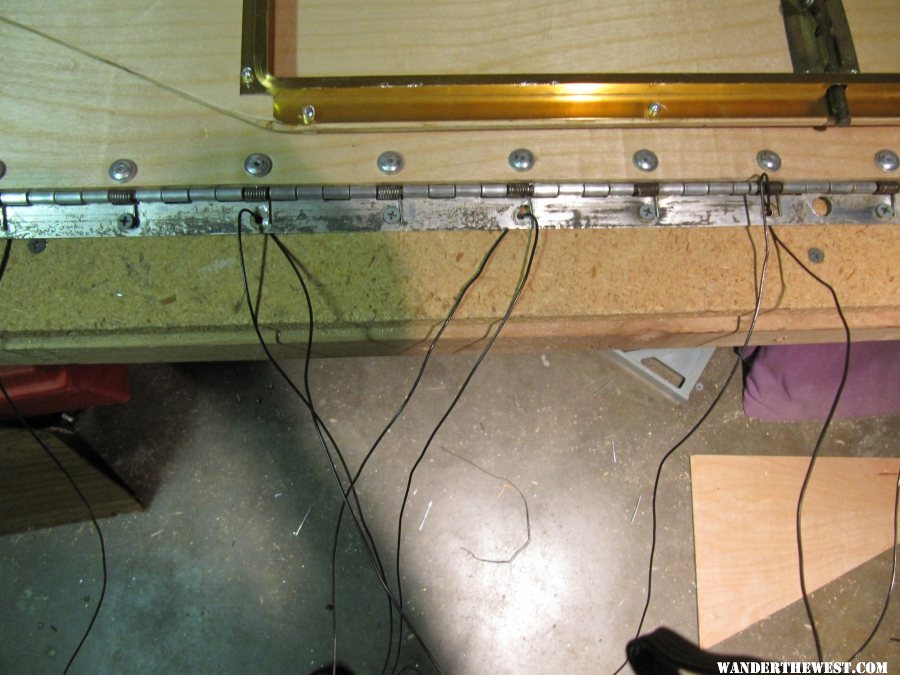
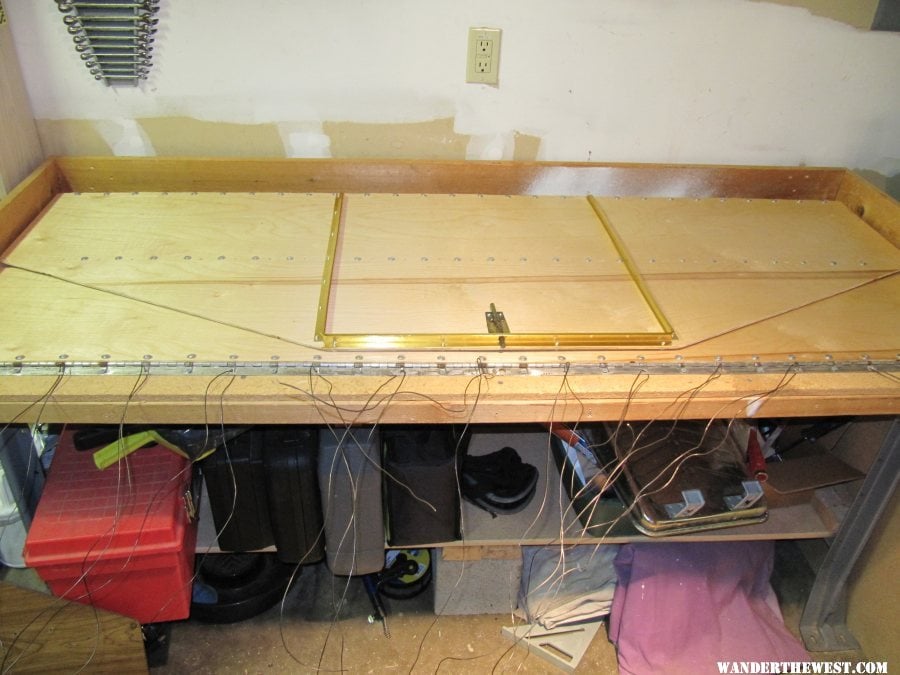
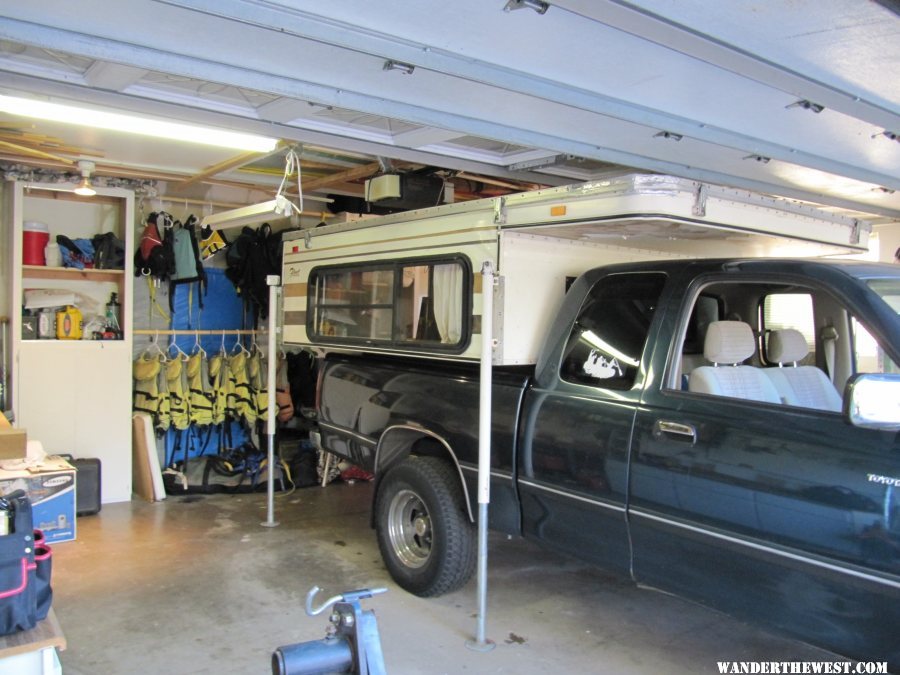
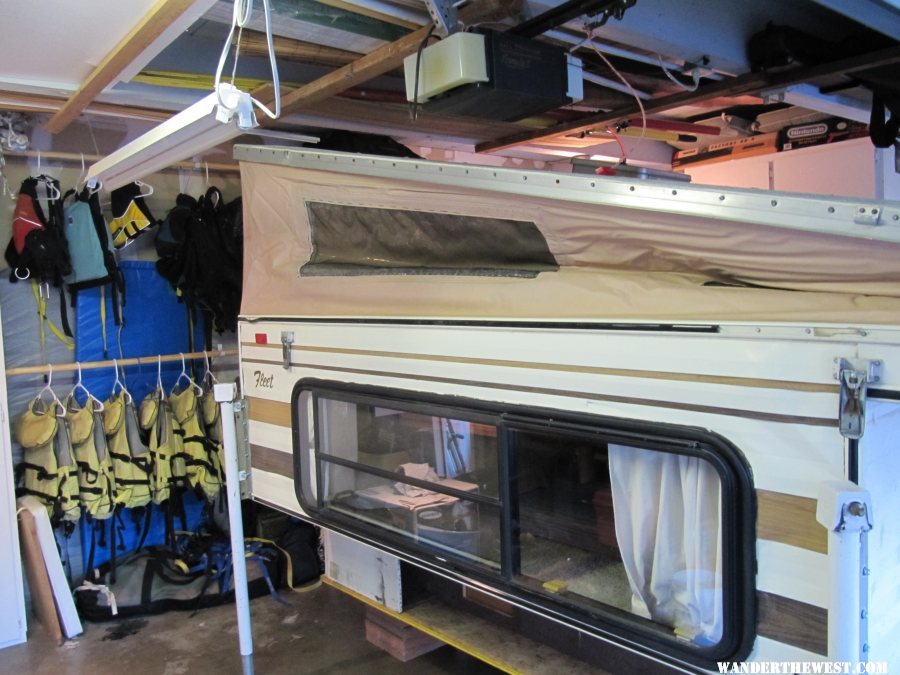
Here's the one to be replaced. Note the duct tape at the ceiling, that is about all that was holding this thing in anymore.

Posted Image

Posted Image

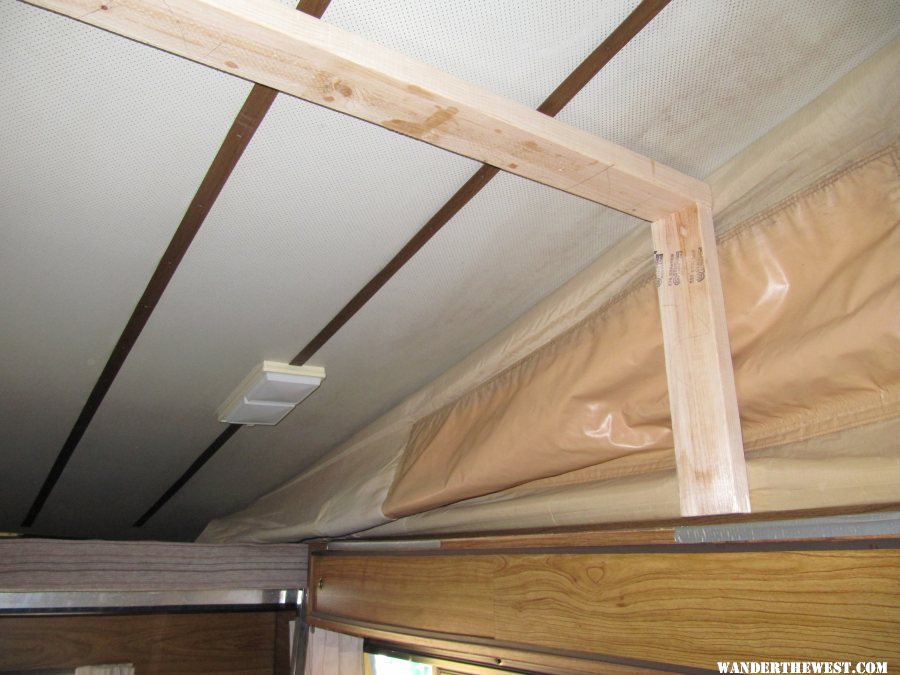
First order of business was to support the roof so that when I took the panel out it didn't come crashing down on me. It is important to get this nice and snug or else fitting your new panel in will be a real bear. I think having only one end up helped me here because I was able to push this support back like a wedge until it was snug and didn't need to be too precise in the measurements of it.
  • 2
Rich 2007 Toyota Tundra Limited with 1989 FWC/ATC Fleet Hybrid fully refurbished

#2 rich

rich

    Senior Member

  • Members
  • 463 posts

Posted 27 May 2010 - 10:29 PM

Posted Image


Posted Image

Next up was to get the long side shelf out of the way so once the panel was free I could remove it easily. There are just 3 wooden blocks with 4 screws a piece in them to take this down. Mine is pretty beat and I plan to rebuild it soon and add some LED lighting to it but that is a project for another time.

Posted Image

The first thing I removed was the brass frame holding the shackle bolt. I am using a punch awl to punch into the rivets then stretching them up, down, right and left to make sure the drill seats in there and doesn't walk on me. Now it is time for the drilling to begin!

Marty, Jeff and Don at ATC were invaluable in helping me with this project. Instead of a punch awl they recommend using a 3/16 ice pick but I couldn't find one and got tired of everyone looking at me like I was a serial killer when I asked if they carried one.

Once the rivets were stretched out I used a 3/16 drill bit to drill the heads off the rivets. The back of the rivets would often stay slotted in the holes which we cause you great headache later so I used the punch all in the hole to shoot the back of the rivets up into the roof.

Once all the rivets were drilled out I then removed the screws along the bottom and removed the panel. My hinges were old and beat so I did not have to secure them, however, if your hinges still have some pop in them you will want to secure the top hinge to the bottom hinge every other hole with bailing wire so that when you remove it the top hinge doesn't flip back violently and rip your side liner.

Once it was out it looked like this.

Posted Image

A lot of 303 Vinyl Cleaner and a little elbow grease got the vinyl looking as good as new and I was able to inspect the wires for the porch light while the panel was off.

Next up was fabricating the panel which I did out of 1/4 inch Birch:

Posted Image

Cut out and sanded

Posted Image

Stained with a clear coat of polyurethane ( I like the natural birch look) and ready for the hinges.

Posted Image

Posted Image

I took the old panel, overlaid it on the new panel and clamped it in place for the drilling process to ensure that the holes would line up with the existing hinges which I am re-using. (I would recommend putting in new hinges if you are doing it but I didn't want to pay for them or mess around with fabricating them because of the springs. You can do it without the springs but then you loose all assistance in lifting the roof.)
  • 0
Rich 2007 Toyota Tundra Limited with 1989 FWC/ATC Fleet Hybrid fully refurbished

#3 Casa Escarlata Robles Too

Casa Escarlata Robles Too

    C'est la vie

  • Site Team
  • 9,307 posts
  • Locationmonterey bay area

Posted 27 May 2010 - 11:21 PM

Nice photos. How did you attach the 3 little straps that pull the liner in when it lowers? Frank
  • 0

2002 Tundra AC TRD 4WD Limited 2009 ATC Bobcat loaded http://sharychic.blogspot.com/


#4 Barko1

Barko1

    Senior Member

  • Members
  • 1,635 posts
  • LocationSouthern Appalachians

Posted 28 May 2010 - 12:33 AM

Nice job! I got mine all out and then found out I have to go to Oregon, via Sacramento, so I'm going to let the pro's do the final install. The final adjustment, getting the little straps hooked up, etc I decided I did enough plus my back is killing me :(
Now what I need is a hydraulic lift to put the cooler in!
  • 0
Granby on an F250 in S. NM

#5 rich

rich

    Senior Member

  • Members
  • 463 posts

Posted 28 May 2010 - 02:49 AM

A couple more panel fab pics, I did the same process with the small panel.

Posted Image


Posted Image

After the panels are fabbed up and the holes drilled I had to take a few straggling rivets out of the old hinges:

Posted Image


I should have mentioned as you take it out there will be 3 rivets from the panel to the side liner, I didn't have to deal with these because the strap between them that helps pull in the vinyl when you close the top was broken already and I didn't bother to replace them.

I used 3/16 rivets to rebuild the panels and I got a piece of advice to use washers, the thought being that it would give more surface area and make it harder for the rivets to pull through the wood over time. I did that but it made it too thick and made it so the panel would not fold completely flat. Live and learn but I don't recommend using washers, just rivet directly through the wood. Rivet guns are cheap and as such I went through 3 of them before the job was done.

Posted Image


Posted Image

Posted Image


It is crucial to pound the back of the rivets completely flat so they don't rip the side liner or interfere with the lift panel closing down flat. I used a ball peen hammer to smash them and a small anvil used in auto body work as the pounding surface.

Posted Image


Posted Image
  • 0
Rich 2007 Toyota Tundra Limited with 1989 FWC/ATC Fleet Hybrid fully refurbished

#6 rich

rich

    Senior Member

  • Members
  • 463 posts

Posted 28 May 2010 - 02:50 AM

Nice photos. How did you attach the 3 little straps that pull the liner in when it lowers? Frank


I didn't bother, my vinyl is so so and I didn't want any more pulling on it risking blowing a hole in it so I left them off. The tucking it in when I close it isn't that bad and not worth risking a hole in my vintage vinyl :D
  • 0
Rich 2007 Toyota Tundra Limited with 1989 FWC/ATC Fleet Hybrid fully refurbished

#7 rich

rich

    Senior Member

  • Members
  • 463 posts

Posted 28 May 2010 - 02:52 AM

Nice job! I got mine all out and then found out I have to go to Oregon, via Sacramento, so I'm going to let the pro's do the final install. The final adjustment, getting the little straps hooked up, etc I decided I did enough plus my back is killing me :(
Now what I need is a hydraulic lift to put the cooler in!


Yeah I was a bit over budget on my remodel project or else I would have paid ATC to do it too. It was a bit of a bear but worth it in the end.

I know, coolers have been destroying my back for a long time.......that tequila is heavy stuff B)
  • 0
Rich 2007 Toyota Tundra Limited with 1989 FWC/ATC Fleet Hybrid fully refurbished

#8 rich

rich

    Senior Member

  • Members
  • 463 posts

Posted 28 May 2010 - 03:08 AM

The final piece was to rig it to get it into the truck and I used a system that was devised by our very own BenG using bailing wire to compress the hinges.

Step one was to screw the top hinge to my work bench every other hole and thread bailing wire through the open holes. Having it attached to the work bench made it easy to use the panel itself to leverage the top hinge to its 90 degree resting angle. Note: The screws that you see beneath the brass frame that holds the shackle bolt in place were a bear to get out one this thing was at 90 degrees so when I did it a second time I didn't put any screws in that section.

Posted Image

All rigged and ready to thread through the bottom hinge and start twisting!

Posted Image

I then used screw drivers and end wrenches for leverage to tighten the bailing wire. I put on my safety glasses for this one because I did snap a few pieces of bailing wire before getting the tensions right.

Hinges in their positions, panel removed from the work bench and ready for install.

Posted Image

After a first dry fit attempt I realized that the original hinge holes even after being drilled through to remove the rivets weren't quite large enough for the 3/16 rivets so I went back through and reamed the hinge holes out a bit more with the drill to make the going a lot easier for the install.

Posted Image

In the above picture sitting on a white box in the lower right of the picture you can see the small black anvil that I used behind the panel to pound the rivets flat. I actually cut a groove out of a 2x4 as a jig to hold it from moving around which made pounding the rivets flat a lot easier.

Posted Image

After that, the install was easy. Set it in place, set one rivet, set one screw, cut and pull one piece of bailing wire and repeat 28 times :-)

I hope this helps.
  • 0
Rich 2007 Toyota Tundra Limited with 1989 FWC/ATC Fleet Hybrid fully refurbished

#9 Casa Escarlata Robles Too

Casa Escarlata Robles Too

    C'est la vie

  • Site Team
  • 9,307 posts
  • Locationmonterey bay area

Posted 28 May 2010 - 08:23 PM

You have quite a project and it looks great. I have the middle strap on the front that pulled off. Marty said bring it in and they would take care of it but i can't see removing the whole front just to reattach it. I can live with a small tuck,most of the time it does fold in by itself. Good luck with the rest of your project. Happy camping Frank
  • 0

2002 Tundra AC TRD 4WD Limited 2009 ATC Bobcat loaded http://sharychic.blogspot.com/


#10 UglyScout

UglyScout

    Senior Member

  • Members
  • 405 posts
  • LocationNewberg, OR

Posted 26 June 2012 - 02:48 PM

I owe Rich a beer or 3. I used the bailing wire compression method seen above to replace my lift panel last night. Worked like a champ!! I got away with only needing 9 wires.

I went out Sunday afternoon to pop the camper and look for something - opened the top and the rear lift panel ripped halfway off the roof! It had been in poor shape for a while and the wood finally rotted out around the rivets and came dettached from the top hinge. Since we are headed out this coming weekend I needed to address the problem ASAP. This thread told me everything I needed to know! I already had the wood from another project, so $40 for some rivets, rivet gun and bailing wire and I was back in business in a mere 7 hours (I only needed to replace the top piece of wood on the panel so it only involved drilling out 100 rivets....).

I'll post pictures later.
  • 0
2002 Chevy 2500HD 1993 Four Wheel Grandby


0 user(s) are reading this topic

0 members, 0 guests, 0 anonymous users