Looks like a great project! Good job.

Dogwood, a '75 10' Cabover Rebuild
Started by
Wooddog
, Jun 24 2012 12:58 PM
26 replies to this topic
#11

Overland Hadley
-

- Members
- 1,365 posts
Senior Member
- LocationLake Superior North
Posted 19 November 2012 - 01:48 AM
Nathanael - Large Format Landscape Photography
www.KuenzliPhotography.com
2012 Four Wheel Camper - The FWC Build
"If life was fair, Utah would be closer to home" DD
www.KuenzliPhotography.com
2012 Four Wheel Camper - The FWC Build
"If life was fair, Utah would be closer to home" DD
#12
caseboy
-
- Members
- 201 posts
Senior Member
- Locationkey center,wa.
Posted 19 November 2012 - 06:52 AM
bruce,
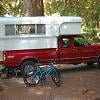
thanks again for all your pics and advice.that strap seems like a great idea. i do have to guide the slides a little on my nco and probably will have too on the cab over too.that's a great tip about not lifting corners. unfortunatly, i have been.i guess i've been lucky so far. i'll have to drive down to the alaskan factory and see bryan someday soon.he'll probably have ideas about my pump and answers to the other thousand questions that come up.i'm also anxious to see the new ones and how they make them. it's only a couple hours away. whats left of that wood strip is visible in this picture.it was stapled along the top of the front panel.it must not be needed as your rig is beautiful and functioning without it.it does look like your front panel is shaped a little different than mine. must have been manufactured in different part of country way back when.
thanks,wes
Attached Thumbnails
#13
Rusty
-
- Members
- 931 posts
Senior Member
- LocationPort Angeles, Washington
Posted 19 November 2012 - 09:23 PM
Wow...what determination....nice pics
A couple things....3M makes a marine adhesive 4200 used in sealing hull penetrations in boats....seems like it would be a good fit for Alaskan roofs...
LVL lumber when sized properly will give you a bit more strength for radius corners and sisters
I would agree on the west system epoxy soak for the NCO overhang...pricey but no mas rot
Bruce your pictures take me back a long way...the glue covered apron hanging in the background...I miss my old shop...with lots of room
Nice work...you guys deserve a medal
2003 Ford 250 Superduty Crew.... 7.3L PowerStroke diesel 1970 10" NCO Alaskan Firestone airbags pulling a 18' Silver Streak runabout
#14
dkoug
-

- Members
-

- 54 posts
Advanced Member
Posted 08 December 2012 - 09:14 PM
Wonderful work but you got me scared
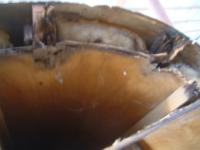
I recently got a $200.00 69 NCO 10' that looks good except for the top front section has good dry rot.
Hoping I don't find much hidden rot.
Wondering if you removed some of the cabinet etc. I'm considering removing the cabinets and moving the kitchen setup across the front of the Alaskan similar in concept to the new mini that they have come up with. I envision 8' from the counter to the rear door as space to make a full time usable unit.
Question is how easy to they come out and condition of the walls behind the removed units?
Enjoy your Alaskan
dkoug
Attached Thumbnails
#15
Wooddog
-
- Members
-
- 18 posts
Member
- LocationThe Baptist Kush of East Tennessee
Posted 09 December 2012 - 04:23 PM
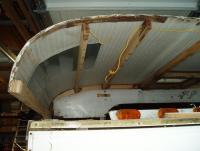
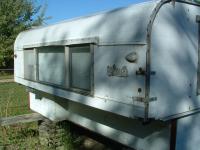
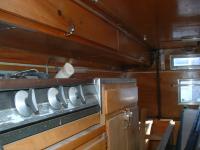
Again, thank you for the compliments. Nathanael, I have been admiring your work for quite awhile. Wes, mine has a name plate from the Sun Valley factory which matches the story PO told of getting it in southern Cal. You'd think they were the same profile but... Rusty, I believe that is the caulking I used; love the stuff. I think it says "below water line" on it. Gotta work for this.
Dkoug, don't let it intimidate you; it's just a big, water resistant cabinet. Perfect size to work on solo. I gutted mine except for the kitchen cabinet frame since I wanted to reuse it. The walls of the lower half of the camper (I call it the tub) are 1/2" ply on the sides, 3/4" ply for the back wall, and curiously, the front wall, IIRC, is a lattice frame of 1x2 with 1/4" ply inside and the aluminum outside and some old crunchy foam in the spaces.
Here's what I learned when I removed the cabinetry from the passenger side: Mine was built by a guy with a brand new wide-crown staple gun and lots of ammu-, er, staples. Many put through from the outside of the shell. There are some screws coming from outside the shell, too. They used glue, too; hence the durability of the thing. I finally found a use for the "Multimaster" type tool I had gotten for Christmas earlier. The flush cutting metal blade will be your best friend. Another useful tool is end-cutters ground down so the cutting edge is flush to the outside. These will pull out nails and staples or just cut them off flush. I was not able to remove the cabinetry without destroying it.
You will also find, as I mentioned earlier, that the cabinets stiffen the side wall so putting a 2' kitchen counter across the front will leave 8' of flexy wall. My passenger side is all 10' unsupported so I shimmed the plywood with 3/4" "studs", filled the gaps with rigid foam, and screwed 1/4" ply over that. It's stiff enough now but it may not age well. We'll see.
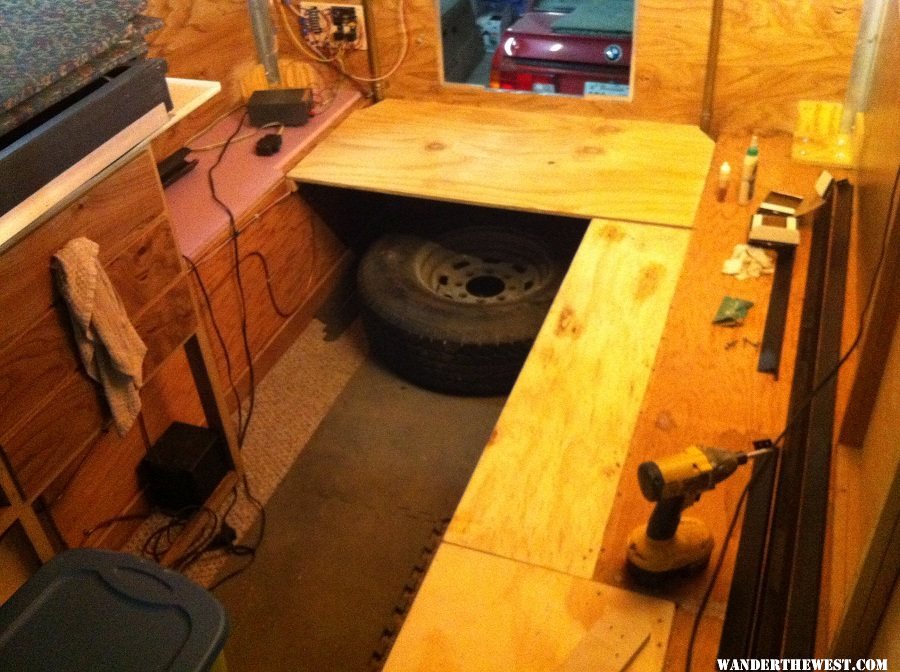
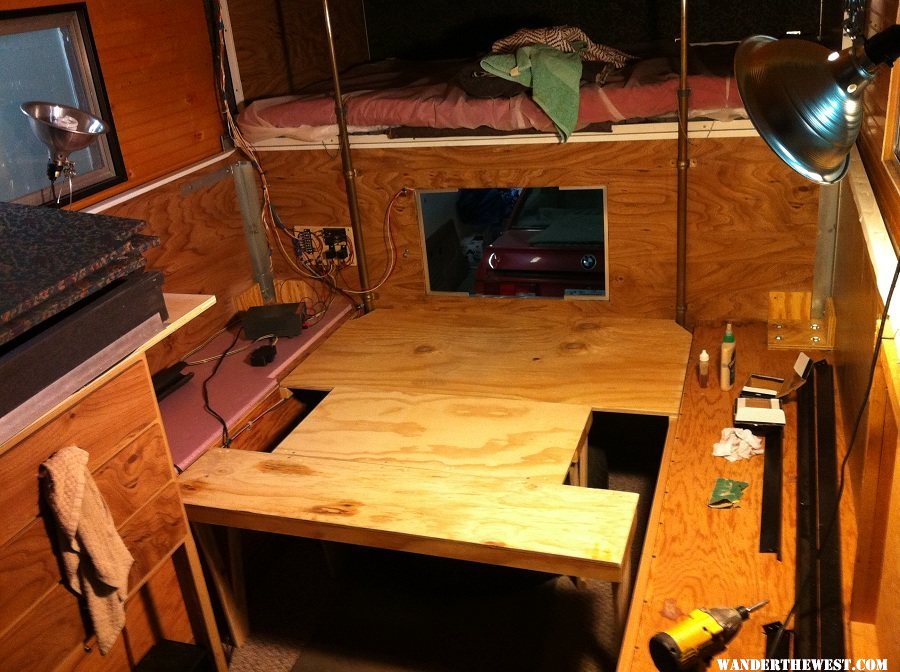
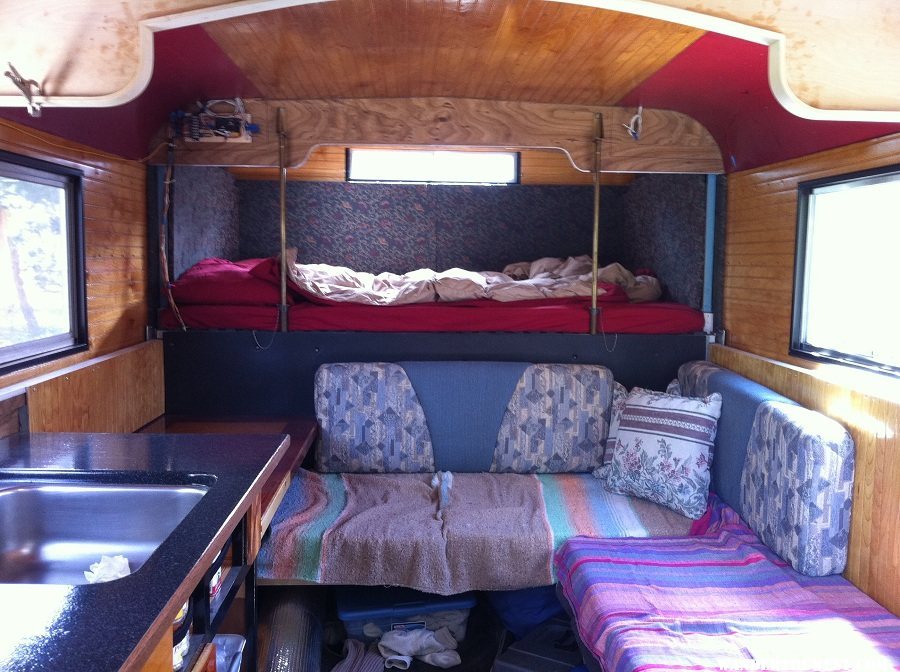
A big desire of mine was to be able to sleep 2 guys without raising the roof. One across the front, the other down the side. The open L shape gives better floor space and more flexible cargo capacity than the original design. My cushions are 24" deep and two fit end to end across the width of the camper. I widened the wings with little "tables" so I can re-configure and have a double bed if desired. I haven't completed this project; the pictures show it mocked up as a double bed.
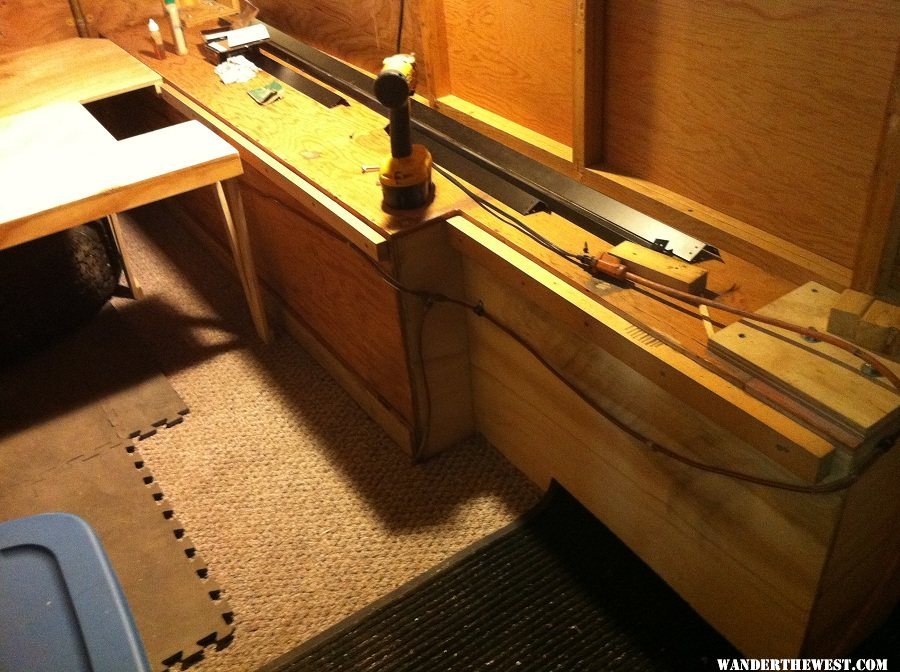
My kitchen counter runs forward 6" past the cabinet frame and overhangs the desk/dining table which runs from the cabinet to the front wall. There is a leaf for the desk which extends across the aisle if I need it. The desk is mounted on a piano hinge so the leading edge can be raised to provide foot room for sleeping.
Here's some fuzzy pictures:

Dkoug, don't let it intimidate you; it's just a big, water resistant cabinet. Perfect size to work on solo. I gutted mine except for the kitchen cabinet frame since I wanted to reuse it. The walls of the lower half of the camper (I call it the tub) are 1/2" ply on the sides, 3/4" ply for the back wall, and curiously, the front wall, IIRC, is a lattice frame of 1x2 with 1/4" ply inside and the aluminum outside and some old crunchy foam in the spaces.
Here's what I learned when I removed the cabinetry from the passenger side: Mine was built by a guy with a brand new wide-crown staple gun and lots of ammu-, er, staples. Many put through from the outside of the shell. There are some screws coming from outside the shell, too. They used glue, too; hence the durability of the thing. I finally found a use for the "Multimaster" type tool I had gotten for Christmas earlier. The flush cutting metal blade will be your best friend. Another useful tool is end-cutters ground down so the cutting edge is flush to the outside. These will pull out nails and staples or just cut them off flush. I was not able to remove the cabinetry without destroying it.
You will also find, as I mentioned earlier, that the cabinets stiffen the side wall so putting a 2' kitchen counter across the front will leave 8' of flexy wall. My passenger side is all 10' unsupported so I shimmed the plywood with 3/4" "studs", filled the gaps with rigid foam, and screwed 1/4" ply over that. It's stiff enough now but it may not age well. We'll see.
A big desire of mine was to be able to sleep 2 guys without raising the roof. One across the front, the other down the side. The open L shape gives better floor space and more flexible cargo capacity than the original design. My cushions are 24" deep and two fit end to end across the width of the camper. I widened the wings with little "tables" so I can re-configure and have a double bed if desired. I haven't completed this project; the pictures show it mocked up as a double bed.
My kitchen counter runs forward 6" past the cabinet frame and overhangs the desk/dining table which runs from the cabinet to the front wall. There is a leaf for the desk which extends across the aisle if I need it. The desk is mounted on a piano hinge so the leading edge can be raised to provide foot room for sleeping.
Here's some fuzzy pictures:
#16
MikeDahlager
-

- Members
- 123 posts
Senior Member
- LocationSpokane, WA
Posted 09 December 2012 - 11:44 PM
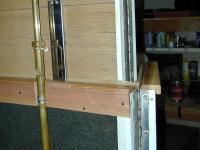
I added top rails to cover the tub gasket on all four sides. It also has the added benefit of stiffening the side wall after I removed all of the cabinetry on the right side.
Mike
Mike
Attached Thumbnails
2007 Okanagan model 96DB, 2001 Dodge 2500 Diesel
"Be the kind of person your dog thinks you are."
#17
dkoug
-
- Members
-
- 54 posts
Advanced Member
Posted 10 December 2012 - 01:06 AM
Mike
Interesting and provides motivation for me. Hopefully it will go into my friend's shop on Dec 22nd.
Thanks much for the pictures.
Curious why the sides are not a heavier plywood.
Thanks very much, will try to post pictures as I proceed.
dkoug
Interesting and provides motivation for me. Hopefully it will go into my friend's shop on Dec 22nd.
Thanks much for the pictures.
Curious why the sides are not a heavier plywood.
Thanks very much, will try to post pictures as I proceed.
dkoug
Attached Thumbnails
#18
Overland Hadley
-
- Members
- 1,365 posts
Senior Member
- LocationLake Superior North
Posted 10 December 2012 - 01:16 AM
Nathanael, I have been admiring your work for quite awhile.
Thank you.
Nathanael - Large Format Landscape Photography
www.KuenzliPhotography.com
2012 Four Wheel Camper - The FWC Build
"If life was fair, Utah would be closer to home" DD
www.KuenzliPhotography.com
2012 Four Wheel Camper - The FWC Build
"If life was fair, Utah would be closer to home" DD
#19
dkoug
-
- Members
-
- 54 posts
Advanced Member
Posted 28 December 2012 - 02:01 AM
Mike
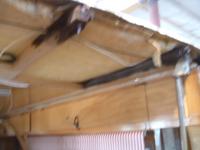
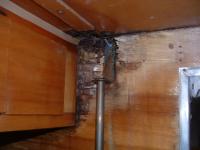
well got the 10' NCO vintage 69 into my friends shop on Xmas Day.
Pulled the top forward wall off, some good rot but could be worse ( I guess)
Some pictures of the first 2 days of destruction.
Got new hip in January and this project reminds me I have not been doing my workout as I should be, waking up with cramps in both legs-lol
top of the season to all
dkoug
Attached Thumbnails
#20
MikeDahlager
-
- Members
- 123 posts
Senior Member
- LocationSpokane, WA
Posted 28 December 2012 - 06:15 PM
Great re-build and the pictures are excellent! What did you do for insulation?
Mike
Mike
2007 Okanagan model 96DB, 2001 Dodge 2500 Diesel
"Be the kind of person your dog thinks you are."


0 user(s) are reading this topic
0 members, 0 guests, 0 anonymous users

