Thought I'd post my recent project up here in case others had questions or wanted to create something similar. I used a post here by ski3pin as a starting point for my build : https://www.wanderthewest.com/forum/topic/5269-building-an-arctic-cold-weather-pack/
If anyone is interested in the details let me know and I can get better pictures or a do a more informative writeup. I started the build having zero knowledge of sewing and learned/improved as I went so this is definitely a doable project! Total time spent was about one weekend ~20ish hours
Materials list:
Barricade Barrier Fabric (Seattle Fabrics) - similar to the fabric used in the link above ~7 yards ~$160
Adhesive/Sew-on velcro $100
Starting point - 1992 Hallmark LaVeta. It comes with a three-layer pop up material. Canvas-like material on the outside, a foam midlayer, and a thin polyester(?) inner. The inner layer durability is questionable and was falling apart when I got the camper so I cut it out. What you see is the foam midlayer.
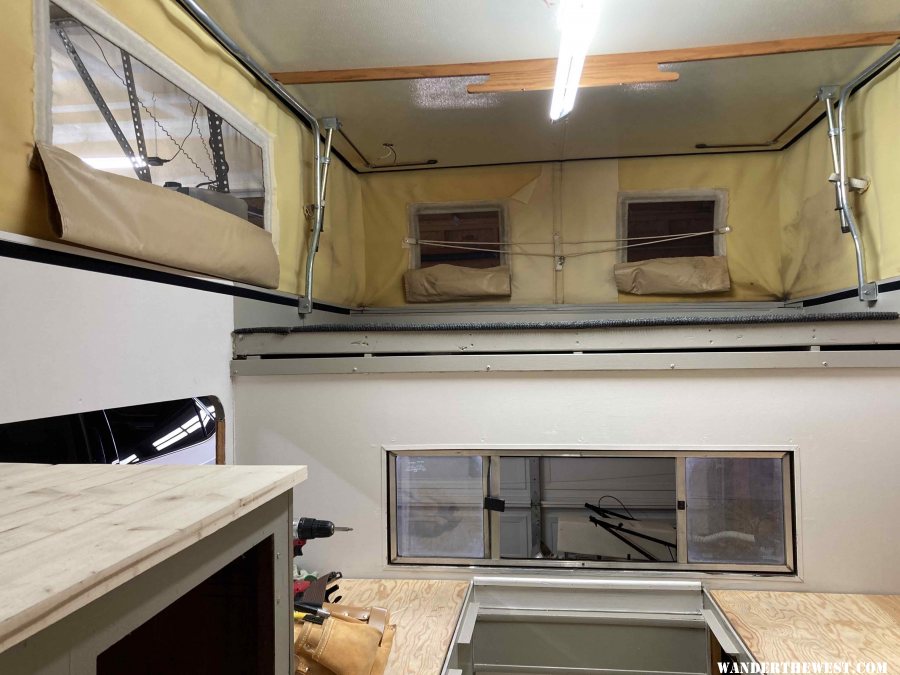
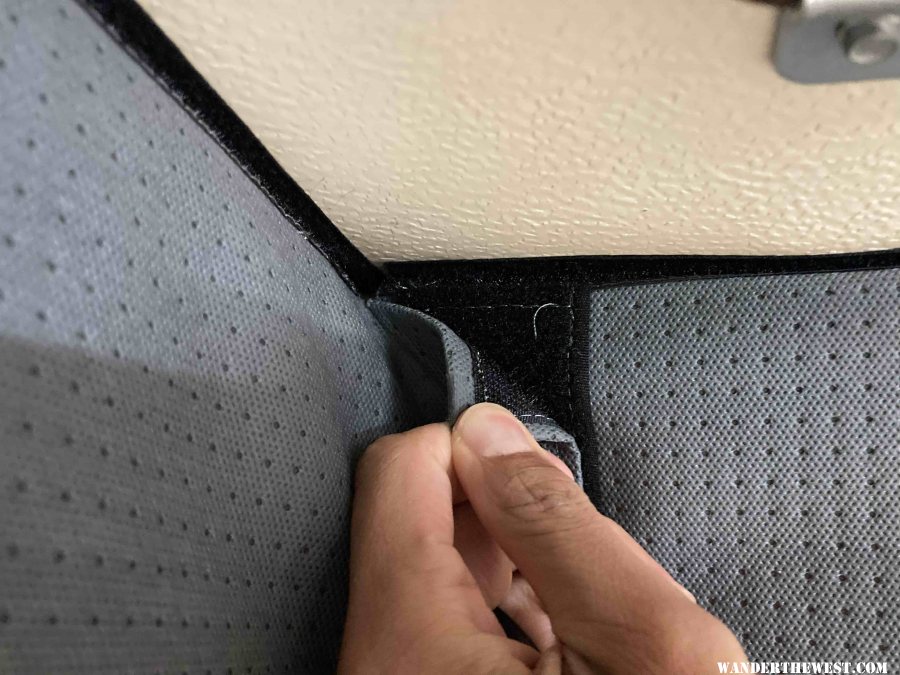
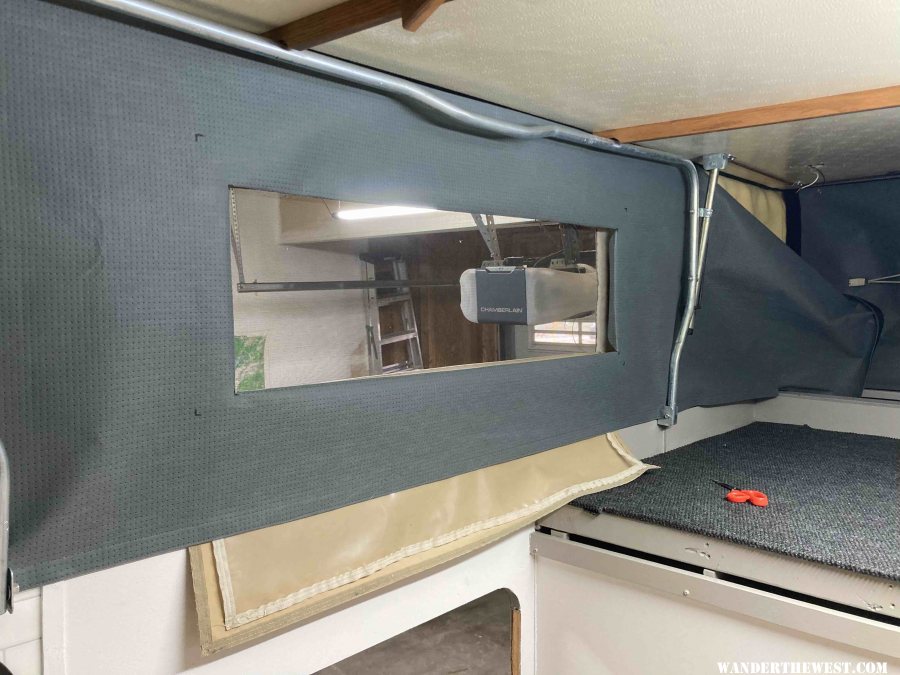
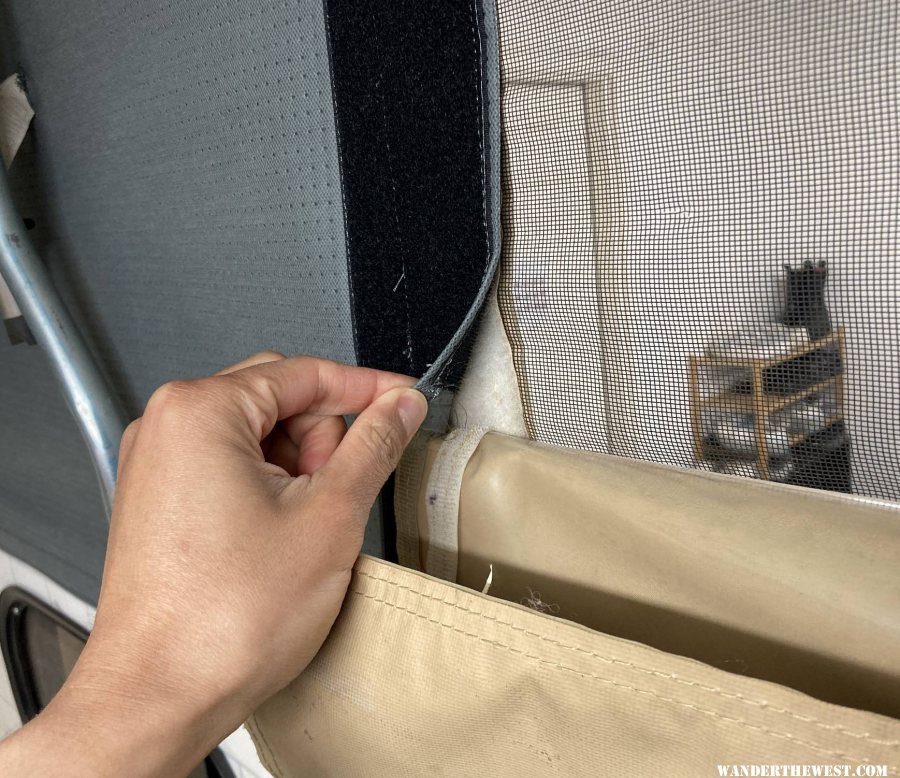
I started with creating four panels for each side of the camper with plans to cut-in the windows after test-fitting the panels. The panels attached on the top and bottom using adhesive velcro stapled into the ceiling/camper walls. The panels attached to each other using an overlapping tab of velcro on the end of each panel. I sewed buttonholes for all of the bungees that pulled the canvas inwards when putting the roof down.

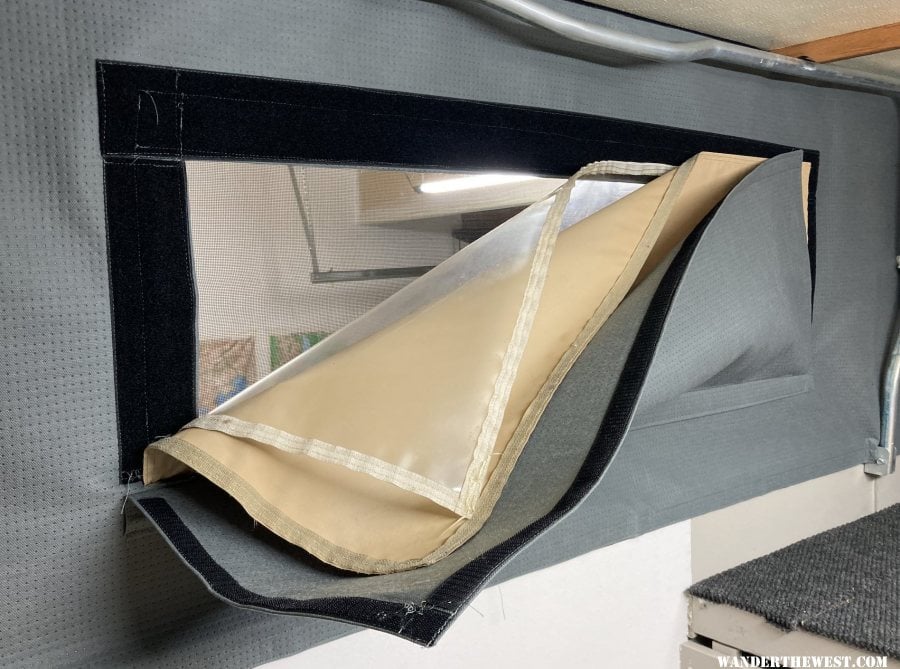
Once I test-fit the panels, I used a bright external light to trace out the window outline. I then cut the windows out with a generous hem.
I have heard of condensation issues between the thermal pack and the outer canvas before so i wanted to prevent that with this project by minimizing the ability of the humid air inside the camper to invade the air space in between the inner/outer layers. Each window has velcro on both sides. One side of the velcro mates with the velcro from the original window. Hopefully this prevents humid air from getting in between the layers. The original windows attach to the velcro on the interior side of the thermal pack. Hopefully this makes sense.
Finished product
If anyone is interested in the details let me know and I can get better pictures or a do a more informative writeup. I started the build having zero knowledge of sewing and learned/improved as I went so this is definitely a doable project! Total time spent was about one weekend ~20ish hours
Materials list:
Barricade Barrier Fabric (Seattle Fabrics) - similar to the fabric used in the link above ~7 yards ~$160
Adhesive/Sew-on velcro $100
Starting point - 1992 Hallmark LaVeta. It comes with a three-layer pop up material. Canvas-like material on the outside, a foam midlayer, and a thin polyester(?) inner. The inner layer durability is questionable and was falling apart when I got the camper so I cut it out. What you see is the foam midlayer.
I started with creating four panels for each side of the camper with plans to cut-in the windows after test-fitting the panels. The panels attached on the top and bottom using adhesive velcro stapled into the ceiling/camper walls. The panels attached to each other using an overlapping tab of velcro on the end of each panel. I sewed buttonholes for all of the bungees that pulled the canvas inwards when putting the roof down.
Once I test-fit the panels, I used a bright external light to trace out the window outline. I then cut the windows out with a generous hem.
I have heard of condensation issues between the thermal pack and the outer canvas before so i wanted to prevent that with this project by minimizing the ability of the humid air inside the camper to invade the air space in between the inner/outer layers. Each window has velcro on both sides. One side of the velcro mates with the velcro from the original window. Hopefully this prevents humid air from getting in between the layers. The original windows attach to the velcro on the interior side of the thermal pack. Hopefully this makes sense.
Finished product