Jump to content


Photo
- - - - -

Loading and unloading without jacks stands

jacks stands

  • Please log in to reply
57 replies to this topic

#51 DavidGraves

DavidGraves

    Senior Member

  • Members
  • 1,267 posts

Posted 31 July 2016 - 12:20 AM

My crazy idea:

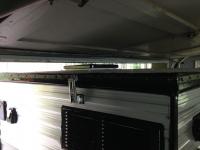
Attach a thin sheet of PTFE (aka, "Teflon") to the bottom of the camper and another thin sheet on the bed of the pickup.

The coefficient of friction of PTFE to PTFE is 0.04... So if the camper weighed 1000 lb then it would only take 40 lb of pull or push to get it moving.

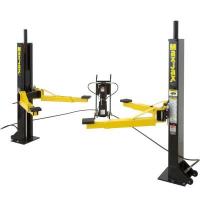
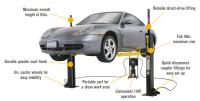
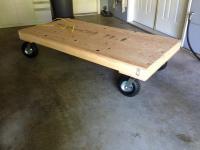
So, you position your height-adjustable dollie -- the top of which is covered with rollers or something like that (maybe more PTFE?) -- right up against the back of the truck bed (maybe with some kind of clamps to make sure it doesn't move during transfer), and then the nearest 10-year-old (no need for four good men) could apply enough force to push or pull the camper to or from dollie and truck bed.


OK, now that I've disclosed this idea publicly, that prevents anyone else from patenting it.  B)


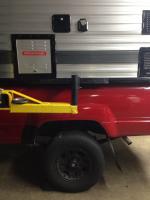
Of course, with such low friction between camper and truck-bed you'd really need to make sure your turnbuckles/whatever were very tight and secure.


Which gives me another idea:  To unload the PTFE-equipped rig, drive the front wheels of the truck up on small ramps, position the height-adjustable dollie at the back of the bed, detach the securing turnbuckles, and the camper slides effortlessly (no need for a 10-year-old) from the bed onto your dollie.  To load the camper, push the dollie-camper combo up to the back of the truck, tilt your tiltable dollie towards the bed, and the camper slides smoothly into place.

Secure turnbuckes tightly.

IF you need some slippery material, Home Depot throws several away most any day....they are large black slippery sheets about 48 " square used under pallets of new stock....they probably recycle some of them but I often see them thrown away in the building materials area.


They may come from different suppliers of heavy pallet deliver stuff.


DavidGraves


  • 0

#52 resto

resto

    Advanced Member

  • Members
  • PipPipPip
  • 31 posts
  • LocationPacific Nothwest

Posted 31 July 2016 - 09:17 PM

The core of my lift is the MaxJax hydraulic car lift made by Danmar. It cost me $2000 a few years ago.


I know, I know... toooooo much money! 


Hear me out, it might still be a good idea for a some of you.

At the time I bought the lift I didn't even own a FWC. I bought it so I could on the cars in our family: my wife's, my 3 children's (late teens), and my own. I was embarrassed at the time to be spending so much money on a lift as my mechanical skills are limited to things like changing oil, brake jobs, and "bolt on exhaust work." I am not embarrassed about it anymore as I feel it has easily paid for itself. So if you work on cars I would suggest this may be the way to go - it was for me.


Why did I choose this lift?


From floor to ceiling my garage height is only 99" (8' 3"). I could only lift the cars approximately 4' before they would hit the roof. But 4" works out perfect for brake and shock work, and by using a stool I can sit and drain oil or other work below the car. I wanted a "two post" lift and this MaxJax was the only one I could find that fit the bill - all others were too big and lifted too high. And while I think $1500 a is more appropriate price point for this lift I didn't have choice.


It is portable (can be moved) but I have setup mine in a more permanent way.


8b5b8f1a-e25f-4b7e-be15-21489e1fb10d_400.jpg


790007.jpg


This is not my garage but the dimension would be similar.


maxjax1.jpg


To attach to camper I use only one arm of the lift from each side. Attached to the arm is my modified piece I mentioned in this thread.


Lift a2.jpg


liftleg1.jpg


So here is my unloading procedure:

  1. Back in until marks painted on concrete floor align with tire
  2. Remove camper turnbuckles
  3. Remove standard pads from lift arm and replace with my camper attachment
  4. Lift arms to correct height and place under bottom edge of camper
  5. Lift camper off truck bed
  6. Move truck outside (from under camper)
  7. Place dolly under camper and lower onto dolly
  8. Move camper on dolly through double doors into heated, "finished" basement
  9. Lift camper roof and dry out as required

This only takes a few minutes and is very safe. Loading is the reverse and takes a similar amount of time.


  • 0

1988 Toyota Truck 4WD

1989 Ranger II - 4WheelResto

"Form follows function" - Sullivan


#53 resto

resto

    Advanced Member

  • Members
  • PipPipPip
  • 31 posts
  • LocationPacific Nothwest

Posted 31 July 2016 - 09:53 PM

Here are some additional pictures to help understand the setup.


This shows how close it is fitting under garage doorway.


IMG_0904.jpg


This shows my dolly. Note: never use the tires (pneumatic) shown in the picture as they are awful for maneuvering. I switched to proper tires/wheels after using these once.


dolly.jpg


In the picture above there is a double door in the background. I can fit my camper through these doors and into the heated basement. I have less than 1/4" clearance on the sides.


Again, as a camper lift it's super expensive. But if you also work on cars, I think and have a low ceiling it's the only way to go. 


Edited by resto, 31 July 2016 - 09:55 PM.

  • 0

1988 Toyota Truck 4WD

1989 Ranger II - 4WheelResto

"Form follows function" - Sullivan


#54 oldebondo

oldebondo

    Member

  • Members
  • PipPip
  • 29 posts
  • LocationColorado

Posted 28 September 2016 - 11:18 PM

I read thru this entire thread and didn't notice that anybody suggested or tried this: max your airbags out > back into your storage stall (or over your u-shaped dolly) & attach legs > let the airbags down > drive truck out.


Comments?


I need to come up with something smart, cheap and easily constructed. I haven't come upon anything yet.


  • 1

#55 hpcbmw

hpcbmw

    Advanced Member

  • Members
  • PipPipPip
  • 95 posts
  • LocationNorthern Cal

Posted 04 October 2016 - 04:42 AM

I don't have much input about loading or unloading, but once off the truck, I lower my camper jacks to put the camper onto my motorcycle trailer. I remove the ramps and put a piece of plywood over the metal frame and the camper sits very comfortably on the trailer. I can then move the camper around behind my car or even my quad. This works for me, since I already had the moto trailer. When the campers on the truck, I use the trailer to haul bikes, when the campers on the trailer, I have the truck bed to haul bikes.

Attached Thumbnails

  • Accord with FWC.jpg

Edited by hpcbmw, 05 October 2016 - 01:24 AM.

  • 1

1997 4 wheel Camper Granby model on 2000 F250 extended cab 4x4 diesel.


#56 oldebondo

oldebondo

    Member

  • Members
  • PipPip
  • 29 posts
  • LocationColorado

Posted 26 October 2016 - 02:08 PM

I read thru this entire thread and didn't notice that anybody suggested or tried this: max your airbags out > back into your storage stall (or over your u-shaped dolly) & attach legs > let the airbags down > drive truck out.


Comments?


I need to come up with something smart, cheap and easily constructed. I haven't come upon anything yet.


I measured the height difference between "bags empty" and "bags full". The difference is about 4" at the rear of the camper and about 2" at the front of the camper. (The difference is due to the pivoting effect about the front wheels.) My gut feel is that this doesn't quite give enough margin to get the camper off. I'd still like to know if anyone has even attempted this.


  • 0

#57 hebegebe

hebegebe

    Senior Member

  • Members
  • 234 posts
  • LocationLA and San Diego

Posted 26 October 2016 - 02:35 PM

I use my airbags to help loading by centering camper in bed then inflating bags to 90/100# to take off load without shifting the camper in truck box. I usually need to lower front jacks a couple more inches to free them up. Reverse procedure to unload. I store my hawk on custom sawhorses which are about 11/2" higher than my truck bed w/ no air in the bags. I think one would need a 4 link rear suspension with taller bags to make a full clearance lift


Sent from my iPhone using Wander The West
  • 0

#58 rando

rando

    Senior Member

  • Members
  • 1,638 posts
  • LocationColorado

Posted 26 October 2016 - 03:41 PM

I measured the height difference between "bags empty" and "bags full". The difference is about 4" at the rear of the camper and about 2" at the front of the camper. (The difference is due to the pivoting effect about the front wheels.) My gut feel is that this doesn't quite give enough margin to get the camper off. I'd still like to know if anyone has even attempted this.

You could get a couple more inches by over inflating/deflating the tires - I have to do this to get my land cruiser through the garage door.  Dropping the tires from 45PSI to 15 PSI drops the back by almost 2".  I don't plan on removing my camper, but if I have to, I will certainly try this method.


  • 0

2016 Fleet Flatbed

2016 Toyota Tacoma


0 user(s) are reading this topic

0 members, 0 guests, 0 anonymous users