Wow, making excellent progress! Keep it up!
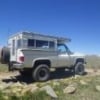

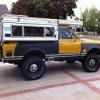
Four Wheel Blazer Pop-up, Finally found one
Started by
Zoomad
, Aug 08 2017 05:08 AM
K5 Blazer 4wc 4wheel FWC pop-up camper crawlabago
268 replies to this topic
#31

Living The Dream
-

- Members
- 464 posts
Senior Member
- LocationFront Range, Colorado
Posted 26 October 2017 - 04:41 AM
My youtube channel about my Four Wheel Camper - https://www.youtube.com/c/timmorrissey
All about my camper - https://www.tgmorrissey.com/camper
Item I used in my build- http://bit.ly/TGMorrisseyParts
#32
Zoomad
-
- Members
- 289 posts
Senior Member
- LocationColorado
Posted 27 October 2017 - 02:38 AM
Zoomad - Steal away on anything I have done. That is the point of posting up here! Thanks for looking into your scrap pile. Hopefully you find some or all of that piece I need. If not, I would still be interested in whatever scrap wood paneling you have. I have not been able to find matching wood paneling anywhere, and could use your scrap to build more cabinetry that matches the existing. Thanks.
I'll check out the pile next time I'm over there. Was planning on this weekend, but the weather looks iffy and I need to go back to Denver and fix my son's truck.
#33
Old Iron
-
- Members
-

- 18 posts
Member
- LocationSanta Ana, CA
Posted 30 October 2017 - 05:52 PM
No rush. I appreciate it.
#34
Zoomad
-
- Members
- 289 posts
Senior Member
- LocationColorado
Posted 11 December 2017 - 02:19 AM
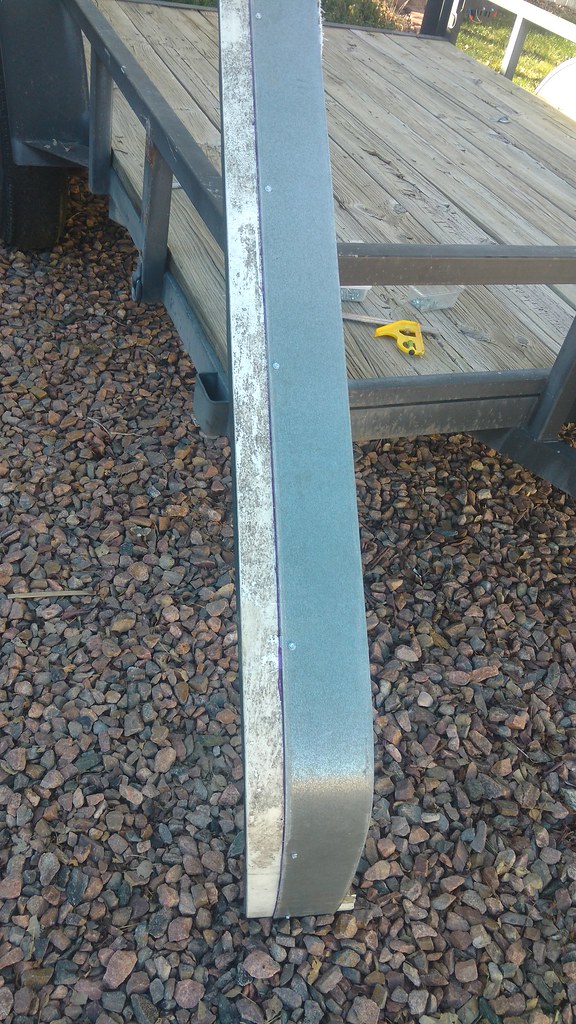
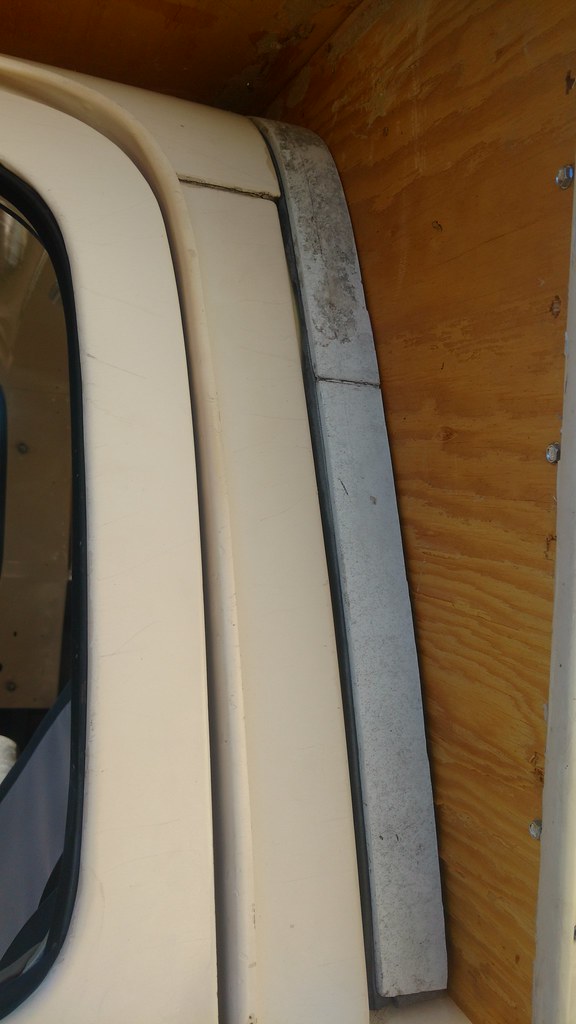
Took advantage of the crazy warm December weather to get a work day in on the camper. So John, Shane and I hit it again this time to get the Blazer top section grafted on the front wall of the camper. The stock top came off and we lined up the truck to get under the camper one of many times today.
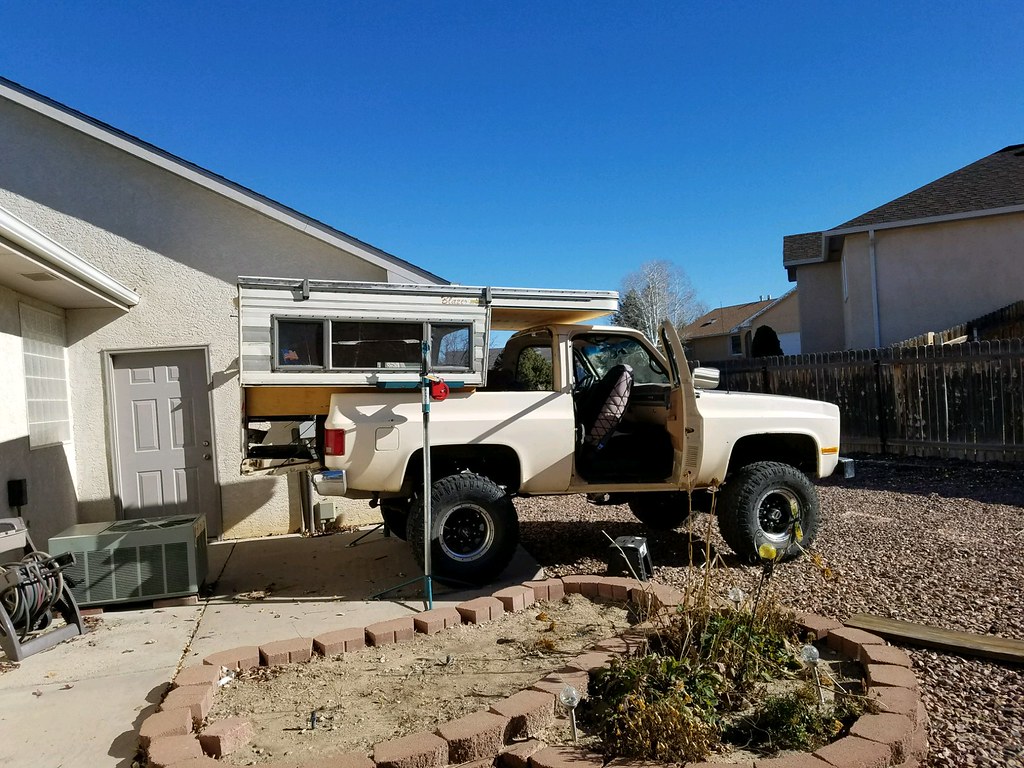
We realized a good idea earlier wasn't such a good idea after all. We had installed an oak block to gusset the roof to the front wall, but it was too tall to allow the new section of top to fit in. Before we could proceed we had to pull it back off again. As you can see there isn't much room between the top of the truck and cab-over section of the camper.

With the camper in place we measured in multiple spots for the amount of distance we needed to cover from the front wall of the camper and where the front edge of the stock top lands. Turns out we needed 1 3/4".
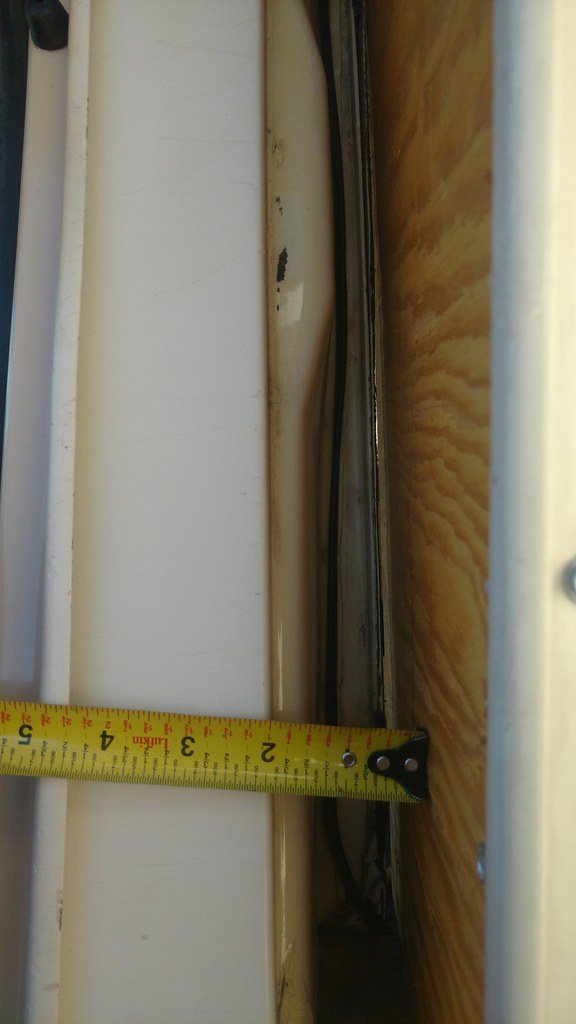
I then took a sliding t-square off of the front lip of the top section and marked out the needed 1 3/4" with an added 1/8th to cover the blade thickness of the cut off wheel we were using. In order to get a straight cut and have a "fence" to guide the cut we took some landscape edging and screwed it to the section of the top.
The actual cutting went smoothly. But damn the dust! Could have used two respirators!
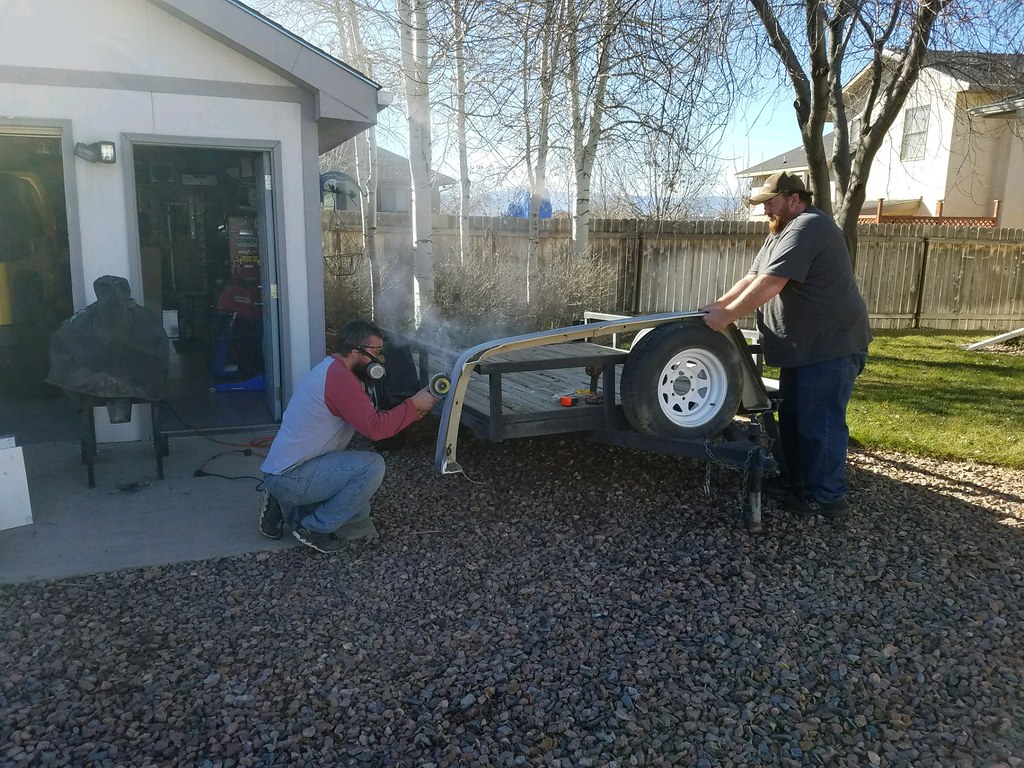
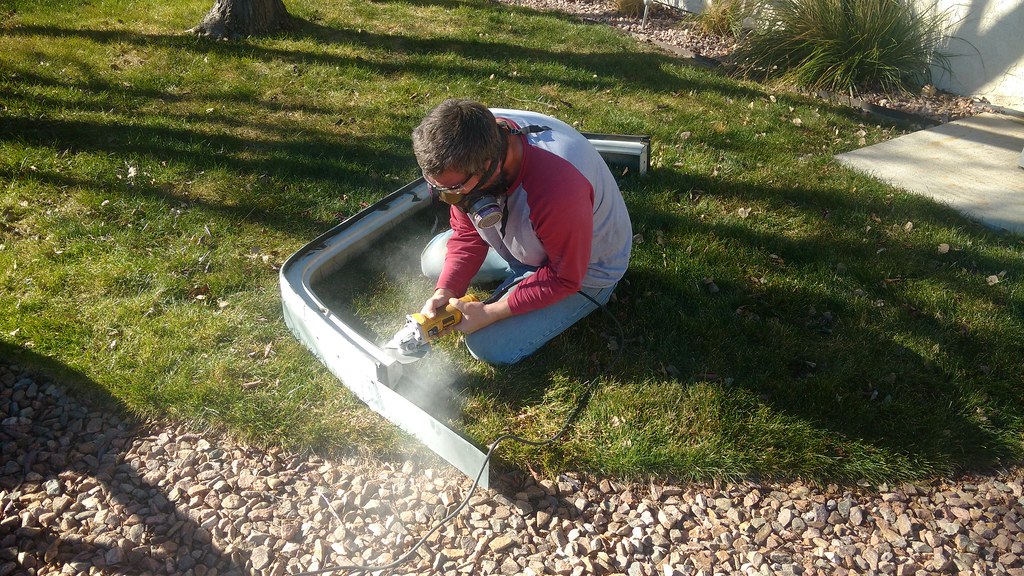
With the outside cut, it was time to cut the inside. As it turns out there is a perfect ledge formed on the inside that is just over 1 3/4" from the front edge so we set the part down on the lawn and used the ledge as the guide. Worked perfectly.
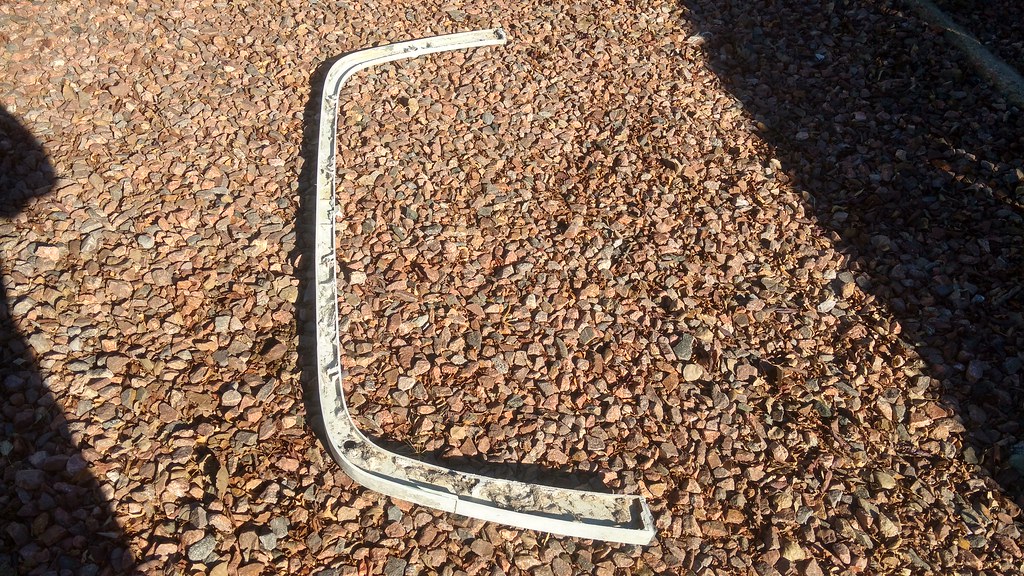
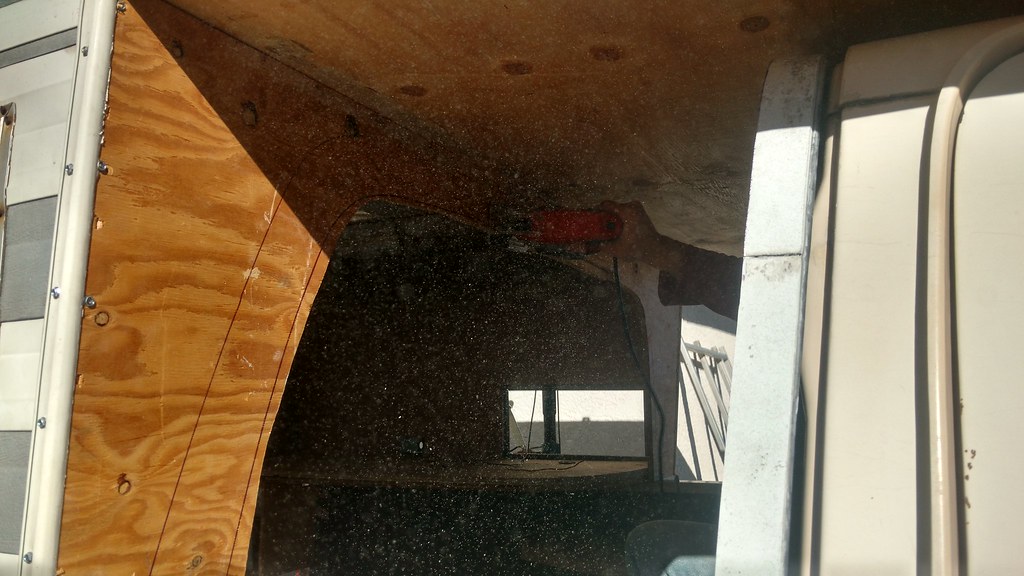
The final product. It was amazing how many spider webs and wasp nests we cleaned out of the cavity after we cut it open.
Test fitting with the camper to the truck. Fits pretty darn well.
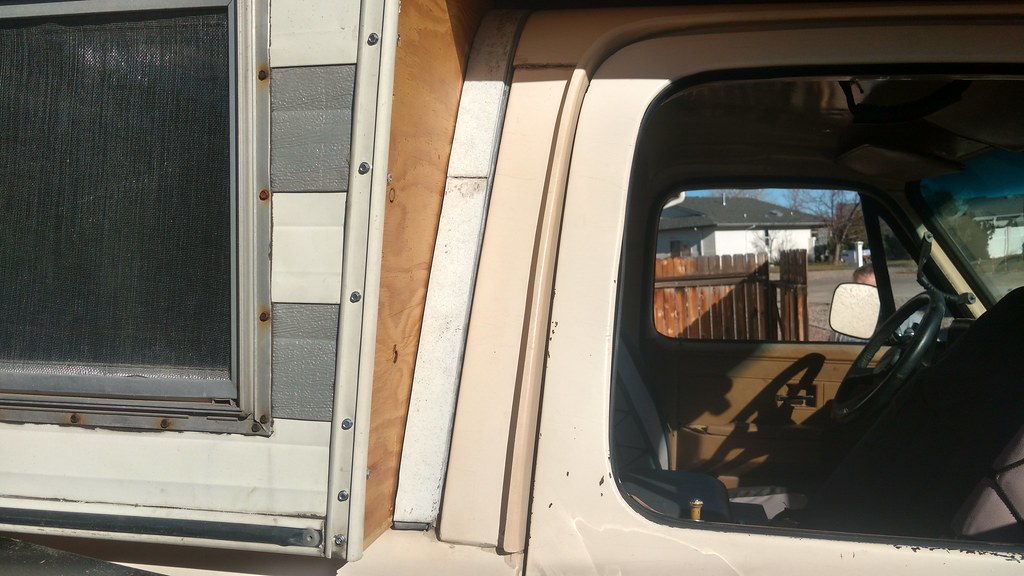
While we had the tools out we finished out our rough cut for the cab wall to match the contour of the cab opening.
With a location line traced where the top section is to sit we added a temporary screw on each side to hold it so we could drill out the holes for the bolts that will attach the camper to the roof of the cab.
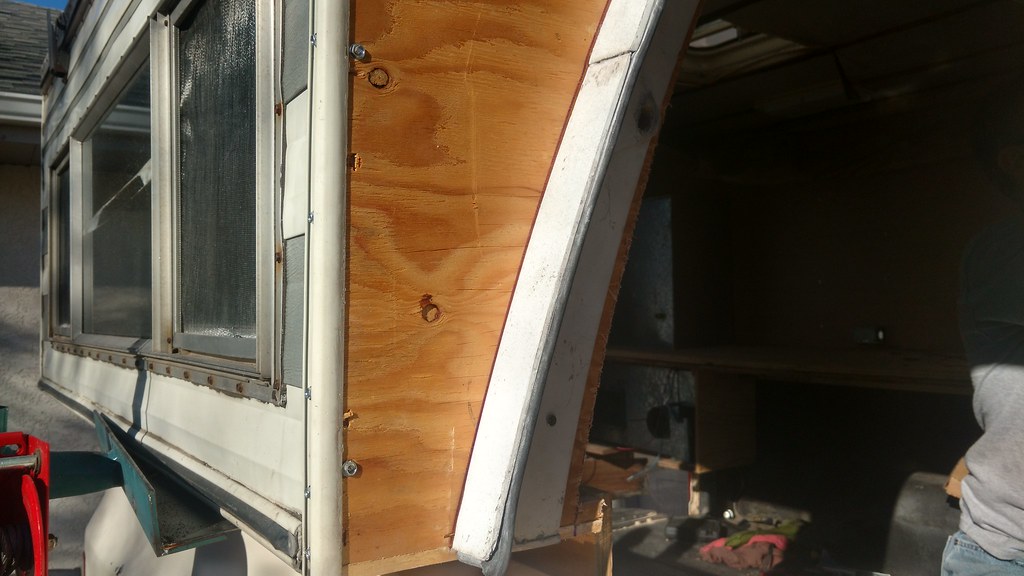
With the camper on we took care of another issue too. The forward section of the driver's side cabinet floor encroaches on the driver's seat going back all the way. A quick radius was drawn and cut out with a jigsaw.
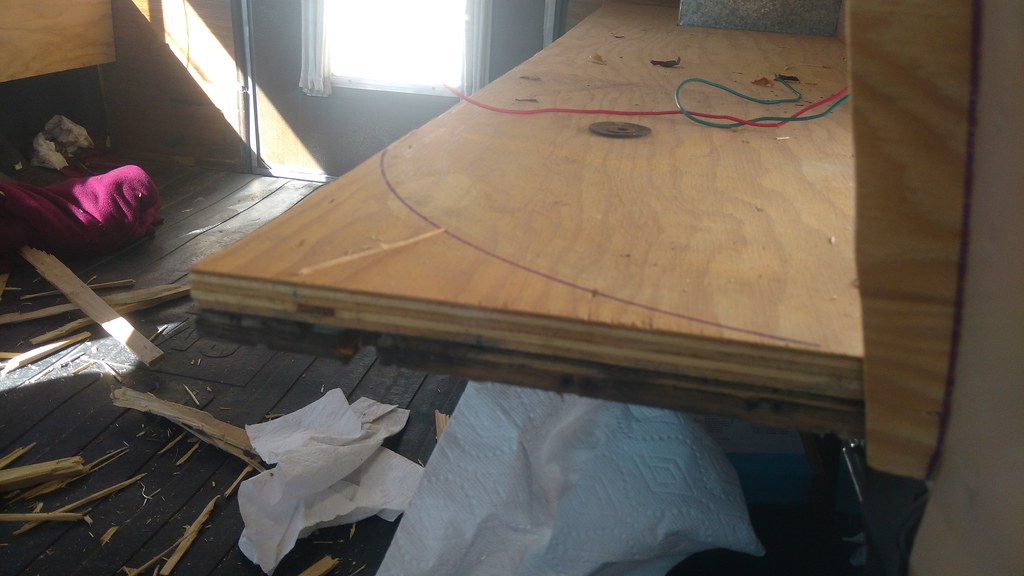
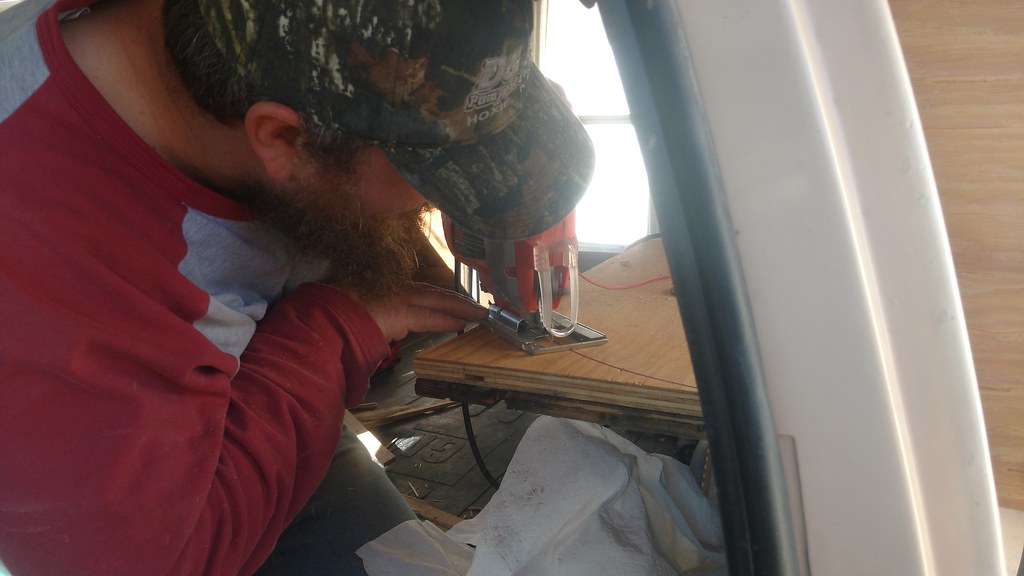
Now the seat can go all the way back and tilt to a comfy angle. All in all, this was a major milestone in the construction phase. We can now move on to cabinetry and rebuilding the bench/storage area. Not too much more and it's getting mounted permanently.
#35
Living The Dream
-
- Members
- 464 posts
Senior Member
- LocationFront Range, Colorado
Posted 11 December 2017 - 04:15 AM
That is looking good! Is there any rubber or foam or anything that also goes on that seal? Or will it be a permanent sealant like silcone?
My youtube channel about my Four Wheel Camper - https://www.youtube.com/c/timmorrissey
All about my camper - https://www.tgmorrissey.com/camper
Item I used in my build- http://bit.ly/TGMorrisseyParts
#36
longhorn1
-

- Members
- 2,826 posts
Ouch, that stings!
- LocationCarmel, Indiana
Posted 11 December 2017 - 11:33 AM
Awesome job. Is the exposed plywood on the front of the camper being covered with aluminum, or just painted? jd
#37
pollux
-
- Members
- 169 posts
Senior Member
- LocationLos Angeles
Posted 12 December 2017 - 12:01 AM
Zoomad: where did you get the modern-looking jacks?
my friend's old jack's gear broke. He needs one for his 85 Fleet. thanks
Edited by pollux, 12 December 2017 - 12:02 AM.
2015 FWC Eagle, 2016 Tacoma 4wd
#38
Zoomad
-
- Members
- 289 posts
Senior Member
- LocationColorado
Posted 12 December 2017 - 05:37 AM
That is looking good! Is there any rubber or foam or anything that also goes on that seal? Or will it be a permanent sealant like silcone?
The fiberglass section is sealed to the front wall of the camper with silicone. You can see the rubber gasket on the leading edge of the fiberglass section. On a stock fiberglass Blazer top there are actually two seals working together to seal the top to the cab. The one you see on the front of the section I've cut will get removed and a new stock seal installed. I'll also install the body side seal that fits in the channel. This way two things are accomplished to improve on the original way the camper installs to the body. One is the factory rubber seals will seal much better than just butting up the camper to the back of the cab with camper tape. Should be air and water tight. Second is now I have the ability to add 6 more attachment points to the vertical part of the cab. Mine was only attached to the bed rails. Now by doing what we've done we had a very easy way to match up where the holes are in the body and transferring them to the cab wall of the camper by drilling front to back. It may not seem like much, but what I felt on the ride home from Denver with just the side bolts the front of the camper was lifting with speed. Part of that had to have been coming from the gaping hole up in the bed area out front, but north of 65 mph I could see the gap from the cab to the camper increase. That's not good. So bolting them to the cab this way the camper isn't going anywhere.
Awesome job. Is the exposed plywood on the front of the camper being covered with aluminum, or just painted? jd
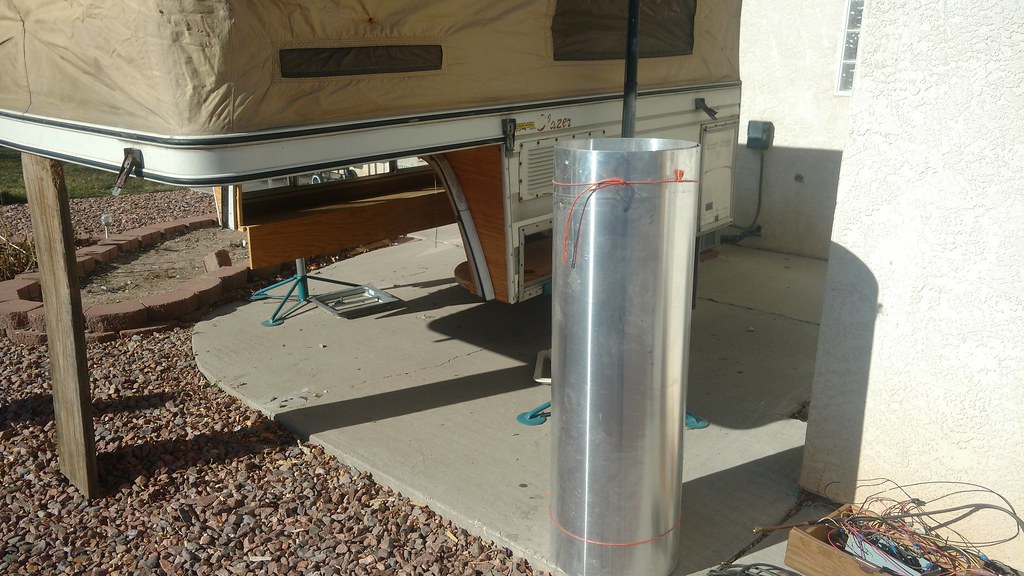
Yeah we aren't leaving the wood exposed. I've got some sheet aluminum I need to pick up from a co-worker to face it with. We will still be sealing the wood prior to that though.
Zoomad: where did you get the modern-looking jacks?
my friend's old jack's gear broke. He needs one for his 85 Fleet. thanks
Actually I got those from another member of this forum. He caught me prior to buying the camper and offered them up to me for $100. I jumped on them. You might notice mine have been modified slightly. We had to get some more up travel on the jacks to reach my higher bedsides. There is an extra 10 inches we added to get the reach we needed. The guy I bought them from bought them from some other dude. Not sure where they came from.
#39
Happyjax
-
- Members
- 1,444 posts
Senior Member
- LocationMaryland
Posted 12 December 2017 - 01:54 PM
Impressive!
2018 Ford F-250. Customized Bundutec Sable 
#40
Zoomad
-
- Members
- 289 posts
Senior Member
- LocationColorado
Posted 12 February 2018 - 04:42 AM
Been behind on updating. Work has been done. Actually got some weather around here so I couldn't get anything done this weekend, but here's a quick rundown of the latest work completed.
We still need to skin the outside exposed wood with some sheet aluminum one of my co-workers had stashed away.
 Work day on the camper. by Rob Zulian, on Flickr
Cab floor section glued and screwed in place. 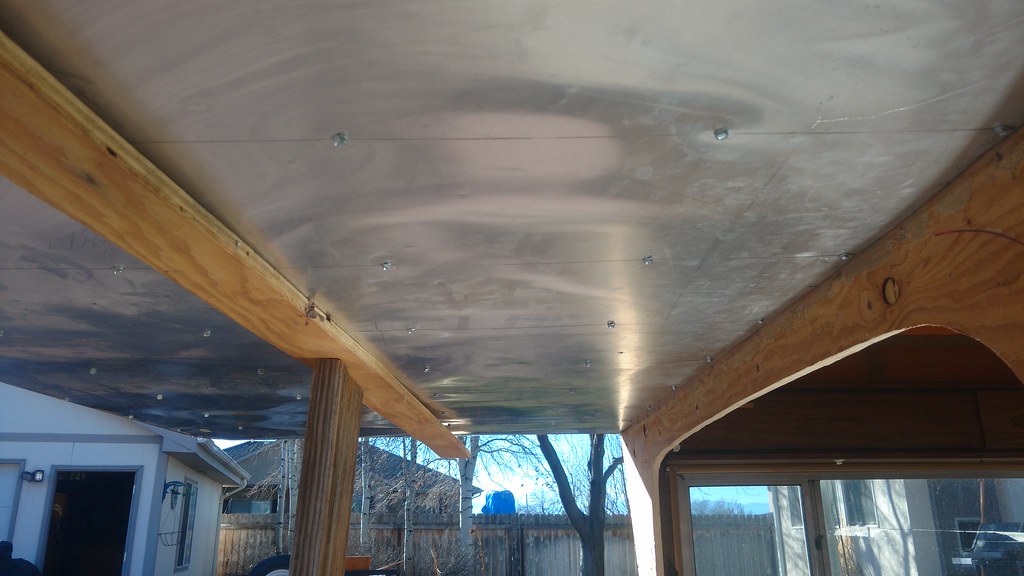 Work day on the camper. by Rob Zulian, on Flickr
Cab wall trimmed out with the fiberglass bolted in place. 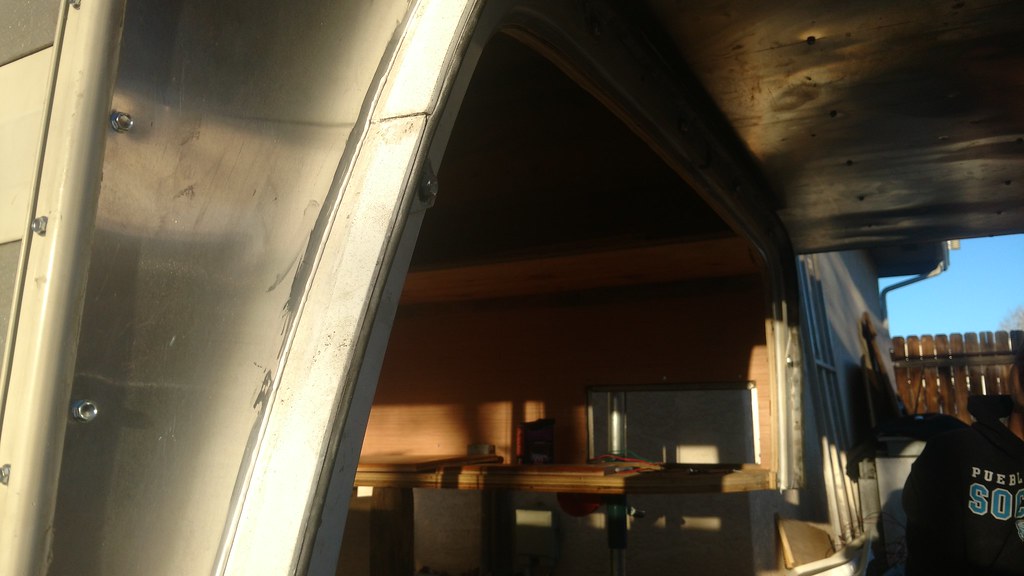 Work day on the camper. by Rob Zulian, on Flickr
Cabinet rebuilding started. 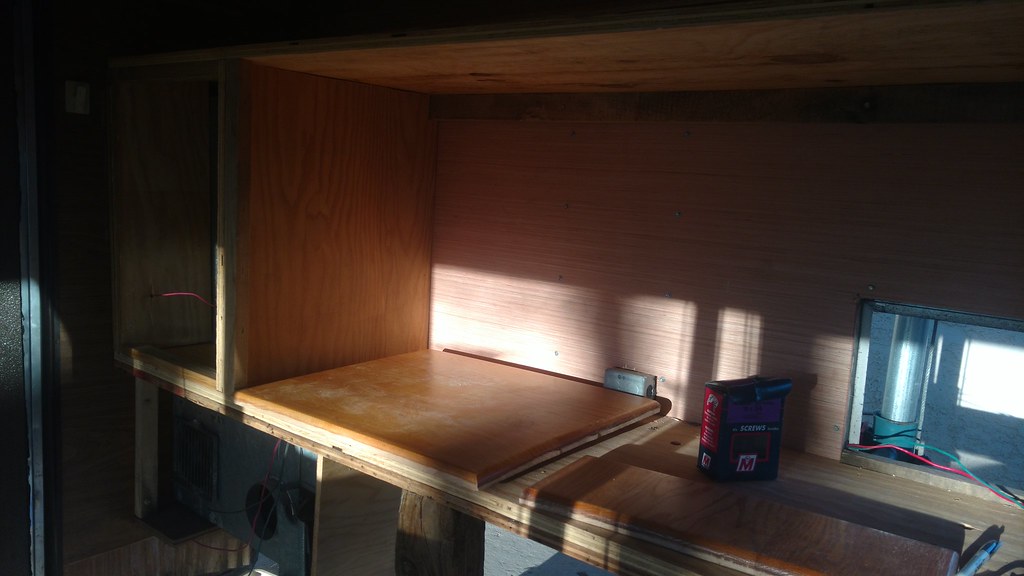 Work day on the camper. by Rob Zulian, on Flickr
John had some oak paneled doors from another cabinet he salvaged and didn't have any use for them we could repurpose them for this project. 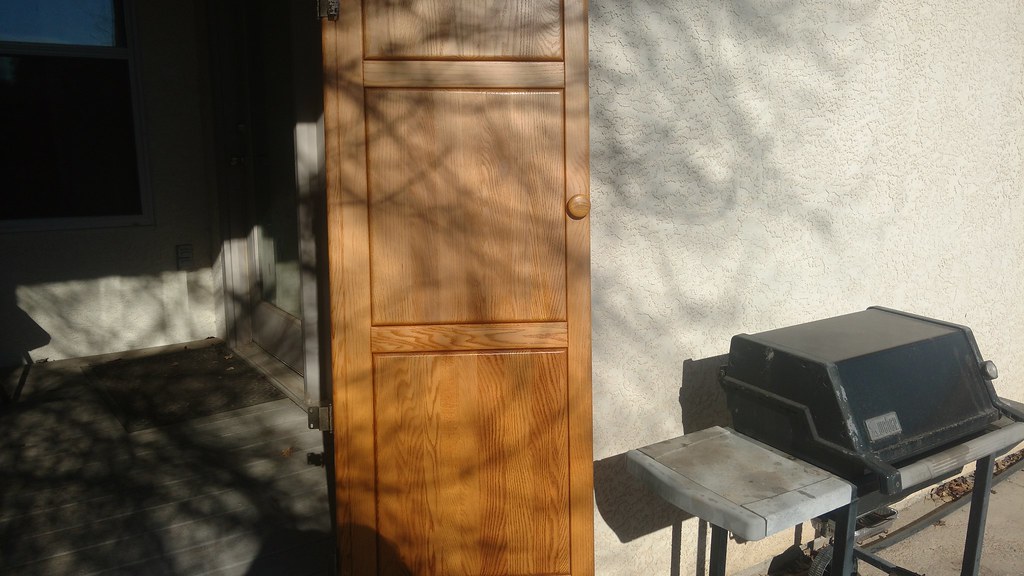 Work day on the camper. by Rob Zulian, on Flickr
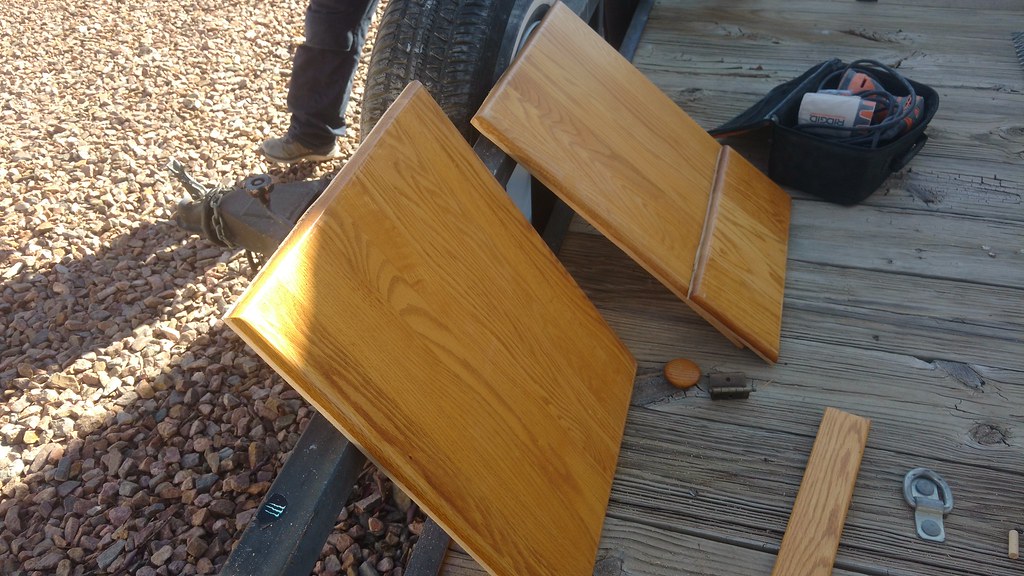 Work day on the camper. by Rob Zulian, on Flickr
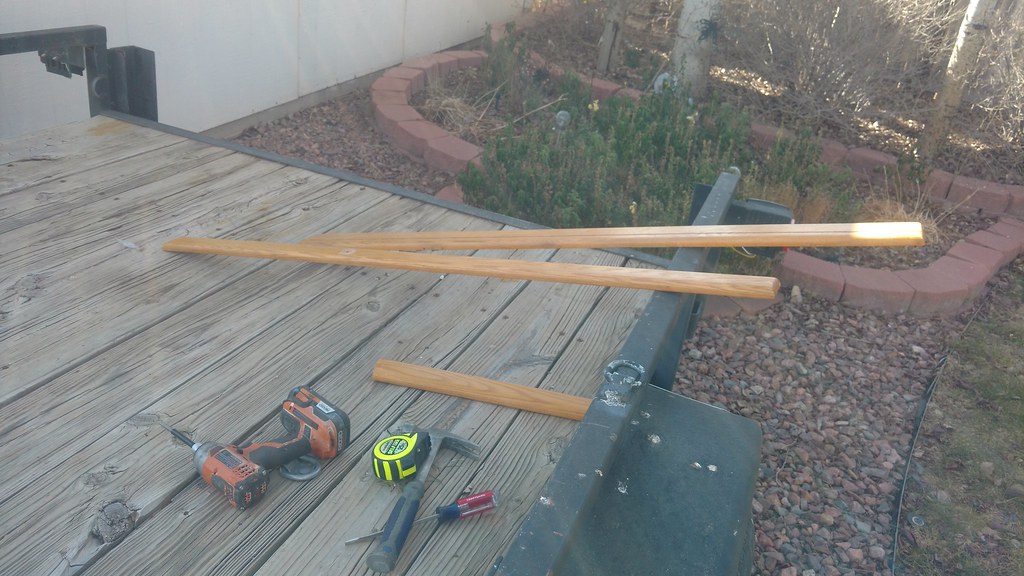 Work day on the camper. by Rob Zulian, on Flickr
Framework completed. 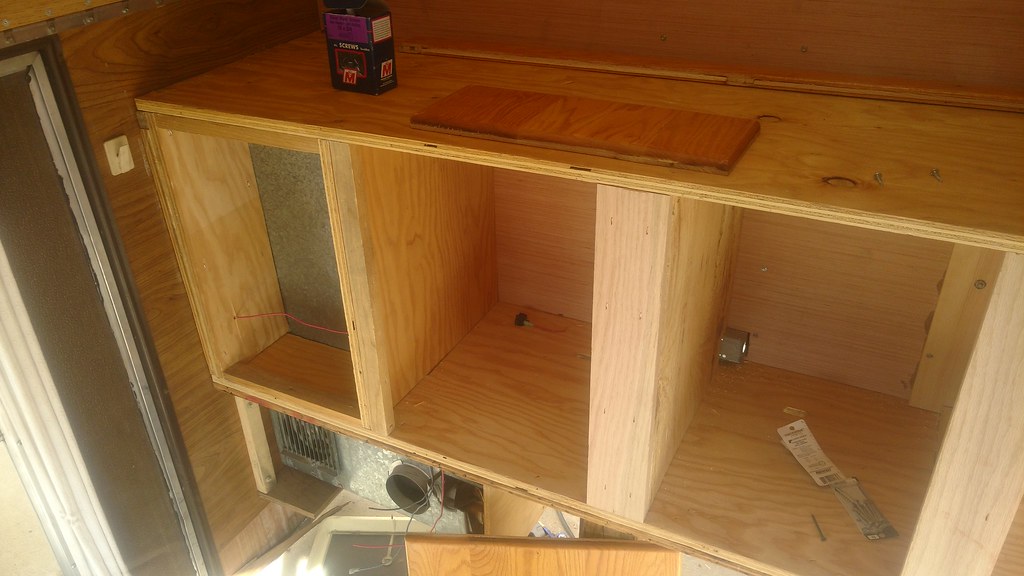 More work by Rob Zulian, on Flickr
Front corner was cut back to allow for clearance to my drivers seat. You'll notice the cab wall opening is cut open larger than the original version. Again this was done due to interference with the front seat not allowing it to move all the way back and have the seat back in a position I find comfy. 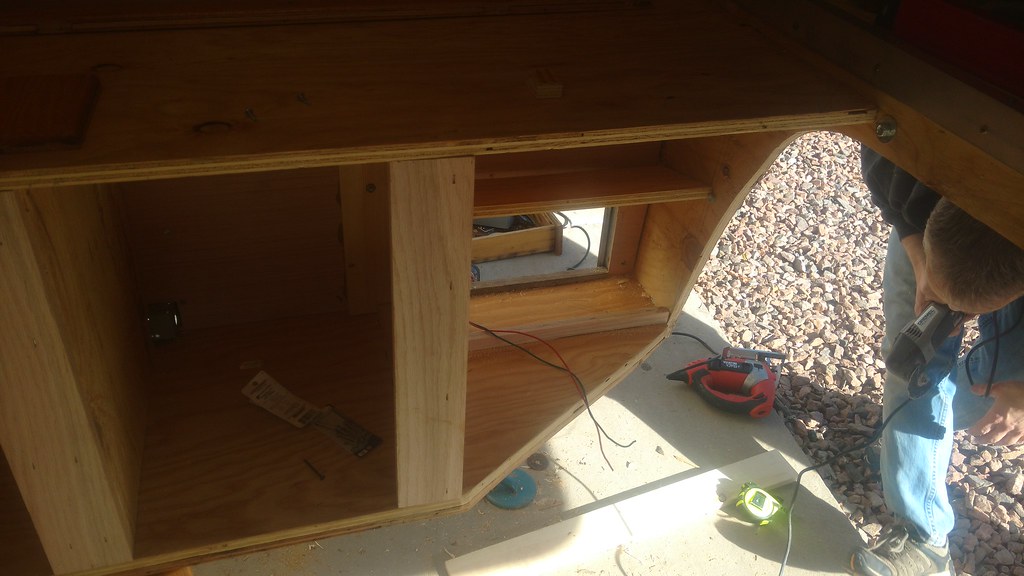 More work by Rob Zulian, on Flickr
This area will be very usefull. Lower cubby will contain the fuse panel and be the wiring hub for the camper. The middle vertical panel will be where the solar control panel, battery monitor panel, usb charge ports and switches will reside. The upper cubby will be for storage of small items. 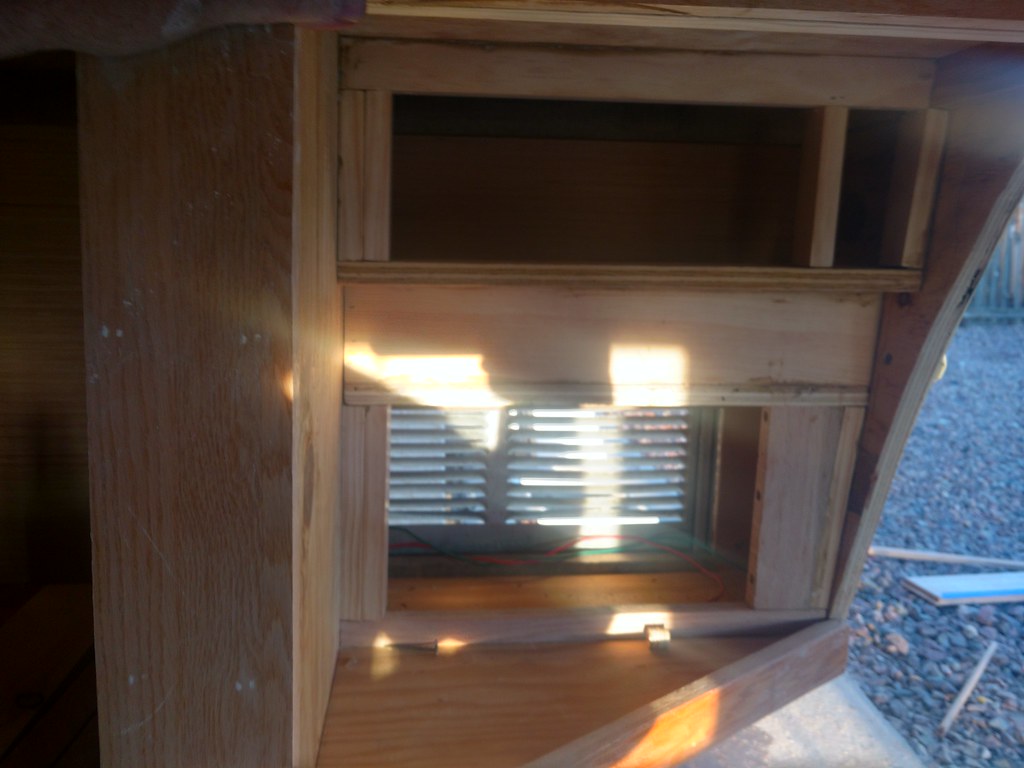 Cabinet work. by Rob Zulian, on Flickr
Cabinet framed out with the oak trim. Still need to hang the doors. 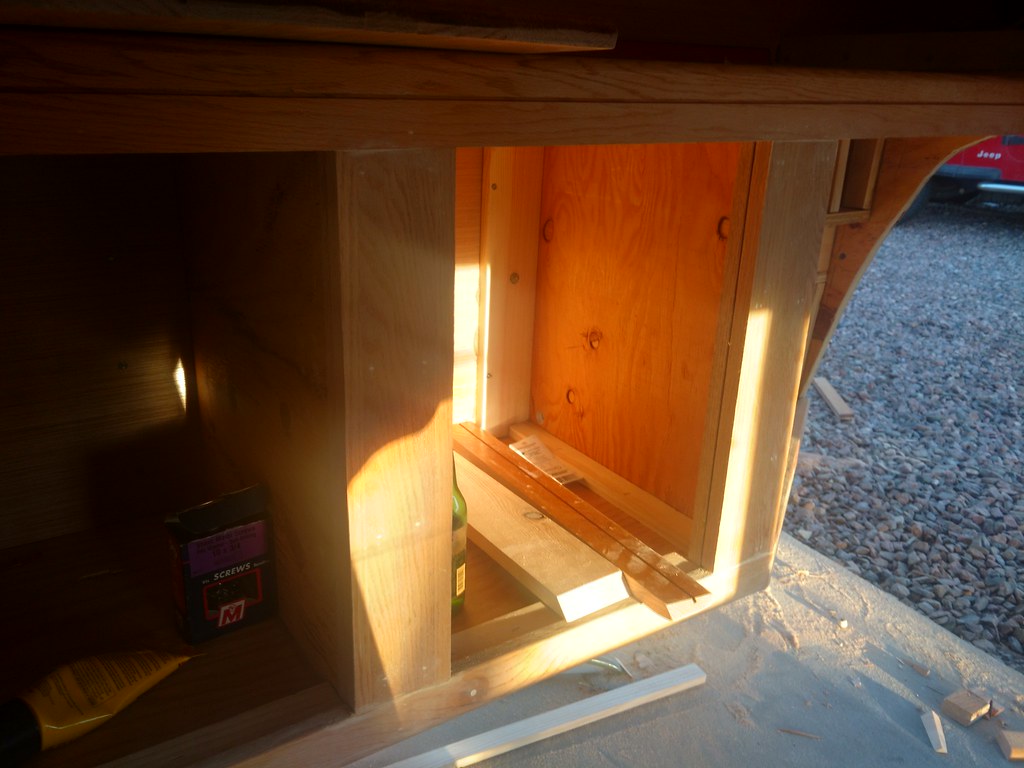 Cabinet work. by Rob Zulian, on Flickr
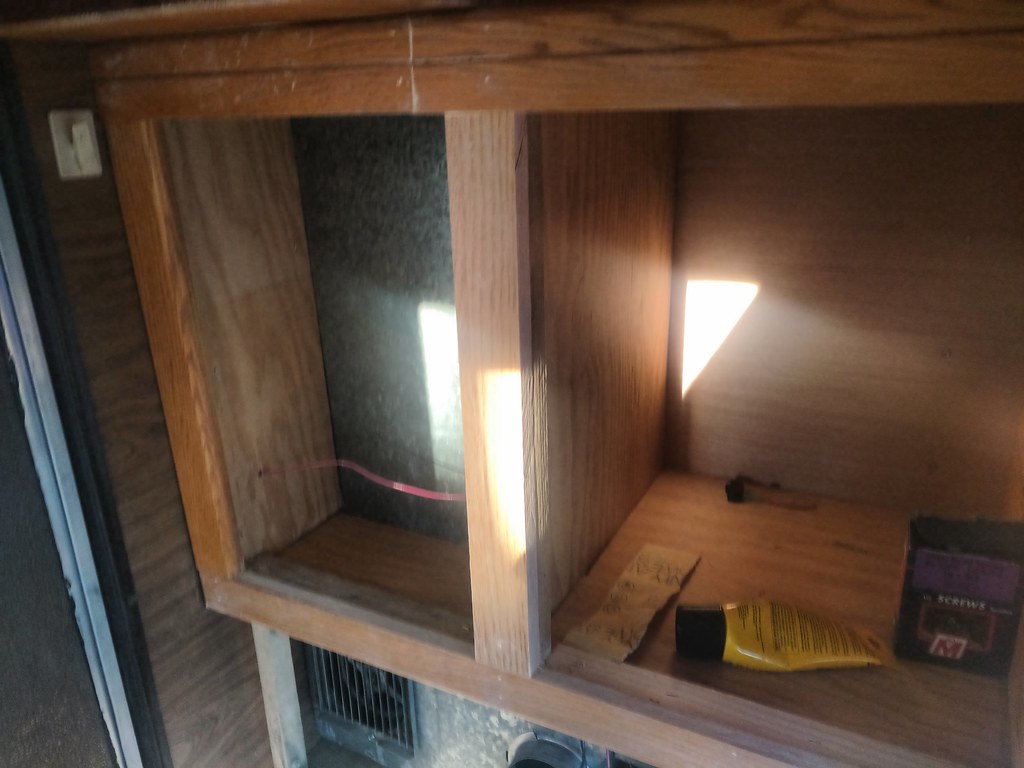 Cabinet work. by Rob Zulian, on Flickr
The countertop will be cut out of stainless steel and inset on the top. 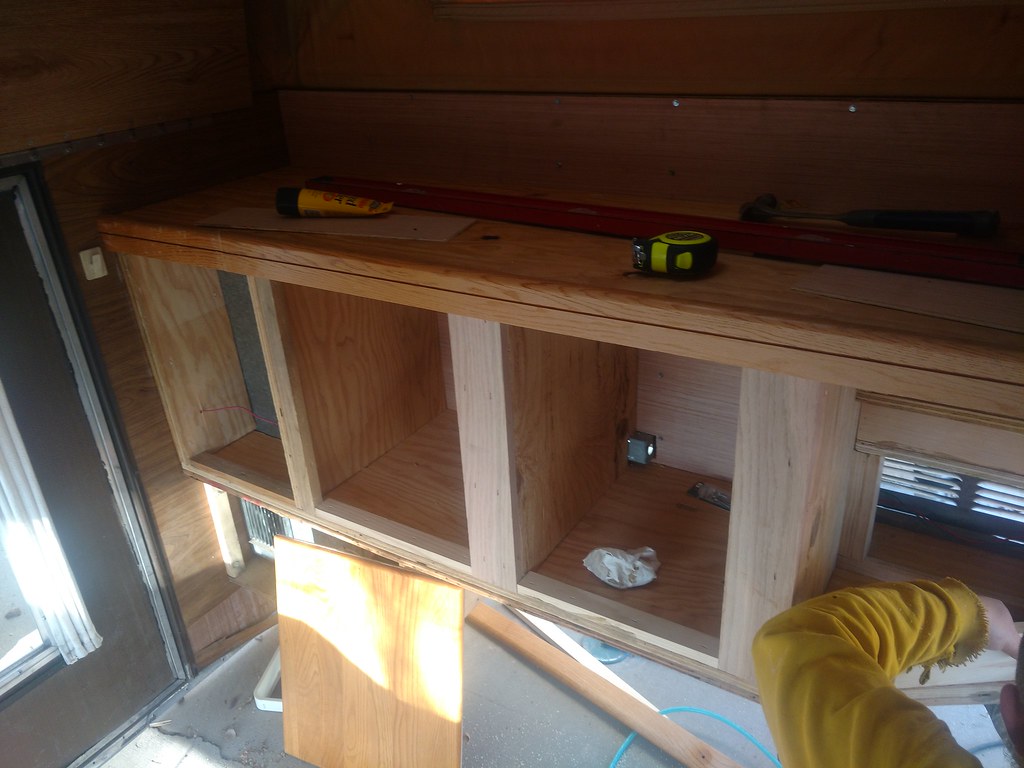 Cabinet work. by Rob Zulian, on Flickr
The cabinet is a large hurdle to get completed. All that is left to it is hang the doors, sand, stain/poly. Next phase is the inside of the roof. The stock headliner was water damaged and falling apart. So it's getting pulled along with the fiberglass batting insulation. Higher density foil backed insulation will be going back in, wiring run for the solar panel, lights and vent fan. The headliner going back in will be a plain white shower wall board. The wallboard is fairly thin/light and the white will brighten up the interior even with the lights off. Plus side is it's water resistant. We will probably reconstruct the lift panels in round metal electrical conduit and make a stronger setup than the plywood panels that are warped to hell.
From there, the camper needs the lower bench redone and the floor stripped of carpet and recovered in a vinyl flooring of some type. Then it's time to drop the camper on again.


Also tagged with one or more of these keywords: K5, Blazer, 4wc, 4wheel, FWC, pop-up, camper, crawlabago
Trucks, Campers, Gear Forums →
Gear Exchange →
2011 FWC Kestrel $16,800 Akron, OHStarted by Smorgash , 15 Apr 2024 |
|

|
||
Trucks, Campers, Gear Forums →
Gear Exchange →
2009 Eagle Four Wheel Camper Madison WisconsinStarted by WiscoK , 10 Apr 2024 |
|

|
||
Trucks, Campers, Gear Forums →
Gear Exchange →
FS: 2023 FWC Project M for 5.5' Full Size Beds - $14,000 - Colchester, VTStarted by danruss , 06 Apr 2024 |
|

|
||
Trucks, Campers, Gear Forums →
Gear Exchange →
For Sale: upgraded 2001 FWC EagleStarted by Wildcat , 26 Feb 2024 |
|

|
||
Trucks, Campers, Gear Forums →
Gear Exchange →
2001 Toyota Tundra W/ 2006 Four Wheel Camper HAWKStarted by carlajuliett , 21 Feb 2024 |
|

|
1 user(s) are reading this topic
0 members, 0 guests, 0 anonymous users
-
Bing (1)

