Jump to content


Photo
* * * * * 3 votes

From propane to diesel, a heater installation


  • Please log in to reply
38 replies to this topic

#1 Jsoboti

Jsoboti

    Advanced Member

  • Members
  • PipPipPip
  • 76 posts
  • LocationNevada

Posted 31 October 2023 - 02:06 PM

Decided to swap out the propane heater for a cheap Chinese diesel heater. To see a list of parts I purchased, see my post at 


https://www.wanderth...evation-winter/


In addition to those items, I also purchased...


10L HDPE Jerrycan from US Plastic. This is the only 10L container I could find that would fit in the propane compartment with 1 propane tank still installed. Also purchased a standpipe and fuel line quick-disconnect kit. Still need a check valve to vent the tank.  https://www.usplasti...&clickid=search


Universal turret mount, used on almost every install on YouTube. https://www.amazon.c...0?ie=UTF8&psc=1


Exhaust Heat Wrap to minimize possibility of the exhaust melting the fuel line. They're very close to each other. https://www.amazon.c...0?ie=UTF8&psc=1


Stainless Cover. https://www.amazon.c...0?ie=UTF8&psc=1


  • 3

2014 F-350 | 2019 FWC Hawk | King Suspension 


#2 Jsoboti

Jsoboti

    Advanced Member

  • Members
  • PipPipPip
  • 76 posts
  • LocationNevada

Posted 31 October 2023 - 02:33 PM

Step 1 was to remove the Attwood/Dometic heater. After removing the plastic cover inside the camper and the 2x brackets mounted to the front of the heater, remove the exterior cover. You'll have to remove the black plastic surround before the heater will come out. To do that, you must bend the silver metal tabs to face outward. 


gallery_10572_1606_4558571.jpg


Next you'll disconnect the propane line. Your propane is OFF right?Then you'll have to carefully separate the black plastic surround from the camper siding. It's REALLY on there because of the Butyl tape. 


gallery_10572_1606_1753003.jpg


Once you plastic surround is removed, you should be able to push the unit into the camper. Disconnect the 4 electrical connections. 1 Pos, 1 Neg, 1 Blue Thermostat, and 1 additional blue wire, no idea what it's used for. 


gallery_10572_1606_2887888.jpg


For size comparison, here is the diesel heater sitting in the propane furnace compartment. The size difference is incredible. I can't believe they don't come like this from the factory. 


gallery_10572_1606_293982.jpg


Hopefully next post will have the unit installed! 


Edited by Vic Harder, 02 November 2023 - 01:42 AM.

  • 2

2014 F-350 | 2019 FWC Hawk | King Suspension 


#3 Vic Harder

Vic Harder

    Doctor Electric

  • Site Team
  • 4,974 posts
  • LocationCalgary, Alberta

Posted 31 October 2023 - 10:41 PM

Thanks for doing this write up.  I suspect I will be doing this for my next build!


  • 0

#4 goinoregon

goinoregon

    Senior Member

  • Members
  • 520 posts
  • LocationPDX

Posted 01 November 2023 - 12:30 AM

i put a propex propane heater in my ATC, and it was similar in size to this diesel.  the propex was very tidy, and easy for even me to install.


  • 0

Oregon


#5 tstumpfig

tstumpfig

    Advanced Member

  • Members
  • PipPipPip
  • 46 posts
  • LocationBend, OR

Posted 01 November 2023 - 09:10 PM

Great stuff so far, can't wait for the next episode


  • 0

2005 FWC Hawk

2005 GMC Sierra 2500 Duramax CCSB


#6 Jsoboti

Jsoboti

    Advanced Member

  • Members
  • PipPipPip
  • 76 posts
  • LocationNevada

Posted 05 November 2023 - 03:07 AM

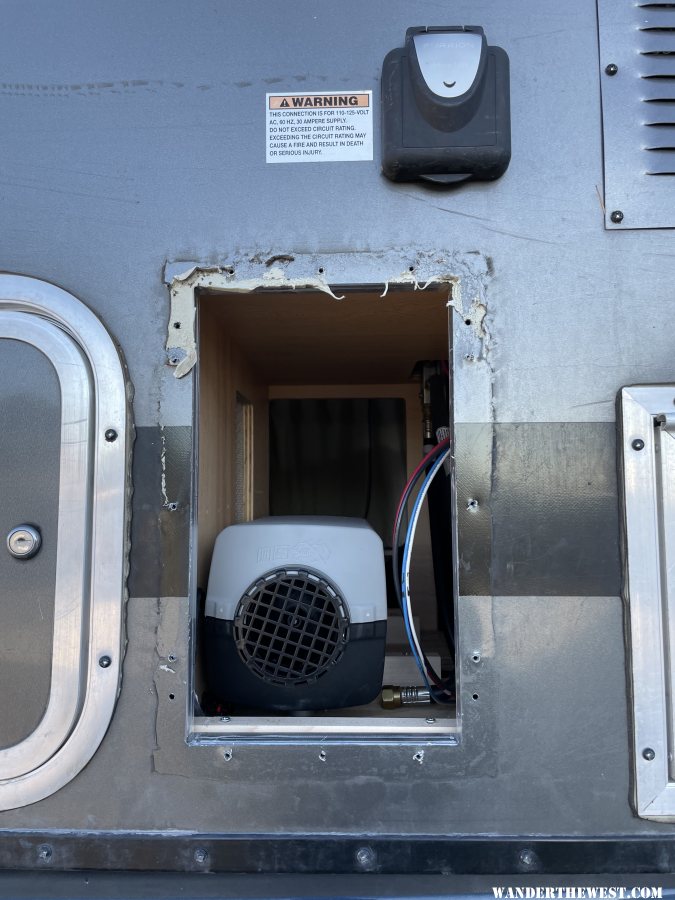
Made some progress today. The hardest part was figuring out how I wanted to mount the heater and where. Space for the combustion air intake and exhaust is tight as I only have 3 inches from the outermost wall of the camper to the bed rail of the truck. 


I settled on a turret mount, which required drilling a 5 inch hole through the camper. Scary! And also surprisingly difficult in such a small space. I started by drilling a pilot hole, to test how far inward I could drill the hole, without hitting the outermost wall of the camper. 


Pilot hole drilled


gallery_10572_1606_2529022.jpg


View from underneath. This tells me I can cut about 3/4" inward from where this hole is drilled, without hitting the lower wall of the camper. 


gallery_10572_1606_1091306.jpg


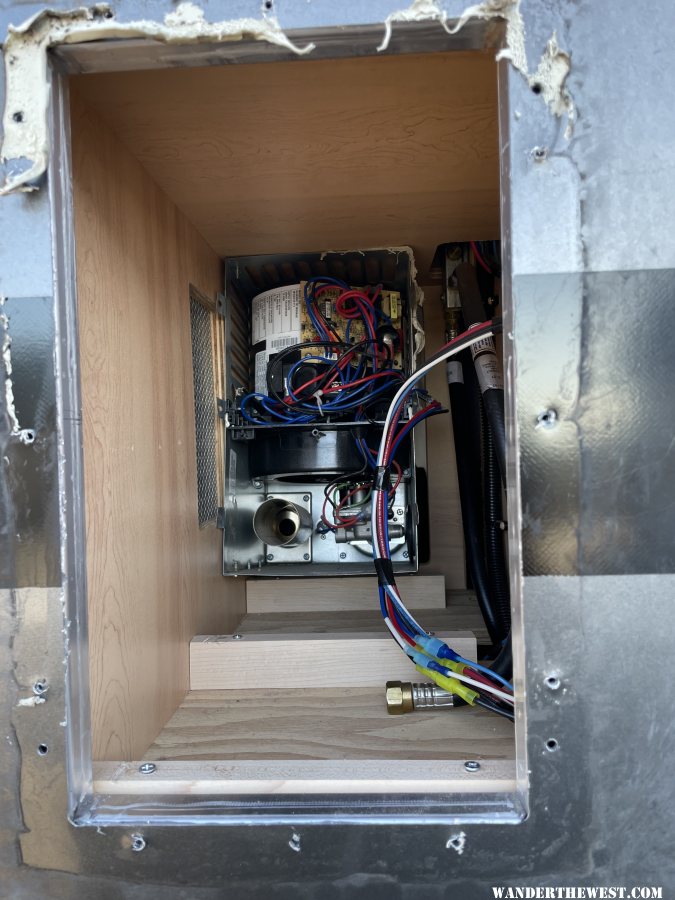
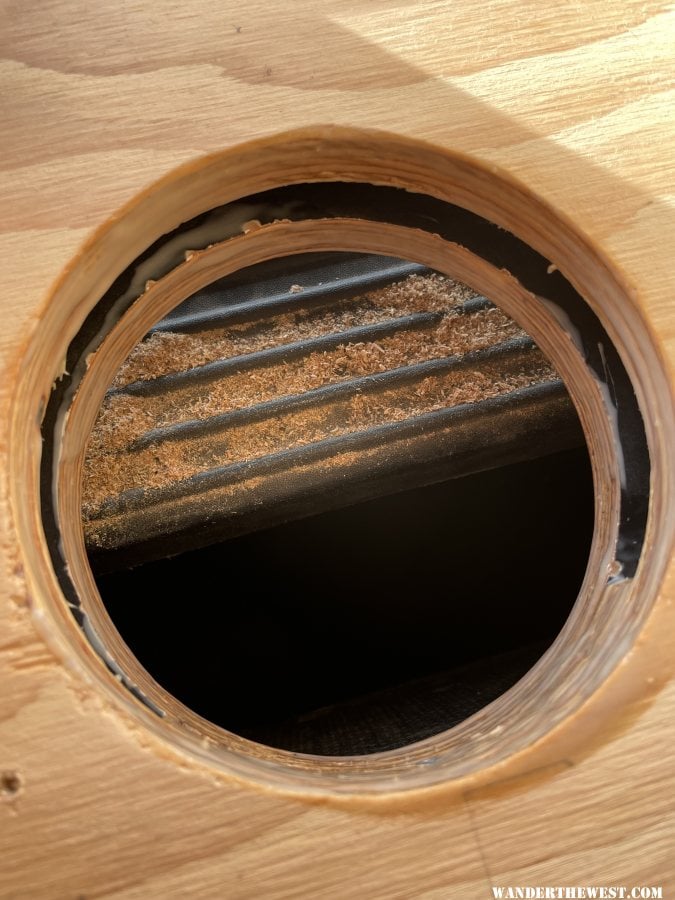
Once I figured out how far inward I could drill the hole, I grabbed the 5" hole saw. I was surprised to see the construction under this cabinet. A layer of plywood, an air gap, then another layer of plywood. There was an extra piece that did not extend all the way into the hole, which I carved out with a chisel. 


gallery_10572_1606_2921362.jpg


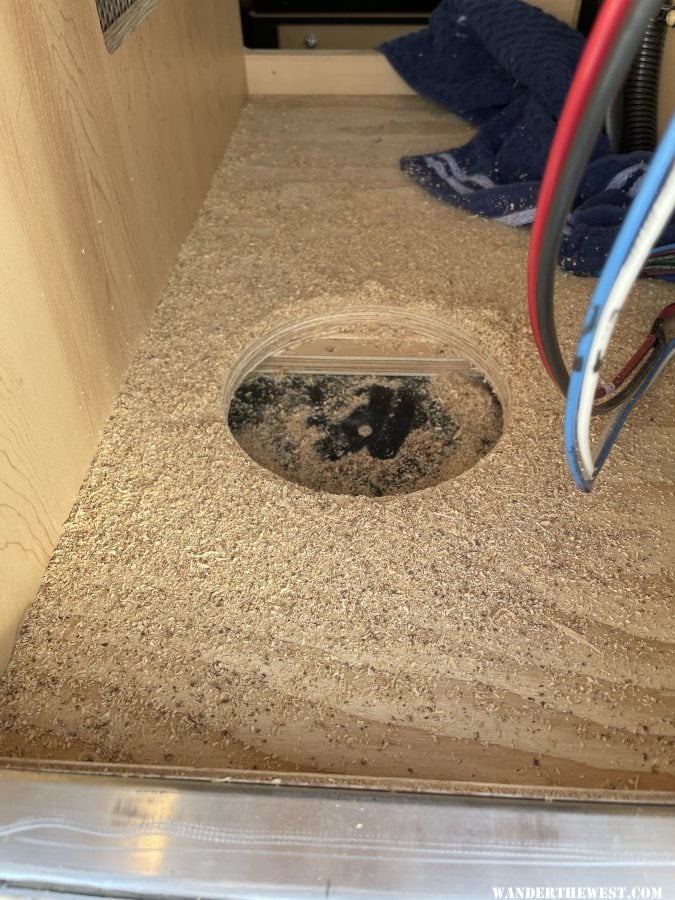
Once that small piece was out of the way I was able to finish the cut with the hole saw. I used a 2 part epoxy to seal the raw edges, seems to have worked well. 


gallery_10572_1606_2080636.jpg


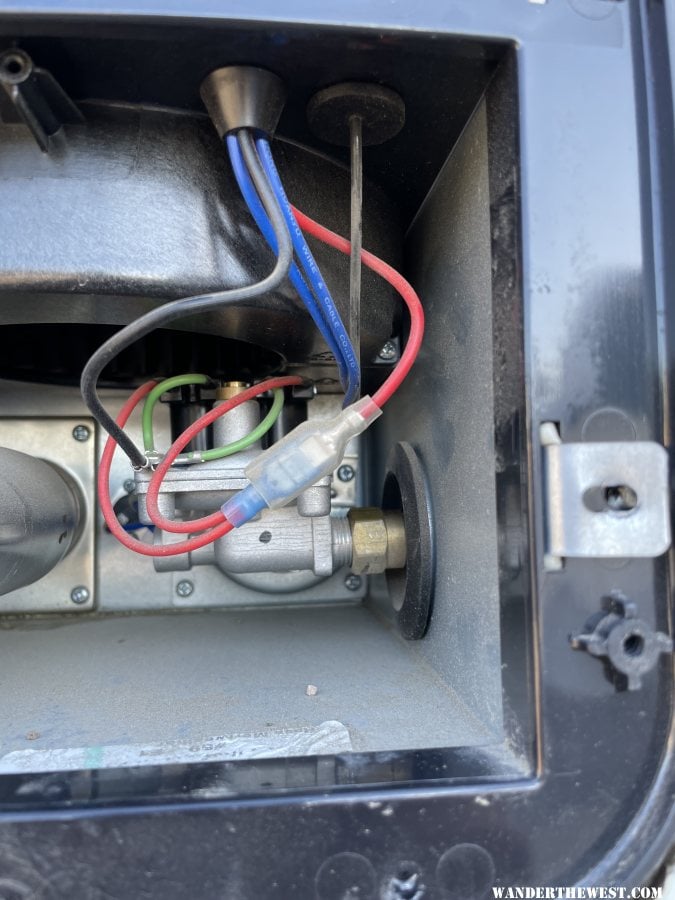
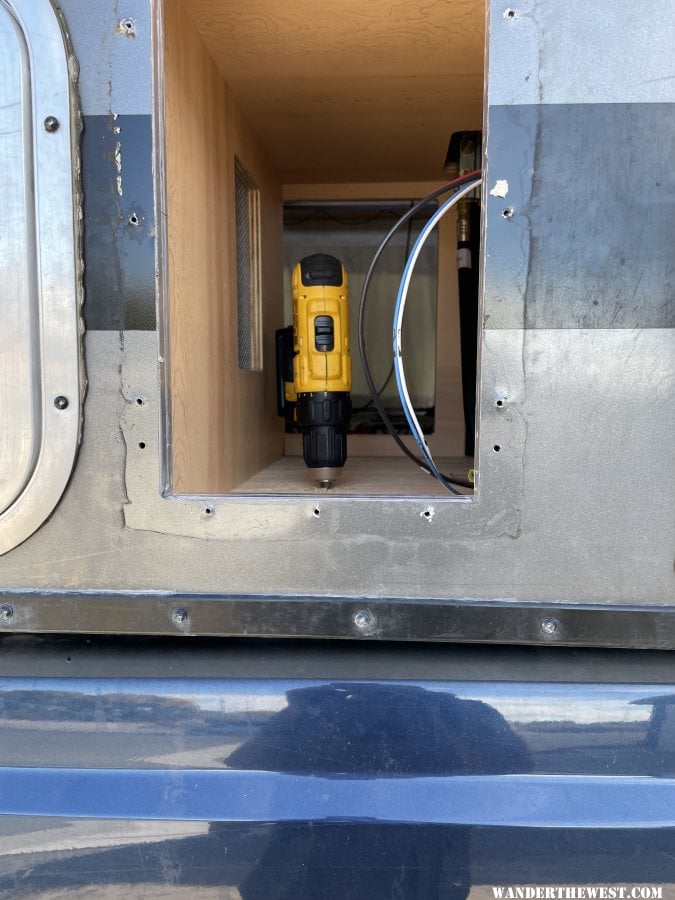
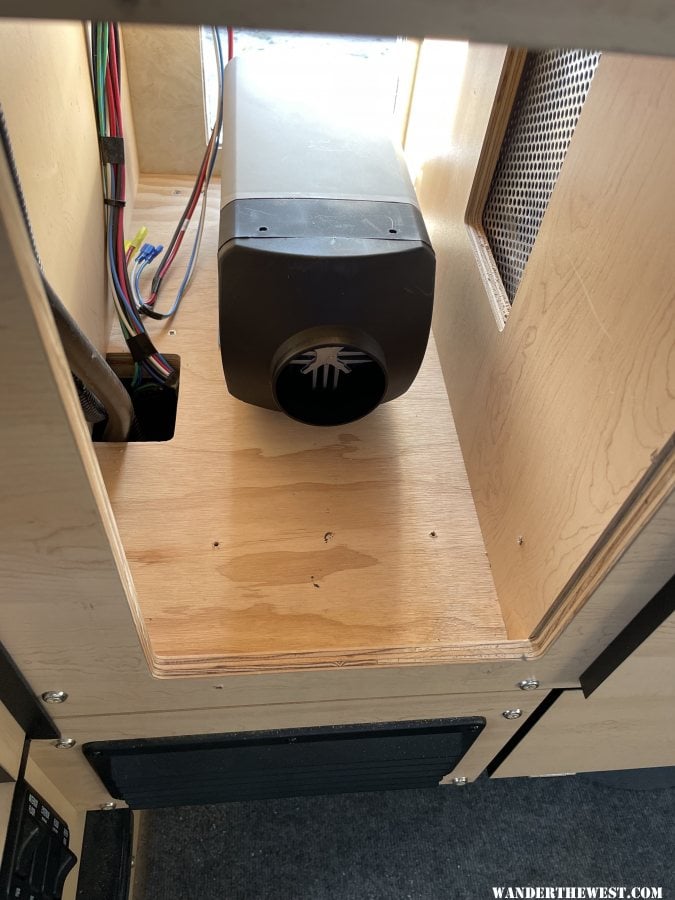
As you can see in the above image, the bed rail will be an issue for the combustion intake hose. The intake hose would have to make a 90 degree turn in 1.5 inches of drop. I think that tight of a bend may break the tube. Any thoughts on using copper or PVC that has a 90 degree on it instead of the traditional flexible ducting? 


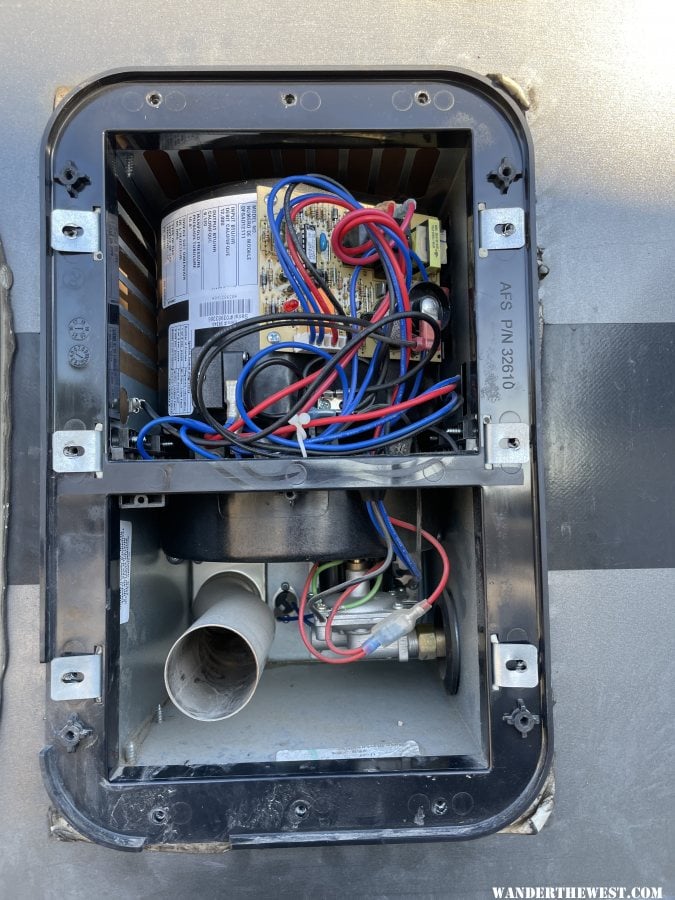
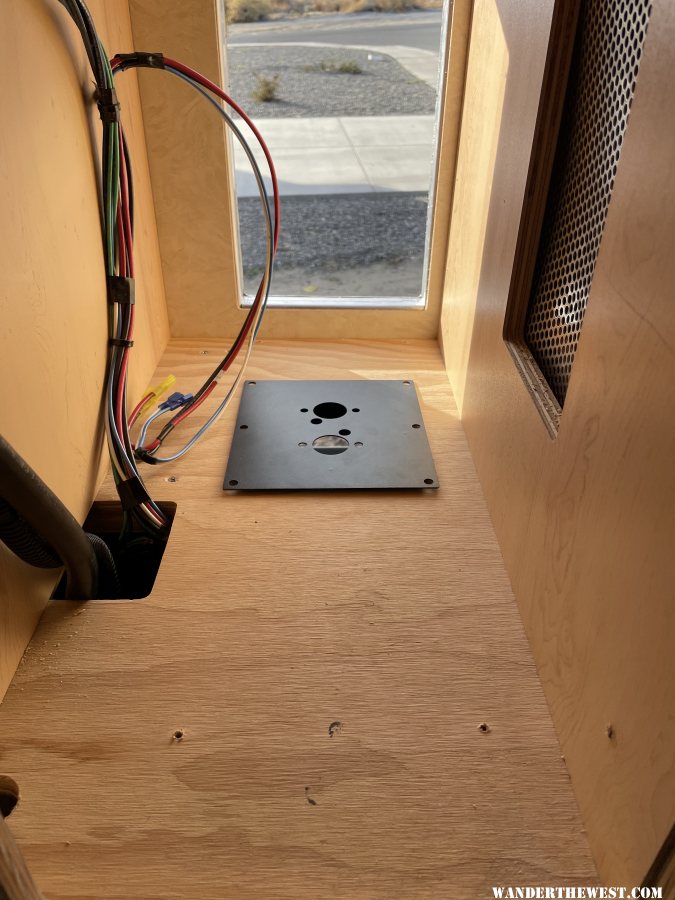
The turret mount dropped into the hole. 


gallery_10572_1606_333076.jpg


The heater sitting in the turret mount. May have enough room to turn this into a usable half cabinet! 


gallery_10572_1606_601179.jpg


I think the rest will require the camper to be off the truck. Hopefully I can get it pulled off sometime this week. 


  • 0

2014 F-350 | 2019 FWC Hawk | King Suspension 


#7 Jsoboti

Jsoboti

    Advanced Member

  • Members
  • PipPipPip
  • 76 posts
  • LocationNevada

Posted 06 November 2023 - 02:38 PM

I decided to bench test the heater as once it's installed, it will be really difficult to get out. 


gallery_10572_1606_3610063.jpg


I couldn't get the unit to fire up fully, kept getting E-10 fault code. Which the internet says is either a Temp. Sensor Failure, or simply "Failure to start". I'm leaning towards the latter. I think I need to come up with a better solution for fuel delivery in this setup. I ran 4 priming cycles, but with the relatively clear diesel, it was difficult if the fuel hose was completely full of diesel or not. 


I'll rig up something better and give it another shot. I won't install the unit until I know she can work properly. 


  • 1

2014 F-350 | 2019 FWC Hawk | King Suspension 


#8 kmcintyre

kmcintyre

    Senior Member

  • Members
  • 1,386 posts
  • LocationBoise, ID

Posted 10 November 2023 - 11:48 AM

Nice progress.  I'm sure many people have had the conversation with FWC about furnance options (like me) and have received the same answer. If there was an approved / certified RV furnace they would have used it by now.  You'd think some company would recognize this "gap" in RV furnaces and develop better options.


  • 1

Boise, ID

2022 Chevy 3500 HD

2023 FWC Flatbed Hawk


#9 Vic Harder

Vic Harder

    Doctor Electric

  • Site Team
  • 4,974 posts
  • LocationCalgary, Alberta

Posted 10 November 2023 - 06:59 PM

Dunno about “improved” since one would have to know what all the design parameters are that RV builders are looking for. Seems some builders think Propex, Truma, etc are “better” but other builders do not. Hard to judge when we don’t know what their priorities are.
  • 0

#10 goinoregon

goinoregon

    Senior Member

  • Members
  • 520 posts
  • LocationPDX

Posted 10 November 2023 - 07:08 PM

I agree with Vic.

I also wonder if the 5" hole is really necessary ?   that seems a bit large.  when i did the propex, i drilled an exhaust thru side, and then snaked the fresh air intake out back towards the rear tie down area.  go


  • 0

Oregon


0 user(s) are reading this topic

0 members, 0 guests, 0 anonymous users