Then you are at the mercy of being California compliant.
 3 votes
From propane to diesel, a heater installation
Started by
Jsoboti
, Oct 31 2023 02:06 PM
38 replies to this topic
#11

pvstoy
-
- Members
- 2,775 posts
Senior Member
- LocationCarson City, NV
Posted 10 November 2023 - 07:57 PM
Patrick
2015 FWC Hawk Flatbed
#12
Vic Harder
-

- Site Team
- 4,974 posts
Doctor Electric
- LocationCalgary, Alberta
Posted 10 November 2023 - 11:14 PM
I agree with Vic.
I also wonder if the 5" hole is really necessary ? that seems a bit large. when i did the propex, i drilled an exhaust thru side, and then snaked the fresh air intake out back towards the rear tie down area. go
Likewise. Two 3/4" holes.
2015 Silverado 3500 crew cab 8' bed Diesel
2012 ATC Puma Shell build - https://www.wanderth...012-puma-build/
Power considerations thread - https://www.wanderth...e-power-scotty/
Building out an electrical system - So, you want to setup a good electrical system in your camper? - Electrical, Charging, Solar, Batteries and Generators - Wander the West
#13
Jsoboti
-
- Members
-

- 76 posts
Advanced Member
- LocationNevada
Posted 11 November 2023 - 04:04 AM
Agree the 5 inch hole isn't 100% necessary. It does help with shielding heat thought with the unit raised up. If the unit was flush with the bottom of the cabinet, the air intake hose wouldn't clear the bed rail. Most of the YouTube mechanics seemed to be using these turret mounts so I figured I would as well. Hopefully it wasn't a mistake!
2014 F-350 | 2019 FWC Hawk | King Suspension
#14
Jsoboti
-
- Members
-
- 76 posts
Advanced Member
- LocationNevada
Posted 11 November 2023 - 04:34 AM
Realized the heater was sitting too low in the cabinet, would have been tough to get clearance for intake ducting and combustion intake hose beneath.
Decided to make a spacer for the turret mount to sit on, raising the heater up about 1/2 an inch.
Heater sitting on the spacer, much mo betta for clearance to the bottom lip of the exterior opening.
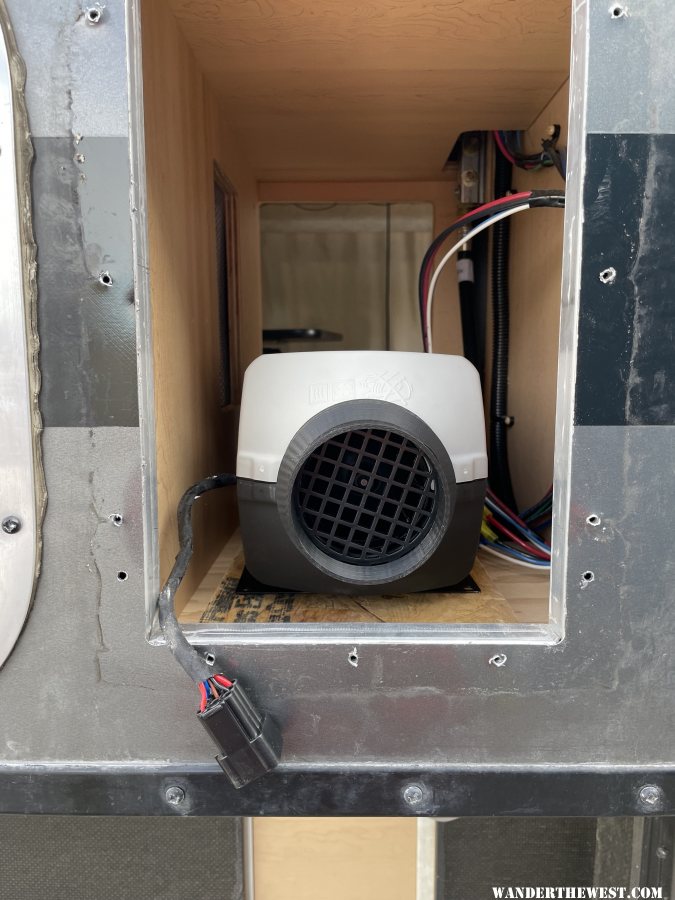
Used a high temperature sealant around the turret mount to prevent any exhaust gasses or moisture from getting back inside the camper.

Turret mountain installed on the spacer

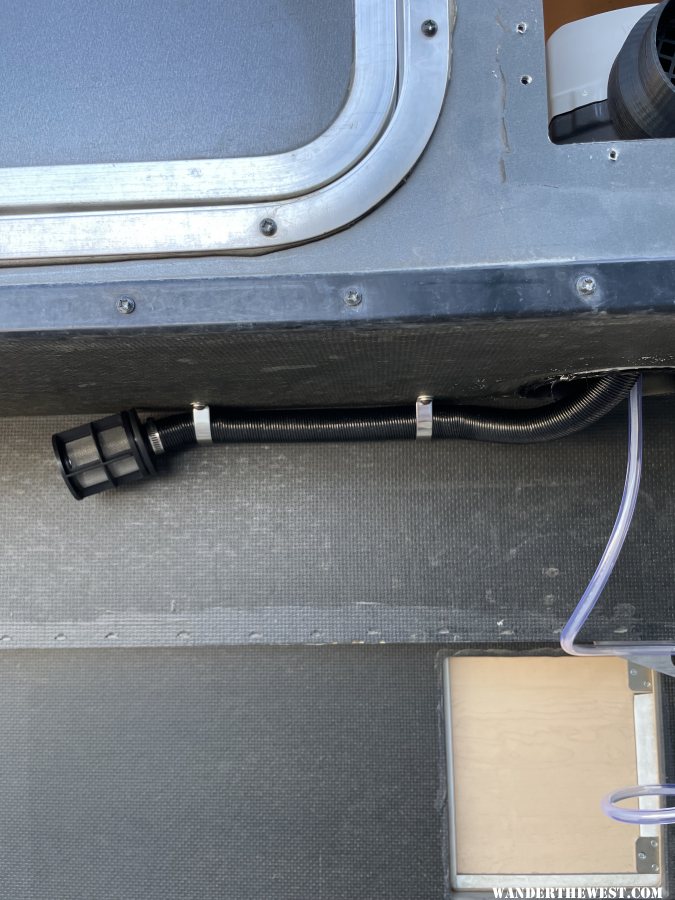
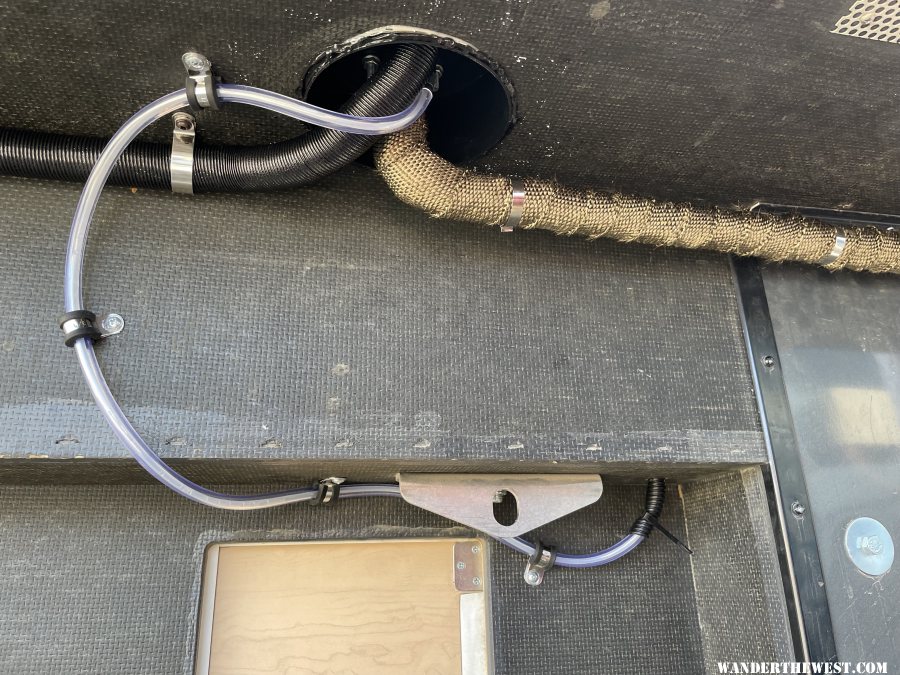
Ran the combustion intake hose forward, mounted as flush to the camper as I could. Worried about crushing it while putting the camper on the truck. I ran the 4mm fuel line through a slightly larger plastic hose for a little added protection.
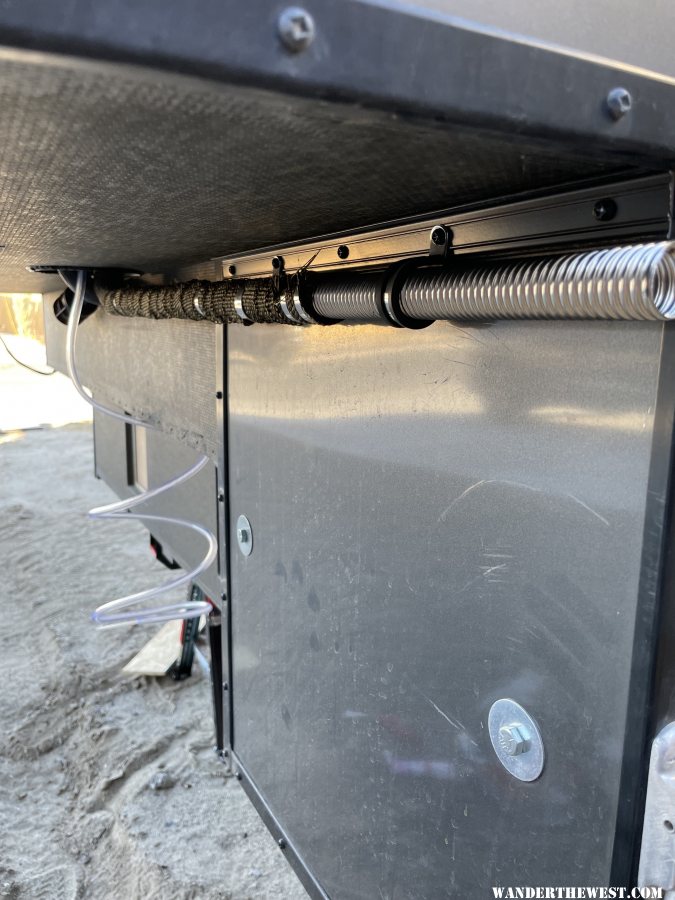
Ran the exhaust aft. Wrapped most of it in exhaust wrap to help protect the fuel line and the camper from heat. The way I had to cut the exhaust hose, I can't get the muffler on. I need to expand the hose about 1-2mm. Not sure how I'm going to skin that cat yet.
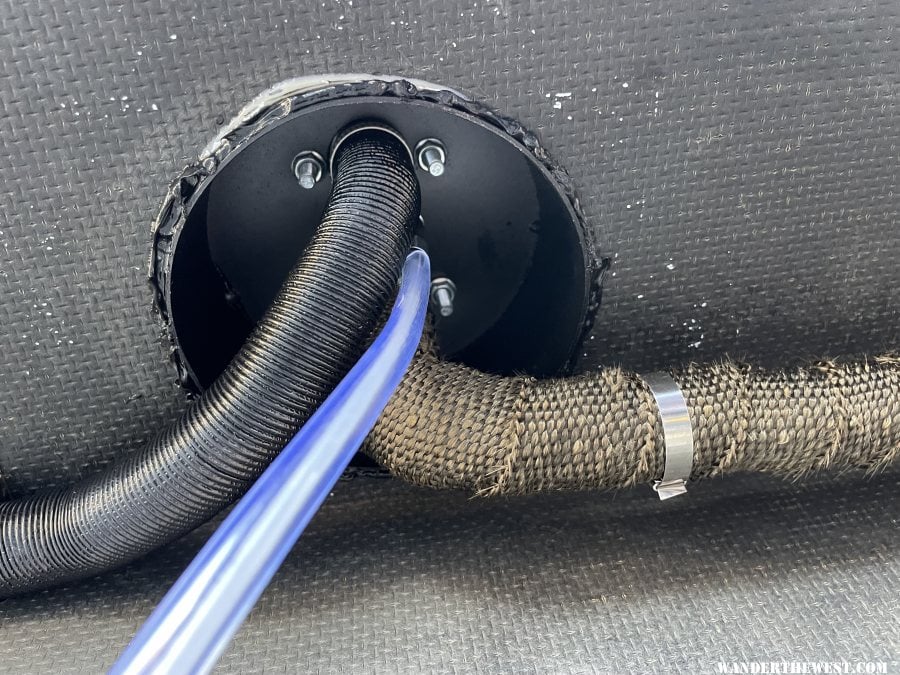
View looking up underneath the turret mount. major PITA to get the hose clamps tight. Should have assembled it all on the bench and put the turret, heater, hoses into the camper at the same time. Seemed almost impossible to secure the turret mount with the heater already bolted to it. However, that is how most people on YouTube seem to do it so it must be possible.
I also used the same high temp. sealant around the bottom lip of the turret mount again to seal out exhaust gasses and moisture. Not the prettiest silicone job but hey, it's DIY.
So far I'm happy with how it's progressing. Fuel system and electrical tomorrow!
2014 F-350 | 2019 FWC Hawk | King Suspension
#15
goinoregon
-

- Members
- 520 posts
Senior Member
- LocationPDX
Posted 11 November 2023 - 06:28 PM
nice work. thx for pics. maybe you could add some 'pipe' sections to cover the pipe. might help from getting crushed when putting camper on.
Oregon
#16
Jsoboti
-
- Members
-
- 76 posts
Advanced Member
- LocationNevada
Posted 12 November 2023 - 02:57 PM
I ran the fuel line as close to the camper as possible to make sure there's enough clearance when the camper goes back on the truck. The end goal was to get the fuel line into the propane compartment. If I had gone straight back into the compartment, the fuel line would have come into the compartment too low and the propane bottle would be interfering with it and wouldn't sit right. So I had to run the line up into the camper and then back into the propane compartment.
I went back and sealed around the split loom with silicone after, don't have a picture of that thought
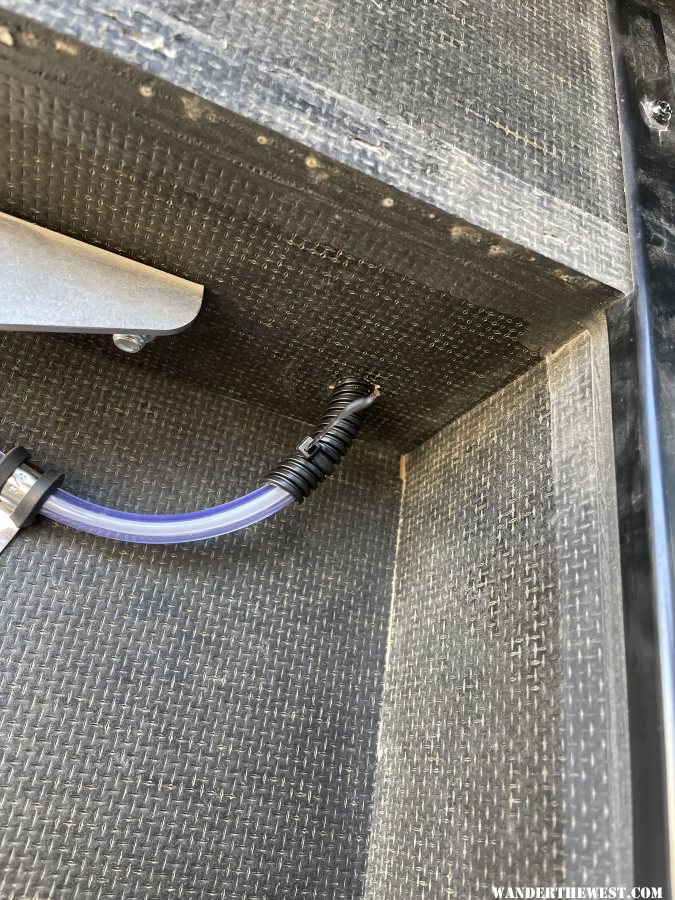
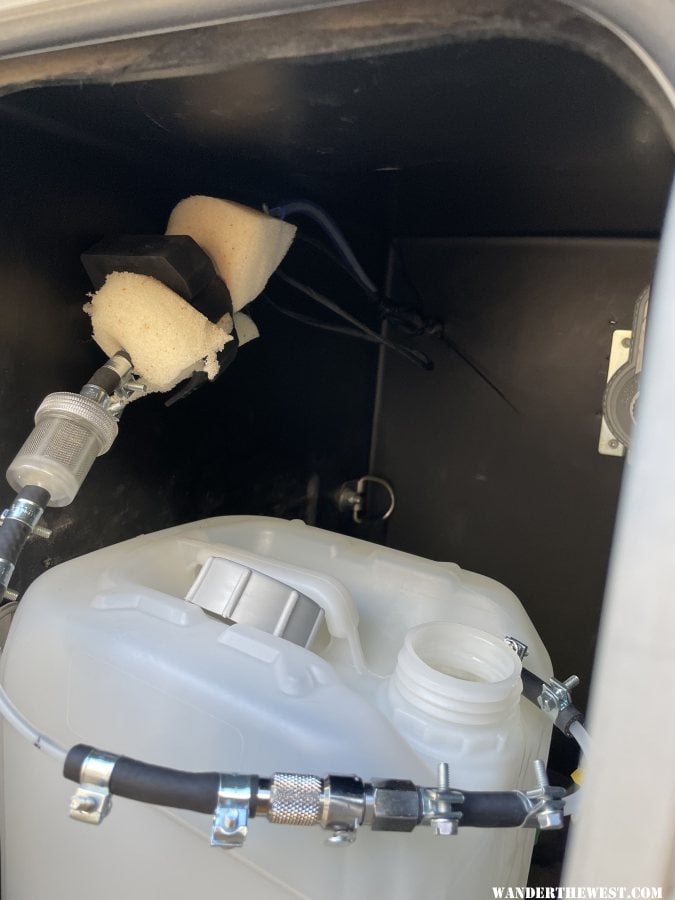
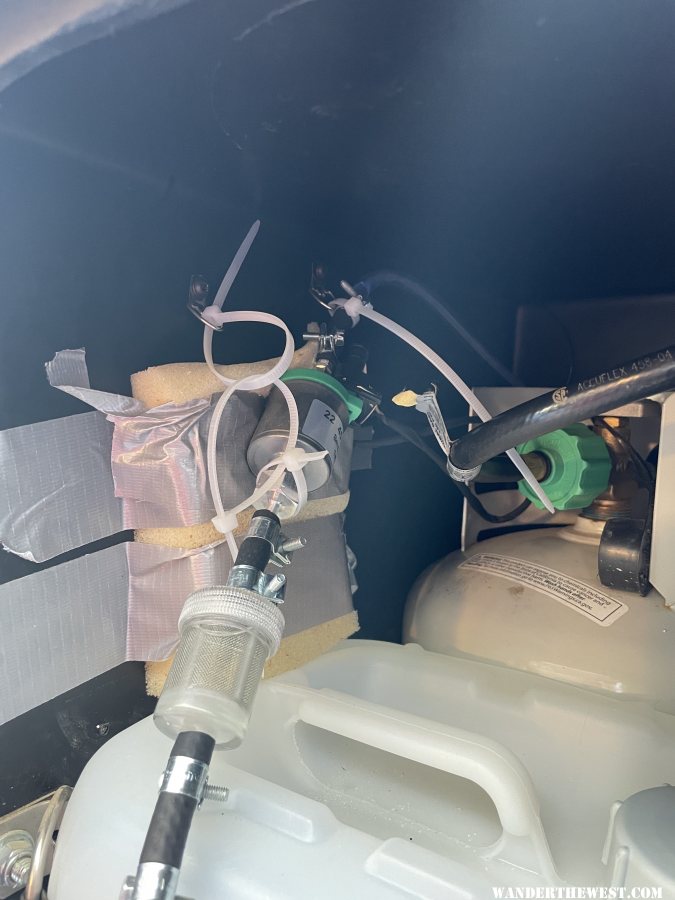
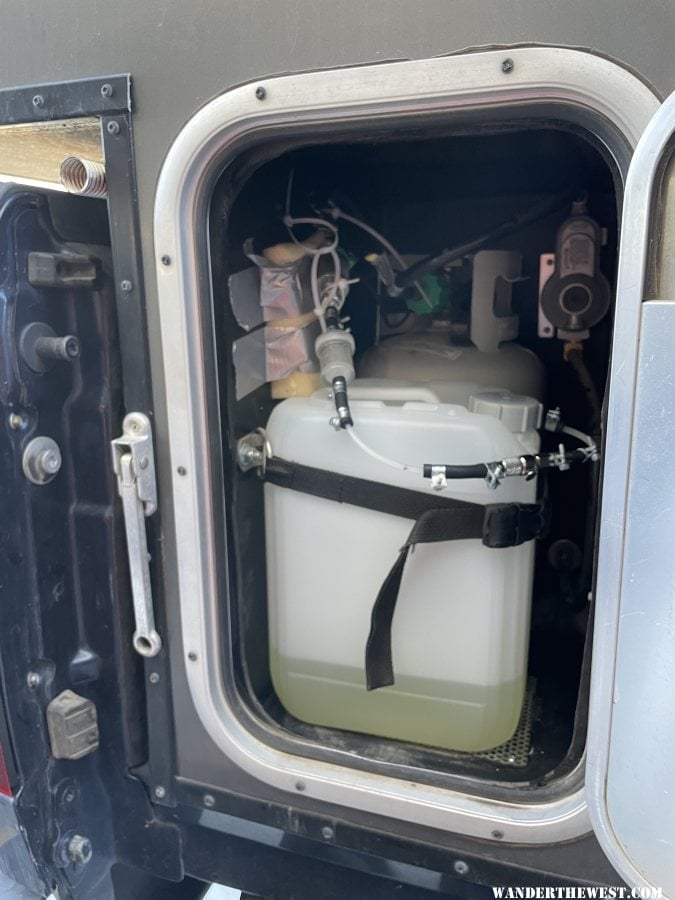
Fuel line coming into the the camper then back into the propane compartment. The 4mm rigid fuel line is protected by the clear vinyl tubing and the split loom. Seems good enough

Fuel line coming into the propane compartment. Its just high enough that it clears the propane tank.
I wanted an easy way to get the diesel tank out of the camper, so I added a quick disconnect to the fuel line
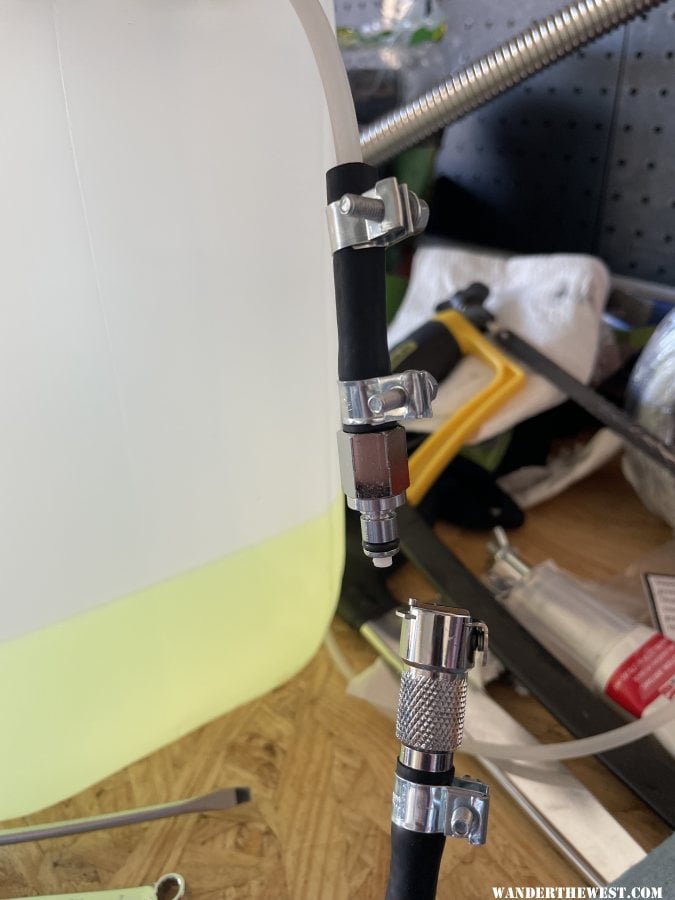
Tank in place with the fuel pump mounted. I wrapped it in foam to try and reduce the noise. It's really not bad in the camper but I'm going to continue to try to figure out ways to make it quieter. Right now the pump mount is just screwed into the plastic of the propane tank liner. I'm not 100% satisfied with it, I'll have to find a better way to mount it in the future.
I did a very rough job on the electrical to get the heater up and running. Easy install, just used butt terminals and crimped them. The heater comes with a fuse on the positive but I used power from the campers fuse box so I got rid on the one on the heaters harness. I still have to make it tidy and mount the LCD, but she runs.
The connector for the fuel pump is quite large, to get it into the propane compartment would have required drilling about a 1.5 inch hole. So I just cut the cable, drilled a 1/4" hole, fed the wire into the compartment, and then crimped the connector back on.
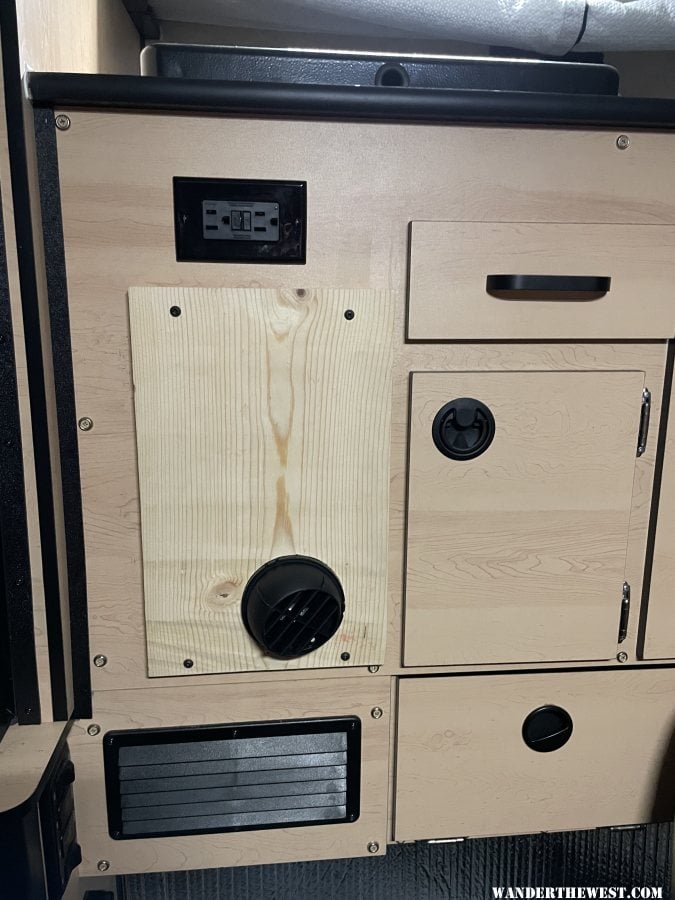
I still have to make a new cabinet face with the hot air output, and modify the stock heater's outer cover vent to accept the diesel heater fan intake. Not really sure how I'm going to do that yet. I'll be traveling for the next month so those projects will have to wait. I'll update when I'm back
2014 F-350 | 2019 FWC Hawk | King Suspension
#17
Jsoboti
-
- Members
-
- 76 posts
Advanced Member
- LocationNevada
Posted 23 December 2023 - 09:09 PM
Returned from my work trip and "finished" the heater. It's usable but not 100% done. It fit on the camper perfectly, no risk of crushing the intake or the exhaust. Phew!
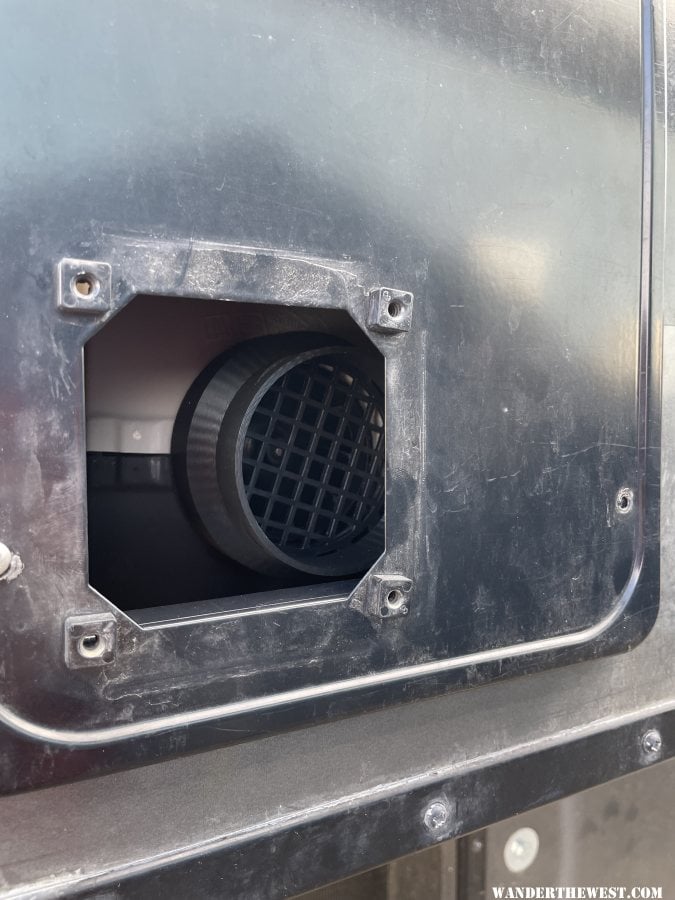
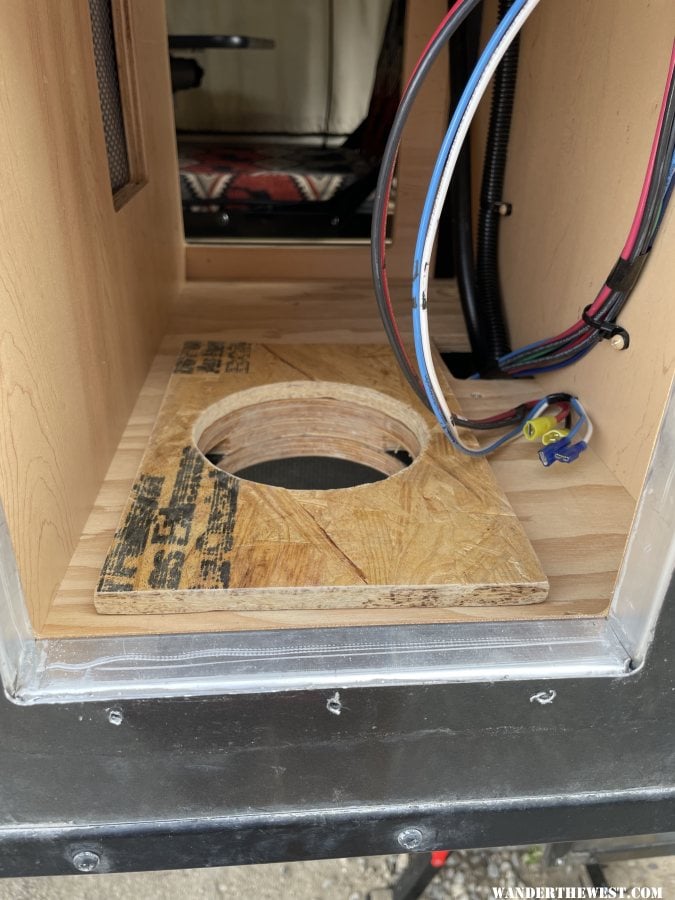
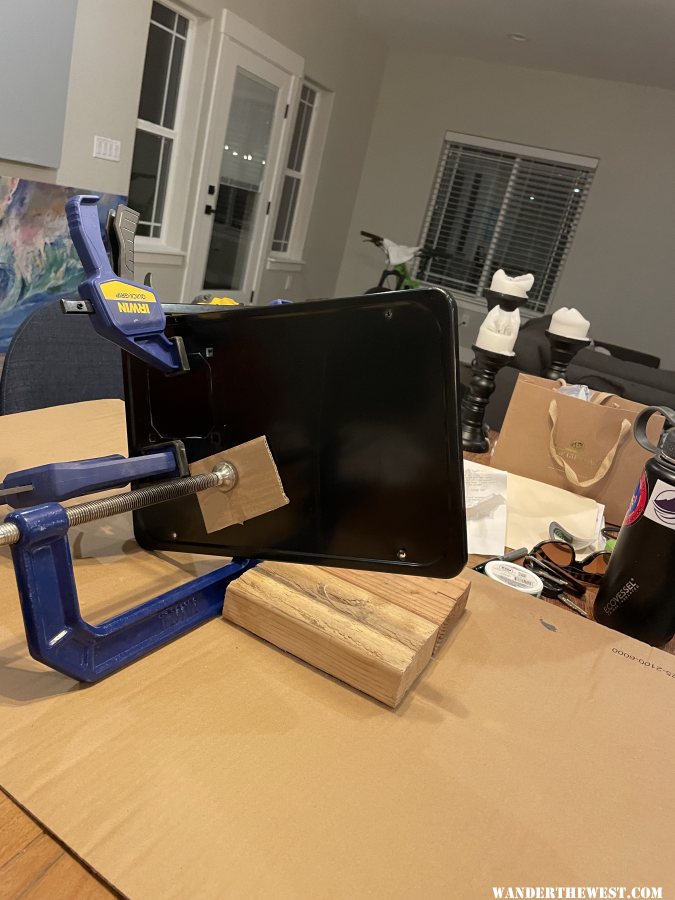
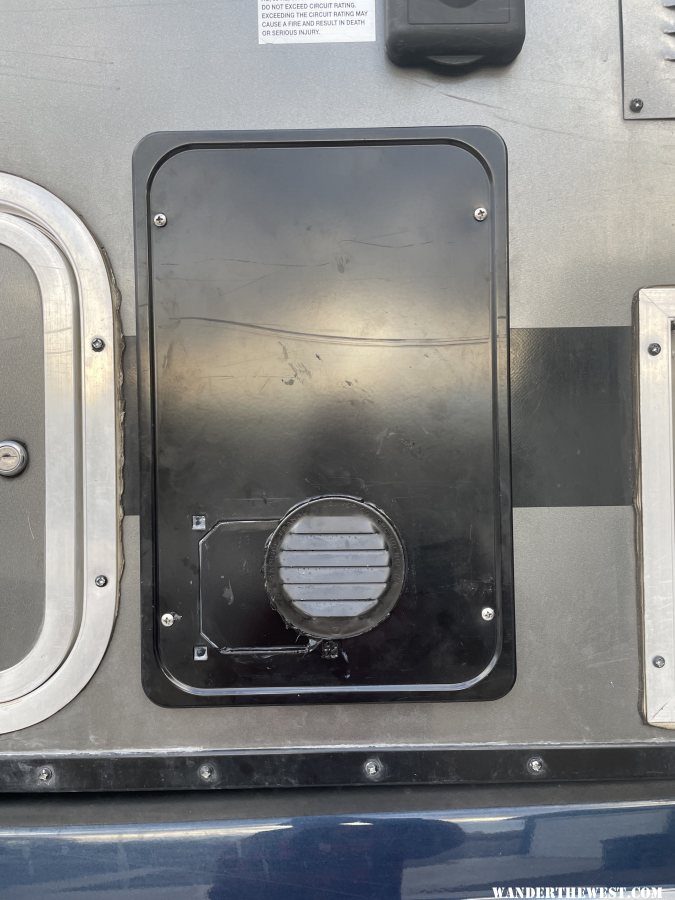
First step was to fill the hole in the external cover. I cut a piece of sheet aluminum, painted it, and epoxy-ed it to the cover.
I used a 3 inch hole saw to the cut the hole for the vent. I used 3 inch ducting to run from this vent into the intake of the diesel heater. I used black silicon to seal everything up.
I mounted the controller where the OEM thermostat was mounted. Easy to route the cable above the cabinets and into this spot.

I made a simple face to cover the compartment. It will eventually be painted by my much more creative and artistic girlfriend. for now it does the job.
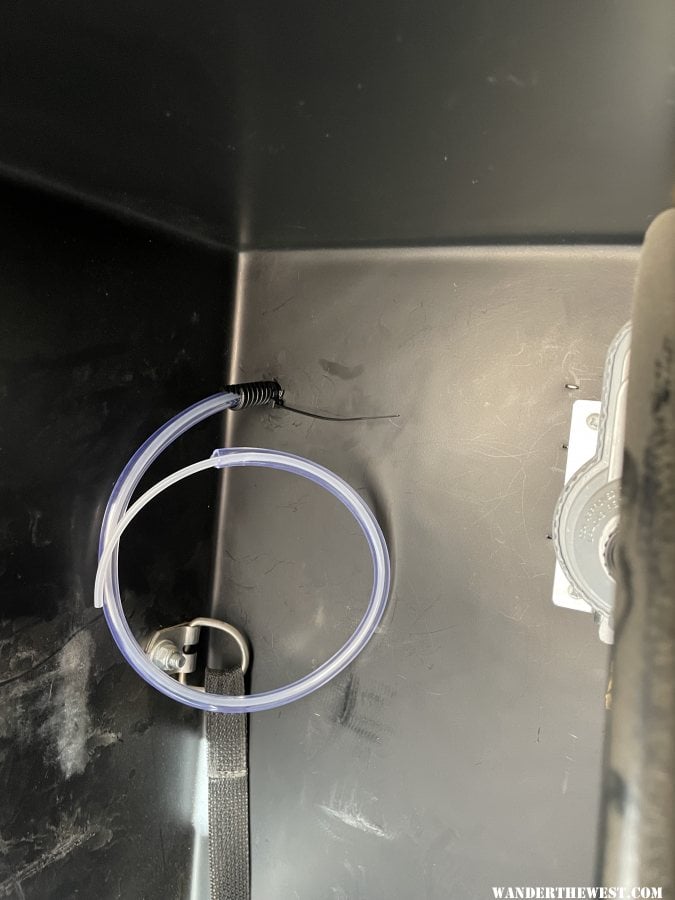
I'm still in the trial and error phase of how/where to mount the fuel pump. Using a rigid mount resulted in being able to hear the pump too much IMHO. Mounting it on these zip ties and resting against this bit of foam REALLY cut down on the noise in the camper, so much so that you can just barely hear it if you listen for it specifically. I think I'll secure it with some elastic instead of zip ties for a final install.
The fuel system is OK but I would prefer a different tank. The standpipe in the fuel tank was difficult to mount and doesn't sit quite flat. If anyone knows of a fuel tank that would be better for this application, please let me know. There's one that seems perfect, but is only sold in Australia and they won't ship to the US. I still have to vent the fuel tank too, thinking about using a dirt bike fuel vent on the cap. Anyone with experience with these?
I used the heater for the first time last weekend. What a difference. Hanging out in the camper with outside temps around 30-ish it was easy to keep the camper at a steady 68 degrees. I modified the mixture for altitude, instructions easily available online.
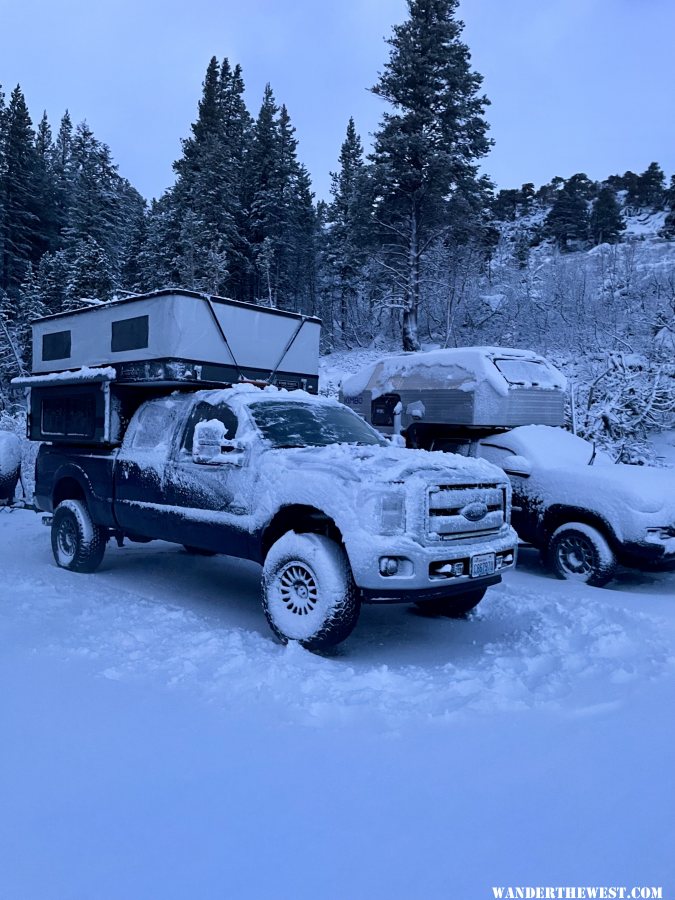
Over night the temps were pretty warm outside, between 29-32 degrees, super warm for the Sierra! I ran the pump on 1.6 Hz. I woke up pretty warm and had to turn it down to 1.2Hz. Camper was about 62 degrees when I woke up and DRY!!!! Id say condensation was reduced by 95% compared to running the propane heater over night with similar ventilation.
Edited by Jsoboti, 23 December 2023 - 09:20 PM.
2014 F-350 | 2019 FWC Hawk | King Suspension
#18
ski3pin
-

- Site Team
- 15,346 posts
Belay On
- LocationSierra Nevada Range
Posted 28 December 2023 - 04:59 PM
Thank you for the posts on your install. Good job! As you gain experience using it, could you comment on amount of diesel used?
2003 Ford Ranger FX4 Level II 2013 ATC Bobcat SE "And in the end, it's not the years in your life that count. It's the life in your years."- Abraham Lincoln http://ski3pin.blogspot.com/
#19
Vic Harder
-
- Site Team
- 4,974 posts
Doctor Electric
- LocationCalgary, Alberta
Posted 28 December 2023 - 10:45 PM
Also, I am super puzzled about your comment regarding condensation. Both the Attwood and the CDH vent combustion gases (and water vapor) outside. The only difference is that the CDH as installed draws both combustion AND the air to be warmed from the outside. Is that enough of a difference? I can plumb my Propex to take in outside air for warming too. Just wondering if I want to do that.
I'd love to hear others chime in on the why of drier air when we pull the air from outside rather than recirculating it. If I were to try to explain it, I would start by:
- Assuming 50% (Relative Humidity) RH at -10*C outside
- Same 50% RH inside the camper, but at 15*C
- Want to heat the air in the camper to 20*C
Scenario #1 - recirculate the heated air
- As the heater runs, it warms up the inside air, increasing its capacity to absorb moisture and thus lowering the RH inside the camper
- This air then sucks up moisture from wet things inside the camper, our sweat and breathing etc
- Eventually the air in the camper get's moist, say 70% RH at 20*C
- We turn the heat off and go to bed
- As the temp drops, water starts to condense out of the air which can no longer hold that amount of moisture.... cold surfaces first
- Many of us complain on WtW about condensation.... 
Scenario #2
- same as above, but we are always pulling in outside air to heat up
- The heated air coming in is always going to be drier, and contributes to constantly lowering the RH in the camper
- "Extra" warm air exists the camper via leaks, fan, etc
- So we blow in yet more warm (and drier) air.... using more fuel
- The RH in the camper never rises above the 50% (or whatever) it started with
- As the temp drops, there is less moisture to condense out.
Plausible?
2015 Silverado 3500 crew cab 8' bed Diesel
2012 ATC Puma Shell build - https://www.wanderth...012-puma-build/
Power considerations thread - https://www.wanderth...e-power-scotty/
Building out an electrical system - So, you want to setup a good electrical system in your camper? - Electrical, Charging, Solar, Batteries and Generators - Wander the West
2012 ATC Puma Shell build - https://www.wanderth...012-puma-build/
Power considerations thread - https://www.wanderth...e-power-scotty/
Building out an electrical system - So, you want to setup a good electrical system in your camper? - Electrical, Charging, Solar, Batteries and Generators - Wander the West
#20
craig333
-

- Members
- 8,023 posts
Riley's Human
- LocationSacramento
Posted 28 December 2023 - 10:58 PM
I've given up on trying to convince people a propane furnace doesn't add moisture. In the hardest rain I've ever been in moisture began seeping in past the stitching in the top. Only took a short amount of time running the furnace to completely dry everything out.
Craig K6JGV_________________________ 2004 2500 CTD 4X4 FWC HAWK 1960 CJ5


0 user(s) are reading this topic
0 members, 0 guests, 0 anonymous users

