
A beautiful job Vic...
Rob

 2 votes
Senior Member
Posted 26 March 2020 - 12:31 PM
A beautiful job Vic...
Rob
2016 Duramax 2.8 Diesel long bed Colorado 4WD with 2011 Eagle
Senior Member
Posted 26 March 2020 - 03:30 PM
Very, very nice!
Senior Member

Posted 26 March 2020 - 03:55 PM
I am curious about the accumulator that you are using with your water pump. These seem like a great idea to keep the noise and vibration down, but what about winterizing? Is there a drain or does the pump blow the water out of it? I am guessing you also use your camper in the winter and/or shoulder season and therefore don't use RV antifreeze?
2016 Fleet Flatbed
2016 Toyota Tacoma
Doctor Electric
Posted 26 March 2020 - 03:57 PM
A beautiful job Vic...
Rob
Thanks Rob. A question for LordWoodCraft - It has been a few weeks since I did the 3 coats of Danish Oil, and it appears to be "drying out" in a few places and I think I will have reapply another coat. Have you seen that before?
Belay On

Posted 26 March 2020 - 04:07 PM
Very nice work and interesting use of space! I've thought that chairs like you've used would be great in a small camper so I'm happy to see them incorporated into your camper. Thanks for the time you've taken to do an excellent write up on your build. Get out and enjoy it! 
*yeah, when we can again.
2003 Ford Ranger FX4 Level II 2013 ATC Bobcat SE "And in the end, it's not the years in your life that count. It's the life in your years."- Abraham Lincoln http://ski3pin.blogspot.com/
Doctor Electric
Posted 26 March 2020 - 04:44 PM
I am curious about the accumulator that you are using with your water pump. These seem like a great idea to keep the noise and vibration down, but what about winterizing? Is there a drain or does the pump blow the water out of it? I am guessing you also use your camper in the winter and/or shoulder season and therefore don't use RV antifreeze?
Good question rando. I am still new to winterizing and winter usage. I used RV antifreeze in my Hawk, and vowed not to do that again. Pain in the butt to get the nasty taste out... 3-4 flushes needed. In the Puma, so far I have not used antifreeze and relied on the pump to fully purge the system. It didn't freeze up, so I am assuming it was all dry and good to go.
It is my understanding that the accumulator doesn't actually hold any water. It can be plumbed as a "pass through" or single ended. It uses air pressure in a bladder to keep the water pressure stable.
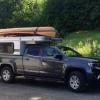
Here are a few pics of the water system:


Lockable water inlet and power outlet

Final positions of the gear. Picture taken during construction... sorry about the mess!
The red doohicky on the left is my WeBoost.

Doctor Electric
Posted 26 March 2020 - 04:53 PM
Very nice work and interesting use of space! I've thought that chairs like you've used would be great in a small camper so I'm happy to see them incorporated into your camper. Thanks for the time you've taken to do an excellent write up on your build. Get out and enjoy it!
*yeah, when we can again.
Thanks! I hate wasted space, and the cluttered look of the cabinets the way the factory builds these campers. The only "wasted" space in this build is behind the AC outlet on the cabinet.

Doctor Electric
Posted 26 March 2020 - 04:54 PM
Wowza Vic! Such a neat job and great use of space. Perty too! Have fun with that fine camper, when you are allowed to....
Thanks! It is no Bundutec, but we hope to get a few good years out of this one!
Doctor Electric
Posted 26 March 2020 - 04:55 PM
Very, very nice!

Senior Member
Posted 26 March 2020 - 05:02 PM
Vic I'm very impressed with what you have accomplished! The planning and design work to making it a reality. Looks awesome! The lack of wasted space is wonderful!
How many brain cells were harmed or killed in the making of this creation?
Patrick
2015 FWC Hawk Flatbed


0 members, 0 guests, 0 anonymous users

